August 7, 2026
Adorable Amigurumi Giraffe – Beginner-Friendly Crochet Pattern
Bring this charming, long-necked friend to life with this easy-to-follow amigurumi giraffe pattern. Perfect for beginners, it features simple shaping, clean color changes, and cute embroidered details for a professional finish.
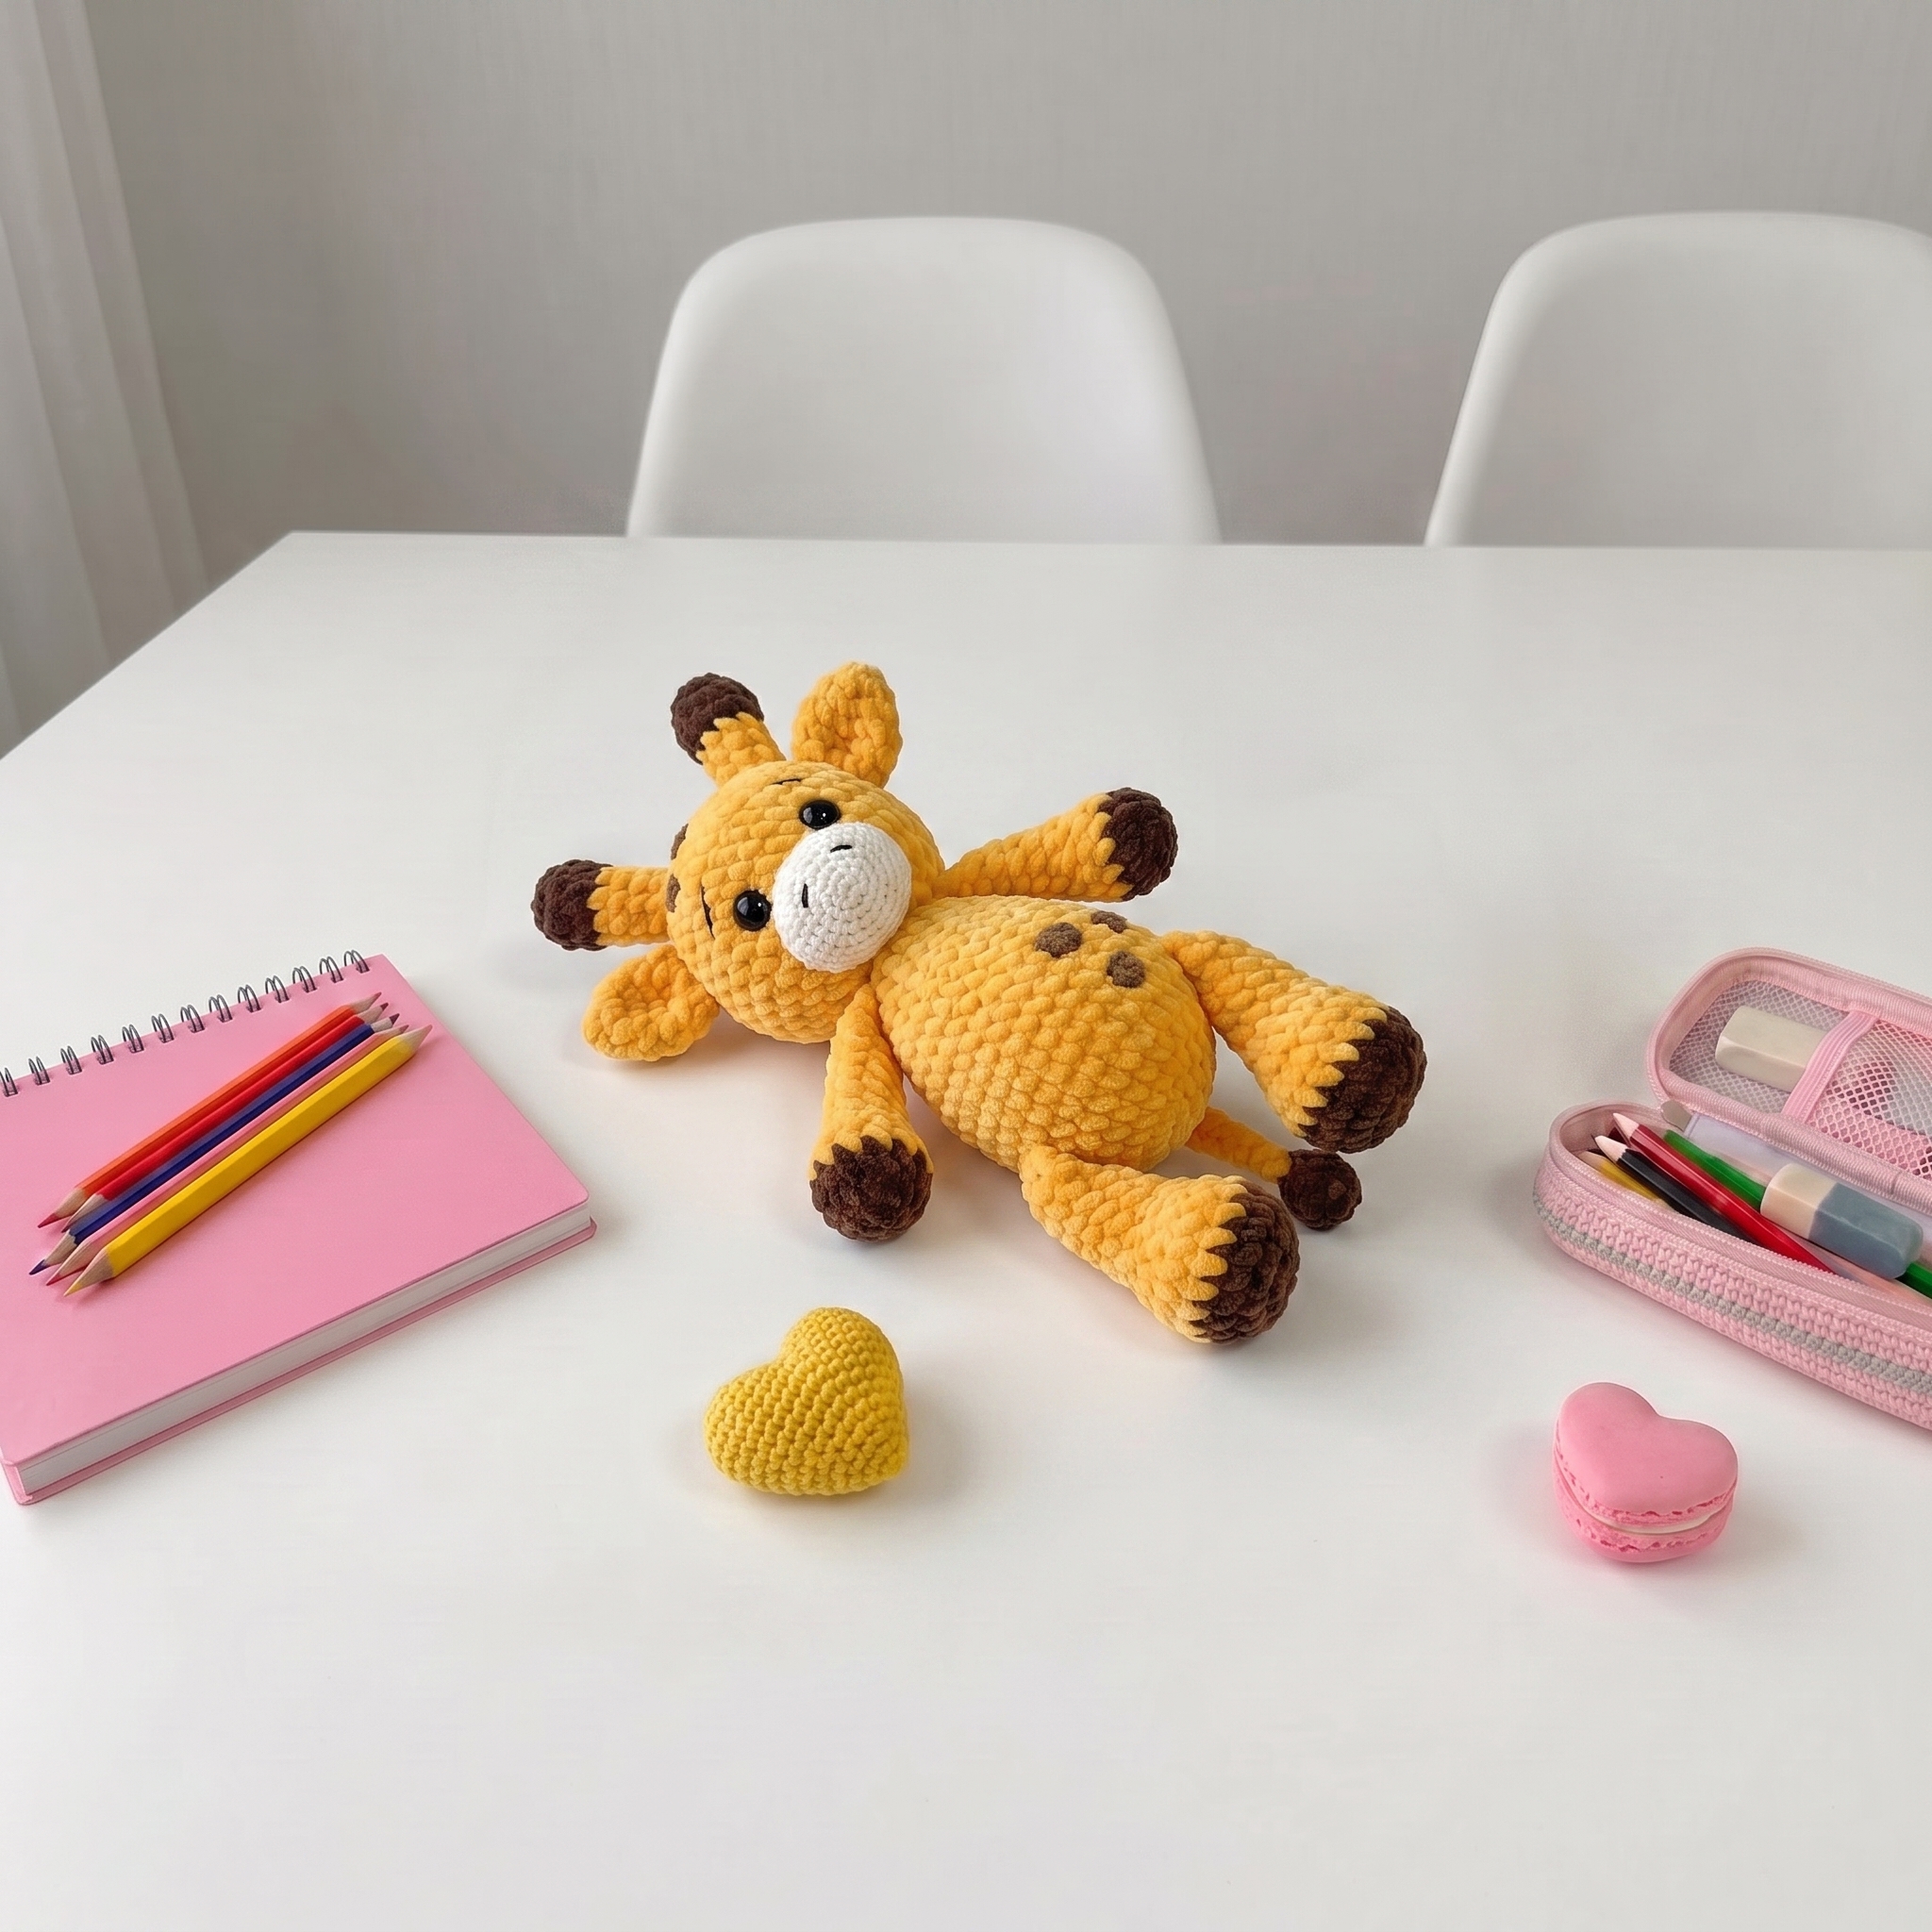
Adorable Amigurumi Giraffe – Complete Step-by-Step Pattern
1. Materials & Abbreviations
This section covers everything you need to gather before beginning. Using the recommended plush yarn ensures a soft, huggable finish, while the correct hook sizes maintain a tight, stuff-proof gauge.
- Yarn: Himalaya Dolphin Baby (or similar plush yarn). Colors: Brown (e.g., #80366) and Yellow (e.g., #80368). Plus, a small amount of light-colored cotton yarn (e.g., YarnArt Jeans) for the muzzle and brown for spots.
- Hooks: 3.5 mm (for the main body) and 2.0 mm (for small details like spots).
- Notions: 12 mm safety eyes, poly-fil stuffing, sewing needle, scissors.
- Abbreviations:
- MR – magic ring
- ch – chain
- sc – single crochet
- hdc – half double crochet
- dc – double crochet
- sl st – slip stitch
- inc – increase (2 sc in one stitch)
- dec – decrease (2 sc crocheted together)
- BLO – back loop only
- FLO – front loop only
What it teaches: Proper tool selection for plush yarns, gauge management, and familiarization with standard international crochet abbreviations.
2. Arms (Make 2)
The arms are worked in two colors to create a "hoof" effect, with minimal stuffing to ensure they drape naturally against the body.
- R1 (Brown): 6 sc in MR (6)
- R2: 6 inc (12)
- R3 (Yellow): 12 sc in BLO (12)
- R4-5: 12 sc (12) [2 rows]
- R6: 3 sc, 3 dec, 3 sc (9)
- R7-13: 9 sc (9) [7 rows]
- Finishing: Fold the arm flat and work sc through both layers to close the opening. Cut yarn and hide the tail inside the arm.
- Important detail: Stuff the bottom of the arm densely, but leave the top completely empty so the arms do not stick out rigidly.
What it teaches: Clean mid-project color changes, utilizing BLO for structural definition, and partial stuffing for natural limb articulation.
3. Legs (Make 2)
The legs feature a similar two-tone "hoof" design and are shaped to provide a stable base for the giraffe to sit or stand.
- R1 (Brown): 6 sc in MR (6)
- R2: 6 inc (12)
- R3: (1 sc, inc) x 6 (18)
- R4 (Yellow): 18 sc in BLO (18)
- R5-6: 18 sc (18) [2 rows]
- R7: 5 sc, 4 dec, 5 sc (14)
- R8: 5 sc, 2 dec, 5 sc (12)
- R9-15: 12 sc (12) [7 rows]
- Finishing: Fold the leg flat and work sc through both layers to close the opening. Cut yarn and hide the tail inside.
- Important detail: Stuff the bottom of the leg densely, but leave the top lightly stuffed or empty to prevent the legs from sticking out awkwardly.
What it teaches: Progressive decreasing for limb shaping and flat-folding techniques for seamless closures.
4. Ears (Make 2)
The ears are simple, flat pieces that are folded slightly during assembly to create a realistic, perky look.
- R1 (Yellow): 7 sc in MR (7)
- R2: 7 sc (7)
- R3: 7 inc (14)
- R4-5: 14 sc (14) [2 rows]
- R6: (1 sc, dec) x 6 (12)
- Finishing: Cut yarn, leaving a long tail for sewing. Do not stuff.
What it teaches: Rapid radial expansion and working flat, un-stuffed appendages.
5. Horns (Make 2)
The ossicones (horns) are small, sturdy cylinders that add characteristic giraffe charm.
- R1 (Brown): 6 sc in MR (6)
- R2: 6 inc (12)
- R3: 12 sc (12)
- R4: (2 sc, dec) x 3 (9)
- R5-8: 9 sc (9) [4 rows]
- Finishing: Cut yarn, leaving a long tail for sewing. Stuff very lightly.
What it teaches: Micro-amigurumi techniques and subtle tapering for small anatomical details.
6. Body
The body is worked from the bottom up, seamlessly incorporating the legs and arms as you progress.
- R1 (Brown): 6 sc in MR (6)
- R2: 6 inc (12)
- R3: (1 sc, inc) x 6 (18)
- R4: (2 sc, inc) x 6 (24)
- R5: (3 sc, inc) x 6 (30)
- [Editor’s Note: The original pattern text contained a typo stating "(3 sc, dec)" for this round, which mathematically yields 24 stitches. Corrected to "(3 sc, inc)" to achieve the stated 30-stitch count.]
- R6: (4 sc, inc) x 6 (36)
- [Editor’s Note: The original pattern text contained a typo stating "(4 sc, dec)" for this round, which mathematically yields 30 stitches. Corrected to "(4 sc, inc)" to achieve the stated 36-stitch count.]
- R7: 36 sc (36)
- R8 (Join Legs): 6 sc, join 1st leg (working 6 sc through the leg and body together), 12 sc, join 2nd leg (working 6 sc through the leg and body together), 12 sc (36). [Ensure the toes of the legs are pointing to the left.]
- R9-11: 36 sc (36) [3 rows]
- R12: 5 sc, (1 sc, dec) x 4, 19 sc (32)
- R13-14: 32 sc (32) [2 rows]
- R15: 6 sc, 4 dec, 18 sc (28)
- R16: 28 sc (28) [Stuff the body firmly and shape the belly.]
- R17: (2 sc, dec) x 7 (21)
- R18: 21 sc (21)
- R19 (Join Arms): 4 sc, join 1st arm (working 2 sc through the arm and body together), 5 sc, join 2nd arm (working 2 sc through the arm and body together), 8 sc (21)
- R20: (1 sc, dec) x 7 (14)
- Finishing: Sl st, cut yarn, leaving a long tail. Stuff the neck area very densely before closing.
What it teaches: Seamless multi-piece joining, mid-round limb attachment, and structured decreasing for torso shaping.
7. Head
The head is a simple, rounded shape that is yarn-sculpted after stuffing to create expressive, sunken eyes.
- R1 (Yellow): 6 sc in MR (6)
- R2: 6 inc (12)
- R3: (1 sc, inc) x 6 (18)
- R4: (2 sc, inc) x 6 (24)
- R5: (3 sc, inc) x 6 (30)
- R6: (4 sc, inc) x 6 (36)
- R7-13: 36 sc (36) [7 rows]
- Important detail: Insert 12 mm safety eyes between R9 and R10, spaced 6 or 7 stitches apart. Stuff the head gradually and firmly.
- R14: (4 sc, dec) x 6 (30)
- R15: (3 sc, dec) x 6 (24)
- R16: (2 sc, dec) x 6 (18)
- R17: (1 sc, dec) x 6 (12)
- R18: 6 dec (6)
- Finishing: Pull the yarn tail tight to close the hole. Use the tail to yarn-sculpt the eyes by pulling the thread from the back of the head through the center of each eye to create a sunken, expressive look.
What it teaches: Spiral increase sequences, strategic safety eye placement, and advanced yarn sculpting for 3D facial definition.
8. Muzzle
The muzzle is worked separately and stretched slightly during assembly to create a soft, oval shape.
- R1 (Light Color): 6 sc in MR (6)
- R2: 6 inc (12)
- R3: (1 sc, inc) x 6 (18)
- R4: (2 sc, inc) x 6 (24)
- R5: (3 sc, inc) x 6 (30)
- R6: (4 sc, inc) x 6 (36)
- R7-8: 36 sc (36) [2 rows]
- Finishing: Cut yarn, leaving a long tail for sewing. Gently stretch the sides of the muzzle to transform it from a perfect circle into a soft oval before attaching it to the face.
What it teaches: Flat circular expansion and fabric manipulation for customized shaping.
9. Tail & Spots
These final details add the signature giraffe characteristics.
Tail (Yellow):
- Chain 12. Cut yarn, leaving a long tail for sewing.
- Tassel (Brown): At the opposite end of the chain, attach brown yarn. Work 2 ch, then 2 dc into the same chain stitch. Chain 3 and sl st to join, forming a small tassel. Tie off and hide ends.
Spots (Brown, Hook 2.0 mm, Make 6):
- R1: 7 sc in MR, sl st to join.
- Finishing: Cut yarn, leaving a tail for sewing. Sew 3 spots onto the head and 3 spots onto the body, arranging them aesthetically.
What it teaches: Chain cord construction, micro-amigurumi detailing, and strategic appliqué placement.
10. Assembly & Finishing
Proper assembly brings the giraffe's personality to life.
- Head to Body: Sew the head securely to the top of the body using the long tail left from the body.
- Muzzle: Sew the muzzle onto the face, centered below the eyes.
- Ears & Horns: Sew the ears to the top sides of the head, folding them slightly at the base for a perky look. Sew the horns just above the eyes, spaced evenly apart.
- Embroidery: Using brown embroidery floss, stitch small eyebrows above the safety eyes and two small nostrils on the muzzle.
- Final Touches: Weave in all remaining loose ends and trim any excess yarn.
What it teaches: Multi-step structural assembly, surface embroidery for facial features, and professional finishing techniques.
Final Section: Where to Go from Here
Congratulations! By completing this amigurumi giraffe, you have mastered foundational spiral shaping, clean color changes, seamless limb joining, and expressive yarn sculpting. This project is an excellent confidence-builder. From here, try experimenting with different yarn weights to create a "jumbo" nursery giraffe, or adapt the spot pattern and color palette to design your own unique animal variations, like an okapi or a spotted fawn. Happy crocheting!