August 12, 2026
Adorable Amigurumi Panda – Complete Pattern with Mini Sweater & Pants
Bring this cuddly little panda to life! This charming pattern features a sweet, huggable panda complete with a custom mini sweater, tiny pants with a functional pocket, and adorable embroidered details. Perfect for intermediate crafters ready to tackle multi-part assembly and cute clothing accessories.
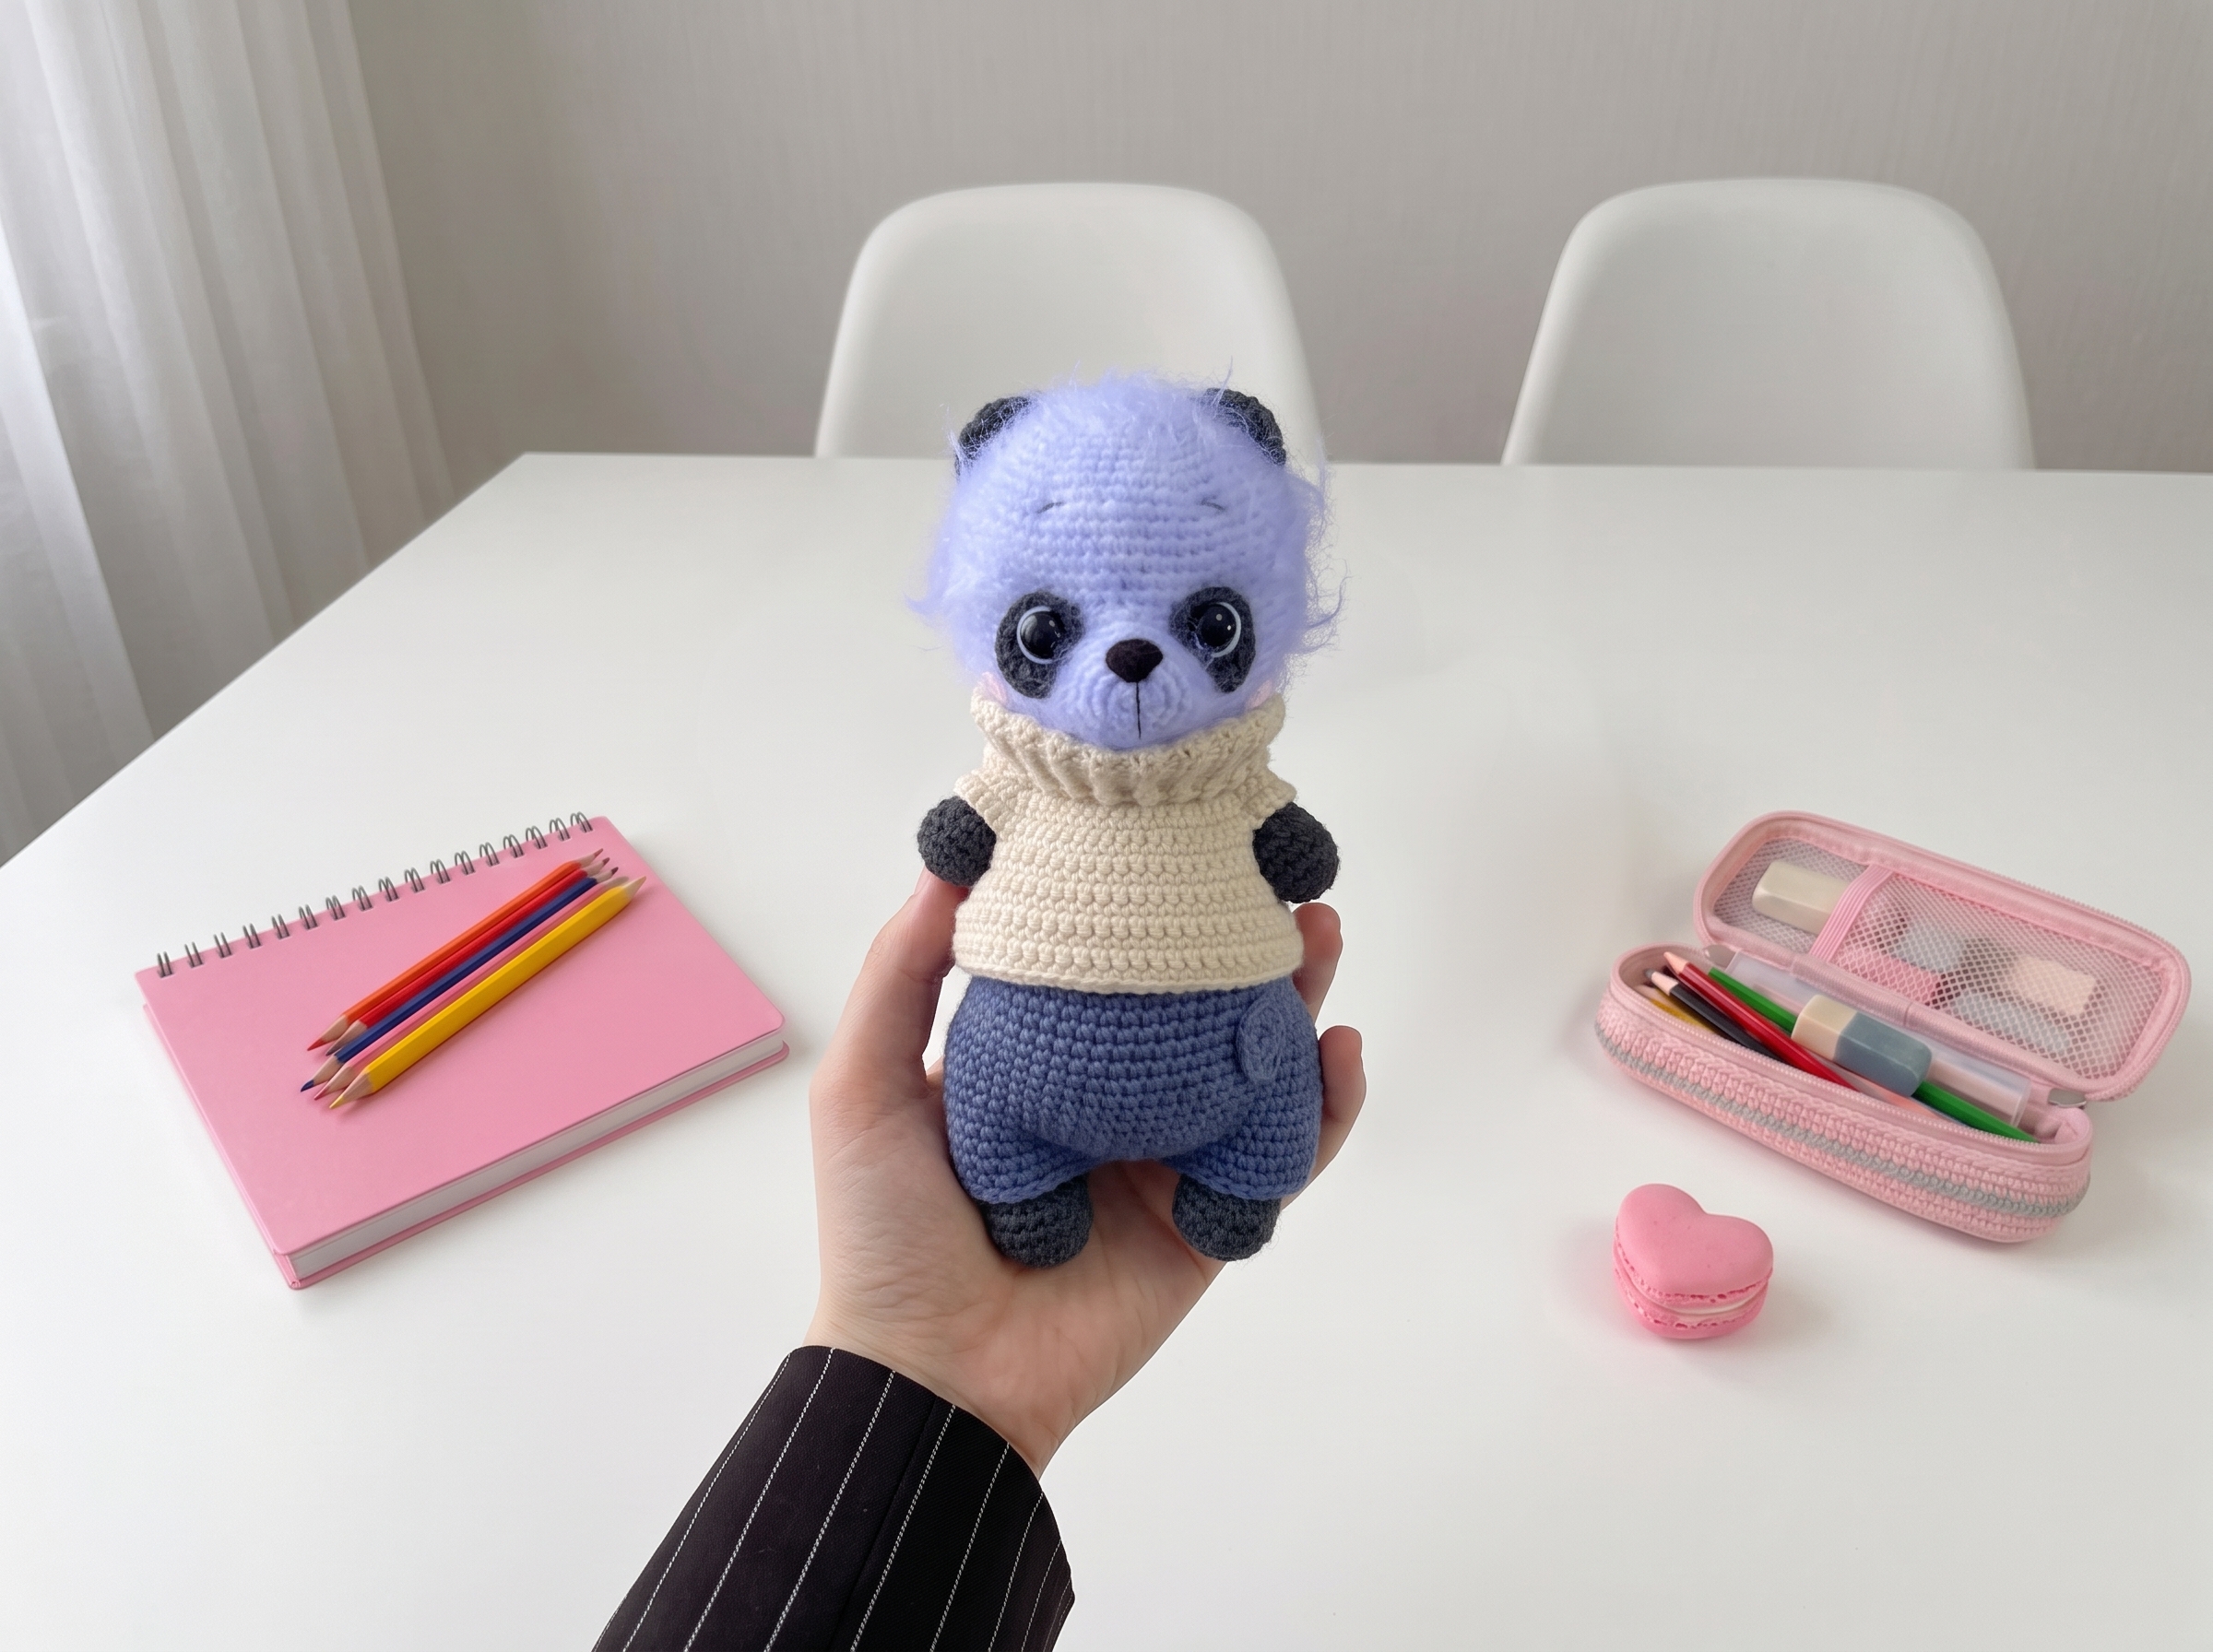
Adorable Amigurumi Panda – Complete Step-by-Step Pattern
1. Materials & Abbreviations
Gather your supplies before we begin! Using the recommended materials will ensure your panda has that perfect, professional plush look.
- Yarn: YarnArt Jeans (50g / 160m) or similar cotton blend.
- Main color (e.g., #208 Gray/Black)
- White (#01)
- Cheeks (#18 Pink/Peach)
- Nose & Brows (#53 Dark Brown/Black)
- Pants (#68 Denim/Blue)
- Hooks: 1.75 mm (for main body) and 1.5 mm (for fine details and clothing).
- Notions: 10 mm safety eyes (without backings, to be sewn/glued), holofiber stuffing, sewing needle, black sewing thread, 3 small buttons (10 mm), pins, scissors, and a lighter (for sealing thread ends).
- Abbreviations:
- MR – magic ring
- ch – chain
- sc – single crochet
- hdc – half double crochet
- dc – double crochet
- sl st – slip stitch
- inc – increase (2 sc in one stitch)
- dec – decrease (2 sc crocheted together)
What you'll master: Proper tool selection for fine cotton yarns, gauge management, and familiarization with standard international crochet abbreviations.
2. Head
We'll start with the head, working in a continuous spiral to build a perfectly round, plush foundation for our panda's sweet face.
- R1: 6 sc in MR (6)
- R2: 6 inc (12)
- R3: (1 sc, inc) x 6 (18)
- R4: (2 sc, inc) x 6 (24)
- R5: (3 sc, inc) x 6 (30)
- R6: (4 sc, inc) x 6 (36)
- R7: (5 sc, inc) x 6 (42)
- R8: 42 sc (42)
- R9: (6 sc, inc) x 6 (48)
- R10: (7 sc, inc) x 6 (54)
- R11: (8 sc, inc) x 6 (60)
- R12: (20 sc, inc) x 3 (63)
- [Editor’s Note: The original pattern stated "(19 sc, inc) x 3 (63)", which mathematically yields 60 stitches. Corrected to "(20 sc, inc) x 3" to achieve the stated 63-stitch count.]
- R13-23: 63 sc (63) [11 rows]
- R24: (10 sc, inc) x 6, 3 sc (69)
- [Editor’s Note: Original stated "(9 sc, inc) x 6, 3 sc (69)", which yields 63 stitches. Corrected to "(10 sc, inc) x 6" to reach the stated 69 stitches.]
- R25: (21 sc, dec) x 3 (66)
- R26: (9 sc, dec) x 6 (60)
- R27: (8 sc, dec) x 6 (54)
- R28: (7 sc, dec) x 6 (48)
- R29: (6 sc, dec) x 6 (42)
- R30: (5 sc, dec) x 6 (36)
- R31: (4 sc, dec) x 6 (30)
- R32: (3 sc, dec) x 6 (24)
- R33: 24 sc (24)
- Switch to 1.5 mm hook and semi-cotton yarn.
- Finishing: Stuff the head firmly with holofiber as you go. Cut yarn, leaving a long tail, and weave it through the front loops to cinch the hole closed. Hide the tail inside.
What you'll master: Spiral increase sequences, managing stitch count transitions, and structured decreasing for smooth, spherical shaping.
3. Upper Paws (Arms)
These little arms are designed to be slightly flattened at the top, giving the panda a natural, relaxed posture when sewn to the body.
- R1: 6 sc in MR (6)
- R2: 6 inc (12)
- R3: (3 sc, inc) x 3 (15)
- R4-6: 15 sc (15) [3 rows]
- R7: 6 sc, 3 dec, 3 sc (12)
- R8-16: 12 sc (12) [9 rows]
- Finishing: Stuff the paw firmly. Fold the top opening in half and crochet through both layers with 6 sc to close it flat. Leave a long tail for sewing.
What you'll master: Creating tapered limbs and using flat-folding techniques for seamless, articulated closures.
4. Body
The body is worked from the bottom up, featuring gentle shaping to create a cute, rounded tummy that perfectly supports the head.
- R1: 6 sc in MR (6)
- R2: 6 inc (12)
- R3: (1 sc, inc) x 6 (18)
- R4: (2 sc, inc) x 6 (24)
- R5: (3 sc, inc) x 6 (30)
- R6: (4 sc, inc) x 6 (36)
- R7: (5 sc, inc) x 6 (42)
- R8: (6 sc, inc) x 6 (48)
- R9: (7 sc, inc) x 6 (54)
- R10: (8 sc, inc) x 6 (60)
- R11-16: 60 sc (60) [6 rows]
- R17: (8 sc, dec) x 6 (54)
- R18-20: 54 sc (54) [3 rows]
- R21: (7 sc, dec) x 6 (48)
- R22-24: 48 sc (48) [3 rows]
- R25: (6 sc, dec) x 6 (42)
- R26-27: 42 sc (42) [2 rows]
- R28: (5 sc, dec) x 6 (36)
- R29-30: 36 sc (36) [2 rows]
- R31: (4 sc, dec) x 6 (30)
- R32: 30 sc (30)
- Switch to 1.5 mm hook and semi-cotton yarn.
- R33: (3 sc, dec) x 6 (24)
- R34-35: 24 sc (24) [2 rows]
- Finishing: Cut yarn, leaving a long tail for attaching the head.
What you'll master: Building a symmetrical, weight-distributed body shape with balanced increase and decrease sequences.
5. Lower Paws (Legs)
The legs feature a subtle shaping at the bottom to mimic little panda feet, finished with a flat top for easy attachment to the body.
- R1: 6 sc in MR (6)
- R2: 6 inc (12)
- R3: (1 sc, inc) x 6 (18)
- R4-7: 18 sc (18) [4 rows]
- R8: 3 sc, (dec, 1 sc) x 3, dec, 4 sc (14)
- R9: 5 sc, dec, 7 sc (13)
- R10-20: 13 sc (13) [11 rows]
- Finishing: Stuff the paw firmly. Fold the top opening in half and crochet through both layers with 7 sc to close it flat. Leave a long tail for sewing.
What you'll master: Progressive limb decreasing and partial stuffing for a natural, floppy drape.
6. Facial Features (Muzzle, Eye Patches & Cheeks)
This is where your panda's personality truly shines! Take your time with these small details for the best results.
Muzzle:
- R1: 6 sc in MR (6)
- R2: 6 inc (12)
- R3: 2 sc, 3 inc, 3 sc, 3 inc, 1 sc (18)
- R4: 3 sc, 3 inc, 6 sc, 3 inc, 3 sc (24)
- R5-6: 24 sc (24) [2 rows]
- Finishing: Leave a long tail. Do not stuff yet (we will stuff it during assembly to keep it soft and squishy).
Eye Patches (Make 2, White Yarn):
- R1: 6 sc in MR (6)
- R2: 6 inc (12)
- [Editor’s Note: Original stated "(4 sc in one st) x 2 (12)", which mathematically yields 8 stitches. Corrected to "6 inc (12)" for a standard, smooth oval expansion.]
- R3 (Right Patch): 2 sc, (hdc, dc, hdc) in one st, 8 sc, (hdc, dc, hdc) in one st, 1 sc (16)
- [Editor’s Note: Adjusted middle sc count from 7 to 8 to achieve the stated 16-stitch total.]
- R3 (Left Patch): 1 sc, (hdc, dc, hdc) in one st, 7 sc, (hdc, dc, hdc) in one st, 1 sc (16)
- Finishing: Fold each patch in half and crochet through both layers with 7 sc to create a slight cup shape. Leave long tails for sewing.
Cheeks (Make 2, Pink Yarn):
- Instructions: 6 sc in MR. Join with 1 sl st. Cut yarn, leaving a long tail for sewing.
What you'll master: Micro-amigurumi techniques, mixed stitch heights (sc, hdc, dc) for organic shaping, and flat-folding for dimensional facial features.
7. Tail
A tiny, subtle tail to complete the panda's silhouette.
- R1: 6 sc in MR (6)
- R2: 6 inc (12)
- R3: 12 sc (12)
- R4: (3 sc, dec) x 2, 2 sc (10)
- Finishing: Leave a long tail. Stuff lightly during final assembly.
What you'll master: Quick, small-piece construction and proportional shaping for subtle anatomical details.
8. Mini Sweater
Let's dress up our panda! This tiny sweater is worked flat, then joined to create armholes, finished with a neat collar and buttonholes.
- Back Panel: With 1.75 mm hook and pants color yarn, ch 16. Starting in 2nd ch from hook, 15 sc. Turn. (Note: Work all subsequent rows in BLO only).
- R2-43: 15 sc, turn [42 rows total]
- Armhole Setup: Without cutting yarn, work across the top edge: 10 sc, ch 10, skip 10 sts of the panel, insert hook in 11th st, 20 sc, ch 10, skip 10 sts, insert hook in 11th st, 10 sc. Join to form a tube. (60 sts)
- R44-49: 60 sc in the round [6 rows]
- Collar & Buttonholes: Work 1 sc in the last st (counts as an inc). Continuing around the top edge, create buttonholes: ch 5, skip 2 sc, sc in next st, 5 sc, ch 5, skip 2 sc, sc in next st, 5 sc.
- Finishing: Cut yarn, leaving a tail. Sew 3 small buttons opposite the buttonholes.
What you'll master: Flat-to-round transitions, creating functional armholes with chain bridges, and adding functional hardware (buttons) to miniature garments.
9. Tiny Pants & Pocket
These adorable pants feature a back opening for easy dressing and a functional little pocket on the front.
Pants:
- R1: Ch 56, join with sl st to form a ring.
- R1-7: 56 sc (56) [7 rows]
- R8 (Back Opening): Ch 6, skip 6 sc, sc in next 50 sc (56)
- R9: 6 sc along the ch-6 space, 50 sc (56)
- R10-18: 56 sc (56) [9 rows]
- R19: Sl st in each st around to create a clean, stretchy hem. Cut yarn.
Pocket:
- R1: Ch 3. Starting in 2nd ch from hook, 2 sc. Turn.
- R2-4: 2 sc, turn [3 rows total]
- Edging: Without cutting yarn, work evenly around the entire rectangle: 1 sc in the same st, 3 sc down the side, 2 sc in the corner, 1 sc across the bottom, 2 sc in the corner, 3 sc up the side, sl st to join.
- Assembly: Sew the pocket securely to the front of the pants.
What you'll master: Working in the round with intentional gaps (button plackets), and creating bordered, appliquéd accessories.
10. Final Assembly & Embroidery
Now for the magic moment where all the pieces come together to create your panda!
- Head to Body: Align the head centrally on the body. Sew securely using the long tail left on the body, stuffing the neck area firmly as you go.
- Limbs: Sew the upper paws to the upper sides of the body (around R48-49 of the body). Sew the lower paws to the bottom of the body, ensuring the panda can sit upright. Attach the tail to the lower back.
- Face: Sew the white eye patches onto the head. Insert the 10 mm safety eyes (or sew/glue them if using open-back eyes) into the center of the patches.
- Muzzle & Cheeks: Stuff the muzzle lightly and sew it centrally below the eyes, spanning about 3 stitches wide. Sew the pink cheeks just below the outer edges of the eye patches.
- Embroidery: Using black thread, embroider a tiny, cute smile on the muzzle. Add small eyebrow stitches above the eyes and tiny dots for nostrils.
- Dress Up: Slide the tiny pants and sweater onto your panda, fasten the buttons, and admire your handiwork!
What you'll master: Multi-step structural assembly, strategic stuffing for poseability, and expressive surface embroidery for realistic facial features.
Final Section: Where to Go from Here
Congratulations, you’ve just brought an incredibly charming panda to life! By completing this pattern, you’ve practiced everything from seamless limb construction and micro-amigurumi facial details to designing and assembling custom miniature clothing.
These skills are incredibly versatile. Next time, try experimenting with different yarn colorways to create a whole "zoo" of dressed-up animals, or adapt the sweater and pants pattern to fit other amigurumi dolls in your collection. Happy crocheting!