August 13, 2026
Adorable Mouse-Bear Amigurumi – Quick & Seamless Crochet Pattern
Meet your new favorite pocket-sized friend! This sweet Mouse-Bear (or Bear-Mouse!) features a cleverly seamless body, minimal sewing, and the cutest embroidered facial details. It’s a wonderfully quick, rewarding project perfect for crafters of all levels.
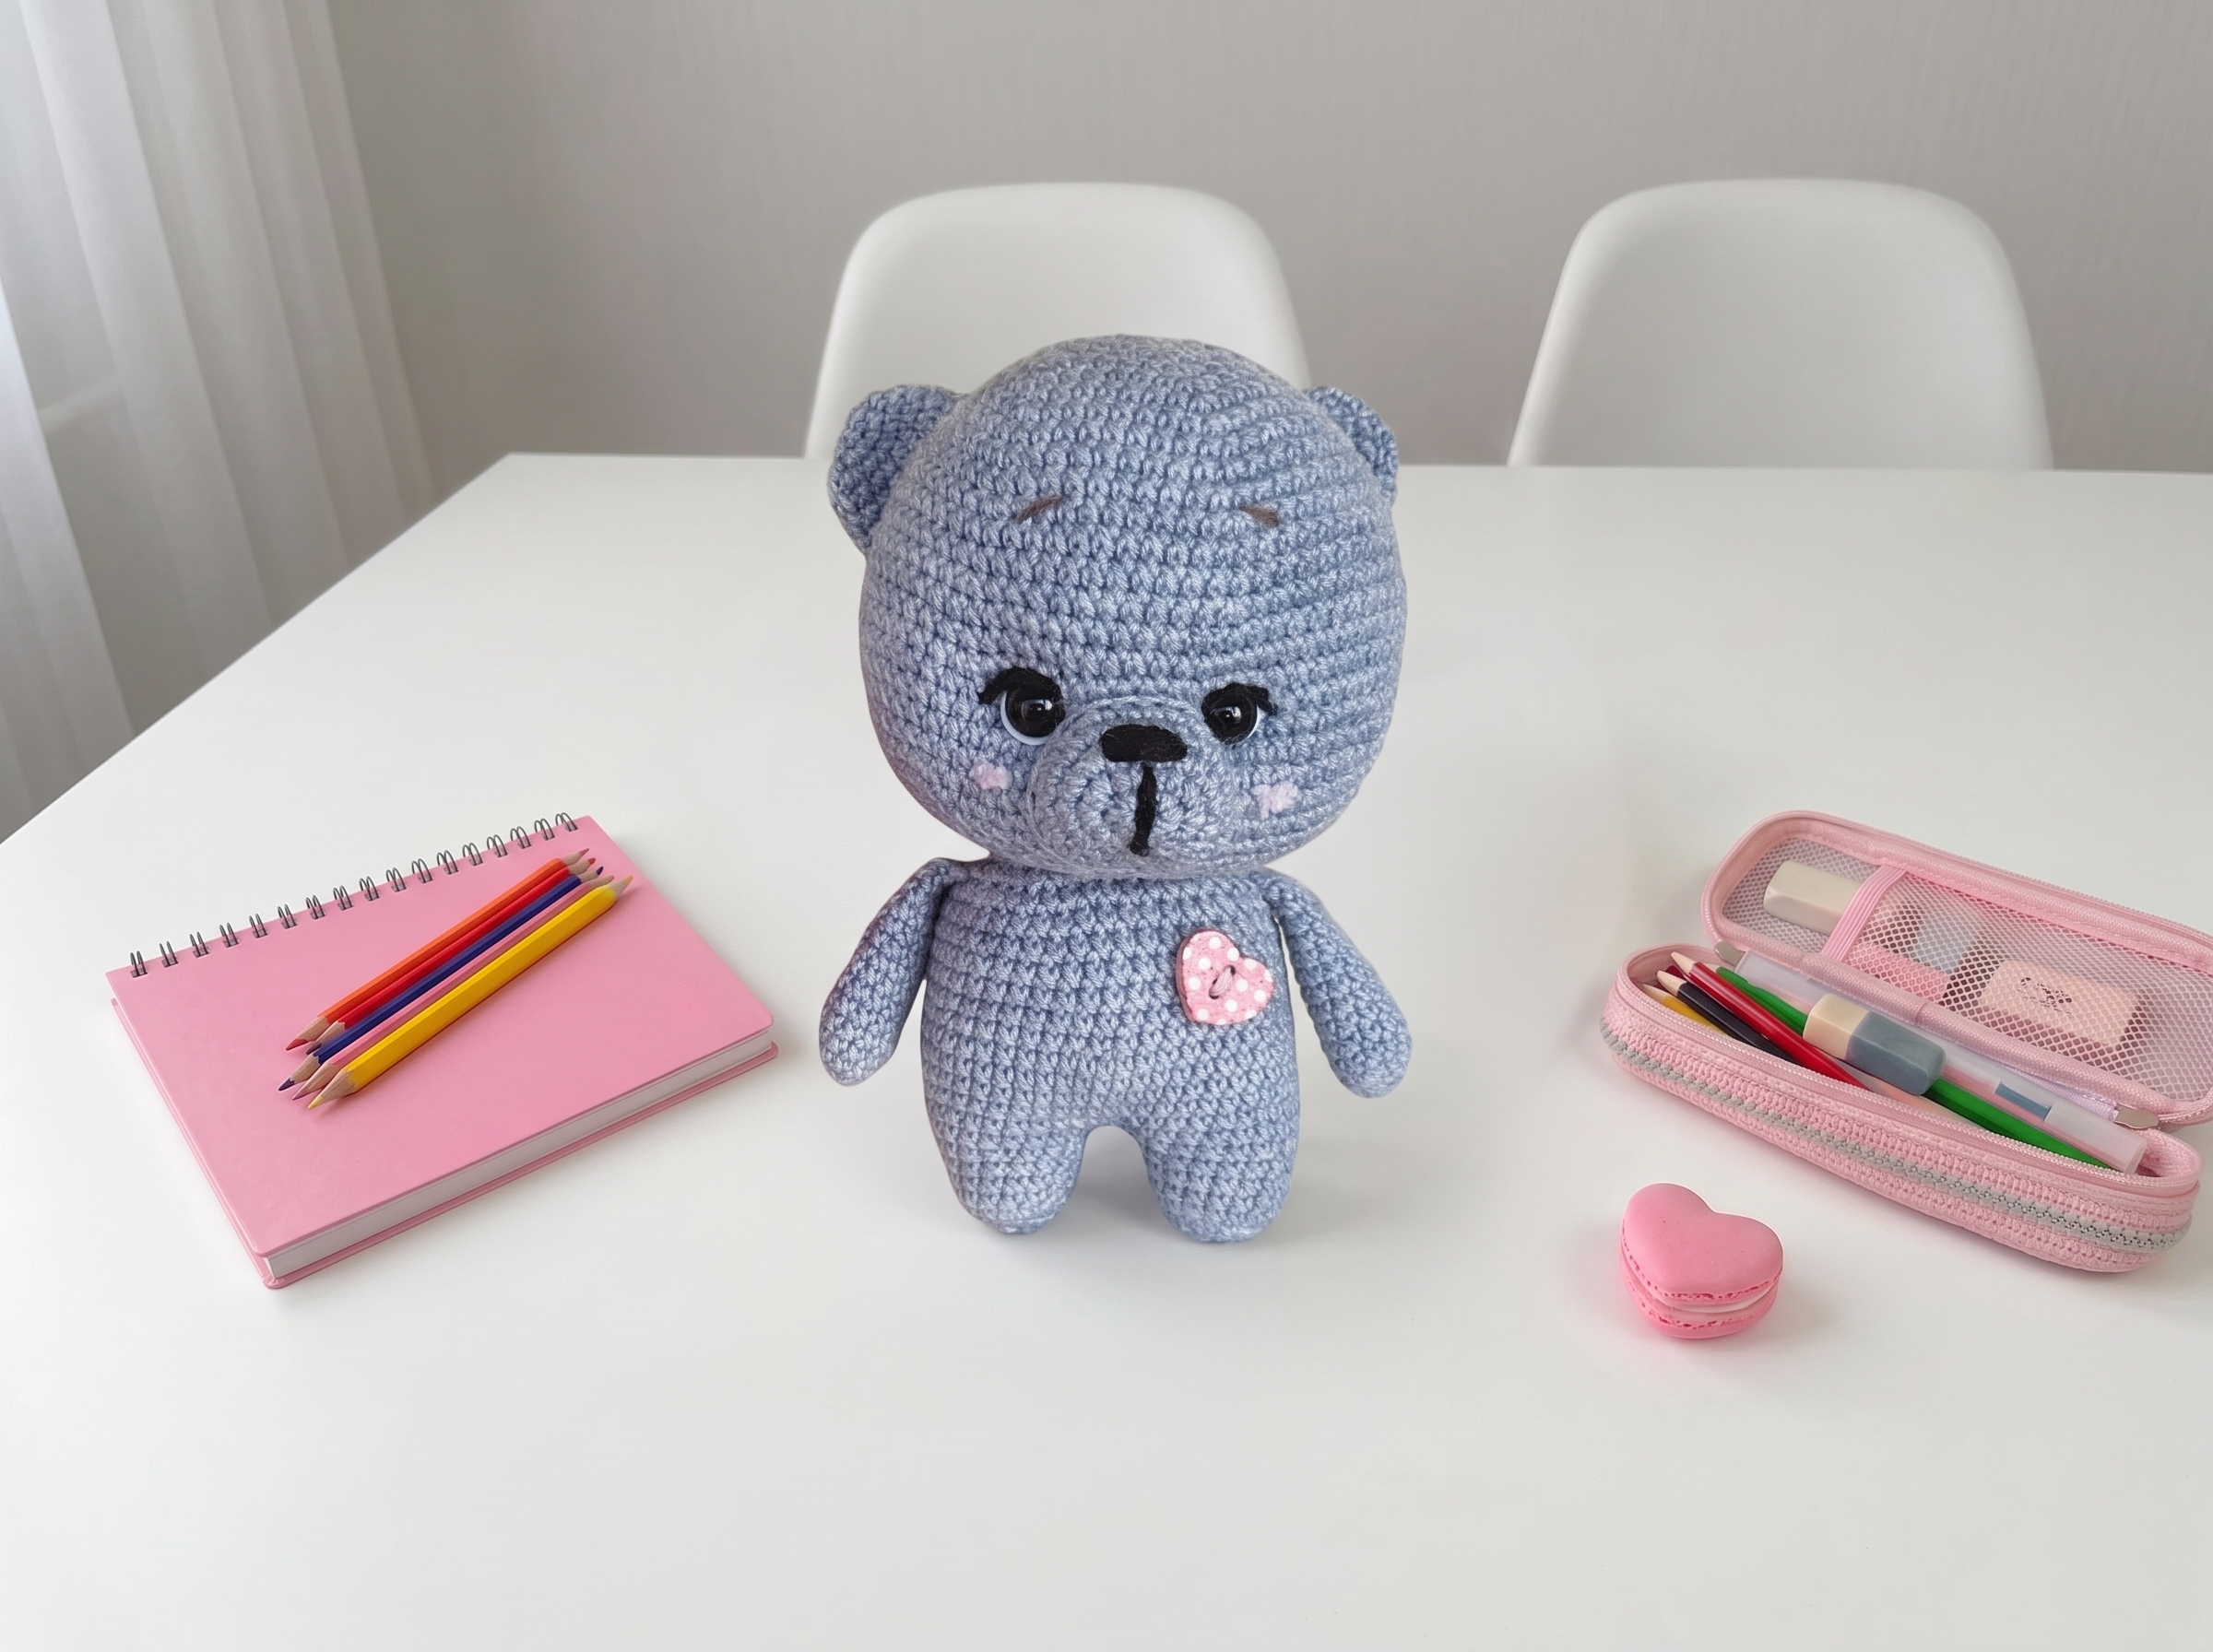
Adorable Mouse-Bear – Complete Step-by-Step Pattern
1. Materials & Abbreviations
Let's gather our supplies! This pattern uses a soft, slightly bulky yarn that works up quickly and gives the finished toy a wonderfully squishy, huggable feel.
- Yarn: Soft, bulky cotton or acrylic blend (e.g., Pekhorka Detskaya Obemnaya or similar, approx. 400m/100g). You'll need a main color, plus small amounts of white, black, cappuccino, and peach for embroidery.
- Hook: 2.0 mm (or size needed to achieve a tight, stuff-proof gauge).
- Notions: 9–10 mm safety eyes, poly-fil stuffing, tapestry needle, scissors, and one small decorative button.
- Abbreviations:
- MR – magic ring
- ch – chain
- sc – single crochet
- inc – increase (2 sc in one stitch)
- dec – decrease (2 sc crocheted together)
- BLO – back loop only
What it teaches: Proper tool selection for plush yarns, gauge management, and familiarization with standard international crochet abbreviations.
2. Head
We'll start with the head, working in a continuous spiral to build a perfectly round, plush foundation.
- R1: 8 sc in MR (8)
- R2: 8 inc (16)
- R3: (1 sc, inc) x 8 (24)
- R4: (3 sc, inc) x 6 (30)
- R5: (4 sc, inc) x 6 (36)
- R6: (5 sc, inc) x 6 (42)
- R7: (6 sc, inc) x 6 (48)
- R8: (7 sc, inc) x 6 (54)
- R9: 54 sc (54)
- R10: (8 sc, inc) x 6 (60)
- R11: 60 sc (60)
- R12: (9 sc, inc) x 6 (66)
- R13-14: 66 sc (66) [2 rows]
- R15: (10 sc, inc) x 6 (72)
- R16-17: 72 sc (72) [2 rows]
- R18: (11 sc, inc) x 6 (78)
- R19-22: 78 sc (78) [4 rows]
- Important detail: Insert safety eyes between R19 and R20, spaced exactly 10 stitches apart (with 8 visible stitches between them).
- R23: (11 sc, dec) x 6 (72)
- R24: (10 sc, dec) x 6 (66)
- R25: (9 sc, dec) x 6 (60)
- R26: (8 sc, dec) x 6 (54)
- R27: (7 sc, dec) x 6 (48)
- R28: (6 sc, dec) x 6 (42)
- R29: (5 sc, dec) x 6 (36)
- R30: (4 sc, dec) x 6 (30)
- R31: (3 sc, dec) x 6 (24)
- Finishing: Fasten off, leaving a long tail for sewing the head to the body later.
What it teaches: Spiral increase sequences, precise safety eye placement, and structured decreasing for smooth, spherical shaping.
3. Arms (Make 2)
These little arms are worked as simple tubes and cleverly folded flat at the top, which means no tedious sewing to attach them later!
- R1: 6 sc in MR (6)
- R2: 6 inc (12)
- R3-12: 12 sc (12) [10 rows]
- R13: (2 sc, dec) x 3 (9)
- Finishing: Fold the top opening in half and work 4-5 sc through both layers simultaneously to close it flat. Leave a long tail for sewing.
What it teaches: Creating uniform tubular limbs and using flat-folding techniques for seamless, articulated closures.
4. Legs & Body
Here’s where the magic happens! We build the legs first, then join them seamlessly to crochet the body in one continuous piece, completely eliminating the need to sew the lower half together.
Legs:
- R1: 8 sc in MR (8)
- R2: 8 inc (16)
- R3: 16 sc in BLO (16)
- R4-6: 16 sc (16) [3 rows]
- R7: (3 sc, inc) x 4 (20)
- Note: Fasten off and cut the yarn on the first leg. On the second leg, do not cut the yarn. We will join them now.
Joining & Body:
- R8 (Joining Round): 20 sc on the 1st leg, 1 sc in the join space, 20 sc on the 2nd leg, 1 sc in the join space (42)
- R9: (6 sc, inc) x 6 (48)
- R10-13: 48 sc (48) [4 rows]
- Fun Detail: This is the perfect spot to switch to red yarn and embroider a cute little heart pattern on the "pants" area!
- R14: (6 sc, dec) x 6 (42)
- R15-20: 42 sc (42) [6 rows]
- R21: (5 sc, dec) x 6 (36)
- R22: (4 sc, dec) x 6 (30)
- R23: (3 sc, dec) x 6 (24)
- Finishing: Fasten off, leaving a long tail.
What it teaches: Seamless multi-piece joining, utilizing unworked loops for structural continuity, and integrated limb construction.
5. Ears & Tail
These small, simple pieces add so much personality to the finished toy.
Ears (Make 2):
- R1: 6 sc in MR (6)
- R2: 6 inc (12)
- R3: (1 sc, inc) x 6 (18)
- R4-6: 18 sc (18) [3 rows]
- Finishing: Fasten off, leaving a very long tail for sewing.
Tail:
- R1: 6 sc in MR (6)
- R2: 6 inc (12)
- R3: 12 sc (12)
- Finishing: Fasten off, leaving a long tail for sewing.
What it teaches: Rapid radial expansion and working flat, un-stuffed appendages.
6. Nose
A slightly flattened, oval-shaped nose that gives the Mouse-Bear its signature sweet expression.
- R1: 8 sc in MR (8)
- R2: 8 inc (16)
- R3: (1 sc, inc) x 8 (24)
- R4-5: 24 sc (24) [2 rows]
- Finishing: Fasten off, leaving a long tail for sewing. Do not stuff yet (we will stuff it lightly during assembly to keep it soft and squishy).
What it teaches: Flat circular expansion and creating raised facial features.
7. Assembly & Finishing
Now for the most rewarding part: bringing your Mouse-Bear to life!
- Head to Body: Stuff the head firmly. Sew the head securely to the top of the body using the long tail left on the body piece.
- Ears: Sew the ears to the sides of the head, starting around R15 and angling them slightly upward toward the center.
- Tail: Sew the tail to the lower back of the body.
- Nose: Stuff the nose very lightly, then sew it centrally on the face, just below the eyes.
- Embroidery: This is where the personality shines! Using your embroidery floss:
- Stitch delicate eyelashes and white eye highlights on the safety eyes.
- Embroider a tiny nose and soft brows using cappuccino thread.
- Add a hint of peach thread to the cheeks for a sweet, rosy blush.
- Final Touch: Sew your decorative button onto the body or head for that perfect finishing detail.
What it teaches: Multi-step structural assembly, yarn sculpting for expressive facial features, and professional finishing techniques.
Final Section: Where to Go from Here
Congratulations! By completing this adorable Mouse-Bear, you’ve mastered foundational spiral shaping, clever integrated limb construction, and expressive surface embroidery. Because this pattern minimizes sewing, it’s an incredibly satisfying and quick project.
From here, try experimenting with different yarn colorways to create a whole family of woodland friends, or adapt the seamless body technique to design your own unique, custom amigurumi characters. Happy crocheting!