August 14, 2026
Adorable Plush Puppy – Quick & Seamless Amigurumi Crochet Pattern
Bring this sweet, huggable puppy to life with this easy-to-follow amigurumi pattern! Featuring clever integrated limb construction, cute embroidered details, and a plush finish, it’s a delightful, confidence-building project for crafters of all levels.
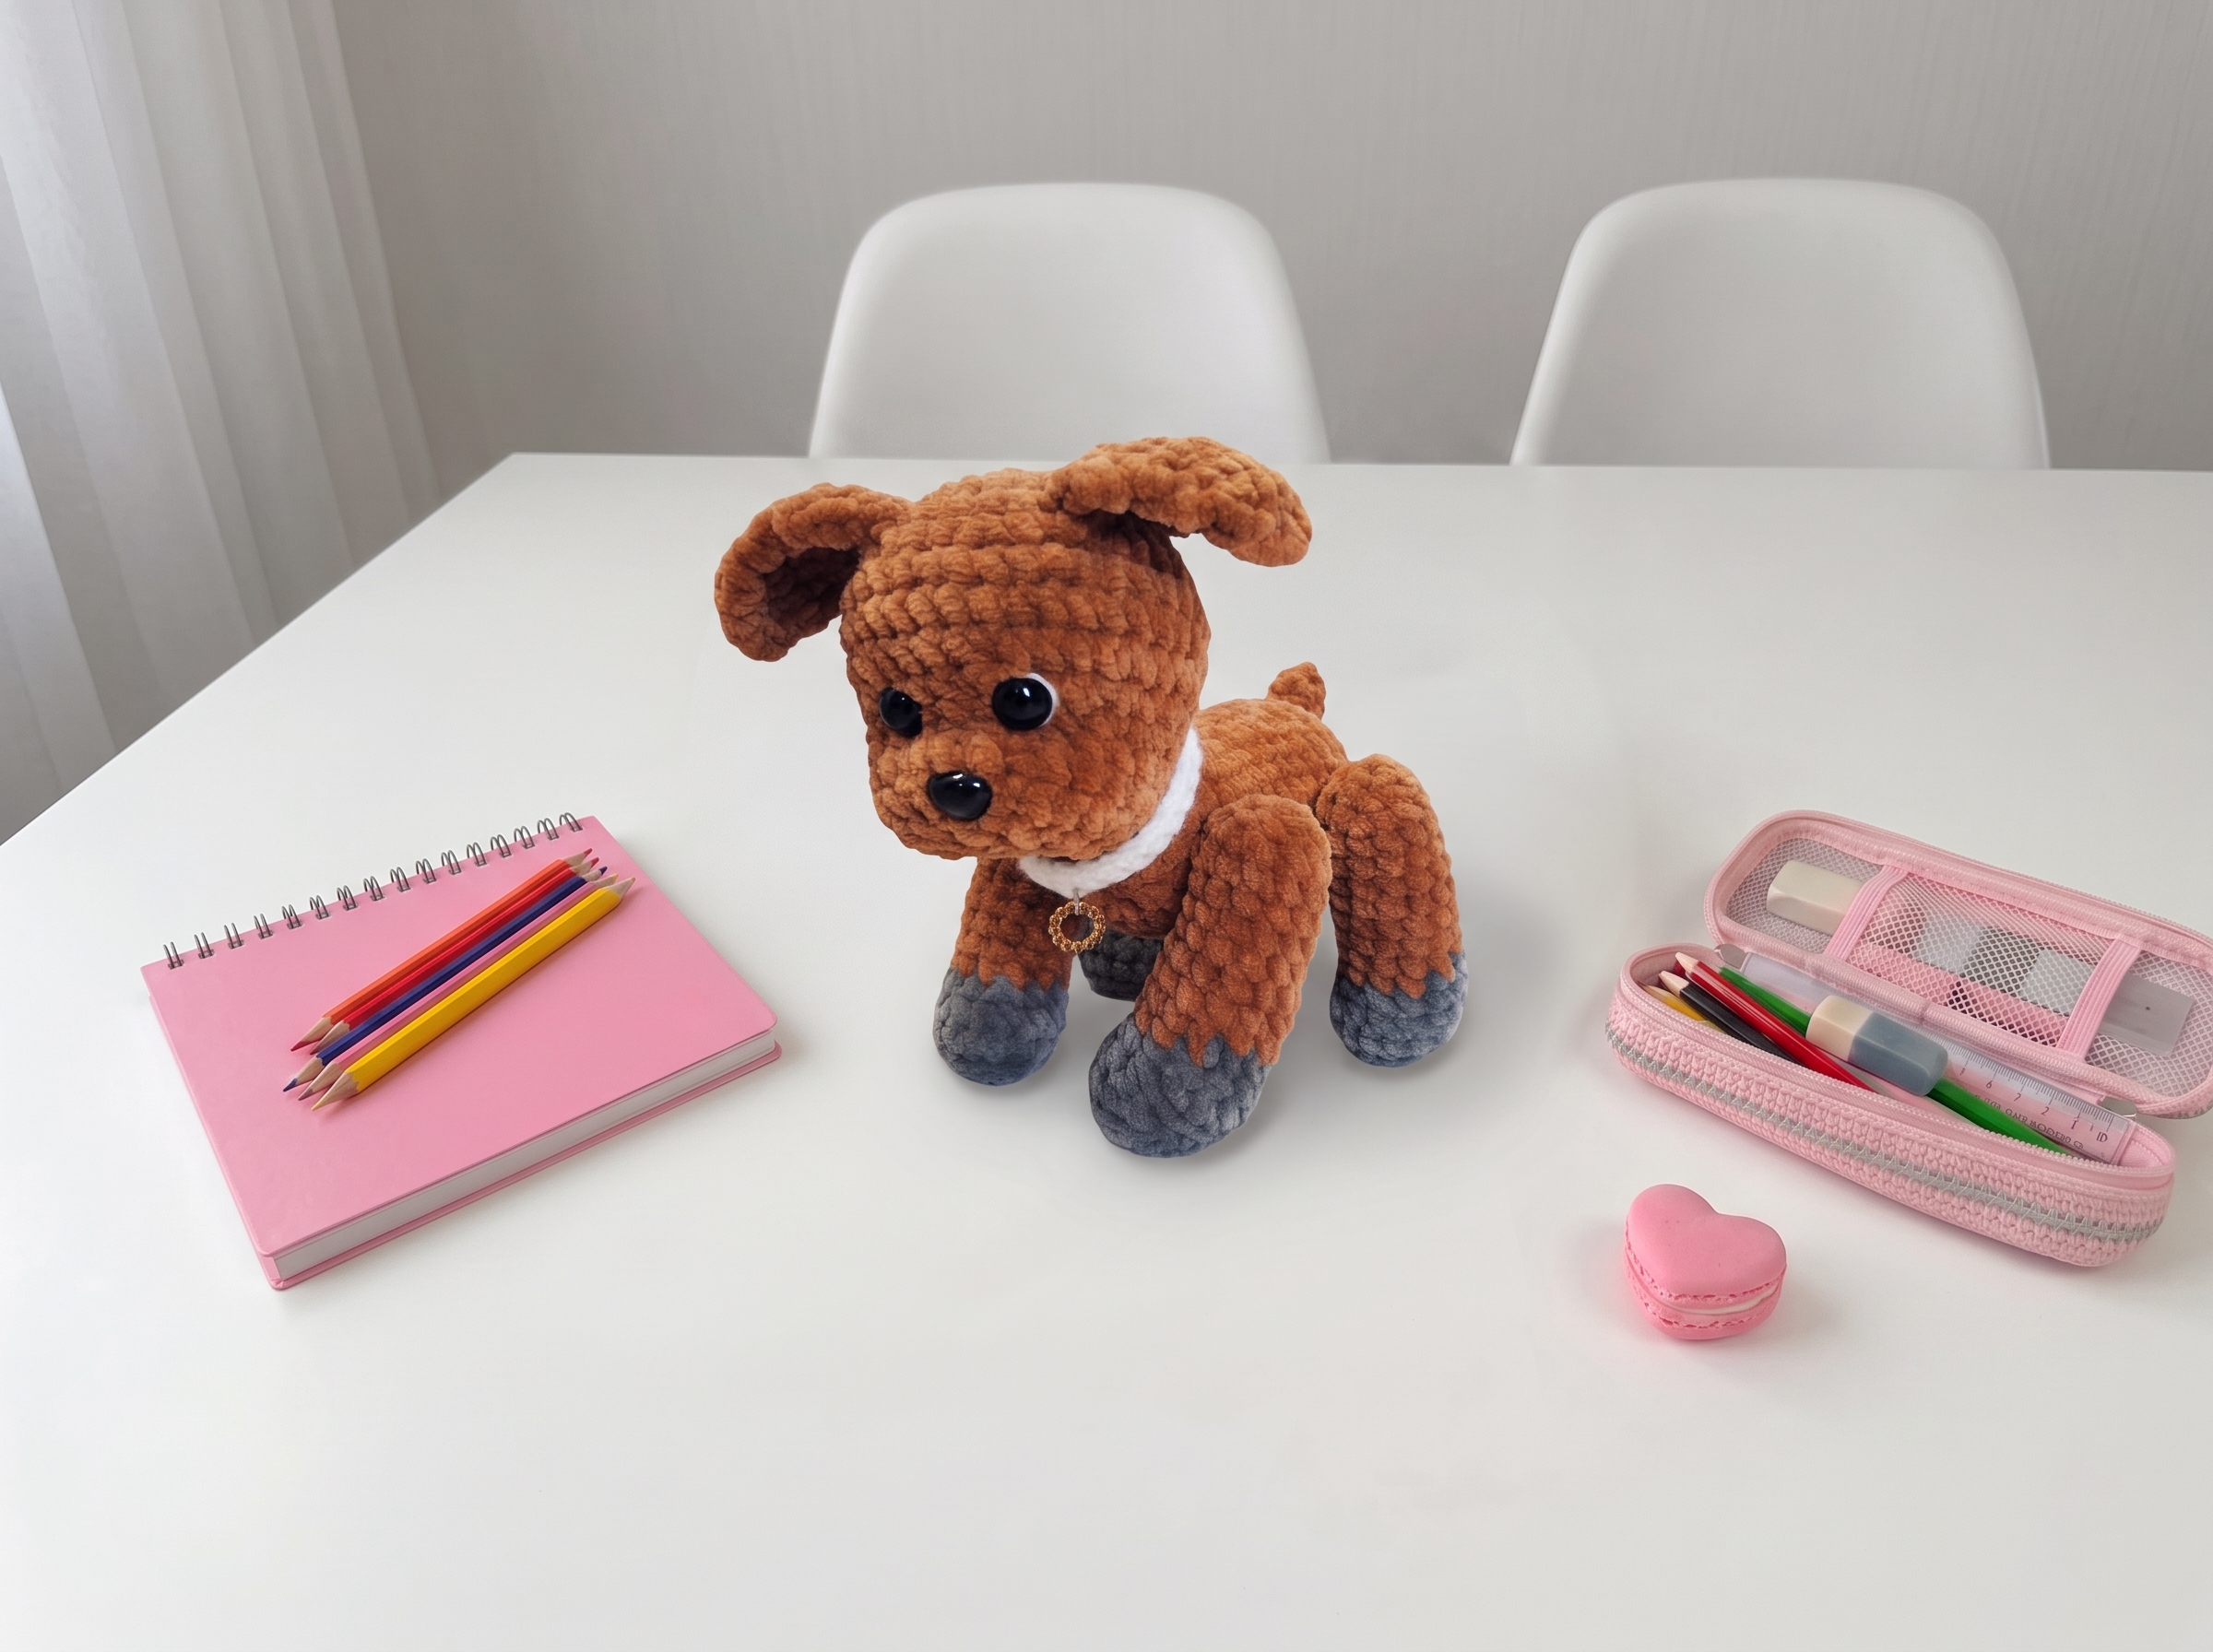
Adorable Plush Puppy – Complete Step-by-Step Pattern
1. Materials & Abbreviations
Let's gather our supplies! This pattern uses a soft, bulky plush yarn that works up quickly and gives the finished toy a wonderfully squishy, huggable feel.
- Yarn: Plush yarn (e.g., YarnArt Dolce or Himalaya Dolphin Baby, approx. 120m/100g). You'll need just over half a skein of your main color, and about 1/8 of a skein of a contrasting color for the paw bottoms.
- Hook: 4.0 mm (or 3.5 mm if you tend to crochet loosely).
- Notions: 12 mm safety eyes, 15 mm safety nose, embroidery floss or thin yarn (for sewing and facial details), large-eye tapestry needle, poly-fil stuffing, scissors, and pins.
- Abbreviations:
- ch – chain
- sc – single crochet
- inc – increase (2 sc in one stitch)
- dec – decrease (2 sc crocheted together)
- MR – magic ring (Note: For plush yarn, the pattern uses a simplified start: ch 2, work the first round's sc into the 2nd ch from the hook).
What it teaches: Proper tool selection for plush yarns, gauge management, and familiarization with standard international crochet abbreviations.
2. Head
We'll start with the head, working in a continuous spiral to build a perfectly round, plush foundation.
- R1: Ch 2, work 8 sc in the 2nd ch from hook (8)
- R2: 8 inc (16)
- R3: (1 sc, inc) x 8 (24)
- R4: (2 sc, inc) x 8 (32)
- R5: 32 sc (32)
- R6: (3 sc, inc) x 8 (40)
- R7-8: 40 sc (40) [2 rows]
- R9: (dec, 3 sc) x 8 (32)
- R10: (dec, 2 sc) x 4, 16 sc (28)
- Important detail: Insert 12 mm safety eyes into the 5th and 9th stitches of this row.
- R11-13: 28 sc (28) [3 rows]
- R14: (dec, 2 sc) x 7 (21)
- Important detail: Insert the 15 mm safety nose into the 5th stitch of this row.
- R15: 10 dec, 1 sc (11)
- R16: 5 dec, 1 sc (6)
- R17: 3 dec.
- Finishing: Pull the yarn tail tight to close the hole, then weave the end securely into the inside of the head.
- Sculpting Tip: Stuff the head firmly, but leave the muzzle area slightly less stuffed. Thread a tapestry needle with strong embroidery floss. Insert the needle at the bottom of the muzzle, bring it up under one eye, across to under the other eye, and back down to the starting point. Pull gently to create a defined, expressive muzzle, then secure the thread inside the head.
What it teaches: Spiral increase sequences, precise safety feature placement, and basic yarn sculpting for expressive facial definition.
3. Ears (Make 2)
The ears are simple, flat semi-circles that are sewn directly onto the head.
- R1: Ch 2, work 4 sc in the 2nd ch from hook (4)
- R2-4: 4 sc (4) [3 rows]
- R5: 2 dec (2)
- Finishing: Pull the yarn tail tight to flatten the piece into a semi-circle. Leave a long tail for sewing.
What it teaches: Working small, flat shapes and utilizing tension to create dimensional forms.
4. Legs (Make 4)
The legs feature a subtle shaping at the bottom to mimic little puppy paws, finished with a flat top for easy attachment to the body.
- R1: Ch 2, work 8 sc in the 2nd ch from hook (8)
- R2: 8 inc (16)
- R3: 16 sc (16)
- R4: dec, 2 sc, dec, 10 sc (14)
- R5: 1 sc, dec, 11 sc (13)
- R6-13: 13 sc (13) [8 rows]
- R14: (dec, 1 sc) x 4, 1 sc (9)
- R15: 4 dec, 1 sc (5)
- R16: 2 dec (3)
- Finishing: Pull the yarn tail tight to close the hole, then weave the end securely inside. Stuff the legs firmly. (Note: If using plastic safety joints, insert them during R13 before finishing the leg).
What it teaches: Progressive limb decreasing, partial stuffing for a natural, floppy drape, and preparing pieces for seamless attachment.
--- can be attached directly.
5. Body
The body is worked from the bottom up, seamlessly integrating the legs as you go, and features clever turning rows to shape the neck and withers.
- R1: Ch 2, work 8 sc in the 2nd ch from hook (8)
- R2: 8 inc (16)
- R3: (1 sc, inc) x 8 (24)
- R4: (2 sc, inc) x 8 (32)
- R5-6: 32 sc (32) [2 rows]
- Important detail: Attach the front legs symmetrically during R6 (around the 1st and 15th stitches).
- R7: 6 sc, dec, 1 sc, dec, 22 sc (30)
- R8-9: 30 sc (30) [2 rows]
- R10: (13 sc, dec) x 2 (28)
- R11-12: 28 sc (28) [2 rows]
- R13: 3 sc, inc, 8 sc, inc, 15 sc (30)
- R14-15: 30 sc (30) [2 rows]
- Important detail: Attach the back legs symmetrically during R14.
- R16 (Start of Neck Shaping): Sc 5. Leave the remaining 7 stitches (the withers/back of the neck) unworked for now, and begin working in turning rows:
- Row 1 (WS): Ch 1, turn, work (2 sc, dec) to the end of the row.
- Row 2 (RS): Ch 1, turn, work (1 sc, dec) to the end of the row.
- Row 3 (WS): Ch 1, turn, work dec to the end of the row.
- Row 4 (RS): Ch 1, turn, work dec to the end of the row.
- Row 5 (WS): Ch 1, turn, 7 sc to the end of the row.
- Row 6 (RS): Ch 1, turn, 7 sc to the end of the row.
- Resume in the round: Do not ch 1. Work 2 sc, then work 7 sc across the unworked withers stitches, then 2 sc to join back to the main body. Continue with: 2 sc, dec, 14 sc.
- R17: Work 1 full round without any decreases to stabilize the neck.
- Finishing: Cut yarn, leaving a long tail for attaching the head.
What it teaches: Seamless multi-piece joining, utilizing unworked loops for structural continuity, and mastering turning rows to shape a 3D neck and withers.
6. Tail
A tiny, subtle tail to complete the puppy's silhouette.
- R1: Ch 2, work 4 sc in the 2nd ch from hook (4)
- R2-4: 4 sc (4) [3 rows]
- R5: 2 dec (2)
- Finishing: Pull the yarn tail tight to close the hole. Leave a long tail for sewing.
What it teaches: Quick, small-piece construction and proportional shaping for subtle anatomical details.
7. Assembly & Finishing
Now for the most rewarding part: bringing your puppy’s personality to life!
- Ears: Sew the ears to the top sides of the head, angling them slightly outward.
- Legs: If not using safety joints, sew the legs directly to the body. To keep them slightly movable, wrap your sewing thread in a continuous circle through the body and both legs at the same level, keeping the stitches close together. Tie off securely and hide the ends.
- Tail: Sew the tail to the lower back of the body.
- Facial Details:
- Embroider a cute, tiny mouth just below the nose.
- Embroider small eyebrows about 4 rows above the eyes.
- Add tiny white stitches to the bottom corners of the safety eyes to create "eye whites" for a lively expression.
- Collar (Optional): Chain a length equal to the puppy's neck circumference. Work 1 row of sc into the chain, join with a sl st, and sew the ends together. Add a tiny metal ring or felt medallion for extra charm!
- Final Fluff: Use a manicure needle, tweezers, or a pet slicker brush to gently tease and fluff the plush yarn, blending the seams and giving your puppy a perfectly soft, professional finish.
What it teaches: Multi-step structural assembly, surface embroidery for expressive facial features, and professional finishing techniques for plush toys.
Final Section: Where to Go from Here
Congratulations! By completing this adorable plush puppy, you have mastered foundational spiral shaping, clever integrated limb construction, and expressive surface embroidery. Because this pattern minimizes sewing and uses a forgiving plush yarn, it’s an incredibly satisfying and quick project.
From here, try experimenting with different yarn colorways to create a whole "pound of puppies" collection, or adapt the seamless body and turning-row techniques to design your own unique, custom amigurumi animals. Happy crocheting!