July 29, 2026
Bunnitty with Hoodie – The Complete Amigurumi Pattern (Bunny & Kitty Versions)
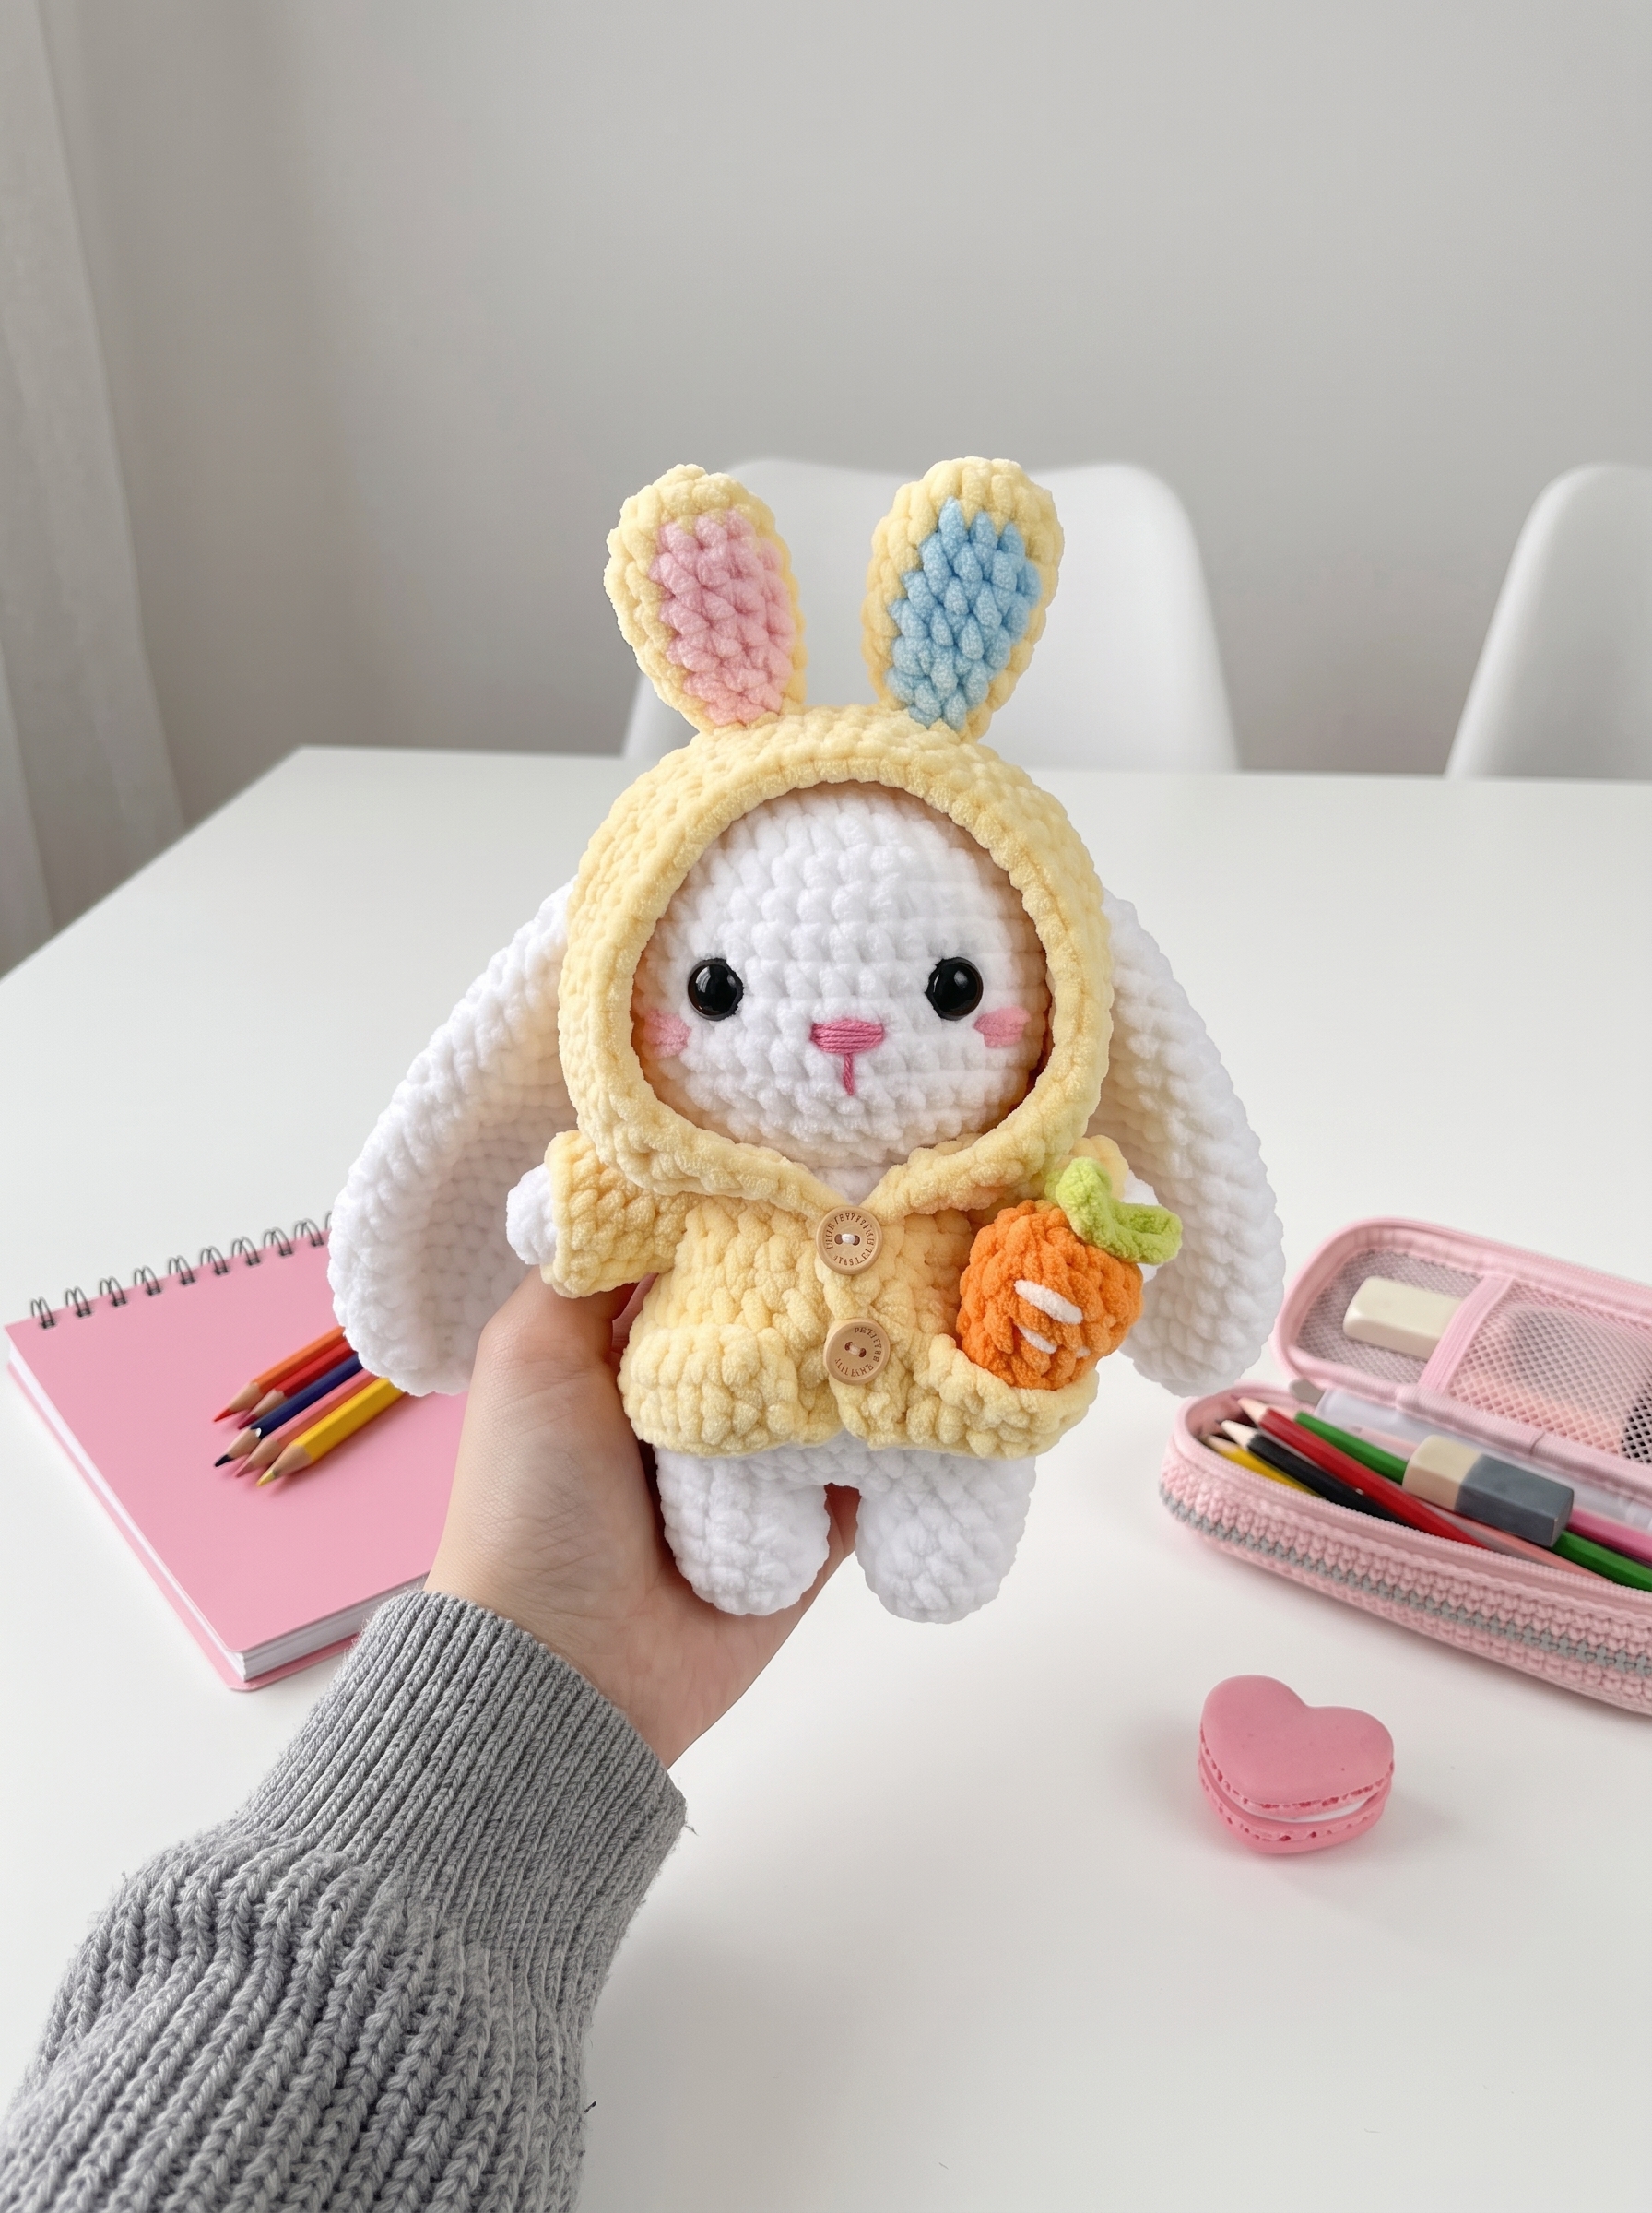
A plush, chubby character pattern with interchangeable hoodie options, complete with facial details, ears, body shaping, and adorable accessories like carrot bags and chicken charms. When someone asks me for a pattern that's cute enough to gift but detailed enough to feel accomplished, I point them to Bunnitty. This pattern combines classic amigurumi shaping with wearable details (that hoodie!), and teaches you everything from invisible decreases to working complex color changes. The best part? You can make a bunny version, a kitty version, or both — they use the same body pattern with different ears and facial features.
- The Head & Face Details
The head is worked in continuous rounds from the top down, with increases to create a chubby sphere. Safety eyes go in between rounds 10–11, and you'll embroider the nose and whiskers after stuffing. Yarn: white plush yarn (Himalaya Dolphin Baby or similar) Hook: 5 mm Key rounds: Start with Mr 8sc, increase to 42sc by round 6, work even rounds 7–12, then decrease to 18sc Face details: Insert 14mm safety eyes 6 stitches apart; embroider yellow nose (kitty) or pink T-shape nose (bunny) on round 11; add black whiskers on rounds 10–12 What it teaches: working in continuous spirals, invisible decreases, placing safety eyes, embroidery on stuffed pieces.
- Ears (Bunny & Kitty Versions)
Bunny ears are long and tapered (20 rounds), while kitty ears are short triangles (5 rounds). Neither is stuffed — they're sewn flat to the head. Bunny ears (make 2): Mr 8sc, increase to 24sc, work even to round 7, then decrease in stages to 6sc. Sew on rounds 8–9 of head, about 5 stitches from eyes. Kitty ears (make 2): Mr 4sc, increase to 16sc over 4 rounds, finish with 16sc. Sew on rounds 3–7 of head. Tip: Leave long tails for sewing; position bunny ears so they stand upright, kitty ears slightly angled. What it teaches: tapering shapes, working without stuffing, strategic placement for character expression.
- Body & Limbs
The body starts as two separate legs, joins at round 6, then shapes up to the neck. Arms are simple tubes sewn on at round 16. Legs (make 2): Mr 6sc, increase to 12sc, work 3 even rounds. Fasten off first leg; continue second leg and chain 2 to join. Body joining: Round 6 = 12sc (first leg) + 2sc (chain) + 12sc (second leg) + 2sc (chain) = 28sc Body shaping: Increase to 32sc by round 7, work even to round 13, decrease to 18sc by round 17 Arms (make 2): Mr 6sc, increase to 8sc, work 5 even rounds. Stuff lightly and sew on body round 16. What it teaches: joining pieces mid-pattern, working around chain spaces, 3D shaping from flat pieces.
- The Hoodie (Hat & Shirt Pieces)
The hoodie is two separate pieces sewn together: a shaped "hat" piece worked from the crown down, and a rectangular "shirt" piece with sleeve openings. Hat piece (bunny/yellow, kitty/pink, monkey/yellow-red): Mr 8sc, increase to 46sc by round 6, work hdc rows with chain spaces for ear holes, finish with dc/hdc/sc border Key shaping: Rounds 10–11 create ear openings with chain-and-skip technique Shirt piece: Chain 41, work 5 rows of hdc with chain-6 spaces for sleeves, sc around edges for smooth finish Sleeves: Work 14sc around each chain-6 space, 3 rounds even What it teaches: working flat pieces after working in round, creating openings with chains, mixing stitch types (sc/hdc/dc) in one piece.
- Hoodie Ears & Accessories
Each hoodie gets matching ears worked in color combinations, plus optional pockets and decorative bows. Bunny hoodie ears (yellow with pink): 8 rounds with color changes, decrease to 6sc. Sew on hoodie round 11. Kitty/Melody ears (pink): 7 rounds, stuff lightly. Sew on hoodie rounds 10–11. Frog ears (green): 3 rounds, flat. Sew on hoodie round 11. Pocket: Chain 7, work 3 rows of 6sc, sew onto shirt front. Bow: Chain 4, work 2dc-ch3-slst sequences into first chain, roll and glue/sew to hoodie. What it teaches: multi-color rounds, reading complex color-change instructions, creating 3D shapes from flat pieces.
- Bonus: Melody x Chicken & Egg Accessories
These tiny charms turn Bunnitty into a gift set — the chicken fits in the hoodie pocket, and the egg is a standalone surprise. Chicken: Mr 7sc, increase to 14sc, work 4 even rounds, decrease to 7sc. Add embroidered eyes and orange beak. Bunny cover (for chicken): Mr 8sc, increase to 20sc, work 4 even rounds. Sew around chicken with bunny ears on top. Chicken x egg: Work in white and yellow color changes across 8 rounds, creating a cracked-egg effect. Insert 9mm eyes on rounds 4–5. Carrot bag: Orange yarn worked from tip to stem, with cream embroidery lines and green leaf top. What it teaches: miniature amigurumi, color changes every stitch, creating "sets" that interact with the main character. Where to Go from Here Once you've made Bunnitty, you've mastered the core amigurumi skills: shaping spheres, working color changes, creating wearable accessories, and assembling multi-part characters. Try swapping the hoodie colors for different characters, or scale the pattern up with bulkier yarn for a floor-pillow version. The same body pattern works for any animal — just change the ears and face. Copier Demander à Qwen Expliquez Traduire(fr-FR)