August 7, 2026
Mister Joe the Frog – Whimsical Amigurumi Crochet Pattern
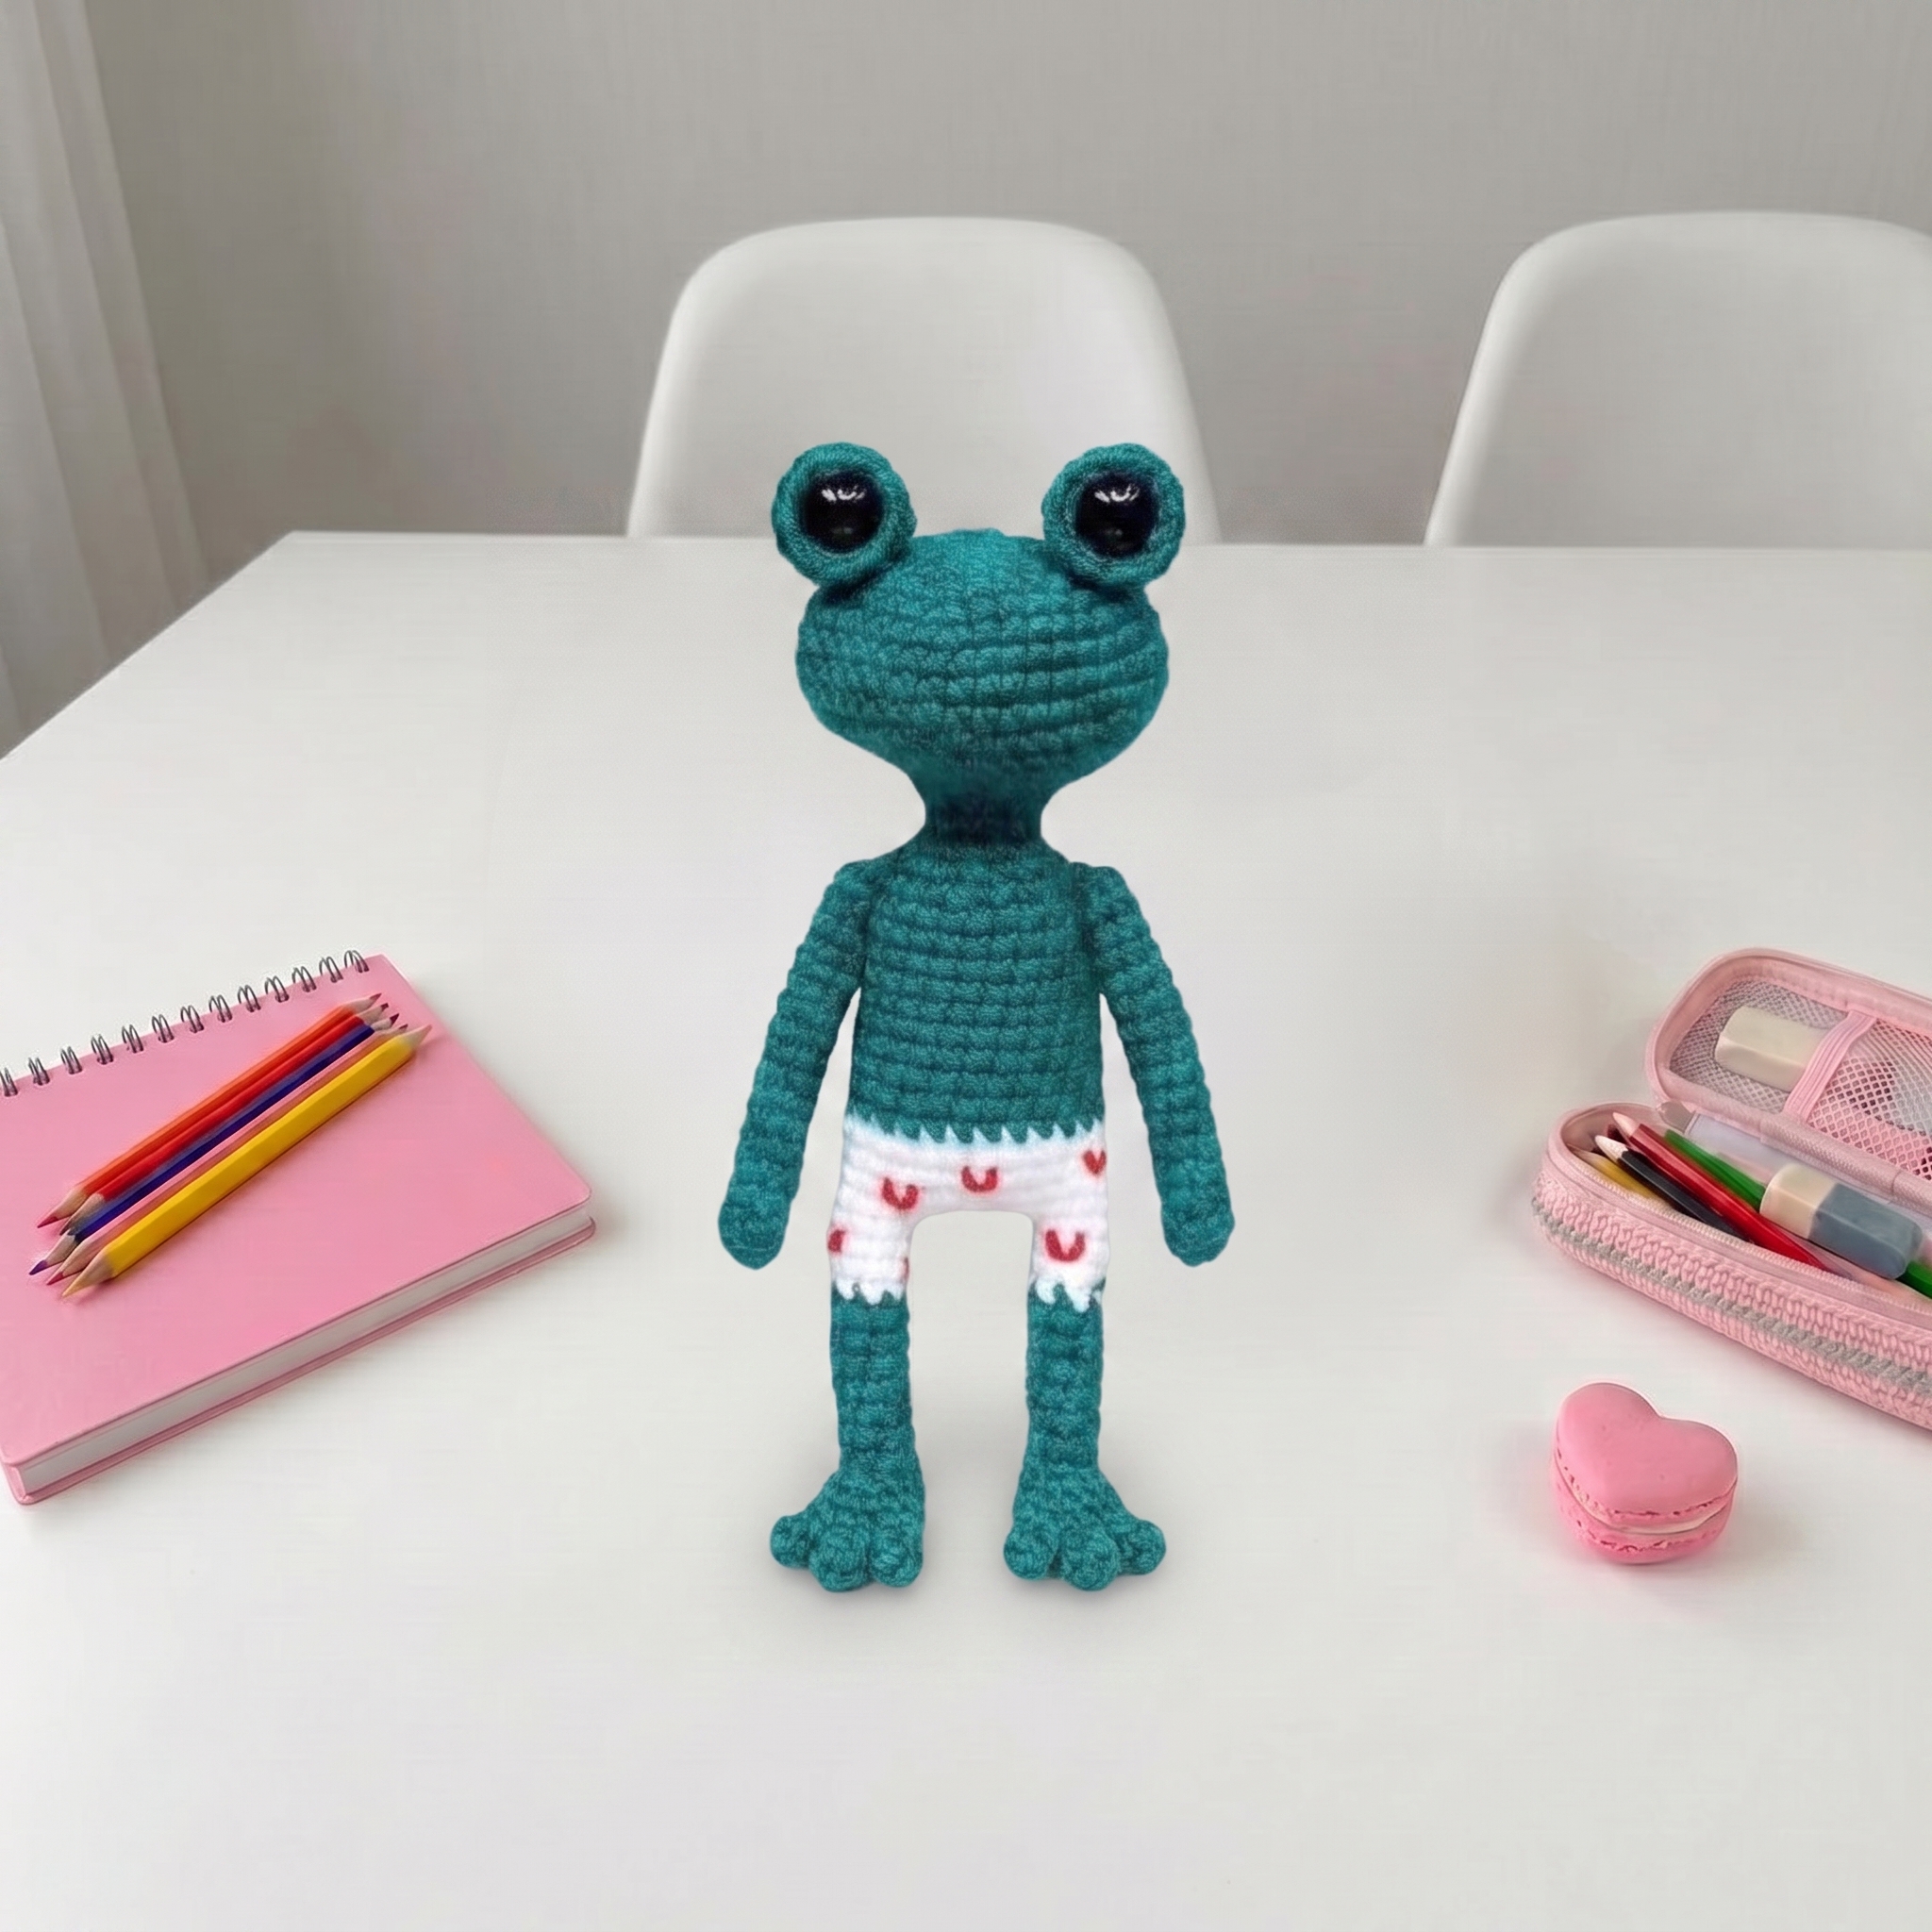
Bring this charming, heart-patterned frog to life with this beginner-friendly amigurumi pattern. Featuring a seamless body construction, cute embroidered details, and classic bead eyes, it is a delightful project for crocheters looking to practice continuous spiral shaping and simple color changes.
Mister Joe the Frog – Complete Step-by-Step Pattern
1. Materials & Abbreviations
This section covers everything you need to gather before beginning. Using the recommended materials ensures the correct gauge and a professional, durable finish.
- Yarn: Katia Monosor (100% cotton, 110m/50g) or similar weight. Colors: Green (main), White (accents/pants), Red (embroidery).
- Hook: 2.5 mm (or size appropriate to achieve a tight, stuff-proof gauge).
- Notions: Two 10 mm acrylic beads (for eyes), poly-fil stuffing, large-eye tapestry needle, stitch marker, scissors.
- Abbreviations:
- MR – magic ring
- ch – chain
- sc – single crochet
- inc – increase (2 sc in one stitch)
- dec – decrease (2 sc crocheted together)
What it teaches: Proper tool selection, gauge management, and familiarization with standard international crochet abbreviations.
2. Legs (Make 2)
The legs are worked as simple, stuffed tubes with a color change to create the appearance of little white socks or pants.
- R1 (Green): 6 sc in MR (6)
- R2-10: 6 sc (6) [9 rows]
- Change to White:
- R11-15: 6 sc (6) [5 rows]
- Finishing: On the first leg, fasten off and cut the yarn. On the second leg, do not cut the yarn. You will continue directly into the body.
What it teaches: Working continuous tubular shapes, executing clean mid-project color changes, and preparing for seamless piece joining.
3. Body
The body is joined seamlessly to the legs using a chain bridge, then worked upward with strategic decreases to shape the torso and neck.
- R16 (Joining Round): 6 sc on the second leg, 12 ch, 6 sc on the first leg, 12 sc along the opposite side of the chain bridge (24)
- [Editor’s Note: The original pattern text for the joining round was slightly fragmented. This mathematically accurate sequence (6 + 12 + 6 = 24) creates a stable, gap-free base.]
- R17-21: 24 sc (24) [5 rows]
- Detail: At this stage, cut the red yarn and embroider a cute heart pattern onto the white "pants" section.
- Change to Green:
- R22-31: 24 sc (24) [10 rows]
- R32: (2 sc, dec) x 6 (18)
- [Editor’s Note: The original text stated "2 sc, 1 dec (12)", which is mathematically impossible from 24 stitches. Corrected to "(2 sc, dec) x 6" to achieve a logical 18-stitch count for gradual tapering.]
- R33: (1 sc, dec) x 6 (12)
- [Editor’s Note: Corrected from garbled original text to maintain the standard decrease sequence.]
- R34: 6 dec (6)
- [Editor’s Note: Corrected from garbled original text to achieve the stated 6-stitch count.]
- R35-36: 6 sc (6) [2 rows]
- Finishing: Fasten off, leaving a long tail for sewing the head.
What it teaches: Seamless multi-piece joining with chain bridges, surface embroidery placement, and structured torso decreasing.
4. Head
The head is worked in a continuous spiral, expanding to form the frog's characteristic wide face, then decreasing smoothly to close at the neck.
- R1: 6 sc in MR (6)
- R2: 6 inc (12)
- R3: (1 sc, inc) x 6 (18)
- R4: (2 sc, inc) x 6 (24)
- R5: (3 sc, inc) x 6 (30)
- R6: (4 sc, inc) x 6 (36)
- R7: (5 sc, inc) x 6 (42)
- R8-10: 42 sc (42) [3 rows]
- R11: (5 sc, dec) x 6 (36)
- R12: (4 sc, dec) x 6 (30)
- R13: (3 sc, dec) x 6 (24)
- R14: (2 sc, dec) x 6 (18)
- R15: (1 sc, dec) x 6 (12)
- R16: 6 dec (6)
- Finishing: Fasten off, leaving a long tail. Sew the head securely to the top of the body, stuffing firmly before closing the final gap.
What it teaches: Spiral increase sequences, maintaining perfect circular tension, and executing symmetrical decrease rounds for spherical shaping.
5. Arms (Make 2)
The arms are simple, slender tubes that are attached to the sides of the body.
- R1: 6 sc in MR (6)
- R2-15: 6 sc (6) [14 rows]
- Finishing: Fasten off, leaving a long tail for sewing. Stuff very lightly before attaching to the body.
What it teaches: Creating uniform, slender appendages and managing minimal stuffing for a natural, floppy drape.
6. Eyes (Make 2)
The eyes are small, flat discs designed to hold the acrylic beads securely.
- R1: 6 sc in MR (6)
- R2: 6 inc (12)
- R3-5: 12 sc (12) [3 rows]
- Assembly: Place a 10 mm acrylic bead into the center of the crocheted piece. Thread a tapestry needle with matching yarn, pass it through the hole in the bead, and pull tight to secure the bead flush against the crochet fabric. Knot securely and hide the tail.
What it teaches: Micro-amigurumi techniques and secure bead integration for durable, child-safe toys.
7. Assembly & Finishing
Proper assembly brings Mister Joe's whimsical personality to life.
- Head to Body: Sew the head securely to the top of the body using the long tail left from the head. Ensure the stuffing is firm and evenly distributed.
- Arms: Sew the arms to the upper sides of the body, just below the neck join.
- Eyes: Sew the completed bead eyes to the top front of the head, spaced evenly apart to give the frog a wide-eyed, charming expression.
- Final Touches: Weave in all remaining loose ends and trim any excess yarn.
What it teaches: Multi-step structural assembly, secure bead attachment, and professional finishing techniques.
Final Section: Where to Go from Here
Congratulations! By completing Mister Joe the Frog, you have mastered foundational spiral shaping, seamless piece joining, and clean color changes. This project is an excellent confidence-builder for working with cotton yarns. From here, try experimenting with different yarn colorways to create a whole "pond friends" collection, or adapt the heart embroidery to add custom initials or patterns to your next amigurumi creation. Happy crocheting!