August 14, 2026
Splash Doll – A Cute Amigurumi Crochet Pattern
Bring this adorable, splash-themed doll to life with this detailed amigurumi pattern. Featuring a cute frog accessory, swim shorts, and a fun inflatable ring, it’s a perfect summer project for intermediate crafters ready to master multi-part assembly and seamless garment construction.
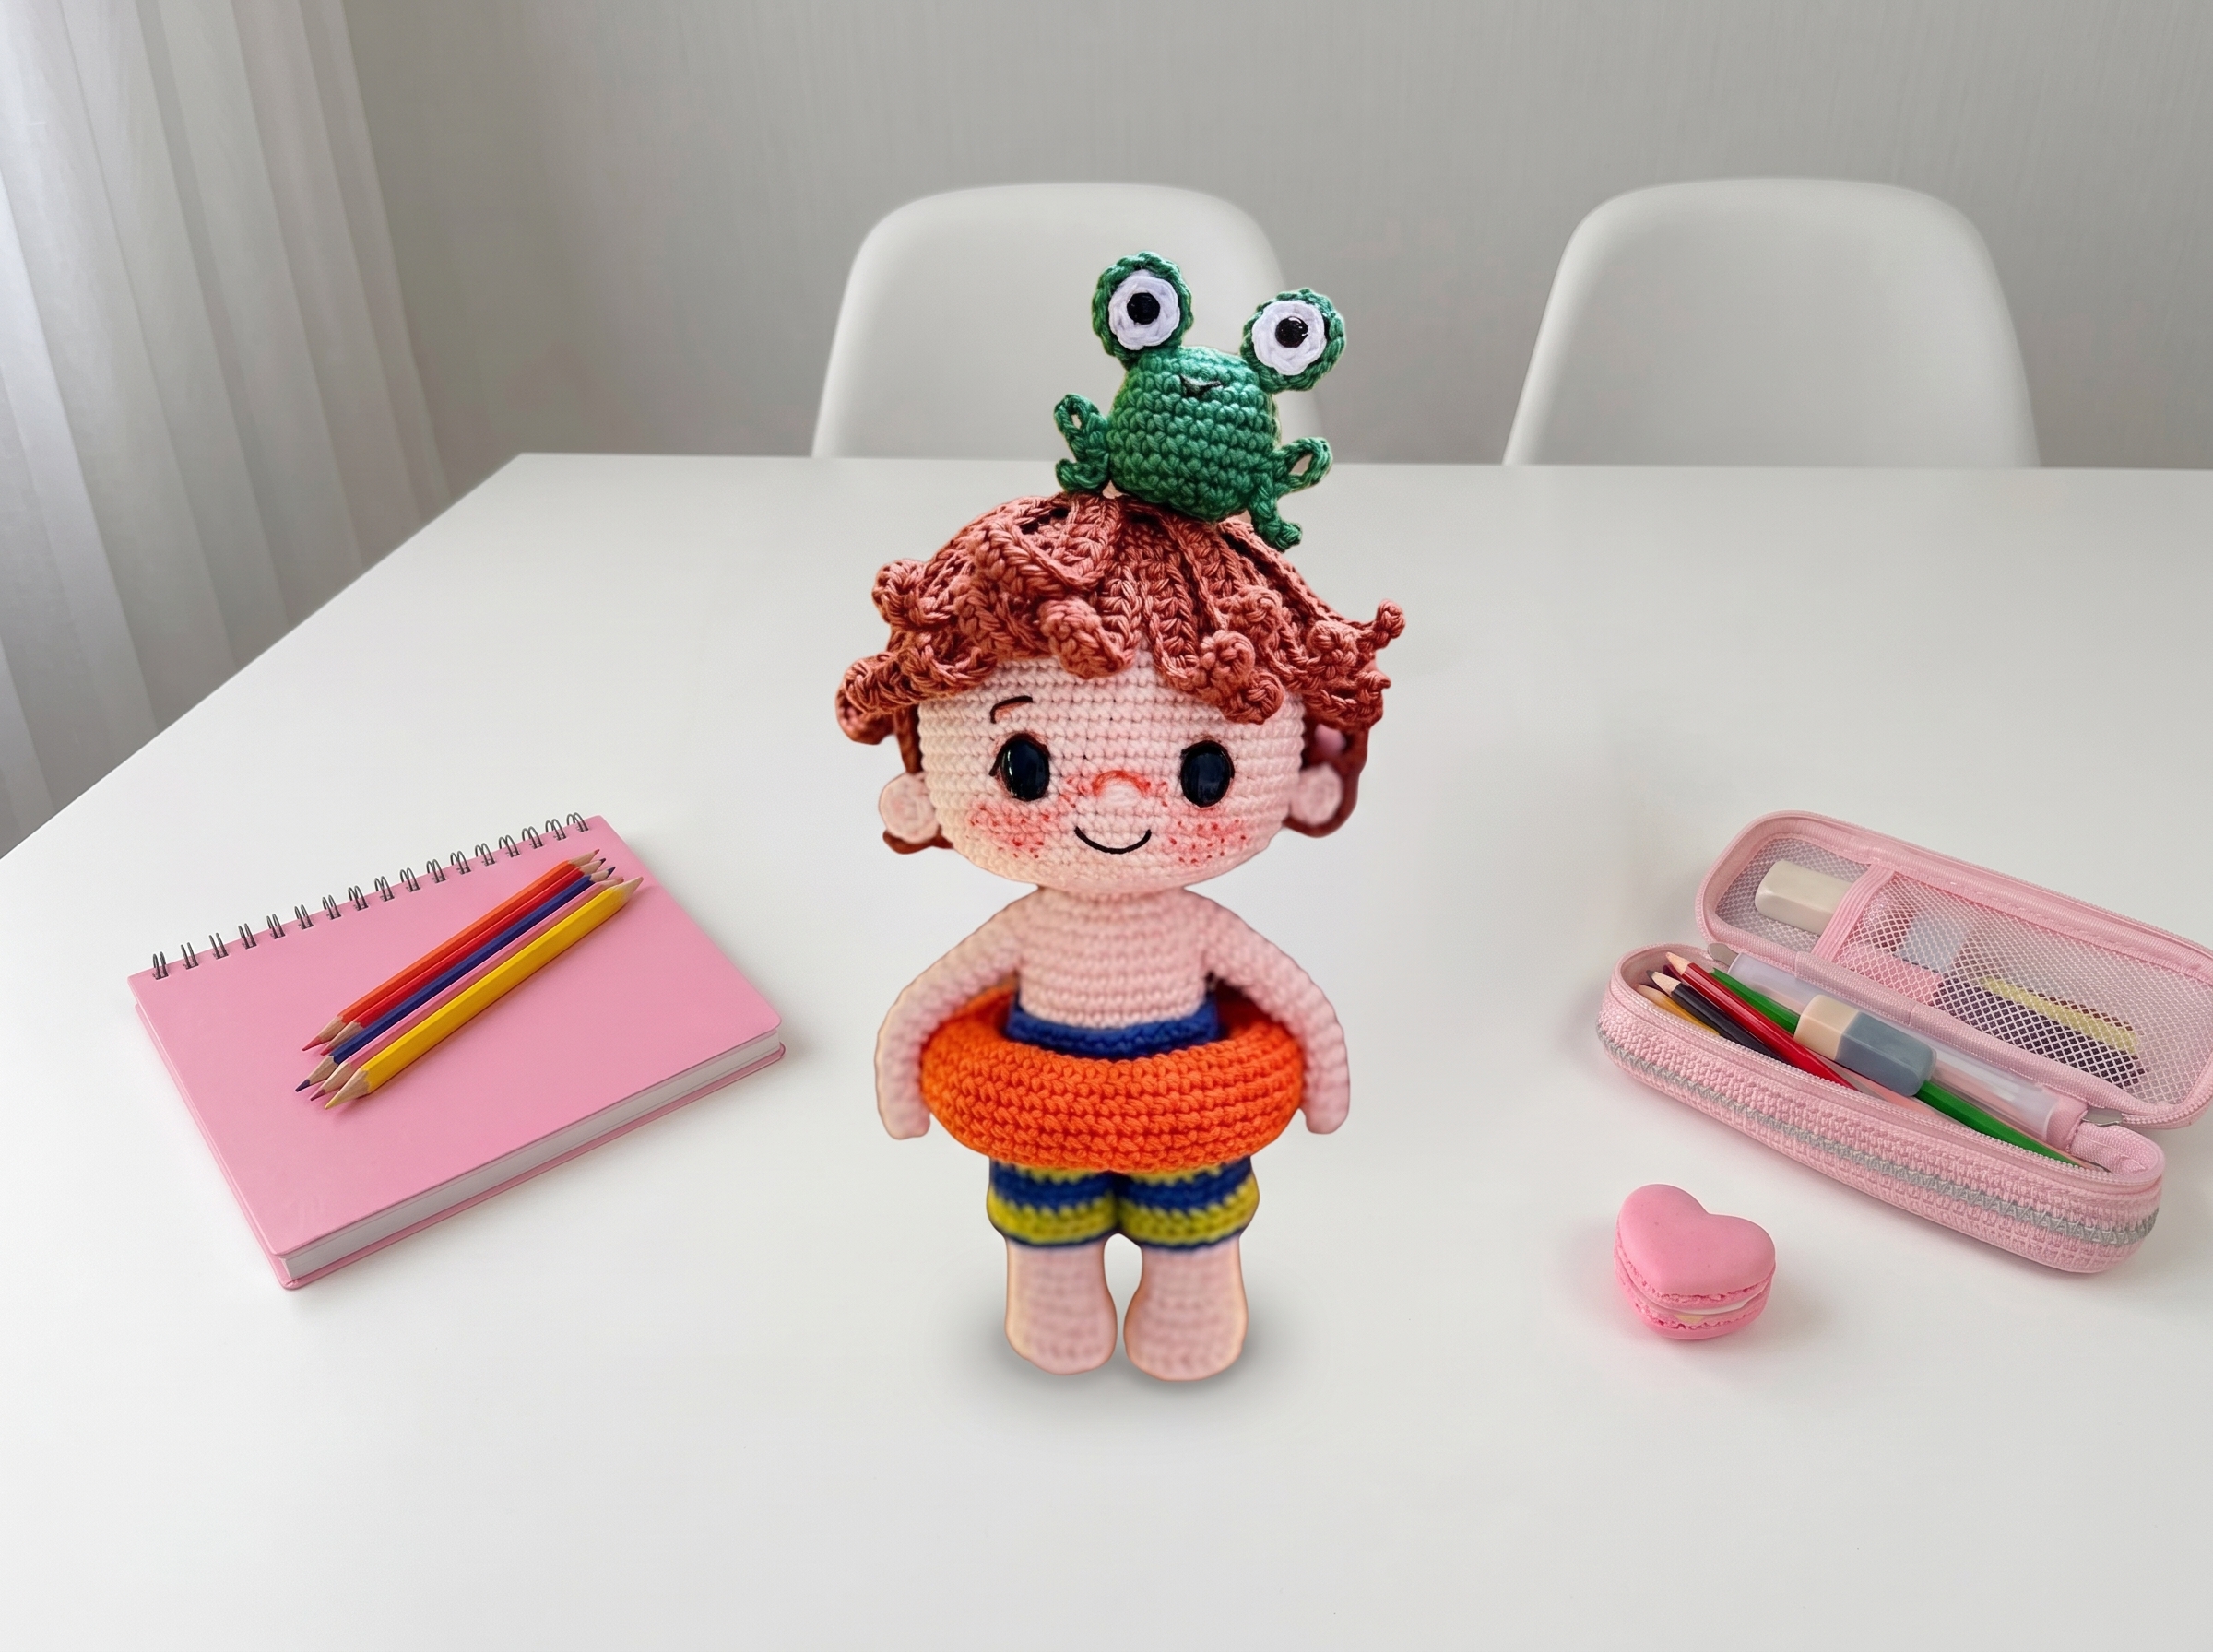
Title: Splash Doll – A Cute Amigurumi Crochet Pattern
Excerpt: Bring this adorable, splash-themed doll to life with this detailed amigurumi pattern. Featuring a cute frog accessory, swim shorts, and a fun inflatable ring, it’s a perfect summer project for intermediate crafters ready to master multi-part assembly and seamless garment construction.
Categories: Amigurumis, Clothing, Seasonal
Splash Doll – Complete Step-by-Step Pattern
1. Materials & Abbreviations
This section covers everything you need to gather before beginning. Using the recommended materials ensures the correct gauge and a professional, durable finish.
- Yarn: Catania (100% cotton, 50g / 125m). Colors: Skin (TR263), Brown (426), Blue (261), Light Green (245), Orange (189), Dark Green (412, for the frog), White (106, for the frog).
- Hook: 3.0 mm (or size appropriate to achieve a tight gauge).
- Notions: 35 cm long x 2.5 mm thick wire, 8x10 mm oval black safety eyes, 5 mm black safety eyes (for the frog), stitch marker, dark brown embroidery thread (for mouth, eyebrows, eyelashes), sewing needle, scissors, fabric glue (for the frog).
- Abbreviations:
- MR – magic ring
- ch – chain
- sc – single crochet
- hdc – half double crochet
- dc – double crochet
- tr – treble crochet
- inc – increase (2 sc in one stitch)
- dec – decrease (2 sc crocheted together)
- BLO – back loop only
- FLO – front loop only
What it teaches: Proper tool selection, gauge management, and familiarization with standard international crochet abbreviations.
2. Arms (Make 2)
The arms are worked as simple, un-stuffed tubular limbs that will be seamlessly integrated into the body later.
- R1 (Skin color): 6 sc in MR (6)
- R2: (2 sc, inc) x 2 (8)
- R3-13: 8 sc (8) [11 rows]
- Finishing: Fasten off. Do not stuff.
What it teaches: Working simple, un-stuffed tubular limbs and preparing for mid-round attachment.
3. Ears (Make 2)
The ears are small, flat semi-circles that add character to the doll's head.
- R1 (Skin color): In MR: 1 ch, 5 hdc, 1 ch, 1 sc. Fasten off.
- Finishing: Leave a long starting tail for sewing to the head.
What it teaches: Working small, flat shapes and leaving tails for seamless assembly.
4. Head
The head is worked in a continuous spiral, featuring a clever chain-skip technique to create the openings for the eyes, followed by structured decreases to shape the face and neck.
- R1 (Skin color): 6 sc in MR (6)
- R2: 6 inc (12)
- R3: (1 sc, inc) x 6 (18)
- R4: (2 sc, inc) x 6 (24)
- R5: (3 sc, inc) x 6 (30)
- R6: 2 sc, inc, (4 sc, inc) x 5, 2 sc (36)
- R7: (5 sc, inc) x 6 (42)
- R8: 3 sc, inc, (6 sc, inc) x 5, 3 sc (48)
- R9: (7 sc, inc) x 6 (54)
- R10: 4 sc, inc, (8 sc, inc) x 5, 4 sc (60)
- R11-19: 60 sc (60) [9 rows]
- R20: 25 sc, 1 ch, skip 1 st, 8 sc, 1 ch, skip 1 st, 25 sc (60) [This creates the openings for the eyes.]
- R21: 60 sc (60) [Insert safety eyes into the skipped chain spaces. Place 8 stitches between the eyes.]
- R22-25: 60 sc (60) [4 rows]
- R26: (2 sc, dec) x 15 (45) [Embroider facial features here.]
- R27: (3 sc, dec) x 9 (36)
- R28: 2 sc, dec, (4 sc, dec) x 5, 2 sc (30)
- R29: (3 sc, dec) x 6 (24)
- R30: (2 sc, dec) x 6 (18) [Begin stuffing firmly.]
- R31: 18 sc in BLO (18)
- R32-38: 18 sc (18) [7 rows]
- Finishing: Fasten off, leaving a long tail for sewing to the body.
What it teaches: Spiral increase sequences, creating intentional openings with chain spaces, and structured decreasing for spherical shaping.
5. Legs (Make 2)
The legs feature a subtle shaping at the bottom to mimic little feet, finished with a flat top for easy attachment to the body.
Left Leg:
- R1 (Skin color): 6 sc in MR (6)
- R2: 6 inc (12)
- R3: (1 sc, inc) x 6 (18)
- R4: 18 sc in BLO (18)
- R5: 18 sc (18)
- R6: 7 sc, 2 dec, 7 sc (16)
- R7: 5 sc, 2 dec, 7 sc (14)
- R8-14: 14 sc (14) [7 rows]
- R15: 10 sc (10) [Begin stuffing.] Fasten off.
Right Leg:
- R1-14: Work exactly as the Left Leg.
- R15: 6 sc (6) [Do not fasten off. We will join the legs here.]
What it teaches: Progressive limb decreasing, partial stuffing, and preparing for seamless multi-piece joining.
6. Body
The body is worked seamlessly from the legs up, integrating the arms mid-round and incorporating an internal wire frame for posability.
- R1: Join the first leg to the second leg with 1 ch. Sc 4 and place a marker. (30 sts total around both legs)
- R2-6: 30 sc (30) [5 rows]
- R7: 3 sc, dec, 13 sc, dec, 10 sc (28)
- R8-12: 28 sc (28) [5 rows]
- R13: 3 sc, 2 sc (working through arm and body together), 12 sc, 2 sc (working through arm and body together), 9 sc (28) [Arms should be positioned on the sides of the body.]
- R14: 3 sc, 6 sc (through arm), 12 sc, 6 sc (through arm), 9 sc (36)
- R15: (4 sc, dec) x 6 (30)
- R16: (3 sc, dec) x 6 (24) [Insert wire and begin stuffing firmly.]
- R17: (2 sc, dec) x 6 (18)
- R18: (1 sc, dec) x 6 (12)
- R19-30: 12 sc (12) [12 rows] [Do not stuff this neck section.]
- R31: 6 dec (6)
- Finishing: Fasten off.
What it teaches: Seamless leg joining, mid-round arm attachment, and inserting internal wire framing for posability.
7. Swim Shorts
The swim shorts are worked in the round with fun color changes and BLO texturing to create a realistic waistband and leg openings.
- R1 (Blue): 32 ch, join with sl st to form a ring, 1 ch (32)
- R2-3: 32 sc (32) [2 rows], sl st, 1 ch
- R4 (Light Green): 32 sc in BLO (32), sl st, 1 ch
- R5: 32 sc (32), sl st, 1 ch
- R6 (Blue): 32 sc in BLO (32), sl st, 1 ch
- R7: 32 sc (32), sl st, 1 ch. Fasten off.
- R8 (Light Green): (7 sc, inc) x 4 (36), sl st, 1 ch
- R9: 36 sc (36), sl st, 1 ch. Fasten off.
- Pant Legs (Make 2): Divide the stitches evenly for each leg (18 sts per leg).
- R10 (Blue): (5 sc, inc) x 3 (21), sl st, 1 ch
- R11: 21 sc (21), sl st, 1 ch
- R12 (Light Green): 21 sc in BLO (21), sl st, 1 ch
- R13: 21 sc (21), sl st, 1 ch
- R14 (Blue): 22 sl st (22). Fasten off.
What it teaches: Working in the round with color changes, creating functional leg openings, and BLO texturing for waistbands.
8. Inflatable Ring
A simple, stuffed tubular accessory that adds a fun summer vibe to the doll.
- R1 (Orange): 47 ch, join with sl st to form a ring, 1 ch (47)
- R2-14: 47 sc (47) [13 rows], sl st, 1 ch
- Finishing: Fasten off, leaving a long tail. Stuff lightly and sew the opening closed.
What it teaches: Creating simple, stuffed tubular accessories.
9. Frog Accessory
A tiny companion that adds a playful touch to the doll's summer outfit.
Body:
- R1 (Dark Green): 6 sc in MR (6)
- R2: 6 inc (12)
- R3: (1 sc, inc) x 6 (18)
- R4: (2 sc, inc) x 6 (24) [Insert 5 mm safety eyes between R3 and R4.]
- R5-9: 24 sc (24) [5 rows] [Embroider mouth in R5.]
- R10: (1 sc, dec) x 8 (16) [Begin stuffing.]
- R11: 8 dec (8)
- Finishing: Fasten off, leaving a long tail for sewing.
Arms (Make 2):
- R1 (Dark Green): 14 ch. Starting in 2nd ch from hook: 3 hdc, 9 sc. Fasten off.
Eyes (Make 2):
- Inner Part (White): 6 sc in MR (6). Fasten off. Place in center and singe the back with a lighter to secure.
- Outer Part (Dark Green): 6 sc in MR (6). R2: 6 inc (12). R3: 12 sl st in BLO (12). Fasten off. Glue the white part to the green part.
What it teaches: Micro-amigurumi techniques, rapid shaping for small companions, and mixed stitch heights for dimensional details.
10. Hair
The hair is built on a radial base with long, flowing strands attached seamlessly in the round to create a voluminous, textured look.
- R1 (Brown): 6 sc in MR (6)
- R2: 6 inc (12)
- R3: (1 sc, inc) x 6 (18)
- R4: 1 sc, inc, (2 sc, inc) x 5, 1 sc (24)
- R5: (3 sc, inc) x 6 (30)
- R6: 2 sc, inc, (4 sc, inc) x 5, 2 sc in BLO (36)
- R7: (5 sc, inc) x 6 (42)
- R8: 3 sc, inc, (6 sc, inc) x 5, 3 sc (48)
- R9 (Outer Layer): (20 ch, skip 2 ch, 18 hdc, 2 sc) x 14 strands, then (13 ch, skip 2 ch, 11 dc, 2 sc) x 10 strands. Fasten off. (Total: 24 strands)
- R9 (Inner Layer, BLO): (22 ch, skip 2 ch, 20 hdc, 3 sc) x 6 strands, then (15 ch, skip 2 ch, 13 dc, 3 sc) x 4 strands. Fasten off. (Total: 10 strands)
What it teaches: Radial expansion, chaining long textured strands, and attaching multiple repetitive elements seamlessly in the round.
11. Assembly & Finishing
Proper assembly and surface detailing bring the Splash Doll's personality to life.
- Head to Body: Sew the head securely to the top of the body using two strands of the body-colored yarn.
- Facial Details: Embroider the nose (double thread, 2 stitches wide) and mouth (2 rows below the nose, 4 stitches wide). Add eyelashes and eyebrows.
- Ears: Sew the ears to the sides of the head.
- Hair: Attach the hair base to the top of the head.
- Accessories: Dress the doll in the swim shorts, place the inflatable ring around the waist, and attach the frog accessory.
What it teaches: Multi-step structural assembly, surface embroidery for expressive facial features, and professional finishing techniques.
Final Section: Where to Go from Here
Congratulations! By completing this Splash Doll, you have mastered foundational spiral shaping, seamless limb joining, and intricate accessory construction. This project is a fantastic confidence-builder for working with cotton yarns and multi-part assemblies. From here, try experimenting with different yarn colorways to create a whole "summer vacation" collection, or adapt the swim shorts pattern to design custom outfits for other amigurumi dolls in your collection. Happy crocheting!