August 7, 2026
Toothed Rabbit Amigurumi – Quirky Crochet Pattern with Carrot & Striped Scarf
Bring a delightfully quirky, wire-posed rabbit to life with this unique amigurumi pattern. Featuring plastic teeth, a sculpted face, and a striped scarf, it is a fun project for intermediate crocheters ready to master wire armatures, surface embroidery, and structural shaping.
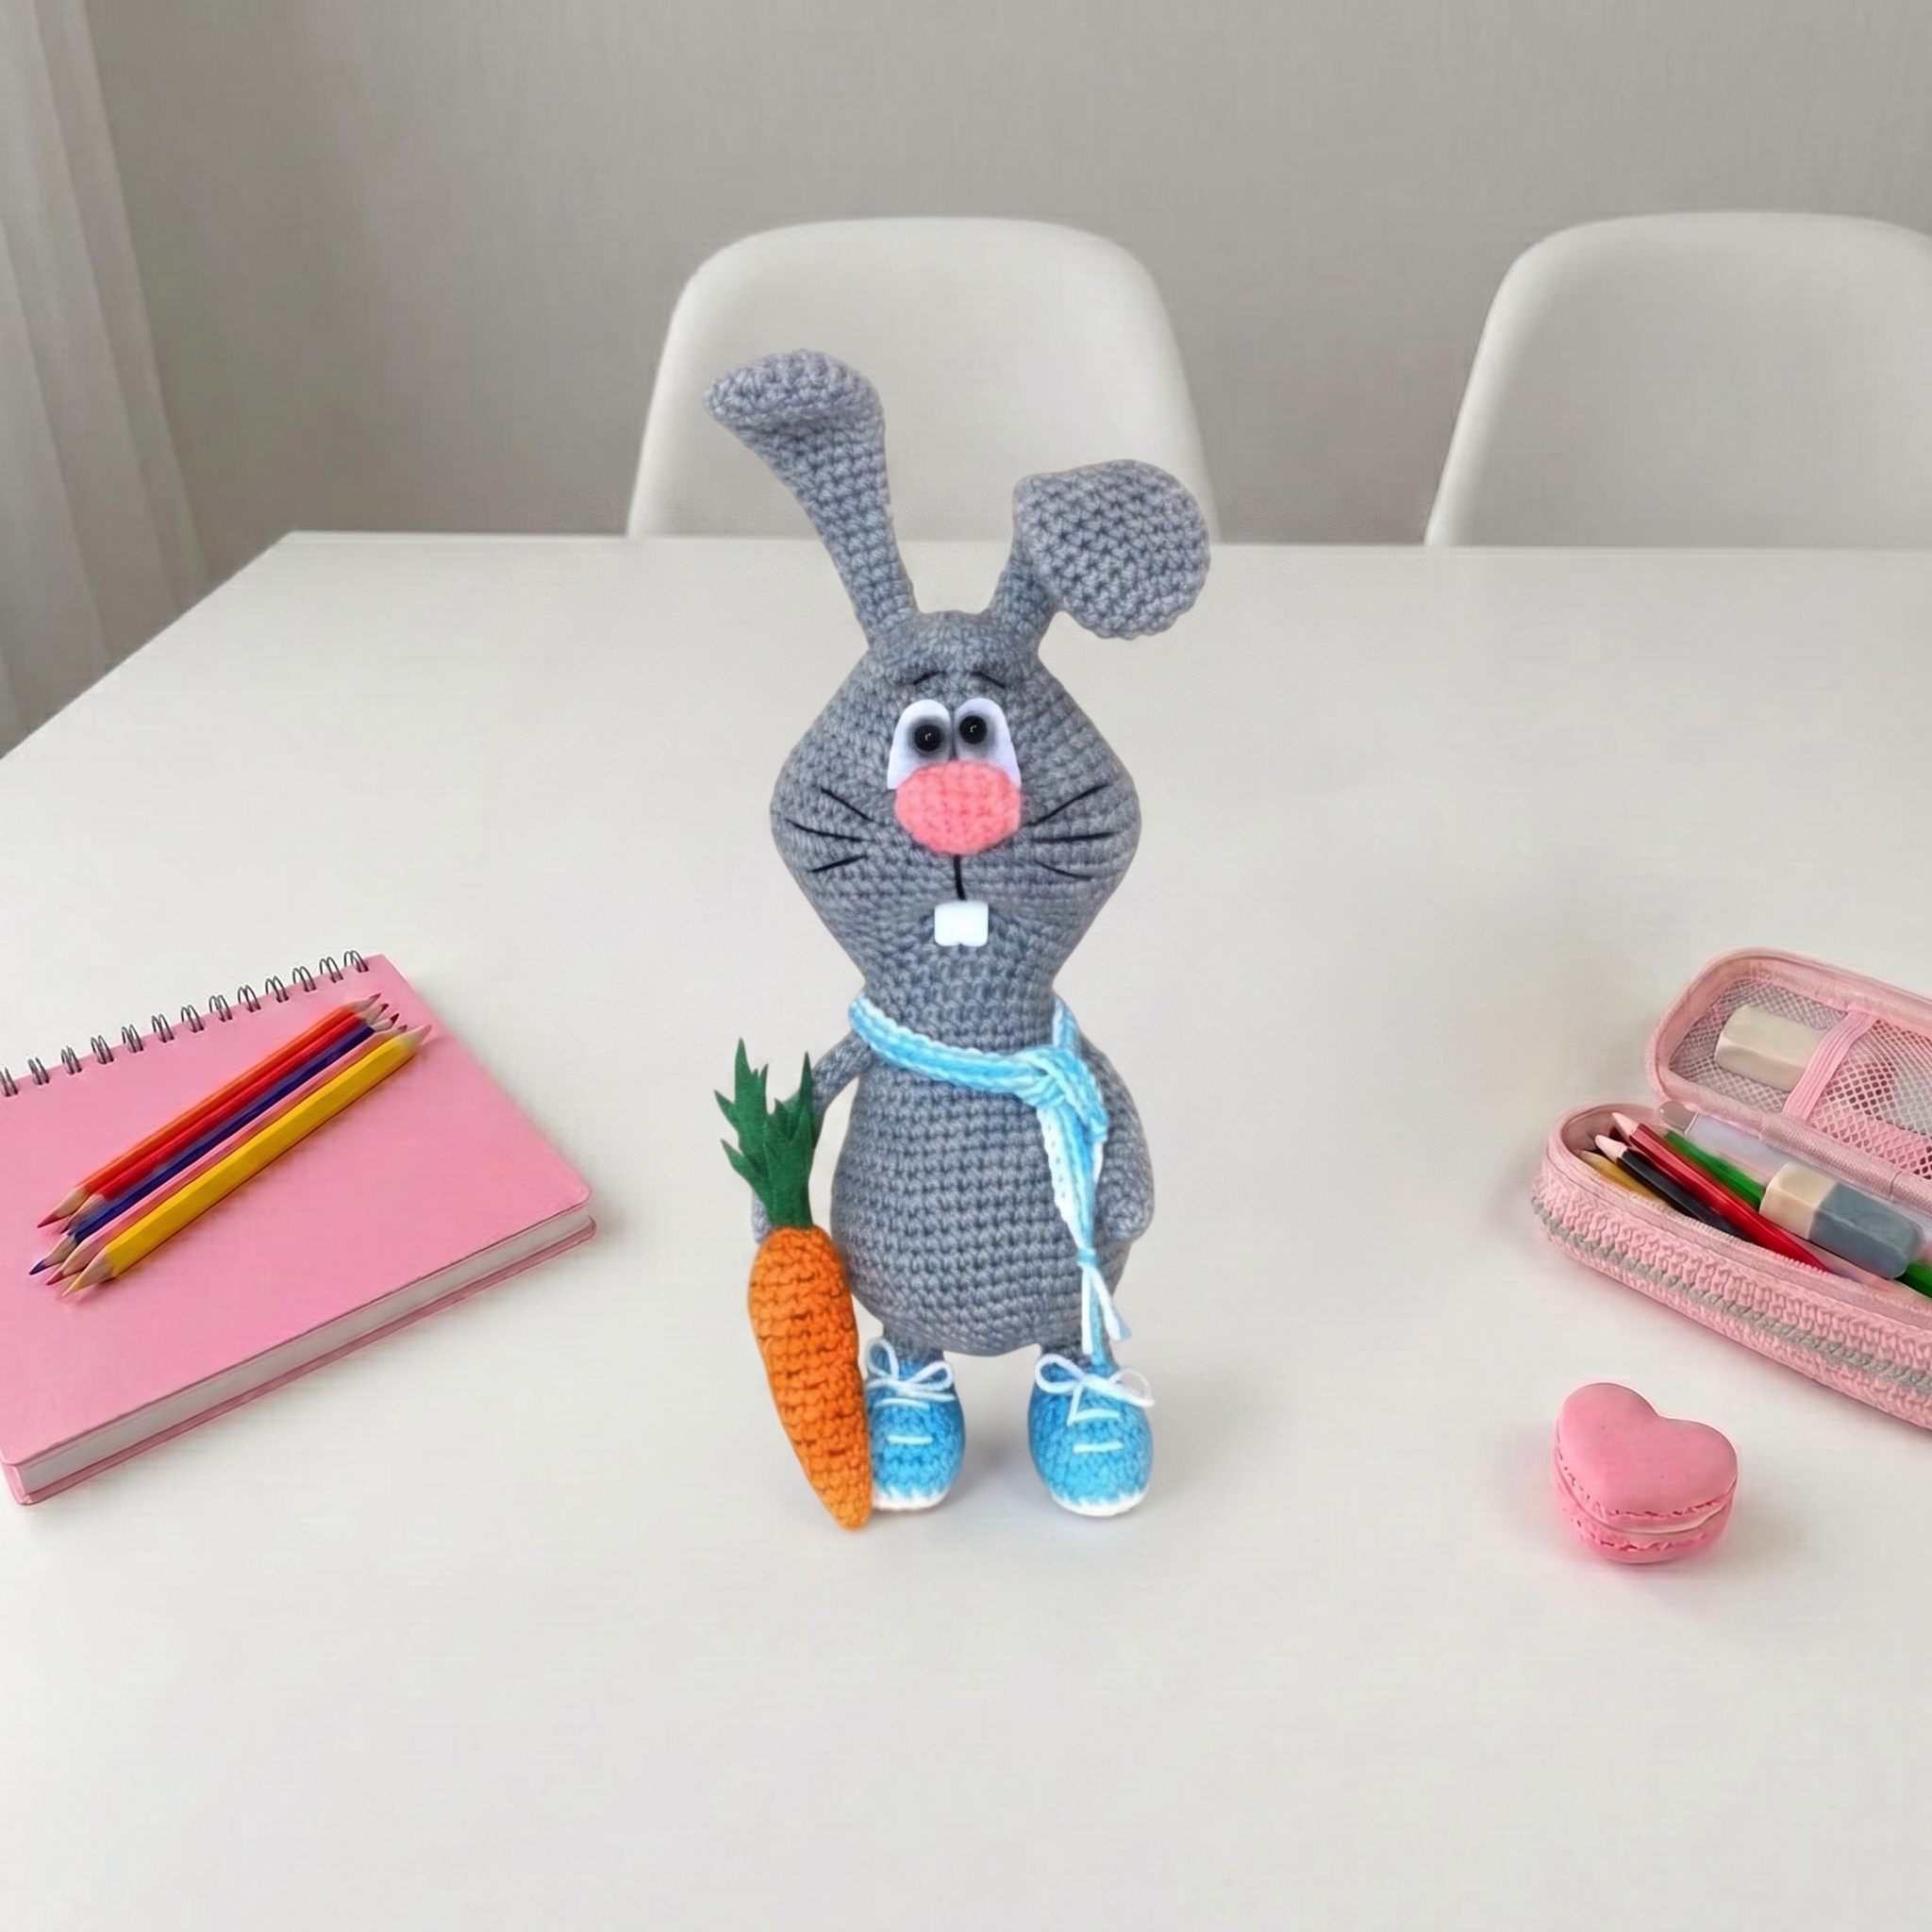
Toothed Rabbit Amigurumi – Complete Step-by-Step Pattern
1. Materials & Abbreviations
This section covers everything you need to gather before beginning. Using the recommended materials ensures the correct gauge and a professional, durable finish.
- Yarn: Pehorka Children's Novelty or similar cotton blend. Colors: Salmon/Steel (Main), White, Light Blue/Birch, Blue/Capri, Coral (for nose), and black embroidery floss.
- Hook: 1.5 mm (or size appropriate to achieve a tight, stuff-proof gauge).
- Notions: Cotton fiberfill, sewing needle, craft glue (PVA or fabric glue), steel wire (for legs/arms), 0.7 mm copper wire (for head), masking tape, white and green felt, 5 mm half-beads, dense cardboard or plastic (for insoles), plastic teeth (or white felt as an alternative).
- Abbreviations:
- ch – chain
- sc – single crochet
- sl st – slip stitch
- inc – increase (2 sc in one stitch)
- dec – decrease (2 sc crocheted together)
- MR – magic ring
- BLO – back loop only
What it teaches: Proper tool selection, gauge management, and familiarization with standard international crochet abbreviations and structural materials.
2. Body
The body is worked in a continuous spiral, featuring a unique mid-section sculpting technique to create the rabbit's distinct posture and shape.
- R1: 6 sc in MR (6)
- R2: 6 inc (12)
- R3: (1 sc, inc) x 6 (18)
- R4: (2 sc, inc) x 6 (24)
- R5-6: 24 sc (24) [2 rows]
- R7: (3 sc, inc) x 6 (30)
- R8: 30 sc (30)
- R9: (4 sc, inc) x 6 (36)
- R10: 36 sc (36)
- R11: (5 sc, inc) x 6 (42)
- R12: 42 sc (42)
- R13: (6 sc, inc) x 6 (48)
- R14: 48 sc (48)
- R15: (7 sc, inc) x 6 (54)
- R16: 54 sc (54)
- R17: (21 sc, 3 dec) x 2 (48)
- R18: (18 sc, 3 dec) x 2 (42)
- R19: (15 sc, 3 dec) x 2 (36)
- R20: (4 sc, dec) x 6 (30)
- R21-23: 30 sc (30) [3 rows]
- R24: (3 sc, dec) x 6 (24)
- R25-27: 24 sc (24) [3 rows]
- R28: (3 sc, inc) x 6 (30)
- R29-31: 30 sc (30) [3 rows]
- R32: (4 sc, inc) x 6 (36)
- R33-35: 36 sc (36) [3 rows]
- R36: (5 sc, inc) x 6 (42)
- R37: 42 sc (42)
- R38: (6 sc, inc) x 6 (48)
- R39: 48 sc (48)
- R40: (7 sc, inc) x 6 (54)
- R41-43: 54 sc (54) [3 rows]
- R44: (7 sc, dec) x 6 (48)
- R45: (6 sc, dec) x 6 (42)
- Sculpting Note: Insert your needle with a long piece of yarn between R11 and R12. Bring it out between R22 and R23, skip 3 sc to the side, and bring the needle back in between R11 and R12 so that there are exactly 7 sc between the entry and exit points. Pull tight and tie the ends together to create a sculpted indent.
- R46: (5 sc, dec) x 6 (36)
- R47: (4 sc, dec) x 6 (30) [Begin stuffing firmly]
- R48: (3 sc, dec) x 6 (24)
- R49: (2 sc, dec) x 6 (18)
- R50: (1 sc, dec) x 6 (12)
- R51: 6 dec (6)
- Finishing: Stuff completely, close the hole, and hide the yarn tail inside.
What it teaches: Spiral increase sequences, complex multi-stitch decreases, and advanced yarn sculpting for 3D shaping.
3. Arms & Ears
The arms are simple tubular limbs, while the ears feature a gradual tapering sequence to create a realistic, elongated shape.
Arms (Make 2, Salmon Color):
- R1: 6 sc in MR (6)
- R2: (1 sc, inc) x 3 (9)
- R3-5: 9 sc (9) [3 rows]
- R6: (1 sc, dec) x 3 (6)
- R7-14: 6 sc (6) [8 rows]
- Finishing: Leave a long tail for sewing.
Ears (Make 2, Salmon Color):
- R1: 6 sc in MR (6)
- R2: 6 inc (12)
- R3: (1 sc, inc) x 6 (18)
- R4-6: 18 sc (18) [3 rows]
- R7: (7 sc, dec) x 2 (16)
- R8: 16 sc (16)
- R9: (6 sc, dec) x 2 (14)
- R10: 14 sc (14)
- R11: (5 sc, dec) x 2 (12)
- R12: 12 sc (12)
- R13: (4 sc, dec) x 2 (10)
- R14: 10 sc (10)
- R15: (3 sc, dec) x 2 (8)
- R16-22: 8 sc (8) [7 rows]
- Finishing: Leave a long tail for sewing.
What it teaches: Creating uniform tubular limbs and executing progressive, multi-stage decreases for tapered appendages.
4. Nose & Carrot
These small, colorful accessories add character and a playful prop for the rabbit to hold.
Nose (Coral/Orange Color):
- R1: 6 sc in MR (6)
- R2: 6 inc (12)
- R3-6: 12 sc (12) [4 rows]
- R7: 6 dec (6)
- Finishing: Stuff lightly, close the hole, and leave a tail for sewing.
Carrot (Orange Color):
- R1: 6 sc in MR (6)
- R2: 6 sc (6)
- R3: (1 sc, inc) x 3 (9)
- R4-5: 9 sc (9) [2 rows]
- R6: (2 sc, inc) x 3 (12)
- R7-10: 12 sc (12) [4 rows]
- R11: (3 sc, inc) x 3 (15)
- R12-16: 15 sc (15) [5 rows]
- R17: (3 sc, dec) x 3 (12)
- R18: (2 sc, dec) x 3 (9)
- Finishing: Leave a long tail for sewing.
What it teaches: Micro-amigurumi techniques, rapid shaping for small props, and working with vibrant accent colors.
5. Boots & Legs
The legs are constructed with a structured cardboard insole and an internal wire armature for posability, featuring a color-blocked boot design.
Boots & Legs (Make 2, Start with White):
- R1: Ch 6. Starting in 2nd ch from hook: 4 sc, 4 sc in last st, turn. 3 sc, 2 sc in last st (13)
- R2: inc, 3 sc, 4 inc, 3 sc, 2 inc (20)
- Important detail: Cut a cardboard insole to the size of the oval base.
- Color change to Light Blue/Birch: Cut white yarn and secure.
- R3: BLO: 20 sc (20)
- R4-6: 20 sc (20) [3 rows]
- R7: 5 sc, 5 dec, 5 sc (15)
- R8: (1 sc, dec) x 5 (10)
- Important detail: Cut a 15 cm piece of steel wire. Make a small loop at one end and wrap it in masking tape. Insert the cardboard insole and the wire into the boot. Stuff firmly.
- Color change to Gray/Blue: Bring yarn to the front.
- R9: BLO: 10 sc (10)
- R10-14: 10 sc (10) [5 rows]
- Finishing: Stuff the leg firmly.
- Edging: With Light Blue/Birch yarn, work 10 sc in BLO around the remaining free half-loops of R9. Cut yarn.
- Laces: Attach White yarn to the half-loops of R3 and work sl st around the entire opening. Leave a 15 cm tail, use it to create laces, and bring the yarn out to the top where the bow will be tied. Tie a bow and secure with PVA glue.
What it teaches: Oval foundation chaining, inserting rigid soles and internal wire armatures, and executing mid-project color changes for footwear.
6. Assembly & Accessories
Proper assembly, wire framing, and surface detailing bring the rabbit's quirky personality to life.
- Head Wire: Thread a 0.7 mm copper wire through the head between R2 and R3. Make small loops at the ends of the wire. Slide the ears onto the wire and sew them securely to the head. Hide the wire ends inside the head.
- Facial Features: Using 3 strands of black embroidery floss, embroider the dividing line on the face, mustache, and eyebrows.
- Teeth: Glue plastic teeth to the mouth area. (Alternatively, cut teeth from white felt and draw a dividing line with a black permanent marker or floss).
- Nose & Eyes: Sew the nose in place. Cut white felt under-eye patches, glue the 5 mm half-beads to them, and then glue the patches over the nose area. You can tone around the eyes with a simple graphite pencil for a soft shadow.
- Upper Paws: Cut a 19 cm piece of steel wire. Poke it through the body between R29 and R30. Make loops at the ends and wrap in tape. Slide the arms onto the wire and sew them to the body. Hide the yarn tails inside.
- Legs: Make loops on the leg wires, insert the legs into the body, and sew securely. Hide the yarn tails inside.
- Tail: Make a small pompom from gray yarn and sew it to the back.
- Carrot Leaves: Cut a leaf shape from green felt. Insert it into the remaining open hole at the top of the carrot and sew it closed. Sew the carrot to the rabbit's paw.
- Scarf:
- Stripe 1: Ch 61 with Light Blue/Birch yarn. Starting in 2nd ch from hook: 60 sl st. Cut yarn.
- Stripe 2: Attach White yarn, work 60 sl st. Cut yarn.
- Repeat: Repeat this 2-stripe combination 2 more times (for a total of 6 stripes).
- Assembly: Wrap the scarf around the rabbit's neck and sew the ends together.
What it teaches: Internal wire framing for posability, surface embroidery, integrating rigid props, and creating striped fabric accessories.
Final Section: Where to Go from Here
Congratulations! By completing this quirky toothed rabbit, you have mastered advanced amigurumi techniques including internal wire armatures, rigid sole insertion, complex body sculpting, and multi-color accessory construction. Use these skills to experiment with different yarn colorways for a whole "quirky critter" collection, or try modifying the facial embroidery and prop designs to create your own unique character variations. Happy crocheting!