August 3, 2026
Veni the Mouse – A Sweet Amigurumi Mouse in Overalls (Full Crochet Pattern)
A charming grey amigurumi mouse with pink ears, jointed-looking bent legs, and an adorable crocheted jumpsuit — perfect for building skills in shaping, stuffing, and simple garment construction.
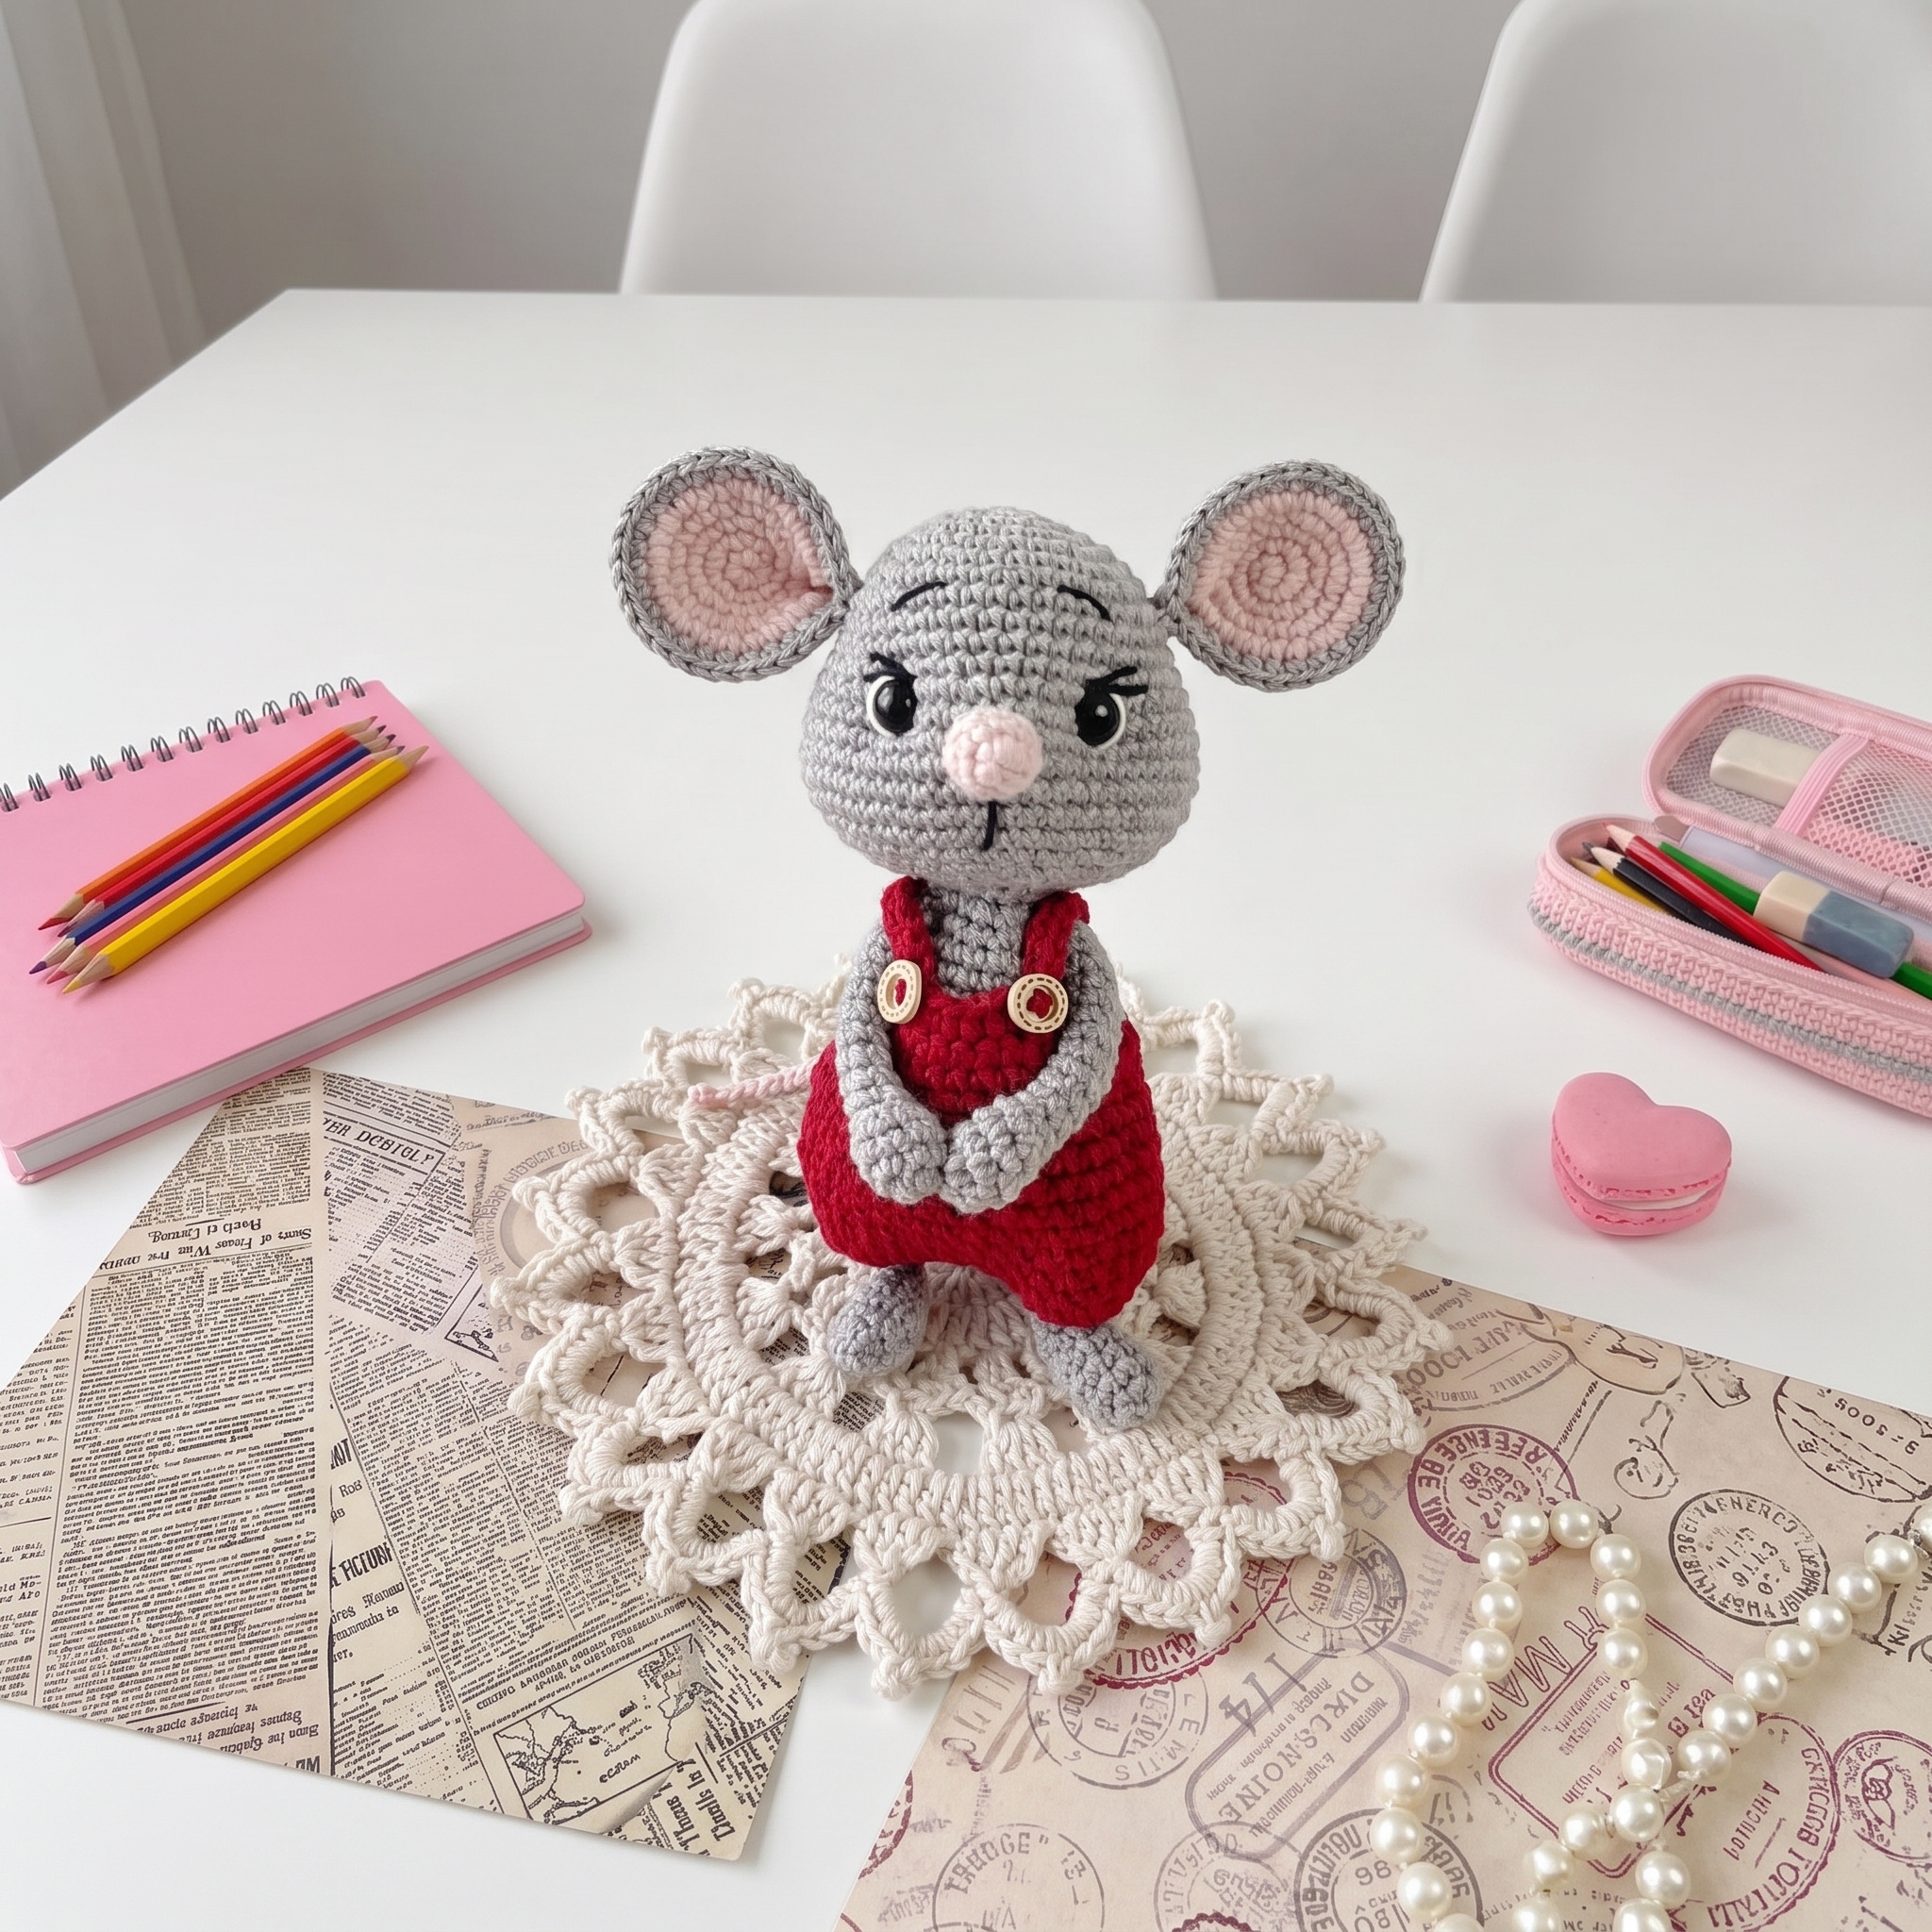
Veni the Mouse – Amigurumi Pattern with Overalls
Materials
- Yarn: Alize Cotton Gold or YarnArt Jeans, in grey and pink; small amounts of black/dark grey and white cotton yarn for embroidery
- Hook: 1.5 mm (or size appropriate to your yarn)
- Safety eyes (author used 9 mm)
- Stuffing (fiberfill)
- Notions/buttons
- Sewing needle
- Note: All pieces are worked in continuous spiral rounds — a stitch marker is recommended to track the start of each round.
Abbreviations
- ch – chain
- sc – single crochet
- sl st – slip stitch
- inc – increase
- dec – decrease
- ( )×n – repeat the stitches in parentheses n times
Tip for even, round shaping: To keep pieces perfectly round, alternate the placement of increases in rounds with even stitch counts. Example: instead of working (4sc, inc)×6, work it as: 2sc, inc, (4sc, inc)×5, 2sc — this staggers the increases around the piece for a smoother shape.
1. Head
The head is worked in a continuous spiral starting from a magic ring, building up to a rounded shape, then decreased and stuffed with cheek shaping at the end.
Worked in grey.
- Rnd 1: 6 sc in magic ring (6)
- Rnd 2: 6 inc (12)
- Rnd 3: (1 sc, inc) × 6 (18)
- Rnd 4: (2 sc, inc) × 6 (24)
- Rnd 5: (3 sc, inc) × 6 (30)
- Rnd 6: (4 sc, inc) × 6 (36)
- Rnd 7: (5 sc, inc) × 6 (42)
- Rnds 8–11: sc around (42) — 4 rounds
- Rnd 12: 8 sc, 2 inc, (inc, 2 sc) × 7, 3 inc, 8 sc (54)
- Rnds 13–18: sc around (54) — 6 rounds
- Rnd 19: (4 sc, dec) × 9 (45)
- Rnd 20: (3 sc, dec) × 9 (36)
- Rnd 21: (2 sc, dec) × 9 (27)
- Rnd 22: (1 sc, dec) × 9 (18)
- Rnd 23: (1 sc, dec) × 6 (12)
Slip stitch into the next stitch, cut yarn, and fasten off.
Insert safety eyes between rounds 12 and 13, spaced 10 stitches apart. Stuff the head firmly, then add gathering stitches to shape the cheeks.
What it teaches: magic ring starts, spiral increase sequences, evenly spaced increase rounds, safety eye placement, and shaping with gathering stitches.
2. Ears
The ears are made from two layers (an inner and an outer piece) crocheted separately, then joined together in the final round.
-
Inner part (make 2), pink:
- Rnd 1: 6 sc in magic ring (6)
- Rnd 2: 6 inc (12)
- Rnd 3: (1 sc, inc) × 6 (18)
- Rnd 4: (2 sc, inc) × 6 (24)
- Rnd 5: (3 sc, inc) × 6 (30)
-
Outer part (make 2), grey:
- Rnd 1: 6 sc in magic ring (6)
- Rnd 2: 6 inc (12)
- Rnd 3: (1 sc, inc) × 6 (18)
- Rnd 4: (2 sc, inc) × 6 (24)
- Rnd 5: (3 sc, inc) × 6 (30)
- Rnd 6 (worked through both inner and outer layers held together): (4 sc, inc) × 6 (36)
Cut yarn, leaving a tail for sewing. Sew the ears to the head, positioning according to the reference photo.
What it teaches: working double-layer pieces, joining two motifs in a single round, and attaching curved pieces neatly.
3. Nose
A small rounded nose worked in pink.
- Rnd 1: 6 sc in magic ring (6)
- Rnd 2: (inc, 1 sc) × 3 (9)
- Rnds 3–4: sc around (9)
- Rnd 5: (dec, 1 sc) × 3 (6)
Leave a tail, stuff lightly, and sew to the face.
What it teaches: quick small-piece construction and proportional shaping for facial features.
4. Body
Worked in grey, shaped like a teardrop to sit naturally under the head.
- Rnd 1: 6 sc in magic ring (6)
- Rnd 2: 6 inc (12)
- Rnd 3: (1 sc, inc) × 6 (18)
- Rnd 4: (2 sc, inc) × 6 (24)
- Rnd 5: (3 sc, inc) × 6 (30)
- Rnd 6: (4 sc, inc) × 6 (36)
- Rnds 7–10: sc around (36) — 4 rounds
- Rnd 11: (4 sc, dec) × 6 (30)
- Rnd 12: sc around (30)
- Rnd 13: (3 sc, dec) × 6 (24)
- Rnd 14: sc around (24)
- Rnd 15: (2 sc, dec) × 6 (18)
- Rnds 16–17: sc around (18) — 2 rounds
- Rnd 18: (1 sc, dec) × 6 (12)
- Rnd 19: sc around (12)
Slip stitch into the next stitch, cut yarn, and leave a tail for sewing. Sew the head to the body.
What it teaches: building a symmetrical body shape with balanced increase and decrease sequences.
5. Arms
Made in grey; only the paw section is stuffed, leaving the rest soft and flat for a natural drape.
- Rnd 1: 6 sc in magic ring (6)
- Rnd 2: (1 sc, inc) × 3 (9)
- Rnds 3–4: sc around (9)
- Rnd 5: 3 dec, 3 sc (6)
Stuff the arm only up to round 5!
- Rnds 6–16: 6 sc around (6) — 11 rounds
If needed, work 1–2 extra sc in the final round so the palms face the correct direction when folded. Fold the arm flat, then work through both layers with 3 sc. Sew to the body.
What it teaches: partial stuffing technique, flattening and closing tubular pieces, and orienting paired pieces so they mirror correctly.
6. Legs
Grey, with a built-in bend for a natural sitting or standing pose.
- Rnd 1: 6 sc in magic ring (6)
- Rnd 2: 6 inc (12)
- Rnds 3–4: sc around (12)
- Rnd 5: (2 sc, dec) × 3 (9)
- Rnds 6–8: sc around (9) — 3 rounds
- Rnd 9: (1 sc, dec) × 3 (6)
- Rnds 10–13: 3 sc, 3 sl st (6) — 4 rounds (these rounds form the leg's bend)
- Rnd 14: (1 sc, inc) × 3 (9)
- Rnds 15–17: sc around (9) — 3 rounds
- Rnd 18: (1 sc, dec) × 3 (6)
Stuff each piece as you go. If needed, use the tail left at the end to add a few stitches through rounds 10–13 to reinforce the bend shape.
What it teaches: using slip stitches to create an intentional bend, combined sc/sl-st rounds, and progressive stuffing.
7. Tail
- Chain 25 + 1 turning chain. Starting from the 2nd chain from the hook, work 1 sl st in each chain across.
Sew the tail to the body.
What it teaches: a simple chain-and-slip-stitch cord technique useful for tails, ties, and straps.
8. Overalls (Jumpsuit)
A simple crocheted jumpsuit that dresses up the finished mouse. Sizing is based on the widest part of the mouse's belly, so try it on as you go.
- Materials: Alize Cotton Gold or YarnArt Jeans yarn, 1.5 mm hook, notions/buttons, sewing needle
- Note: Worked in rounds; each round begins with a turning chain and ends with a slip stitch.
Instructions:
- Chain a foundation equal to the widest part of the mouse's belly (the author used 36 chains — all further counts are based on this).
- Rnds 1–2: 36 sc
- Rnd 3: 34 sc, ch 2, skip 2 sc from the previous round, sl st (forms the opening for the tail)
- Rnds 4–8: 36 sc
Then decrease so the pant legs fit neatly around the legs:
- Rnd 9: 7 sc, dec, 16 sc, dec, 9 sc (34)
- Rnd 10: 7 sc, dec, 15 sc, dec, 8 sc (32)
- Rnd 11: 6 sc, dec, 15 sc, dec, 7 sc (30)
Sew together approximately 3–4 sc at the center bottom to divide the legs.
Forming the bib (top front piece):
- Row 1: At the front, work 6 sc (centered), turn, ch 1
- Rows 2–3: 6 sc, turn, ch 1
Without cutting the yarn, work one round of sc evenly around the top edge. At the back, form the straps: ch 13, then work 12 sc back along the chain. (You can crochet the straps directly during this edging round, or make them separately and sew them on.) Sew buttons to the front of the bib.
The overalls are complete!
What it teaches: garment shaping around a 3D body, dividing a tube into two legs, working a flat bib panel, and adding straps and closures.
Final Section: Where to Go from Here
By finishing Veni the mouse, you'll have practiced nearly every core amigurumi skill: magic rings, spiral shaping, staggered increases and decreases, layered pieces, partial stuffing, built-in joint bends, and even a small garment. From here, try adding more complex clothing pieces, experimenting with jointed limbs for posability, or designing your own facial embroidery to give each mouse a unique expression.