September 6, 2026
Adorable Monkey Amigurumi – A Sweet & Cuddly Crochet Pattern
Meet your new favorite crochet companion! This charming monkey features a sweet smiling face, expressive ears, and a perfectly poseable sitting position. With its classic brown and cream color combination and endearing expression, this pattern is a delightful intermediate-friendly project that makes a heartwarming gift or a treasured addition to your amigurumi collection.
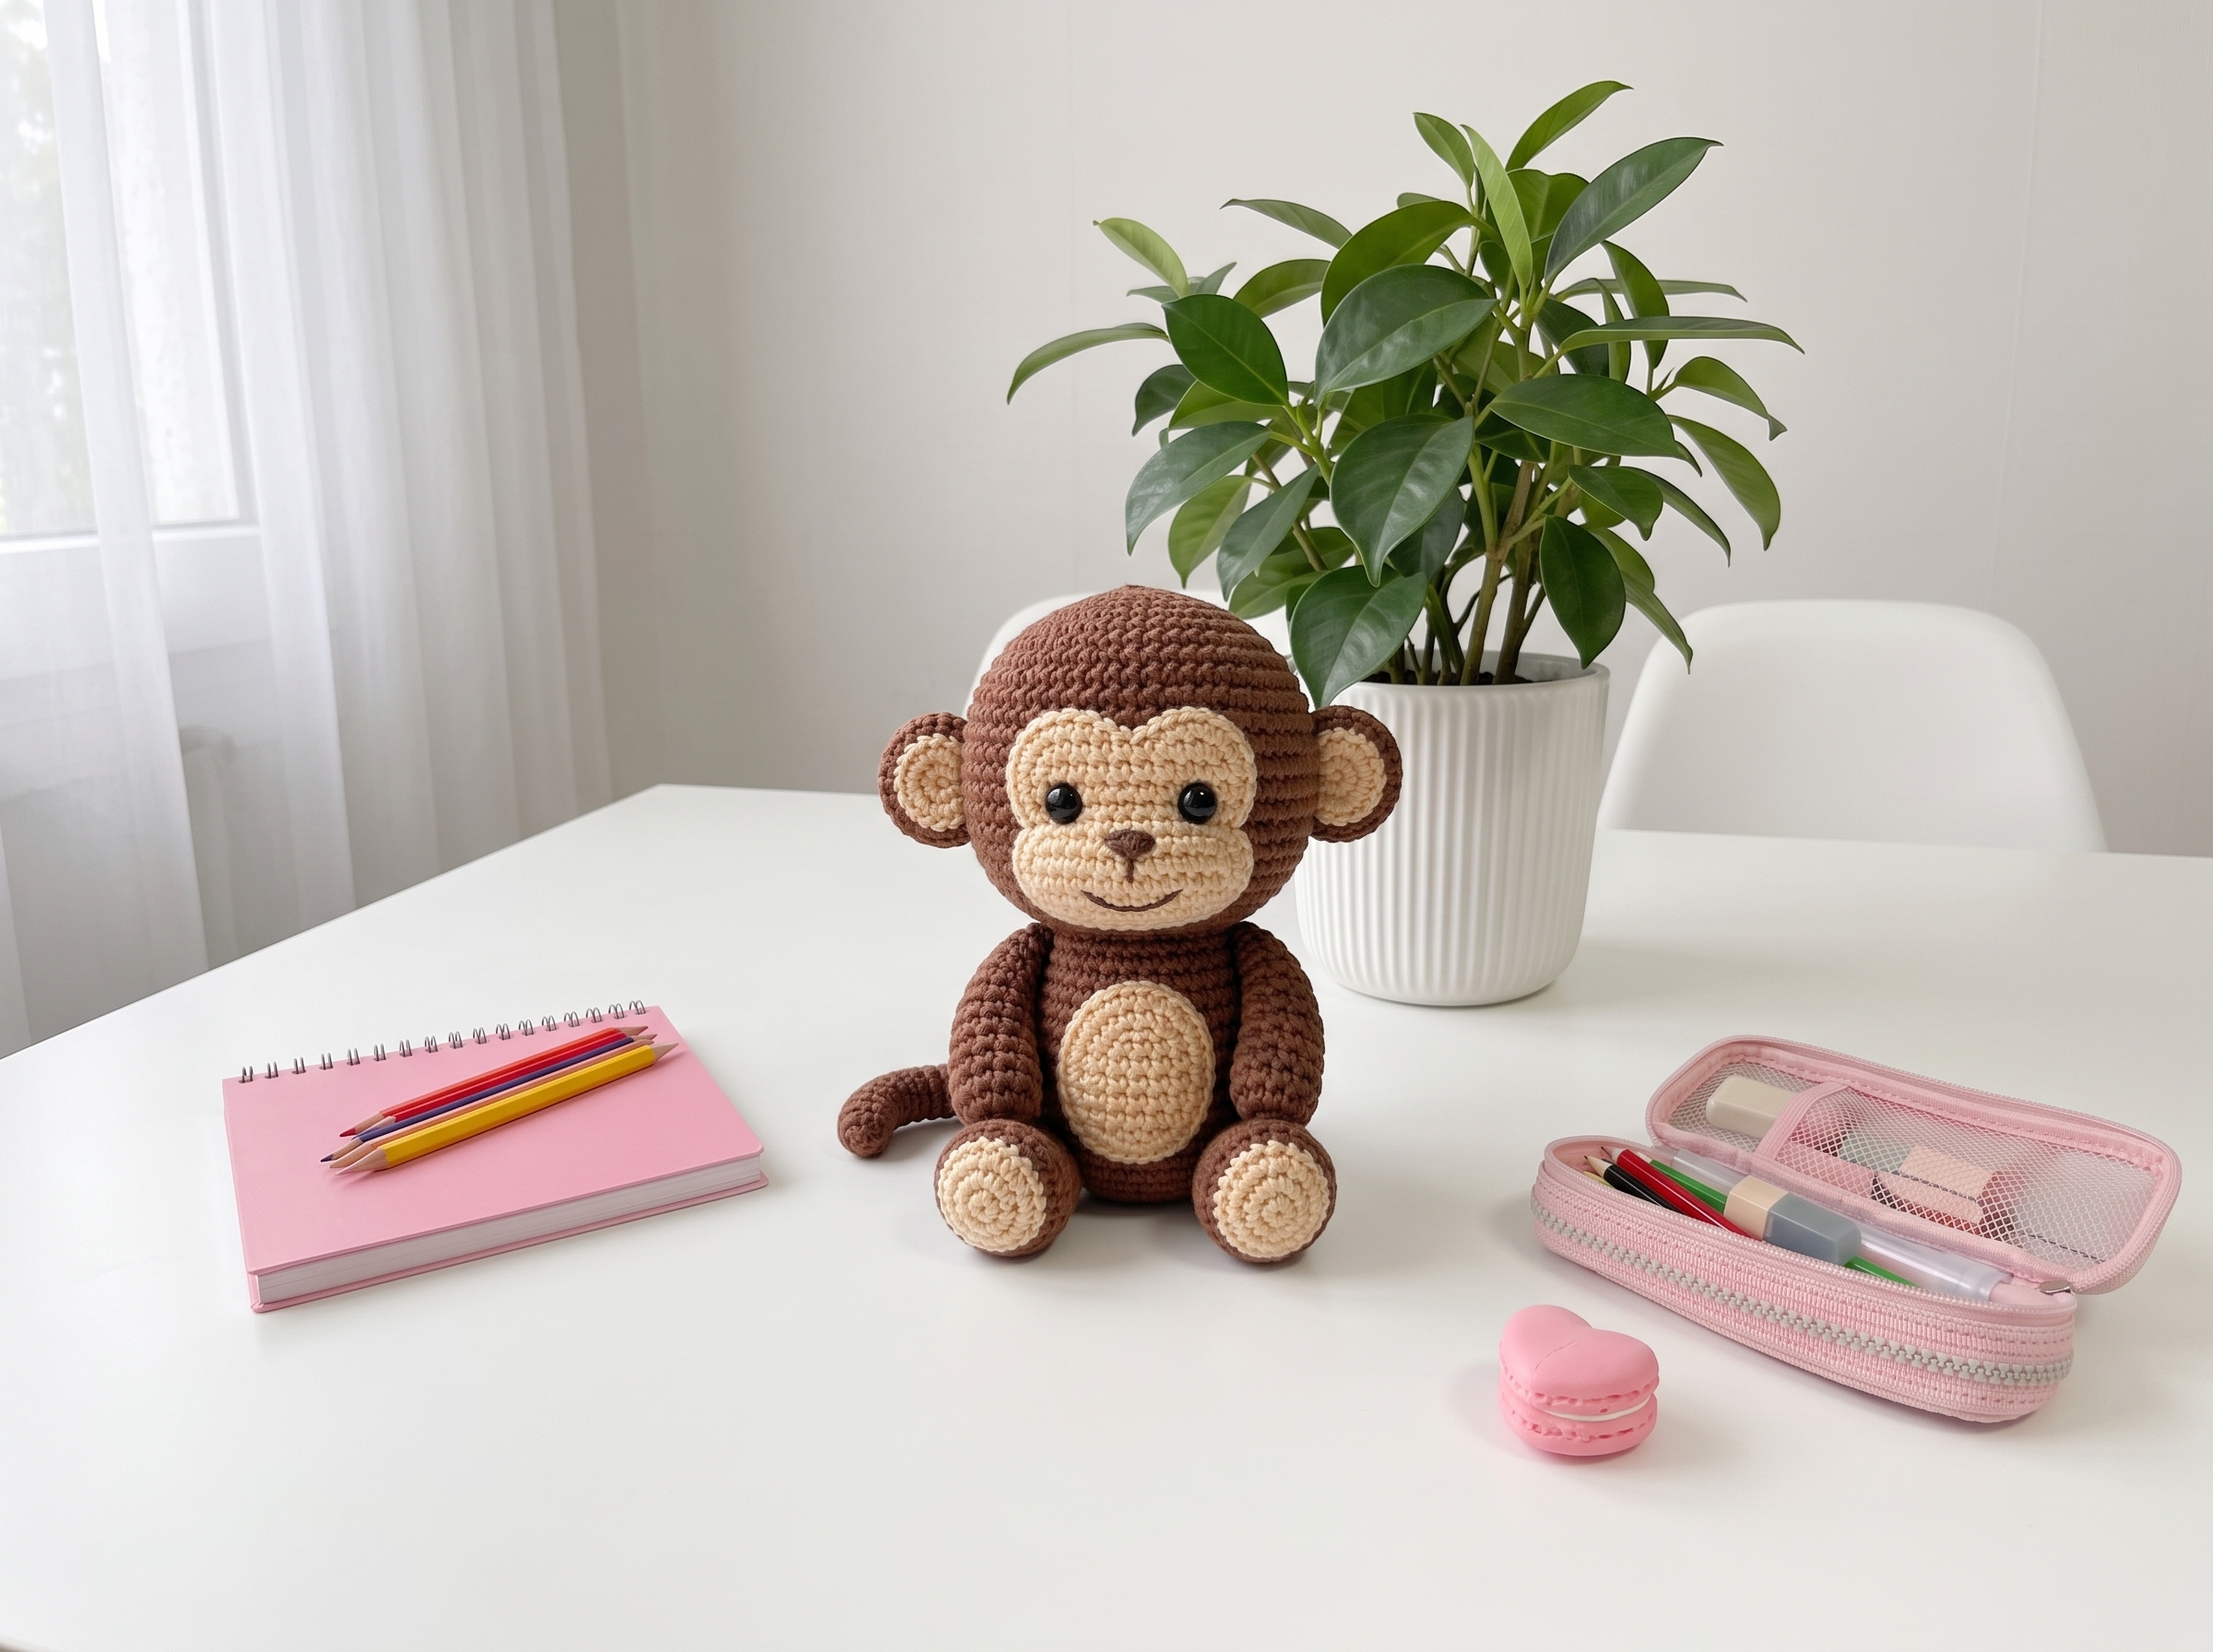
Adorable Monkey Amigurumi – Complete Step-by-Step Pattern
1. Gathering Your Supplies
To create this sweet monkey, we'll use smooth cotton yarn for crisp stitch definition and a huggable texture.
- Yarn: Worsted weight cotton or cotton blend (e.g., YarnArt Jeans, Catania, or similar, approx. 160m / 50g). You will need:
- Brown: For the body, head, arms, legs, and tail (approx. 100g)
- Cream/Beige: For the face, belly, feet, and inner ears (approx. 50g)
- Black: A tiny amount for embroidery (or use safety eyes)
- Hook: 2.5 mm or 3.0 mm (choose the size that gives you a tight, stuff-proof gauge).
- Notions:
- 10-12 mm safety eyes (or black embroidery floss)
- Poly-fil stuffing
- Tapestry needle
- Scissors
- Stitch markers
- Optional: Small amount of pink yarn or blush for cheeks
What you'll master: Working with multiple colors, seamless shaping, and creating expressive facial features.
2. Abbreviations & Special Techniques
Let's quickly review a few terms. If you're new to any of these, don't worry—you'll be a pro by the time we reach the tail!
- MR: Magic ring
- ch: Chain
- sc: Single crochet
- inc: Increase (2 sc in one stitch)
- dec: Decrease (2 sc crocheted together invisibly)
- sl st: Slip stitch
- BLO / FLO: Back loop only / Front loop only
3. The Head (Brown)
The head is worked from the top down, creating a perfectly round shape.
- R1: 6 sc in MR (6)
- R2: 6 inc (12)
- R3: (1 sc, inc) x 6 (18)
- R4: (2 sc, inc) x 6 (24)
- R5: (3 sc, inc) x 6 (30)
- R6: (4 sc, inc) x 6 (36)
- R7: (5 sc, inc) x 6 (42)
- R8: (6 sc, inc) x 6 (48)
- R9-13: 48 sc (48) [5 rows]
- Eye Placement: If using safety eyes, insert them between R10 and R11, spaced 8-9 stitches apart.
- R14: (6 sc, dec) x 6 (42)
- R15: (5 sc, dec) x 6 (36)
- R16: (4 sc, dec) x 6 (30)
- Stuffing: Begin stuffing the head firmly, making sure it's evenly filled.
- R17: (3 sc, dec) x 6 (24)
- R18: (2 sc, dec) x 6 (18)
- Finishing: Fasten off, leaving a long tail. Do NOT close the hole yet—we'll attach the face first!
What you'll master: Spiral increase/decrease sequences and achieving a flawless, spherical shape.
4. The Face (Cream/Beige)
This oval-shaped face piece gives your monkey its sweet expression.
- R1: 6 sc in MR (6)
- R2: 6 inc (12)
- R3: (1 sc, inc) x 6 (18)
- R4: (2 sc, inc) x 6 (24)
- R5: (3 sc, inc) x 6 (30)
- R6: (4 sc, inc) x 6 (36)
- R7: (5 sc, inc) x 6 (42)
- R8: (6 sc, inc) x 6 (48)
- R9: (7 sc, inc) x 6 (54)
- R10: 54 sc (54)
- Finishing: Fasten off, leaving a long tail for sewing. Do not stuff.
What you'll master: Creating a flat, oval-shaped piece for facial features.
5. The Ears (Make 2: Brown outer, Cream inner)
Outer Ear (Brown):
- R1: 6 sc in MR (6)
- R2: 6 inc (12)
- R3: (1 sc, inc) x 6 (18)
- R4: (2 sc, inc) x 6 (24)
- R5: 24 sc (24)
- Finishing: Fasten off, leaving a tail.
Inner Ear (Cream):
- R1: 6 sc in MR (6)
- R2: 6 inc (12)
- R3: (1 sc, inc) x 6 (18)
- Finishing: Fasten off, leaving a tail.
Assembly: Place the cream circle on top of the brown circle and sew together around the edges. Fold slightly at the base to create a cupped shape.
What you'll master: Creating layered pieces for dimension.
6. The Body (Brown)
The body is worked from the neck down, creating a chubby, sitting-friendly shape.
- R1: 6 sc in MR (6)
- R2: 6 inc (12)
- R3: (1 sc, inc) x 6 (18)
- R4: (2 sc, inc) x 6 (24)
- R5: (3 sc, inc) x 6 (30)
- R6: (4 sc, inc) x 6 (36)
- R7-10: 36 sc (36) [4 rows]
- R11: (4 sc, dec) x 6 (30)
- R12-13: 30 sc (30) [2 rows]
- R14: (3 sc, dec) x 6 (24)
- Stuffing: Stuff the body firmly, especially the bottom so it can sit upright.
- Finishing: Fasten off, leaving a tail for sewing.
What you'll master: Structured torso shaping and strategic stuffing.
7. The Belly Patch (Cream/Beige)
This adorable oval belly adds character to your monkey!
- R1: 6 sc in MR (6)
- R2: 6 inc (12)
- R3: (1 sc, inc) x 6 (18)
- R4: (2 sc, inc) x 6 (24)
- R5: (3 sc, inc) x 6 (30)
- R6: 30 sc (30)
- Finishing: Fasten off, leaving a long tail. Do not stuff.
What you'll master: Creating decorative accent pieces.
8. Arms (Make 2: Brown)
- R1: 6 sc in MR (6)
- R2: 6 inc (12)
- R3-4: 12 sc (12) [2 rows]
- R5: (4 sc, dec) x 2 (10)
- R6-12: 10 sc (10) [7 rows]
- Stuffing: Lightly stuff the arm, keeping it slightly flat.
- Finishing: Fasten off, leaving a long tail. Flatten the top and sew closed.
What you'll master: Creating uniform, lightly stuffed appendages.
9. Legs & Feet (Make 2)
Leg (Brown):
- R1: 6 sc in MR (6)
- R2: 6 inc (12)
- R3: (1 sc, inc) x 6 (18)
- R4-6: 18 sc (18) [3 rows]
- R7: (4 sc, dec) x 3 (15)
- R8-10: 15 sc (15) [3 rows]
- Stuffing: Lightly stuff the leg.
- Finishing: Fasten off, leaving a tail.
Foot Sole (Cream):
- R1: 6 sc in MR (6)
- R2: 6 inc (12)
- R3: (1 sc, inc) x 6 (18)
- Finishing: Fasten off, leaving a tail.
Assembly: Sew the cream foot sole to the bottom of each leg.
What you'll master: Multi-color limb construction.
10. Tail (Brown)
- R1: 6 sc in MR (6)
- R2-15: 6 sc (6) [14 rows]
- Finishing: Fasten off, leaving a tail. You can leave it straight or gently curve it.
What you'll master: Creating a simple, cord-like appendage.
11. Assembly & The Magic of Embroidery
Now for the most rewarding part: bringing your monkey's personality to life!
- Attach the Face: Pin the cream face oval onto the brown head, positioning it in the lower third. The top of the face should be around R12-13 of the head. Sew it securely in place.
- Embroider the Features:
- Eyes: If not using safety eyes, embroider two small black circles or use French knots.
- Nose: Create a small oval or heart shape with black thread, centered on the face.
- Mouth: Embroider a sweet, curved smile below the nose.
- Optional: Add tiny pink blush marks on the cheeks!
- Attach the Ears: Sew the ears to the sides of the head, around R8-9.
- Body Assembly:
- Sew the belly patch to the front of the body.
- Attach the head to the body, making sure it sits straight.
- Sew the arms to the sides of the body.
- Attach the legs to the bottom front, positioning them so the monkey can sit.
- Sew the tail to the back of the body.
What you'll master: Multi-step structural assembly and expressive surface embroidery.
Final Section: Where to Go from Here
Congratulations! By completing this Adorable Monkey Amigurumi, you've practiced foundational spiral shaping, multi-color assembly, and the delicate art of facial embroidery. This project is a fantastic confidence-builder and makes an absolutely heartwarming gift for a child, a friend, or even yourself!
From here, try experimenting with different color combinations to create a whole "jungle friends" collection. You could make a gray gorilla, a golden tamarin with orange fur, or even a whimsical purple monkey! Try adding accessories like a tiny banana, a bow tie, or a little vest. Happy crocheting, and enjoy your beautiful new handmade friend! ✨