August 18, 2026
Adorable Owl Brooch – Quick & Easy Amigurumi Crochet Pattern
Whip up this charming, pocket-sized owl brooch in no time! Featuring a cute ruffled skirt, tiny bows, and a clever flat-sewn body, it’s the perfect beginner-friendly project for adding a whimsical, handmade touch to any outfit or bag.
Jump to pattern instructions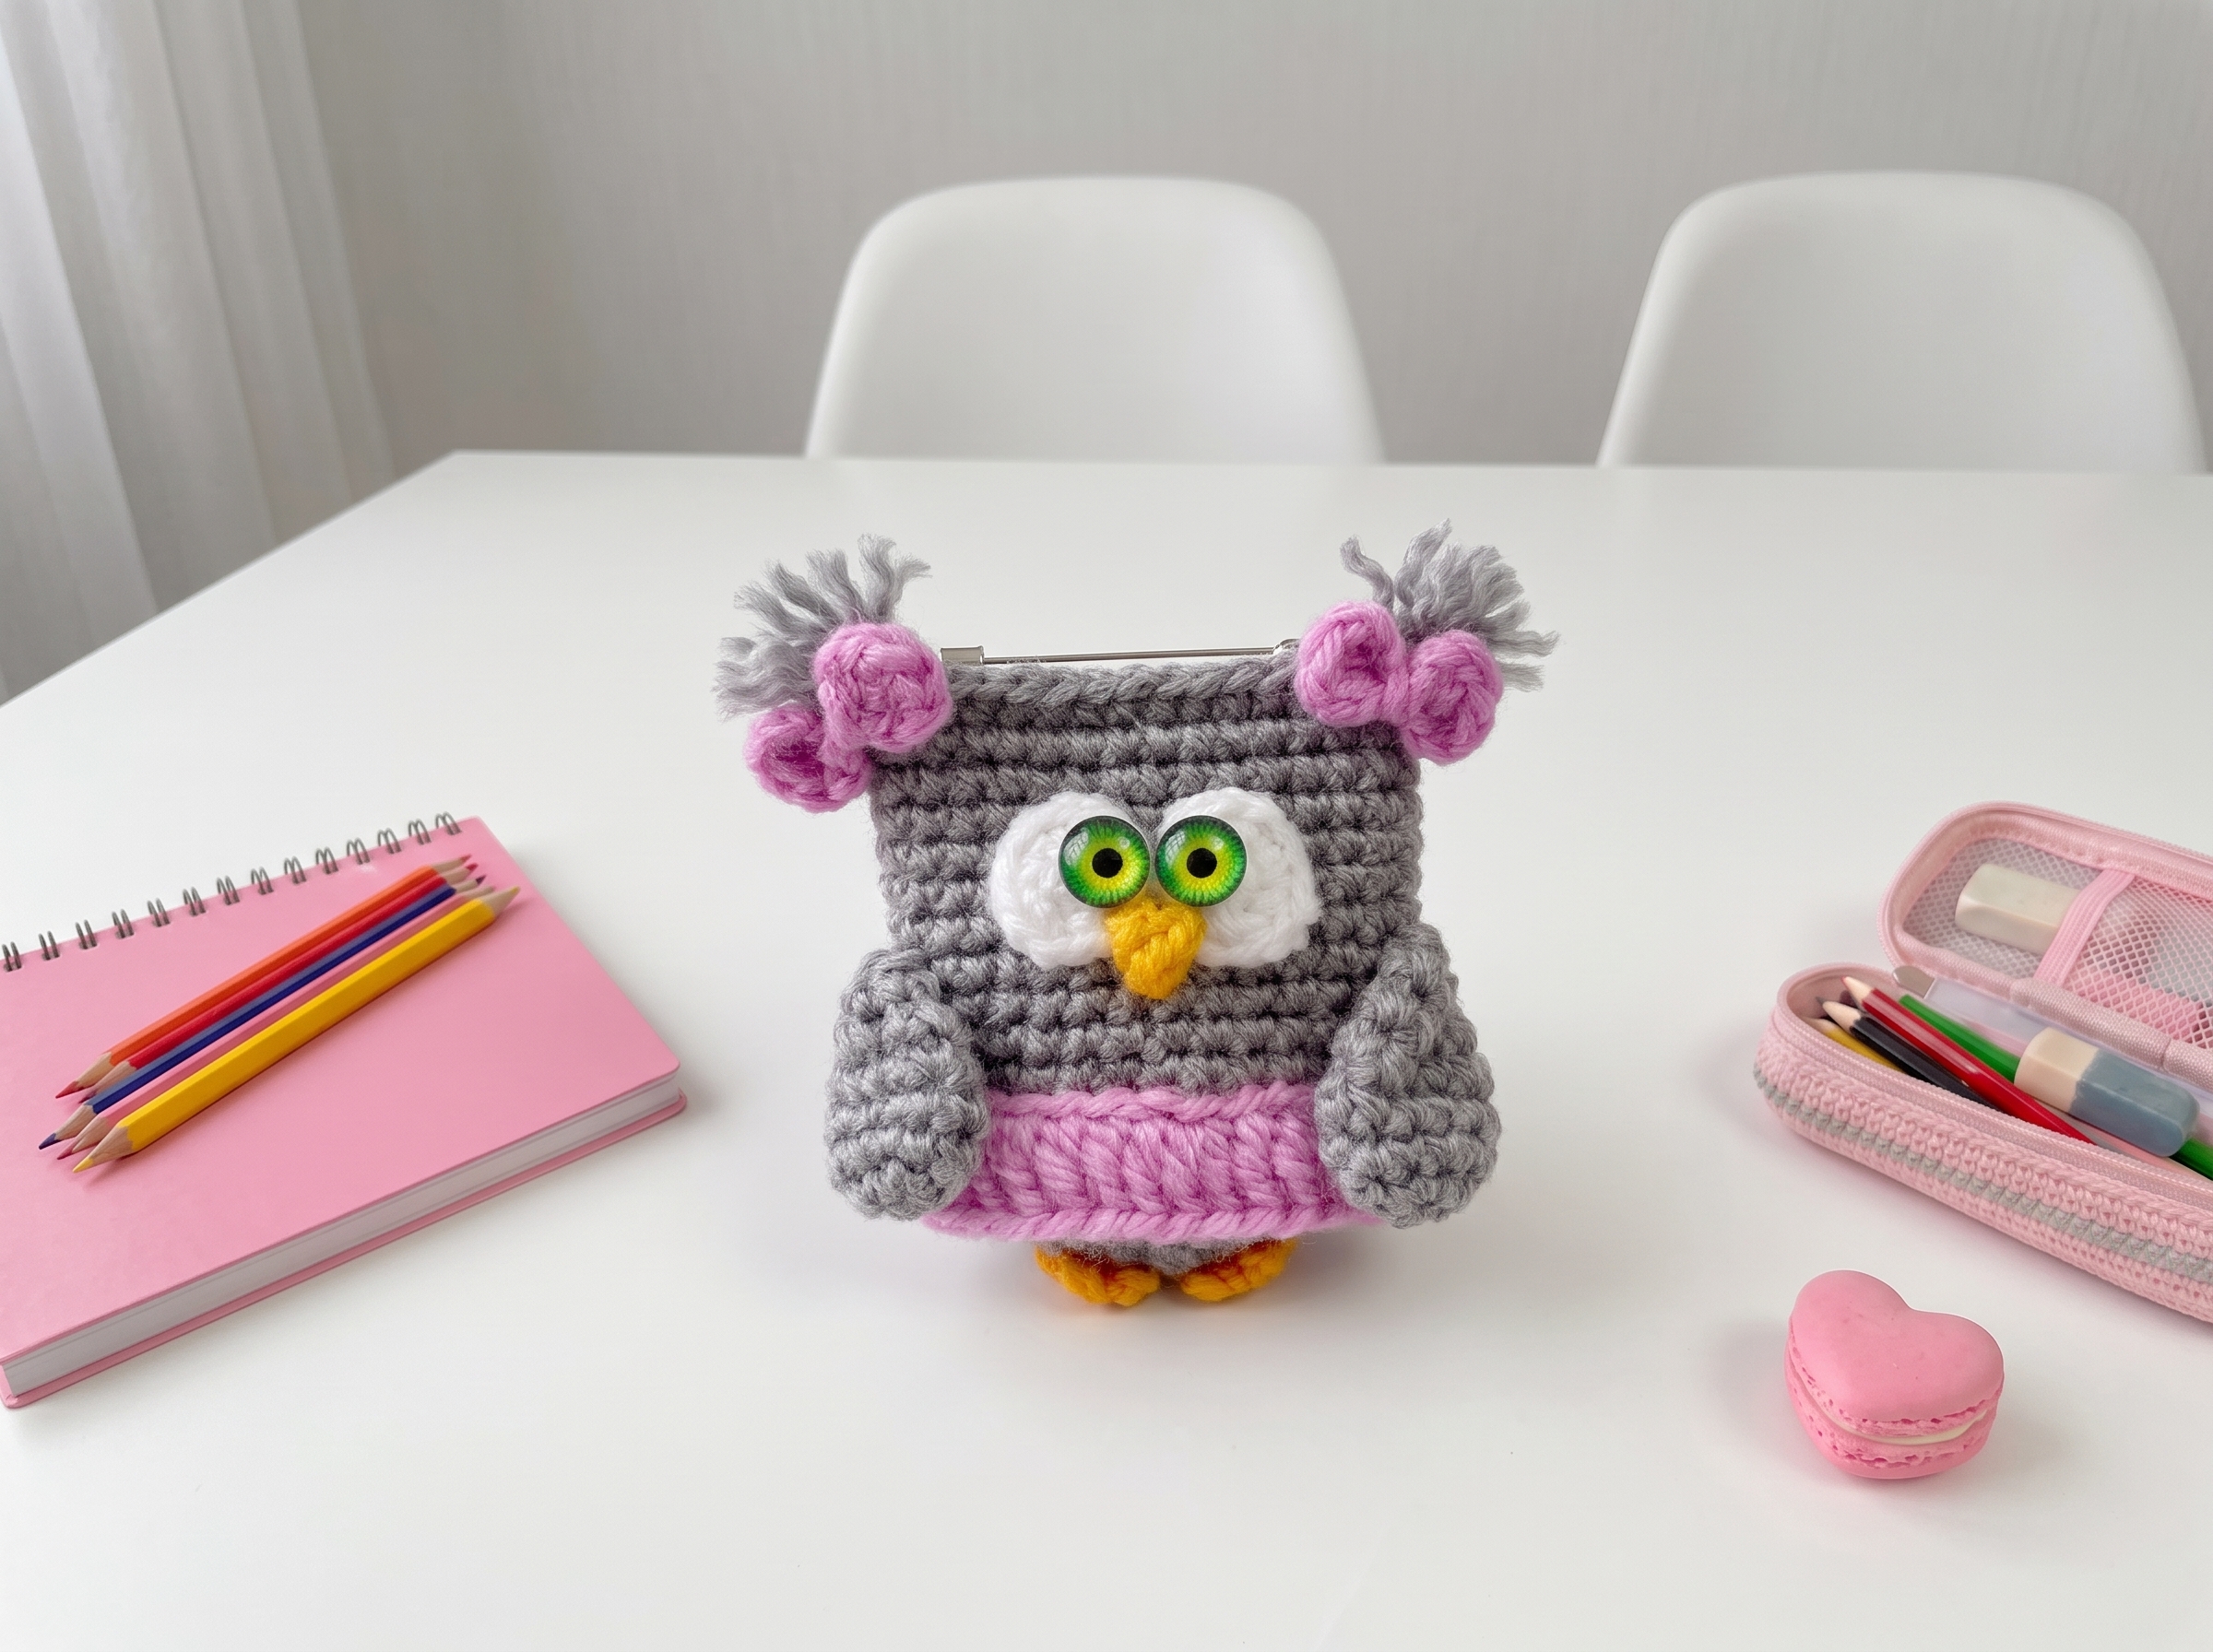
Adorable Owl Brooch – Complete Step-by-Step Pattern
1. Materials & Abbreviations
Let's gather our supplies! This project is wonderfully quick and uses very little yarn, making it a fantastic stash-buster.
- Yarn: YarnArt Baby or similar lightweight acrylic/cotton blend (approx. 150m / 50g). You'll need small amounts of Gray (main body), White (eyes), Yellow (beak and legs), and Pink (skirt and bows).
- Hook: 2.0 mm – 2.5 mm (or whatever size gives you a tight, stuff-proof gauge with your chosen yarn).
- Notions: Two 6–8 mm black beads or safety eyes, a standard brooch pin base, light poly-fil stuffing, tapestry needle, scissors, and a dab of fabric glue.
- Finished Size: Approximately 6 cm tall.
- Abbreviations:
- MR – magic ring
- ch – chain
- sc – single crochet
- hdc – half double crochet
- dc – double crochet
- inc – increase (2 sc in one stitch)
- dec – decrease (2 sc crocheted together)
- sl st – slip stitch
What you'll master: Getting a feel for your yarn and hook, and reviewing the foundational stitches that make up this cute little owl.
2. Body
The body is worked as a flat, circular piece that gets folded and lightly stuffed at the end, creating a charming, slightly squishy profile perfect for a brooch.
- R1: 6 sc in MR, then work an inc in each st around (12)
- R2: (1 sc, inc) x 6 (18)
- R3: (2 sc, inc) x 6 (24)
- R4: (3 sc, inc) x 6 (30)
- R5-17: 30 sc (13 rows)
- Finishing: Do not fasten off yet. Fold the piece perfectly in half. Using your tapestry needle and the working yarn, sew straight through both layers for exactly 15 stitches to close the bottom, leaving the top open. Stuff the owl very lightly through the top opening so it keeps a soft, flat profile, then sew the top opening closed.
What you'll master: Consistent circular increases and the clever "fold-and-sew" technique that gives this brooch its unique, dimensional-yet-flat shape.
3. Eyes (Make 2)
These bright white circles make the perfect canvas for our little owl's expressive gaze.
- R1 (White): 6 sc in MR (6)
- R2: 6 inc (12)
- Finishing: Fasten off, leaving a tail for sewing.
What you'll master: Quick, tiny circular motifs and neat finishing for small appliqué pieces.
4. Beak
A tiny, sharp little beak that adds instant personality to the face.
- Instructions (Yellow): Ch 4. Starting in the 2nd ch from the hook, work 1 sl st, 1 sc, and 1 hdc.
- Finishing: Fasten off, leaving a long tail. Sew securely to the center of the face, just below where the eyes will be placed.
What you'll master: Working multiple different stitch heights into a short chain to create organic, tapered shapes.
5. Wings (Make 2)
The wings are worked in a tapered teardrop shape, mimicking the natural fold of a resting owl's wing.
- R1 (Gray): 6 sc in MR (6)
- R2: 6 inc (12)
- R3: 4 sc, dec, 4 sc, dec (10)
- R4: 3 sc, dec, 3 sc, dec (8)
- R5: 2 sc, dec, 2 sc, dec (6)
- R6: 1 sc, dec, 1 sc, dec (4)
- Finishing: Fasten off, leaving a tail for sewing. Sew each wing to the sides of the owl's body.
What you'll master: Strategic placement of decreases to create a smooth, tapered teardrop shape without needing to sew seams.
6. Legs (Make 2)
These cute little feet are made entirely of chains and slip stitches, giving them a fun, fringed look.
- Instructions (Yellow): Ch 7. Starting in the 2nd ch from the hook, work 3 sl st back down the chain.
- Toe 1: Ch 3, turn, work 2 sl st back down, then 1 sl st into the 4th chain of the main leg chain.
- Toe 2: Ch 3, turn, work 2 sl st back down, then 1 sl st into the 4th chain of the main leg chain.
- Finishing: Continue with sl st to the end of the main chain. Fasten off, leaving a tail. Sew both legs to the bottom front of the owl's body.
What you'll master: Creative use of slip stitches and chain loops to build detailed, fringed textures without complex sewing.
7. Ear Tufts
A classic owl feature that is incredibly easy to achieve!
- Instructions: Cut 4–6 short strands of gray yarn, all the exact same length. Fold them in half, loop them through the top corners of the owl's head (like a fringe or tassel), and trim the ends evenly with sharp scissors so they look neat and perky.
What you'll master: Simple yarn manipulation to add realistic, textured details in seconds.
8. Skirt & Bows
Let's dress up our owl with a sweet, ruffled pink skirt and matching bows.
Skirt (Pink):
- R1: Ch 30, join with a sl st to form a ring. Work 36 dc around, placing an inc (2 dc in the same stitch) every 5th stitch to create a gentle ruffle. (36)
- Finishing: Fasten off, leaving a long tail. Sew the skirt around the lower half of the owl's body.
Bows (Pink):
- Note: The original pattern references a graphic diagram for the bow. To keep your pattern complete, you can create a simple mini-bow by chaining 6, working (sc, hdc, dc, hdc, sc) across, chaining 1, turning, and working sc across. Wrap the center tightly with a separate piece of yarn and sew it to the skirt or head.
- Finishing: Sew the bows securely to the owl's skirt or head as desired.
What you'll master: Creating ruffled fabric with double crochet increases and assembling multi-part clothing accessories.
9. Final Assembly & Details
Now for the magic moment where your owl truly comes to life!
- Face Details: Glue or sew the white eye circles onto the upper body. Glue the black beads into the center of the white circles.
- Embroidery: Using a single strand of black embroidery floss, stitch tiny eyelashes on the outer corners of the eyes. You can also add a hint of pink blush to the cheeks using a tiny bit of chalk, pastel, or acrylic paint.
- Brooch Base: Apply a strong fabric glue to the back of the owl and firmly press your brooch pin base into place. Allow it to dry completely before wearing.
What you'll master: Precision placement of facial features, delicate surface embroidery, and securely attaching hardware to handmade items.
Final Section: Where to Go from Here
Congratulations! You've just crocheted an absolutely adorable owl brooch. Because this pattern relies on flat folding and simple appliqué techniques, it’s a wonderfully quick and satisfying project.
From here, try experimenting with different yarn colors to create a whole forest of owls, or adapt the skirt and bow elements to dress up other small amigurumi characters in your collection. Happy crocheting!