August 20, 2026
Freestyle Shirt – A Simple Top-Down Raglan Tee (Knitting Pattern)
A breezy, top-down raglan tee perfect for spring and summer! Choose between a chic solid color or a trendy thin-striped version. With customizable lengths, a perfectly tailored neckline, and seamless construction, this knit is your new wardrobe staple.
Jump to pattern instructions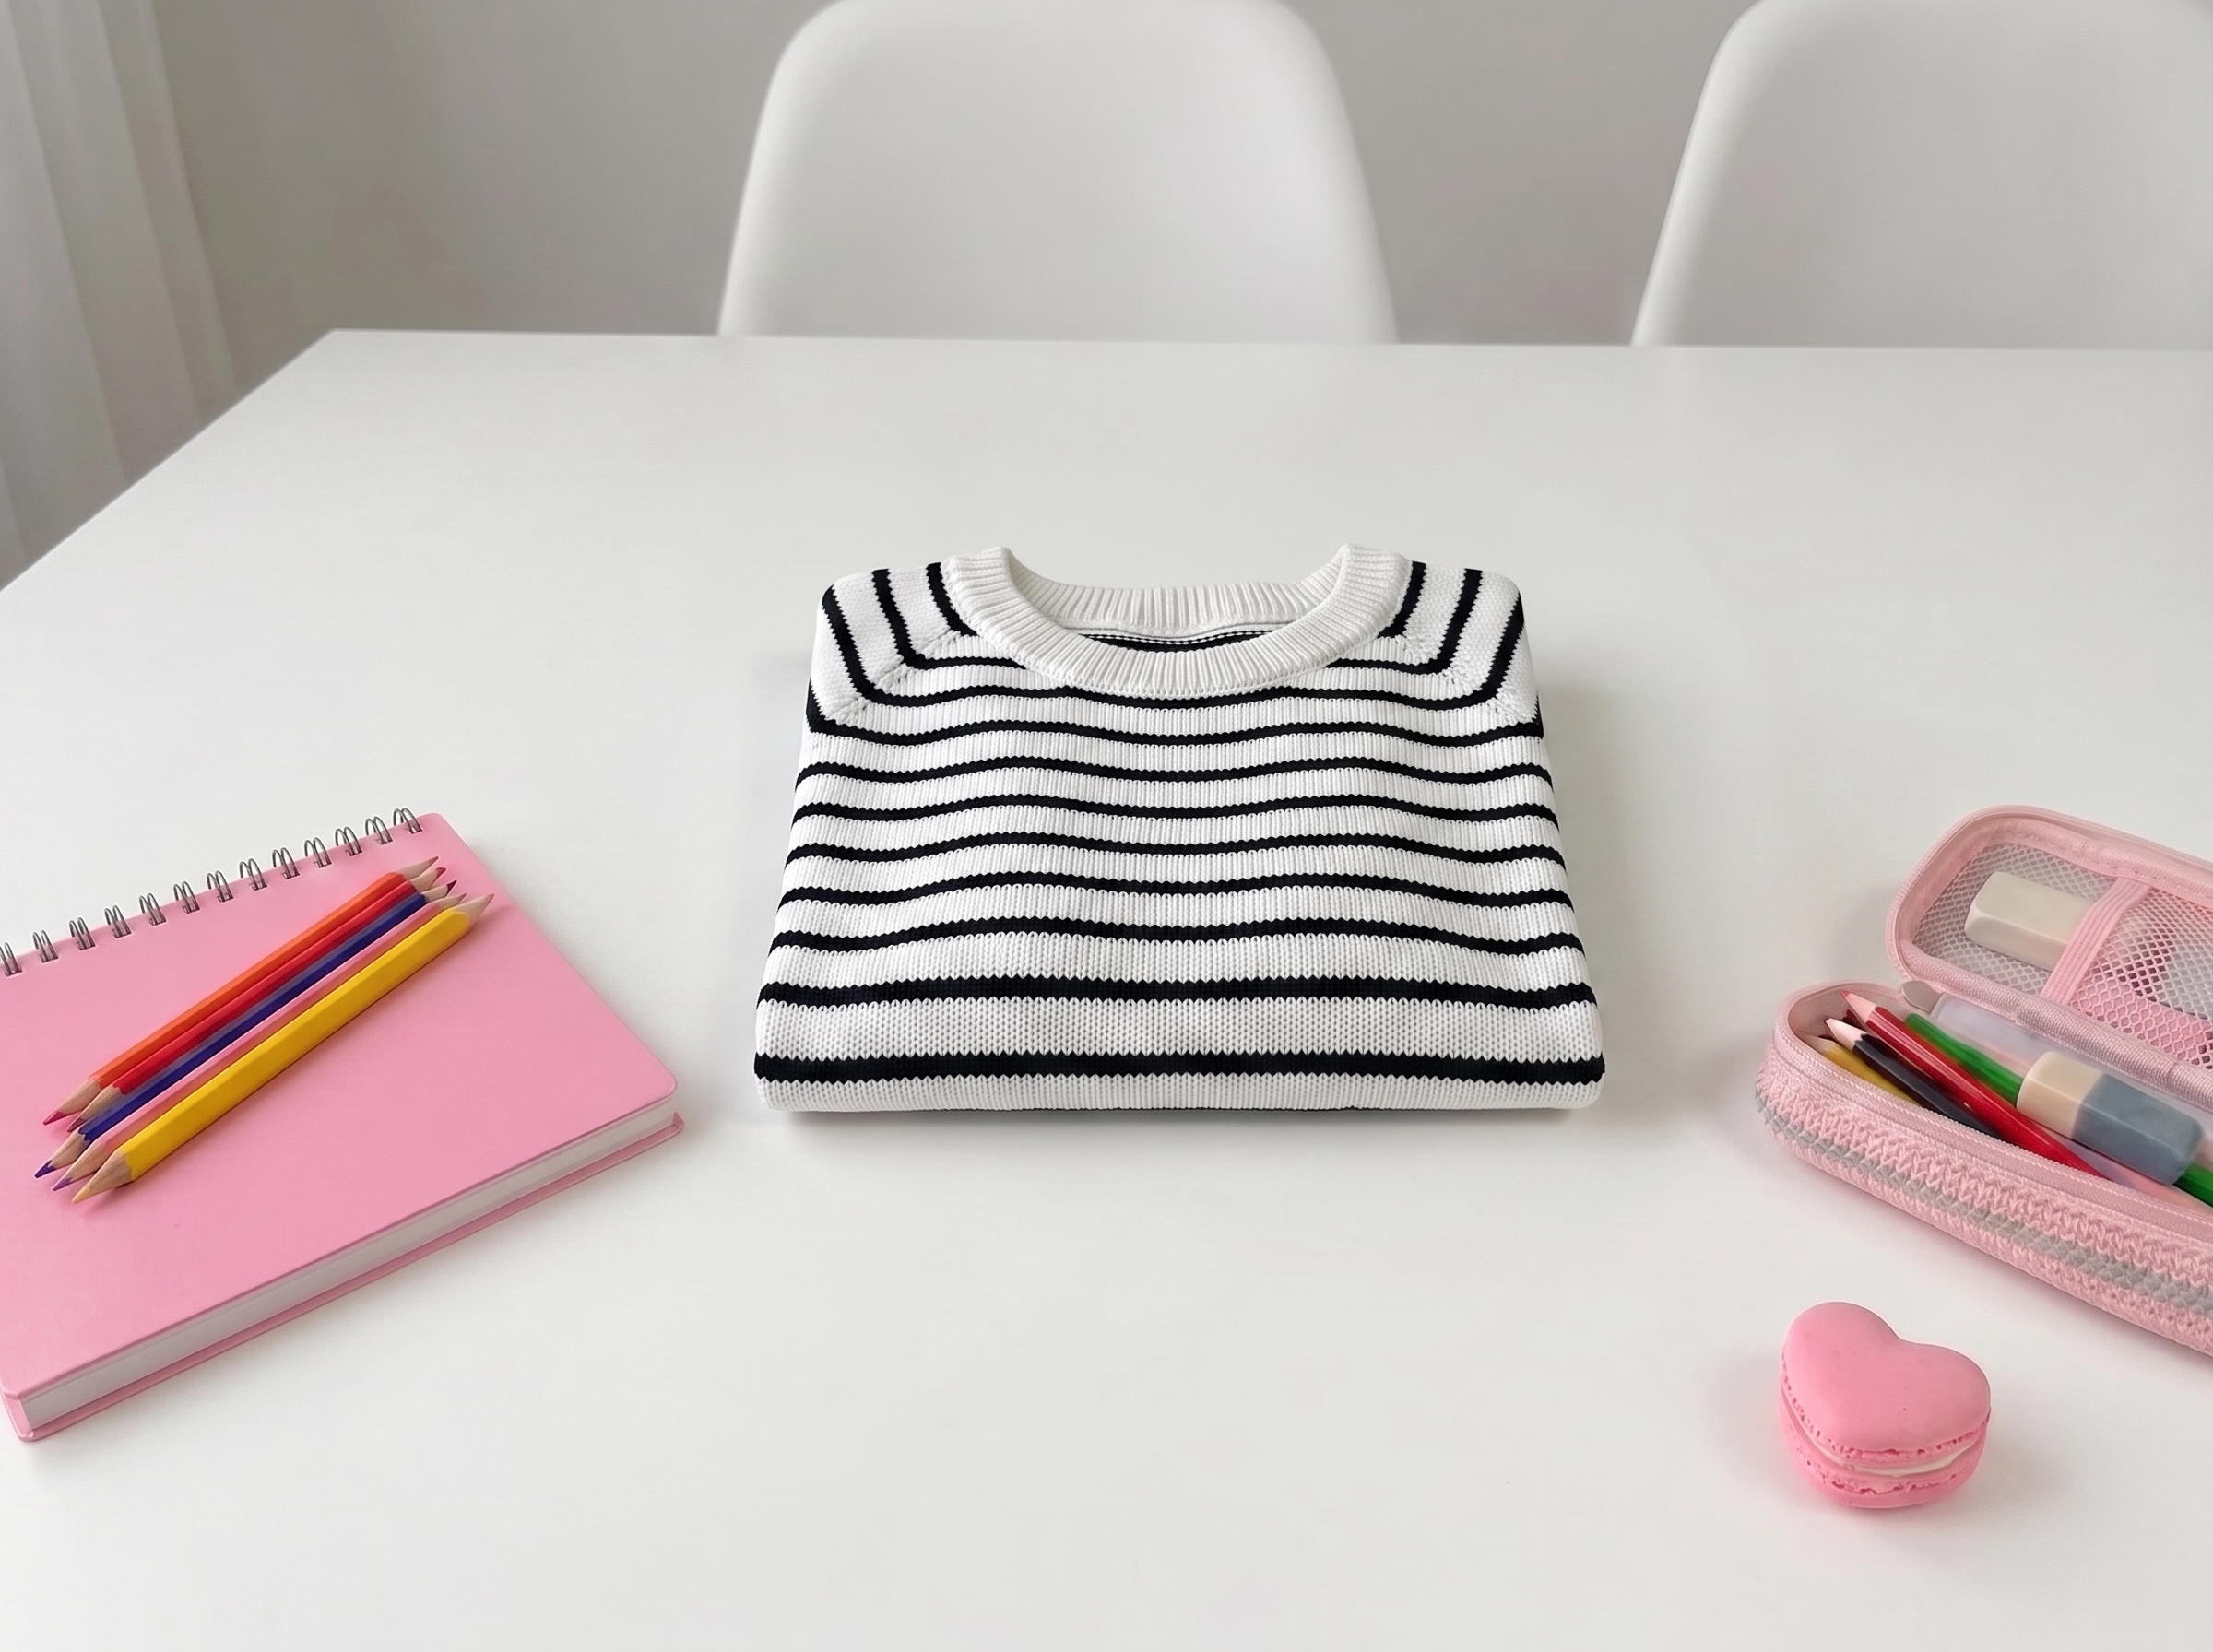
Freestyle Shirt – Complete Step-by-Step Knitting Pattern
Note: While our usual focus is crochet, this beautiful pattern is a knit design! I’ve translated and formatted it with the same loving, precise care so you can dive right into your next knitting project.
1. Materials & Gauge
Gathering the right materials is the first step to a garment you'll want to wear on repeat. This pattern is designed for lightweight, breathable yarns that drape beautifully.
- Yarn (Solid Version): 250(300) 350(400) 450(500) g of a lightweight yarn (approx. 160-165m / 50g).
- Suggestions: Summer in Kashmir by BC Garn (90% cotton, 10% cashmere), Morning Salutation Vegan Fino by Kremke Soul Wool (51% lyocell, 49% cotton), or Alba by BC Garn (100% cotton).
- Yarn (Striped Version): 200(250) 250(300) 350(400) g of Alba in White (Main Color, MC) + 50(100) 100(100) 100(150) g of Alba in Black (Contrast Color, CC).
- Needles:
- 3.5 mm circular needles (40-60 cm and 80-100 cm lengths) for the main body.
- 2.5 mm circular needles (40-60 cm) for the neckband and sleeve cuffs.
- 2.5 mm circular needles (80-100 cm) for the body hem.
- Notions: Stitch markers (at least 5), tapestry needle, stitch holders or waste yarn, and a measuring tape.
- Gauge: 24 stitches x 32-33 rows = 10 x 10 cm (4" x 4") in stockinette stitch with 3.5 mm needles, after washing and blocking.
- Tip: Always wash and block your gauge swatch! Cotton and cotton-blends can change significantly after their first bath.
What you'll master: Evaluating yarn substitutions based on meterage, achieving the perfect gauge, and preparing for seamless garment construction.
2. Abbreviations & Special Techniques
Let’s get familiar with the shorthand and special moves we’ll be using to shape this beautiful tee.
- MC / CC: Main Color / Contrast Color
- RS / WS: Right Side / Wrong Side
- st(s): stitch(es)
- k / p: knit / purl
- M1R: Make 1 Right (lift the strand between stitches from back to front, knit through the front loop)
- M1L: Make 1 Left (lift the strand between stitches from front to back, knit through the back loop)
- PM / SM: Place marker / Slip marker
- BOR: Beginning of Round
- DP: Double stitch (used in German short rows: slip 1 st purlwise, bring yarn to front, pull yarn up and back over the needle to create a "double" loop, turn work).
- kDP / pDP: Knit or purl the Double Stitch as one single stitch, working through both legs of the loop to close the gap seamlessly.
What you'll master: German short rows for a flawless neckline, and invisible M1L/M1R increases for clean raglan lines.
3. Neckline & Short Row Shaping
We start at the very top, using German short rows to gently raise the back of the neck so the front sits comfortably without gaping.
- Cast On: With 3.5 mm needles, cast on 120(124) 124(128) 128(132) sts. Join in the round, being careful not to twist. PM for BOR.
- Setup Round: Knit 1 round, placing markers to divide the sections:
- 1 k (left sleeve), PM, 1 k (raglan line), PM,
- 38(40) 40(42) 42(44) k (back), PM, 1 k (raglan line), PM,
- 15(15) 15(15) 15(15) k (right sleeve), PM, 1 k (raglan line), PM,
- 48(50) 50(52) 52(54) k (front), PM, 1 k (raglan line), PM,
- 14(14) 14(14) 14(14) k (left sleeve). (Note: The BOR is now just before the first left sleeve stitch).
German Short Rows (Work back and forth):
- Row 1 (RS): 1 k, M1R, SM, 1 p (raglan), SM, M1L, k to next raglan line, M1R, SM, 1 p (raglan), SM, M1L, 4 k, turn.
- Row 2 (WS): Create a DP, work in pattern to BOR, SM, 3 p, turn.
- Row 3 (RS): Create a DP, 2 k, SM, 2 k, M1R, SM, 1 p, SM, M1L, k to next raglan, M1R, SM, 1 p, SM, M1L, 4 k, kDP, 4 k, turn.
- Row 4 (WS): Create a DP, work in pattern to DP, pDP, 4 p, turn.
- Row 5 (RS): Create a DP, 6 k, SM, 3 k, M1R, SM, 1 p, SM, M1L, k to next raglan, M1R, SM, 1 p, SM, M1L, 9 k, kDP, 3 k, turn.
- Row 6 (WS): Create a DP, work in pattern to DP, pDP, 3 p, turn.
- Row 7 (RS): Create a DP, 9 k, SM, 4 k, M1R, SM, 1 p, SM, M1L, k to next raglan, M1R, SM, 1 p, SM, M1L, 13 k, kDP, 3 k, turn.
- Row 8 (WS): Create a DP, work in pattern to DP, pDP, 3 p, turn.
- Row 9 (RS): Create a DP, 12 k, SM, 5 k, M1R, SM, 1 p, SM, M1L, k to next raglan, M1R, SM, 1 p, SM, M1L, 17 k, kDP, 1 k, SM, 1 p, SM, 1 k, turn.
- Row 10 (WS): Create a DP, 1 k (raglan), work in pattern to DP, pDP, 1 p, SM, 1 k (raglan), SM, 1 p, turn.
- Row 11 (RS): Create a DP, M1R, SM, 1 p, SM, M1L, 14 k, SM, 6 k, M1R, SM, 1 p, SM, M1L, k to next raglan, M1R, SM, 1 p, SM, M1L, 20 k, M1R, SM, 1 p, SM, M1L, kDP, 3 k, turn.
- Row 12 (WS): Create a DP, work in pattern to DP, pDP, 3 p, turn.
- Row 13 (RS): Create a DP, 4 k, M1R, SM, 1 p, SM, M1L, 15 k, SM, 7 k, M1R, SM, 1 p, SM, M1L, k to next raglan, M1R, SM, 1 p, SM, M1L, 22 k, M1R, SM, 1 p, SM, M1L, 4 k, kDP, 3 k, turn.
- Row 14 (WS): Create a DP, work in pattern to DP, pDP, 3 p, turn.
- Row 15 (RS): Create a DP, 8 k, M1R, SM, 1 p, SM, M1L, 16 k, SM, 8 k, M1R, SM, 1 p, SM, M1L, k to next raglan, M1R, SM, 1 p, SM, M1L, 24 k, M1R, SM, 1 p, SM, M1L, 8 k, kDP, 3 k, turn.
- Row 16 (WS): Create a DP, work in pattern to DP, pDP, 3 p, turn.
- Row 17 (RS): Create a DP, 12 k, M1R, SM, 1 p, SM, M1L, 17 k, SM, 9 k, M1R, SM, 1 p, SM, M1L, k to next raglan, M1R, SM, 1 p, SM, M1L, 26 k, M1R, SM, 1 p, SM, M1L, 12 k, kDP, 3 k, turn.
- Row 18 (WS): Create a DP, DP, work in pattern to DP, pDP, 3 p, turn.
- Row 19 (RS): Create a DP, 16 k, M1R, SM, 1 p, SM, M1L, 18 k, SM, 10 k, M1R, SM, 1 p, SM, M1L, k to next raglan, M1R, SM, 1 p, SM, M1L, 28 k, M1R, SM, 1 p, SM, M1L, 16 k, kDP, 3 k, turn.
- Row 20 (WS): Create a DP, work in pattern to DP, pDP, 3 p, turn.
- Row 21 (RS): Create a DP, 20 k, M1R, SM, 1 p, SM, M1L, 19 k, SM, 11 k, M1R, SM, 1 p, SM, M1L, k to next raglan, M1R, SM, 1 p, SM, M1L, 30 k, M1R, SM, 1 p, SM, M1L, 20 k, kDP, 3 k, turn.
- Row 22 (WS): Create a DP, work in pattern to DP, pDP, 3 p, turn.
- Row 23 (RS): Create a DP, 24 k, M1R, SM, 1 p, SM, M1L, 20 k, remove BOR marker, 12 k, M1R, SM, 1 p, SM, M1L, k to next raglan, M1R, SM, 1 p, SM, M1L, 32 k, M1R, SM, 1 p, SM, M1L, 24 k, kDP, 10(12) 12(14) 14(16) k, kDP (this closes the final DP from the previous WS row).
- Finishing the Neck: Cut yarn.
What you'll master: Precision short-row shaping, managing multiple markers, and seamlessly closing double-stitch gaps for a professional finish.
4. The Yoke
Now the magic happens! We’ll join the work into a continuous circle and expand the yoke to fit your bust and arms perfectly.
- Setup: Move the BOR marker so it sits after the left sleeve raglan line (meaning the round will now begin with the first back stitch). To do this, simply slip 61 sts from the left needle to the right needle without knitting. Join new yarn.
- Round 1: 62(64) 64(66) 66(68) k (back), SM, 1 p (raglan), SM, 34 k (right sleeve), SM, 1 p (raglan), SM, 62(64) 64(66) 66(68) k (front), SM, 1 p (raglan), SM, 34 k (left sleeve), SM, 1 p (raglan). (Total: 196(200) 200(204) 204(208) sts).
- Round 2 (Increase Round): M1L, k to 1 st before marker, M1R, SM, 1 p, SM, M1L, k sleeve sts, M1R, SM, 1 p, SM. Repeat this M1L / M1R sequence around all 4 raglan lines. (8 sts increased. Total: 204(208) 208(212) 212(216) sts).
- Round 3: Work in pattern (knit the knit sts, purl the raglan sts).
- Repeat: Repeat Rounds 2 and 3 a total of 23(25) 25(27) 27(27) times, ending with a Round 3 (no increases).
- Stitch Count Check: You should now have 380(400) 400(420) 420(424) sts. (Back/Front: 108(114) 114(120) 120(122) sts each. Sleeves: 80(84) 84(88) 88(88) sts each).
For Sizes M, L, XL, XXL Only (Extra Body Width):
- Body Increase Round: M1L, k to marker, M1R, SM, 1 p, SM, k sleeve sts, SM, 1 p, SM, M1L, k to marker, M1R, SM, 1 p, SM, k sleeve sts, SM, 1 p, SM. (Only increases on the front and back, not the sleeves).
- Next Round: Work in pattern.
- Repeat: Repeat these 2 rounds (1) 3(5) 9(12) times, ending with a pattern round.
- Final Yoke Stitch Count: (400) 412(440) 456(472) sts.
What you'll master: Reading multi-size instructions, tracking raglan increases, and customizing fit for different body types.
Note: The original pattern includes a beautiful "Striped Version" variation. If you choose stripes, simply alternate 6 rounds of MC and 2 rounds of CC, starting the CC at the end of Short Row 8. Change colors at the beginning of the round to keep the joins invisible!
5. The Body
Time to separate the sleeves and let the shirt take shape!
- Setup: Remove the BOR marker. Knit 108(116) 120(130) 138(146) sts (back) + 1 k (the former raglan line).
- Separate Right Sleeve: Place the next 80(84) 84(88) 88(88) sleeve sts onto a piece of waste yarn.
- Underarm: Cast on 0(0) 4(4) 8(12) sts using the backward loop method.
- Front: Knit 1 (former raglan) + 108(116) 120(130) 138(146) (front) + 1 (former raglan).
- Separate Left Sleeve: Place the next 80(84) 84(88) 88(88) sleeve sts onto waste yarn.
- Underarm: Cast on 0(0) 4(4) 8(12) sts.
- Finish Round: Knit 1 (former raglan). Place the BOR marker in the center of this new left underarm.
- Body Total: 220(236) 252(272) 296(320) sts.
- Work Body: Knit in stockinette stitch (k every round) until the piece measures approximately 47(49) 51(53) 56(58) cm from the original cast-on edge (or about 2 cm shorter than your desired final length).
Hem Finishing:
- Switch to 2.5 mm needles.
- Rounds 1-8: Knit.
- Round 9: Purl (this creates your fold line).
- Rounds 10-16: Knit.
- Assembly: Fold the hem to the inside (WS) and use your tapestry needle to neatly sew the live stitches to the corresponding purl bumps on Round 9.
What you'll master: Seamless underarm cast-ons, managing large circumferences, and creating a clean, professional folded hem.
6. The Sleeves
We’ll pick up right where we left off to create sleeves that are perfectly proportioned to the body.
- Setup: From the Right Side, starting at the center of the underarm cast-on, pick up and knit 0(0) 2(2) 4(6) sts from the underarm. Knit across the 80(84) 84(88) 88(88) held sleeve sts. Pick up and knit 0(0) 2(2) 4(6) sts from the other side of the underarm. Join in the round and PM for BOR. (Total: 80(84) 88(92) 96(100) sts).
- Work Sleeve: Knit in stockinette stitch in the round until the sleeve measures 10 cm from the underarm (or 2 cm shorter than your desired length).
- Cuff Finishing:
- Switch to 2.5 mm needles.
- Rounds 1-7: Knit.
- Round 8: Purl (fold line).
- Rounds 9-14: Knit.
- Assembly: Fold the cuff to the inside (WS) and sew the live stitches to the corresponding purl bumps on Round 8. Repeat for the second sleeve.
What you'll master: Picking up underarm stitches without creating holes, and executing a seamless folded cuff.
Pro-Tip for the Neckband: To prevent your neckline from stretching out over time, you can thread a thin, clear elastic thread through the neckband as you sew it down on the inside. It’s an invisible game-changer!
7. The Neckband
Let’s give this tee a polished, boutique-quality finish.
- Setup: From the Wrong Side, using 2.5 mm needles, pick up and knit 120(124) 124(128) 128(132) sts directly from the very first round of the yoke (this is why we threaded waste yarn through those stitches at the beginning!).
- Join in the round and PM for BOR.
- Round 1: Knit all stitches.
- Rounds 2+: Work in 1x1 rib (k1, p1) for approximately 4.5 cm, or your preferred neckband height.
- Assembly: Fold the neckband to the inside (WS) and neatly sew the live stitches to the corresponding purl bumps on the first round.
What you'll master: Picking up stitches from a provisional edge and creating a structured, non-stretchy ribbed neckband.
Final Section: Where to Go from Here
Take a deep breath and look at what you’ve just created! By finishing the Freestyle Shirt, you’ve conquered German short rows, seamless raglan increases, and professional folded hems. These are the exact techniques used by high-end fashion designers to create custom-fitted garments.
Now that you understand how to manipulate flat fabric to fit a 3D body, the sky is the limit. Try experimenting with different yarn weights to create a cozy, oversized winter version, or play with bold, colorful stripes to make a statement piece. Block your finished tee, slip it on, and enjoy your beautiful new handmade wardrobe staple. Happy knitting!