September 6, 2026
Pastel Flower Doll Amigurumi – A Sweet & Soothing Crochet Pattern
Bring this adorable, sleepy-eyed flower doll to life! Featuring a sweet yellow face, a beautiful halo of soft pastel petals, and a cozy mint-green body, this pattern is a joyful, intermediate-friendly project. It’s perfect for gifting, nursery decor, or adding a touch of springtime magic to your handmade collection.
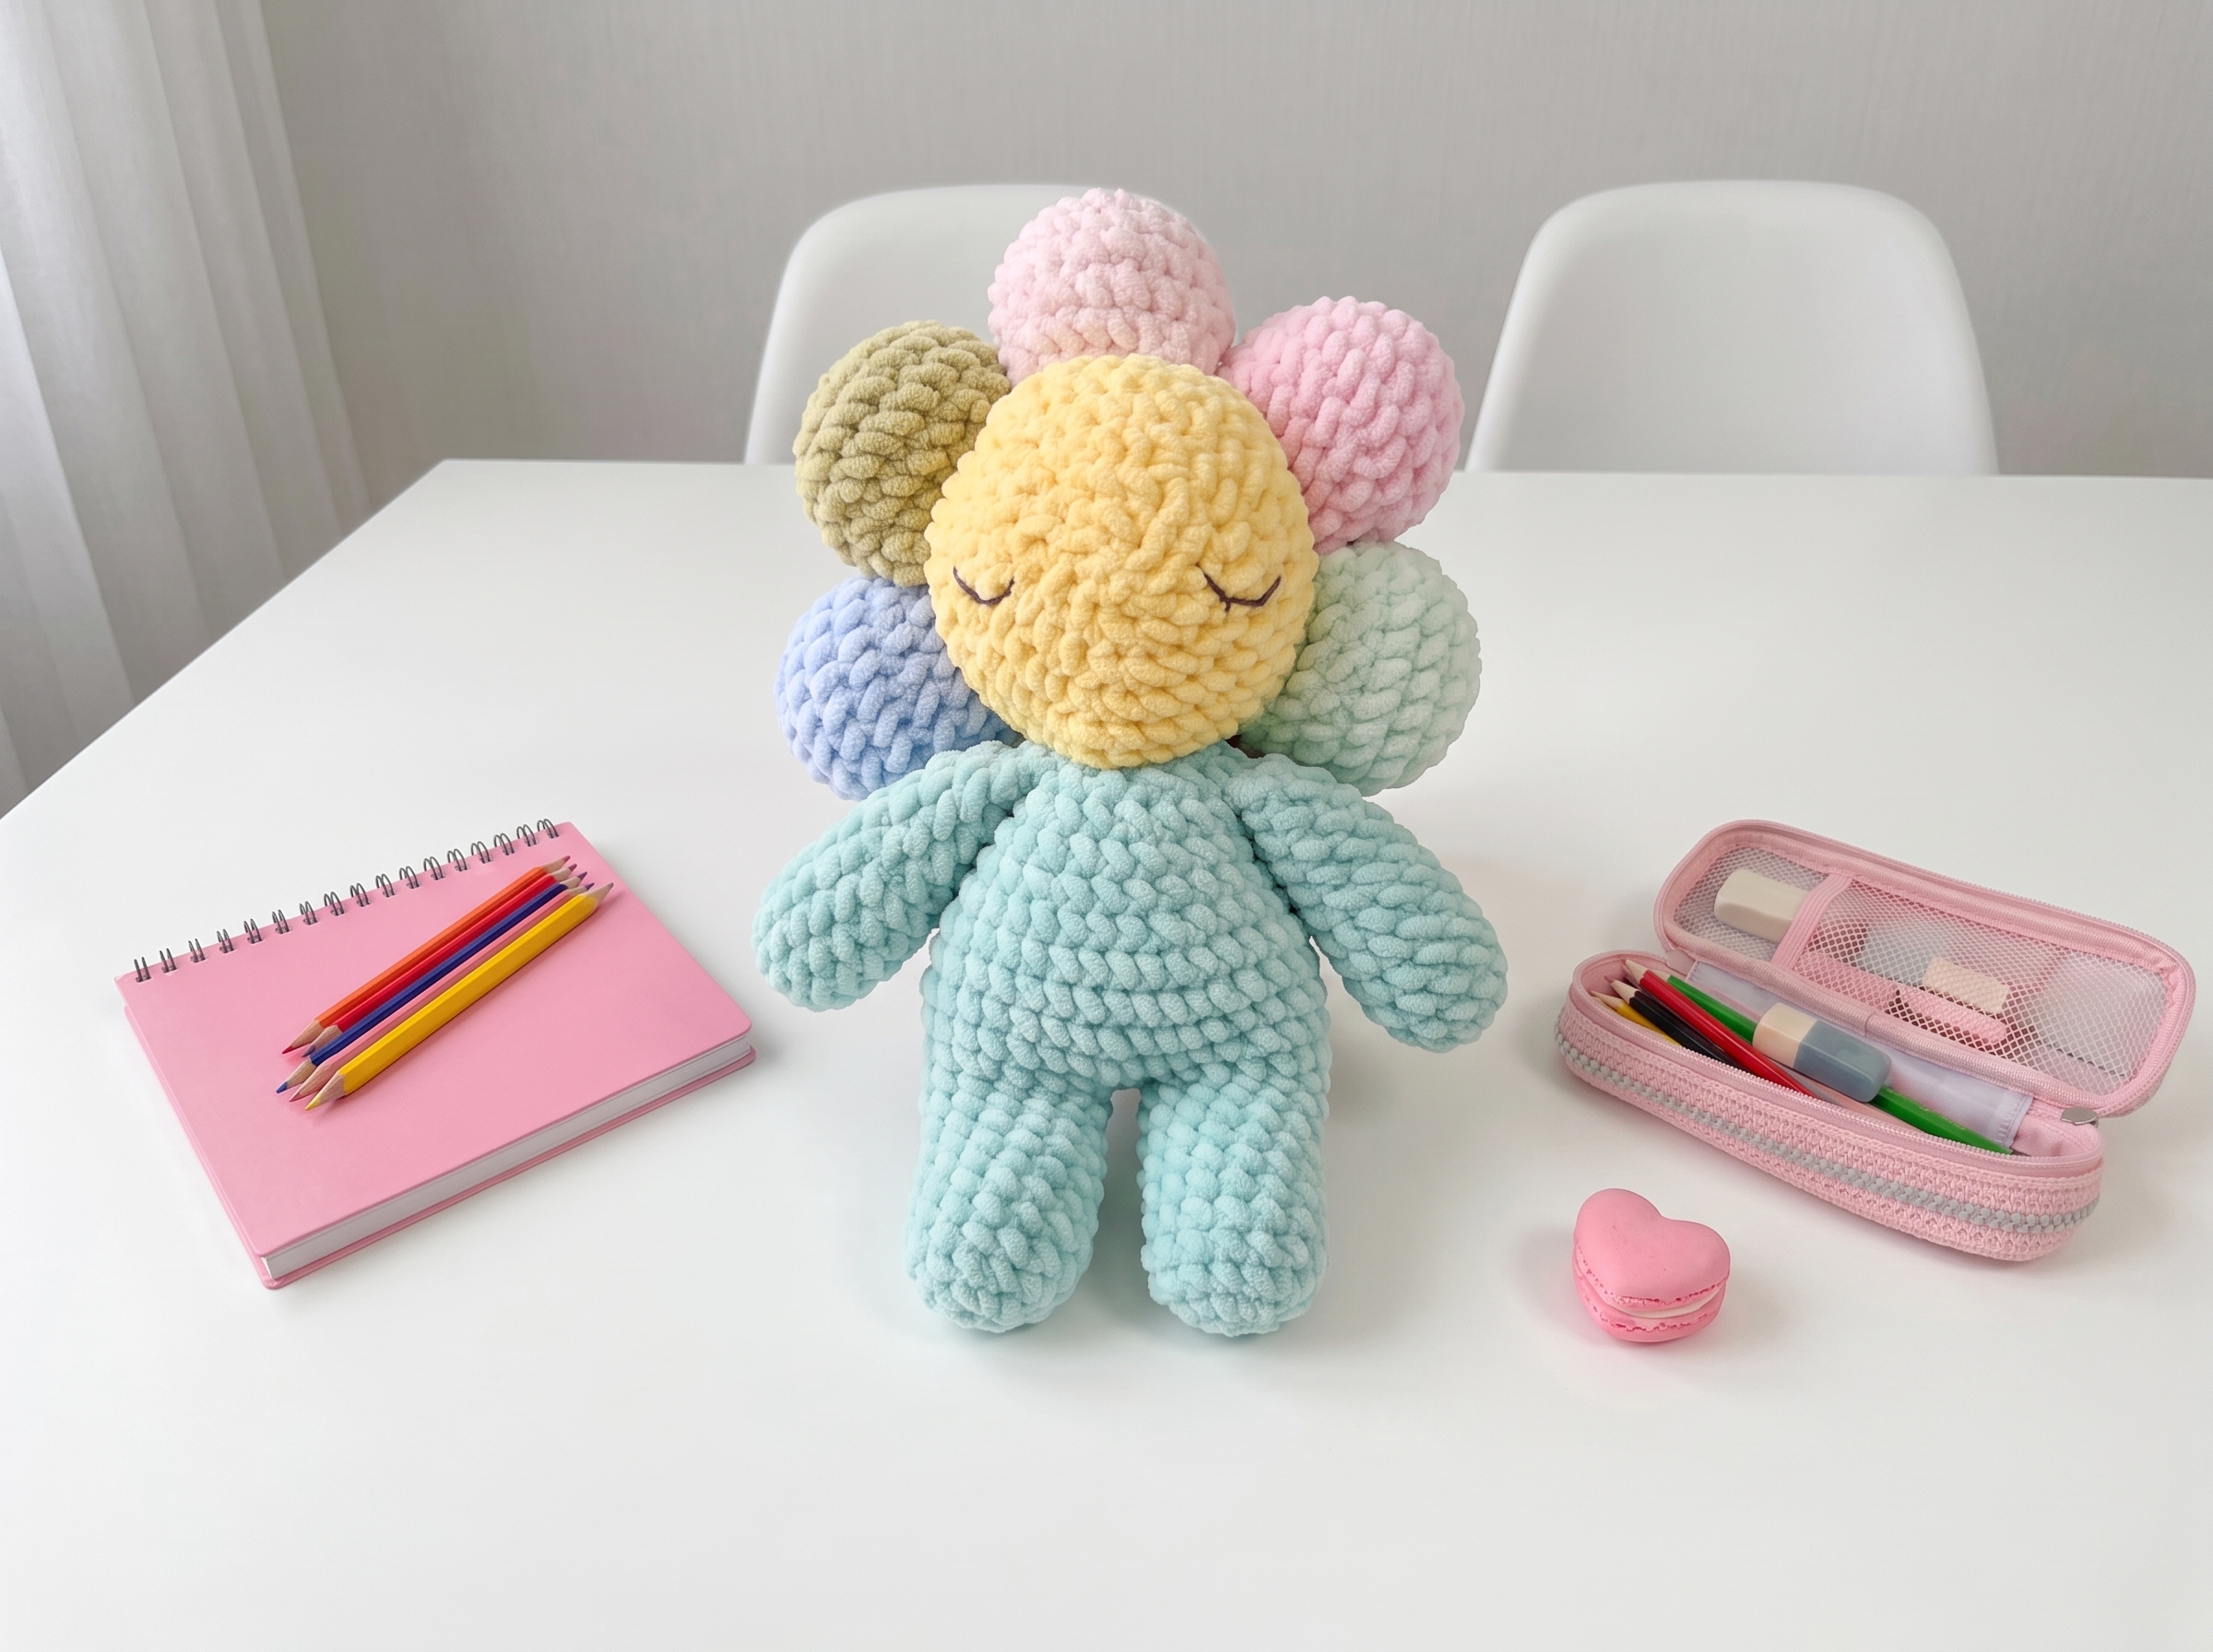
Pastel Flower Doll – Complete Step-by-Step Pattern
1. Gathering Your Supplies
To achieve that soft, huggable look with crisp stitch definition, a smooth cotton or cotton-blend yarn is highly recommended.
- Yarn: Worsted weight cotton or acrylic blend (e.g., YarnArt Jeans, Catania, or similar, approx. 160m / 50g). You will need small amounts of:
- Yellow: For the face
- Mint Green: For the body, arms, legs, and some petals
- Light Pink: For petals
- Light Blue: For petals
- Cream / Off-White: For petals
- Black: A tiny amount of embroidery floss for the eyes
- Hook: 2.5 mm or 3.0 mm (choose the size that gives you a tight, stuff-proof gauge).
- Notions: Poly-fil stuffing, tapestry needle, scissors, stitch markers, and pink pastel chalk or cosmetic blush (for the cheeks!).
What you'll master: Working with multiple colors, seamless shaping, and delicate surface embroidery for expressive features.
2. Abbreviations & Special Techniques
Let’s quickly review a few terms. If you're new to any of these, don't worry—you'll be a pro by the time we reach the petals!
- MR: Magic ring
- ch: Chain
- sc: Single crochet
- inc: Increase (2 sc in one stitch)
- dec: Decrease (2 sc crocheted together invisibly)
- sl st: Slip stitch
- BLO / FLO: Back loop only / Front loop only
3. The Face (Yellow)
The face is worked in a continuous spiral, building up to a perfectly round, plush shape that will serve as the center of our flower.
- R1: 6 sc in MR (6)
- R2: 6 inc (12)
- R3: (1 sc, inc) x 6 (18)
- R4: (2 sc, inc) x 6 (24)
- R5: (3 sc, inc) x 6 (30)
- R6-10: 30 sc (30) [5 rows]
- R11: (3 sc, dec) x 6 (24)
- R12: (2 sc, dec) x 6 (18)
- Stuffing: Begin stuffing the face firmly with poly-fil. Keep the shape round and smooth.
- R13: (1 sc, dec) x 6 (12)
- R14: 6 dec (6)
- Finishing: Fasten off, leaving a long tail. Use your tapestry needle to weave the tail through the front loops of the remaining 6 stitches and pull tight to close the hole seamlessly. Hide the end inside the head.
What you'll master: Spiral increase/decrease sequences and achieving a flawless, spherical shape.
4. The Pastel Petals (Make 1 of each: Pink, Mint, Blue, Cream)
We will crochet the petals flat and then sew them around the head. This allows you to easily mix and match your favorite pastel colors!
- R1: Ch 3. Sc in the 2nd ch from hook, 3 sc in the last ch. Working down the opposite side of the starting chain: 2 sc, sl st in the first sc (6 sts).
- R2: Ch 1 (does not count as a st). 2 sc in the first st, 3 sc, 3 sc in the next st, 3 sc, sl st in the first st (12 sts).
- R3: Ch 1. (Inc, 2 sc) x 2, inc, 3 sc, (inc, 2 sc) x 2, sl st in the first st (18 sts).
- R4: Ch 1. Sc in each stitch around to create a clean, finished edge. Sl st in the first st.
- Finishing: Fasten off, leaving a very long tail (at least 30 cm) for sewing.
What you'll master: Working flat, organic shapes and creating uniform, scalloped edges.
5. The Body (Mint Green)
The body is a simple, sturdy pear-shape that perfectly supports the beautiful flower head.
- R1: 6 sc in MR (6)
- R2: 6 inc (12)
- R3: (1 sc, inc) x 6 (18)
- R4: (2 sc, inc) x 6 (24)
- R5-12: 24 sc (24) [8 rows]
- R13: (2 sc, dec) x 6 (18)
- R14-15: 18 sc (18) [2 rows]
- Stuffing: Stuff the body firmly, especially the lower half, so your doll can sit or stand upright.
- R16: (1 sc, dec) x 6 (12)
- R17: 6 dec (6)
- Finishing: Fasten off, leaving a long tail for attaching the head. Weave the tail through the front loops to cinch the hole closed.
What you'll master: Structural stuffing and structured torso decreasing.
6. Arms & Legs (Mint Green, Make 4)
These are kept small, simple, and stubby to match the sweet, minimalist aesthetic of the doll.
- R1: 6 sc in MR (6)
- R2-4: 6 sc (6) [3 rows]
- Finishing: Fasten off, leaving a long tail for sewing. Do not stuff.
What you'll master: Creating uniform, un-stuffed appendages.
7. Assembly & The Magic of Embroidery
Now for the most rewarding part: bringing your flower doll’s personality to life!
- Attach the Petals: Arrange your 4 colored petals evenly around the back and sides of the yellow face. Use the long tails and a tapestry needle to sew them securely in place, overlapping the bases slightly so no yellow shows through the gaps.
- Head to Body: Sew the completed flower head securely to the top of the mint green body.
- Limbs: Sew the arms to the upper sides of the body, and the legs to the bottom front, spacing them evenly so the doll sits nicely.
- The Sleeping Face: This is where the magic happens! Thread a tapestry needle with black embroidery floss.
- Eyes: Embroider two gentle, downward-curving arcs (like little rainbows) to create a peaceful, sleeping expression. Space them about 6–8 stitches apart.
- Cheeks: Take a dry, clean makeup brush or cotton swab, dip it lightly into pink pastel chalk or cosmetic blush, and gently tap it onto the cheeks just below and slightly outward from the eyes.
- Optional: Add a tiny vertical stitch in the center for a delicate nose.
What you'll master: Multi-step structural assembly, strategic color placement, and surface embroidery for expressive, heartwarming facial features.
Final Section: Where to Go from Here
Congratulations! By completing this Pastel Flower Doll, you’ve practiced foundational spiral shaping, multi-color assembly, and the delicate art of facial embroidery. This project is a fantastic confidence-builder and makes an absolutely heartwarming gift for a new baby, a friend, or even yourself!
From here, try experimenting with different color palettes to create a whole "garden" of flower dolls. You could make an "autumn" version with mustard, rust, and olive green, or a "winter" version with icy blues, silvers, and crisp white. Happy crocheting, and enjoy your beautiful new handmade friend!