October 5, 2026
Bonesy the Keychain Skeleton
Meet the friendliest little skeleton you will ever carry in your pocket. Bonesy has a round cream skull with big black eye sockets, a tiny triangle nose, and a stitched toothy grin. His ribcage is striped with black, and his long ribbed arms stretch up over his head to hold on to the keyring, like he is hanging on for dear life. He is made from tiny tubes and spheres, so he works up fast and is a great way to use up scrap cotton. Hang him on your keys, your bag zipper, or your Halloween tree. Pour something warm, grab your softest cream yarn, and let us make a spooky little friend.
Jump to pattern instructions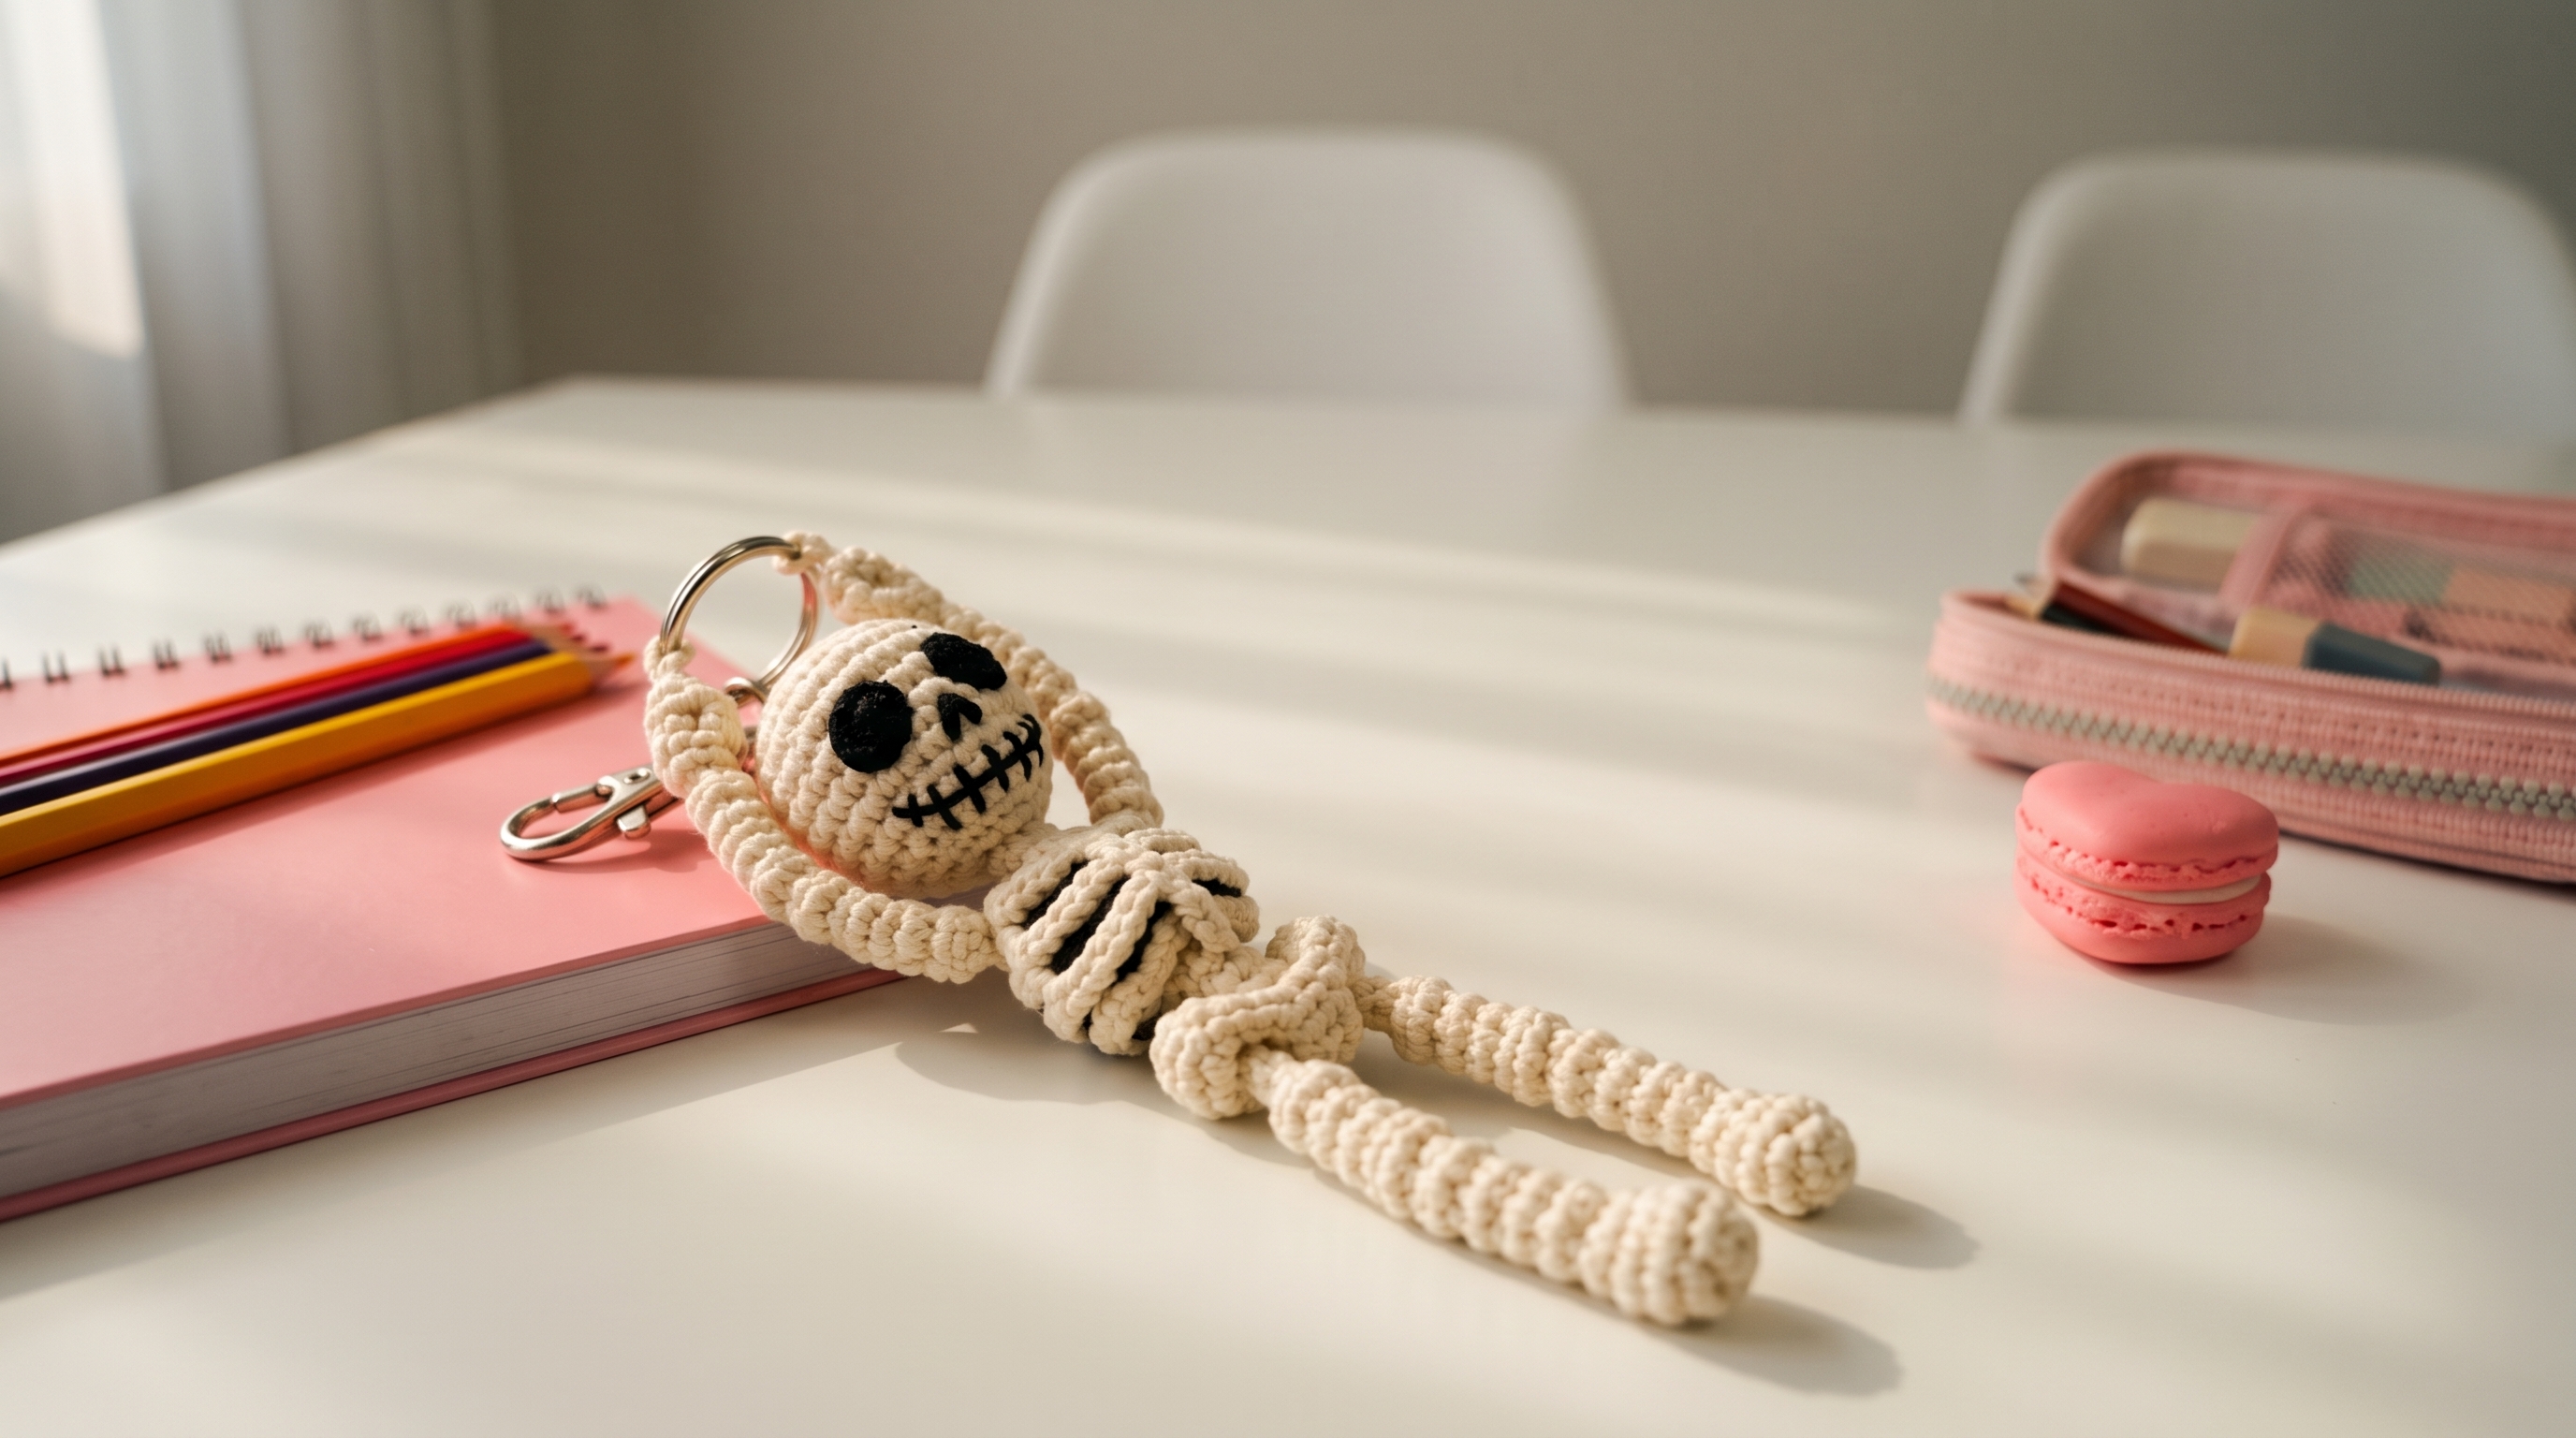
Bonesy the Keychain Skeleton
Difficulty: Easy to intermediate (tiny pieces and lots of sewing, but only basic stitches)
Finished Size: About 7 inches (18 cm) long from the top of the head to the bottom of the feet, not including the keyring.
Time to Complete: 3 to 4 hours.
What You Will Need
Yarn:
- Cream or off-white (C), about 60 yards (55 m)
- Black (K), a small scrap of about 5 yards (4.5 m), for the face and ribs
- Tip: Use a DK or sport weight 100% cotton yarn. Cotton gives crisp stitches that look like carved bone. Use a hook two sizes smaller than the ball band suggests, so the stuffing does not show through.
Tools:
- 2.5 mm (C/2) crochet hook
- 1 split keyring with a swivel clasp or a lobster clasp, about 1 inch (2.5 cm) wide
- Poly-fil or fiberfill stuffing
- Yarn needle with a large eye for sewing and embroidering
- Black embroidery thread or yarn
- Stitch markers
- Sharp scissors
- Straight pins
- Tweezers or the back end of a pencil, for stuffing tiny pieces
The Basics (US Terms)
- MR = magic ring
- sc = single crochet
- inc = increase (work 2 single crochets into the same stitch)
- dec = decrease (work 2 single crochets together, invisible decrease is best)
- sl st = slip stitch
- BLO = back loop only
- C, K = cream, black
- All pieces are worked in continuous rounds. Use a stitch marker to mark the first stitch of each round.
Let Us Get Started
Bonesy is made of a skull, a ribcage, a pelvis, two arms, and two legs. Then add the face and ribs with embroidery.
Part 1: The Skull
Worked with cream yarn.
- Round 1: Work 6 sc into a magic ring. (6 stitches)
- Round 2: Inc in every stitch around. (12 stitches)
- Round 3: (1 sc, inc) repeat 6 times. (18 stitches)
- Round 4: (2 sc, inc) repeat 6 times. (24 stitches)
- Rounds 5 to 8: Work 1 sc in every stitch around. (24 stitches)
- Round 9: (2 sc, dec) repeat 6 times. (18 stitches)
- Stuff the skull firmly so it is nice and round.
- Round 10: (1 sc, dec) repeat 6 times. (12 stitches)
- Round 11: Dec 6 times. (6 stitches)
- Cut the yarn, leaving a long tail. Pull the tail through the front loops of the last 6 stitches and pull tight to close. Weave in the end.
Part 2: The Ribcage
Worked with cream yarn.
- Round 1: Work 6 sc into a magic ring. (6 stitches)
- Round 2: Inc in every stitch around. (12 stitches)
- Round 3: (1 sc, inc) repeat 6 times. (18 stitches)
- Round 4: (2 sc, inc) repeat 6 times. (24 stitches)
- Rounds 5 to 8: Work 1 sc in every stitch around. (24 stitches)
- Round 9: (2 sc, dec) repeat 6 times. (18 stitches)
- Round 10: Work 1 sc in every stitch around. (18 stitches)
- Stuff the ribcage firmly, but keep it a little oval.
- Round 11: (1 sc, dec) repeat 6 times. (12 stitches)
- Cut the yarn, leaving a long tail for sewing. Leave the 12 stitches open for attaching the pelvis.
- Gently press the ribcage so it is slightly flatter on the front and back, like a real ribcage.
Part 3: The Pelvis
Worked with cream yarn.
- Round 1: Work 6 sc into a magic ring. (6 stitches)
- Round 2: Inc in every stitch around. (12 stitches)
- Round 3: (1 sc, inc) repeat 6 times. (18 stitches)
- Rounds 4 to 5: Work 1 sc in every stitch around. (18 stitches)
- Round 6: (1 sc, dec) repeat 6 times. (12 stitches)
- Stuff firmly.
- Cut the yarn, leaving a long tail for sewing. Leave the end open.
- Press the pelvis flat, so it looks like a wide, rounded bowl.
Part 4: The Arms (Make 2)
Worked with cream yarn. Start at the hand.
- Round 1: Work 6 sc into a magic ring. (6 stitches)
- Round 2: (1 sc, inc) repeat 3 times. (9 stitches)
- Round 3: Work 1 sc in every stitch around. (9 stitches)
- Round 4: (1 sc, dec) repeat 3 times. (6 stitches) This is the knobby hand.
- Round 5: Work 1 sc in every stitch around. (6 stitches)
- Stuff the hand with a tiny bit of stuffing.
- Rounds 6 to 8: Work 1 sc in the BLO of every stitch around. (6 stitches) Working in the back loops gives the shaft its ribbed bone look.
- Round 9: (1 sc, inc) repeat 3 times. (9 stitches) This is the elbow knob.
- Round 10: Work 1 sc in every stitch around. (9 stitches)
- Round 11: (1 sc, dec) repeat 3 times. (6 stitches)
- Stuff the elbow knob lightly.
- Rounds 12 to 14: Work 1 sc in the BLO of every stitch around. (6 stitches)
- Round 15: (1 sc, inc) repeat 3 times. (9 stitches) This is the shoulder knob.
- Round 16: Work 1 sc in every stitch around. (9 stitches)
- Round 17: (1 sc, dec) repeat 3 times. (6 stitches)
- Stuff the shoulder knob lightly.
- Cut the yarn, leaving a long tail for sewing. Leave the end open.
Part 5: The Legs (Make 2)
Worked with cream yarn. Start at the foot.
- Round 1: Work 6 sc into a magic ring. (6 stitches)
- Round 2: (1 sc, inc) repeat 3 times. (9 stitches)
- Round 3: Work 1 sc in every stitch around. (9 stitches)
- Round 4: (1 sc, dec) repeat 3 times. (6 stitches) This is the rounded foot.
- Round 5: Work 1 sc in every stitch around. (6 stitches)
- Stuff the foot with a tiny bit of stuffing.
- Rounds 6 to 11: Work 1 sc in the BLO of every stitch around. (6 stitches)
- Round 12: (1 sc, inc) repeat 3 times. (9 stitches) This is the knee knob.
- Round 13: Work 1 sc in every stitch around. (9 stitches)
- Round 14: (1 sc, dec) repeat 3 times. (6 stitches)
- Stuff the knee knob lightly.
- Rounds 15 to 20: Work 1 sc in the BLO of every stitch around. (6 stitches)
- Round 21: (1 sc, inc) repeat 3 times. (9 stitches) This is the hip knob.
- Round 22: Work 1 sc in every stitch around. (9 stitches)
- Round 23: (1 sc, dec) repeat 3 times. (6 stitches)
- Stuff the hip knob lightly.
- Cut the yarn, leaving a long tail for sewing. Leave the end open.
Embroidery
Use the black embroidery thread or yarn and the yarn needle. Pull the stitches snug, but not so tight that they pucker the fabric. Knot the ends on the inside and bury them under the surface.
The Face:
- Eyes: Embroider two large, rounded ovals on the skull, about 5 stitches apart and a little above the center. Each oval should be about 4 stitches wide and 4 rounds tall. Fill them in with small straight stitches, side by side, until the oval is solid black.
- Nose: Between the eyes and a little lower, embroider a small upside-down triangle, about 2 stitches wide. Fill it in with a few tiny stitches.
- Mouth: Below the nose, embroider a horizontal line about 8 stitches wide. Then add 5 or 6 short vertical stitches across the line, evenly spaced, to make the teeth.
The Ribs:
- Find the front of the ribcage, which is the side that faces you when the ribcage is flat.
- Embroider 3 curved black lines on each side of the center, starting near the middle and curving outward and downward. Keep the lines about 2 rounds apart.
- Start the lines a little away from the center, to leave a gap for the breastbone. Make each line about 6 to 8 stitches long.
Assembly and Finishing
This is where Bonesy comes to life. Take your time pinning before you sew.
Making the Body:
- Pin the pelvis to the bottom of the ribcage, with the open ends together, and the pelvis tilted slightly forward.
- Sew them together all the way around with the ribcage tail, using small, firm stitches. Add a bit more stuffing before you close, if needed.
Attaching the Legs:
- Pin the hip knob of each leg to the bottom side of the pelvis, about 3 stitches apart.
- Sew each leg on firmly, going around twice. The legs should hang straight down.
Attaching the Head:
- Pin the skull on top of the ribcage, tilted slightly forward.
- Sew all the way around the base of the skull, going through the top stitches of the ribcage. Sew firmly, so the head does not wobble.
Attaching the Arms:
- Pin the shoulder knob of each arm on the side of the ribcage, near the top and just below the head.
- Sew each arm on firmly with the tail.
- Raise the arms up on each side of the head, with the elbows bent outward. The hands should meet above the head.
Adding the Keyring:
- Slide the keyring through the loop of the clasp, if it does not already have one.
- Place the keyring above the head, between the hands.
- Using cream yarn, wrap the hands around the ring, and sew them together behind it with a few small stitches, so the ring stays in place. Make sure the ring can still swing freely.
- Weave in all remaining ends.
A Few Friendly Tips
- Keep it snug: Keep your tension tight and even. The tiny pieces need tight stitches, or the stuffing will show.
- Stuffing tiny pieces: Tear off very small tufts of stuffing, and use tweezers or the back of a pencil to push it in. Stuff the knobs a little, and leave the shafts empty so the arms and legs stay bendy.
- Bendy bones: If you want posable arms and legs, wrap a pipe cleaner in cream yarn, and slide it inside each shaft before you stuff the ends.
- Spooky details: Add a tiny bow tie, a witch hat, or a bit of pink for a cheek. A lighter or darker bone shade, such as ivory or taupe, makes the skeleton look older.
- Different uses: Skip the keyring, and add a loop of yarn to the top of the head to make a Halloween ornament, or sew a magnet inside for a fridge friend.
- Size up: For a bigger skeleton, use a worsted weight yarn and a 3.5 mm hook, with the same stitch counts, and add extra rounds to the shafts.
- Safe for little ones: Since all the details are embroidered, this skeleton is safe for small children. Sew the arms and legs on with extra stitches, and make sure the keyring is securely fastened.
I hope you enjoy making this little spooky friend. He is such a fun, quick project and makes a wonderful handmade gift or Halloween treat.
If you run into any trouble or just want to share how your skeleton turned out, please reach out. I love seeing what you create.
Happy crocheting and happy Halloween!