October 5, 2026
Pumpkin Pup
This little white puppy is all dressed up for Halloween. He has a big round head, long floppy black ears, a shiny black nose, and sleepy smiling eyes. A cozy orange jack-o'-lantern tummy, a tiny red collar, and a pumpkin cap with a leafy top finish off his costume. His arms and feet are small and stubby, so he stands up proudly all on his own. He is made from simple spheres, so he is a lovely project for a cozy autumn weekend. Pour something warm, grab your softest white yarn, and let us go trick-or-treating.
Jump to pattern instructions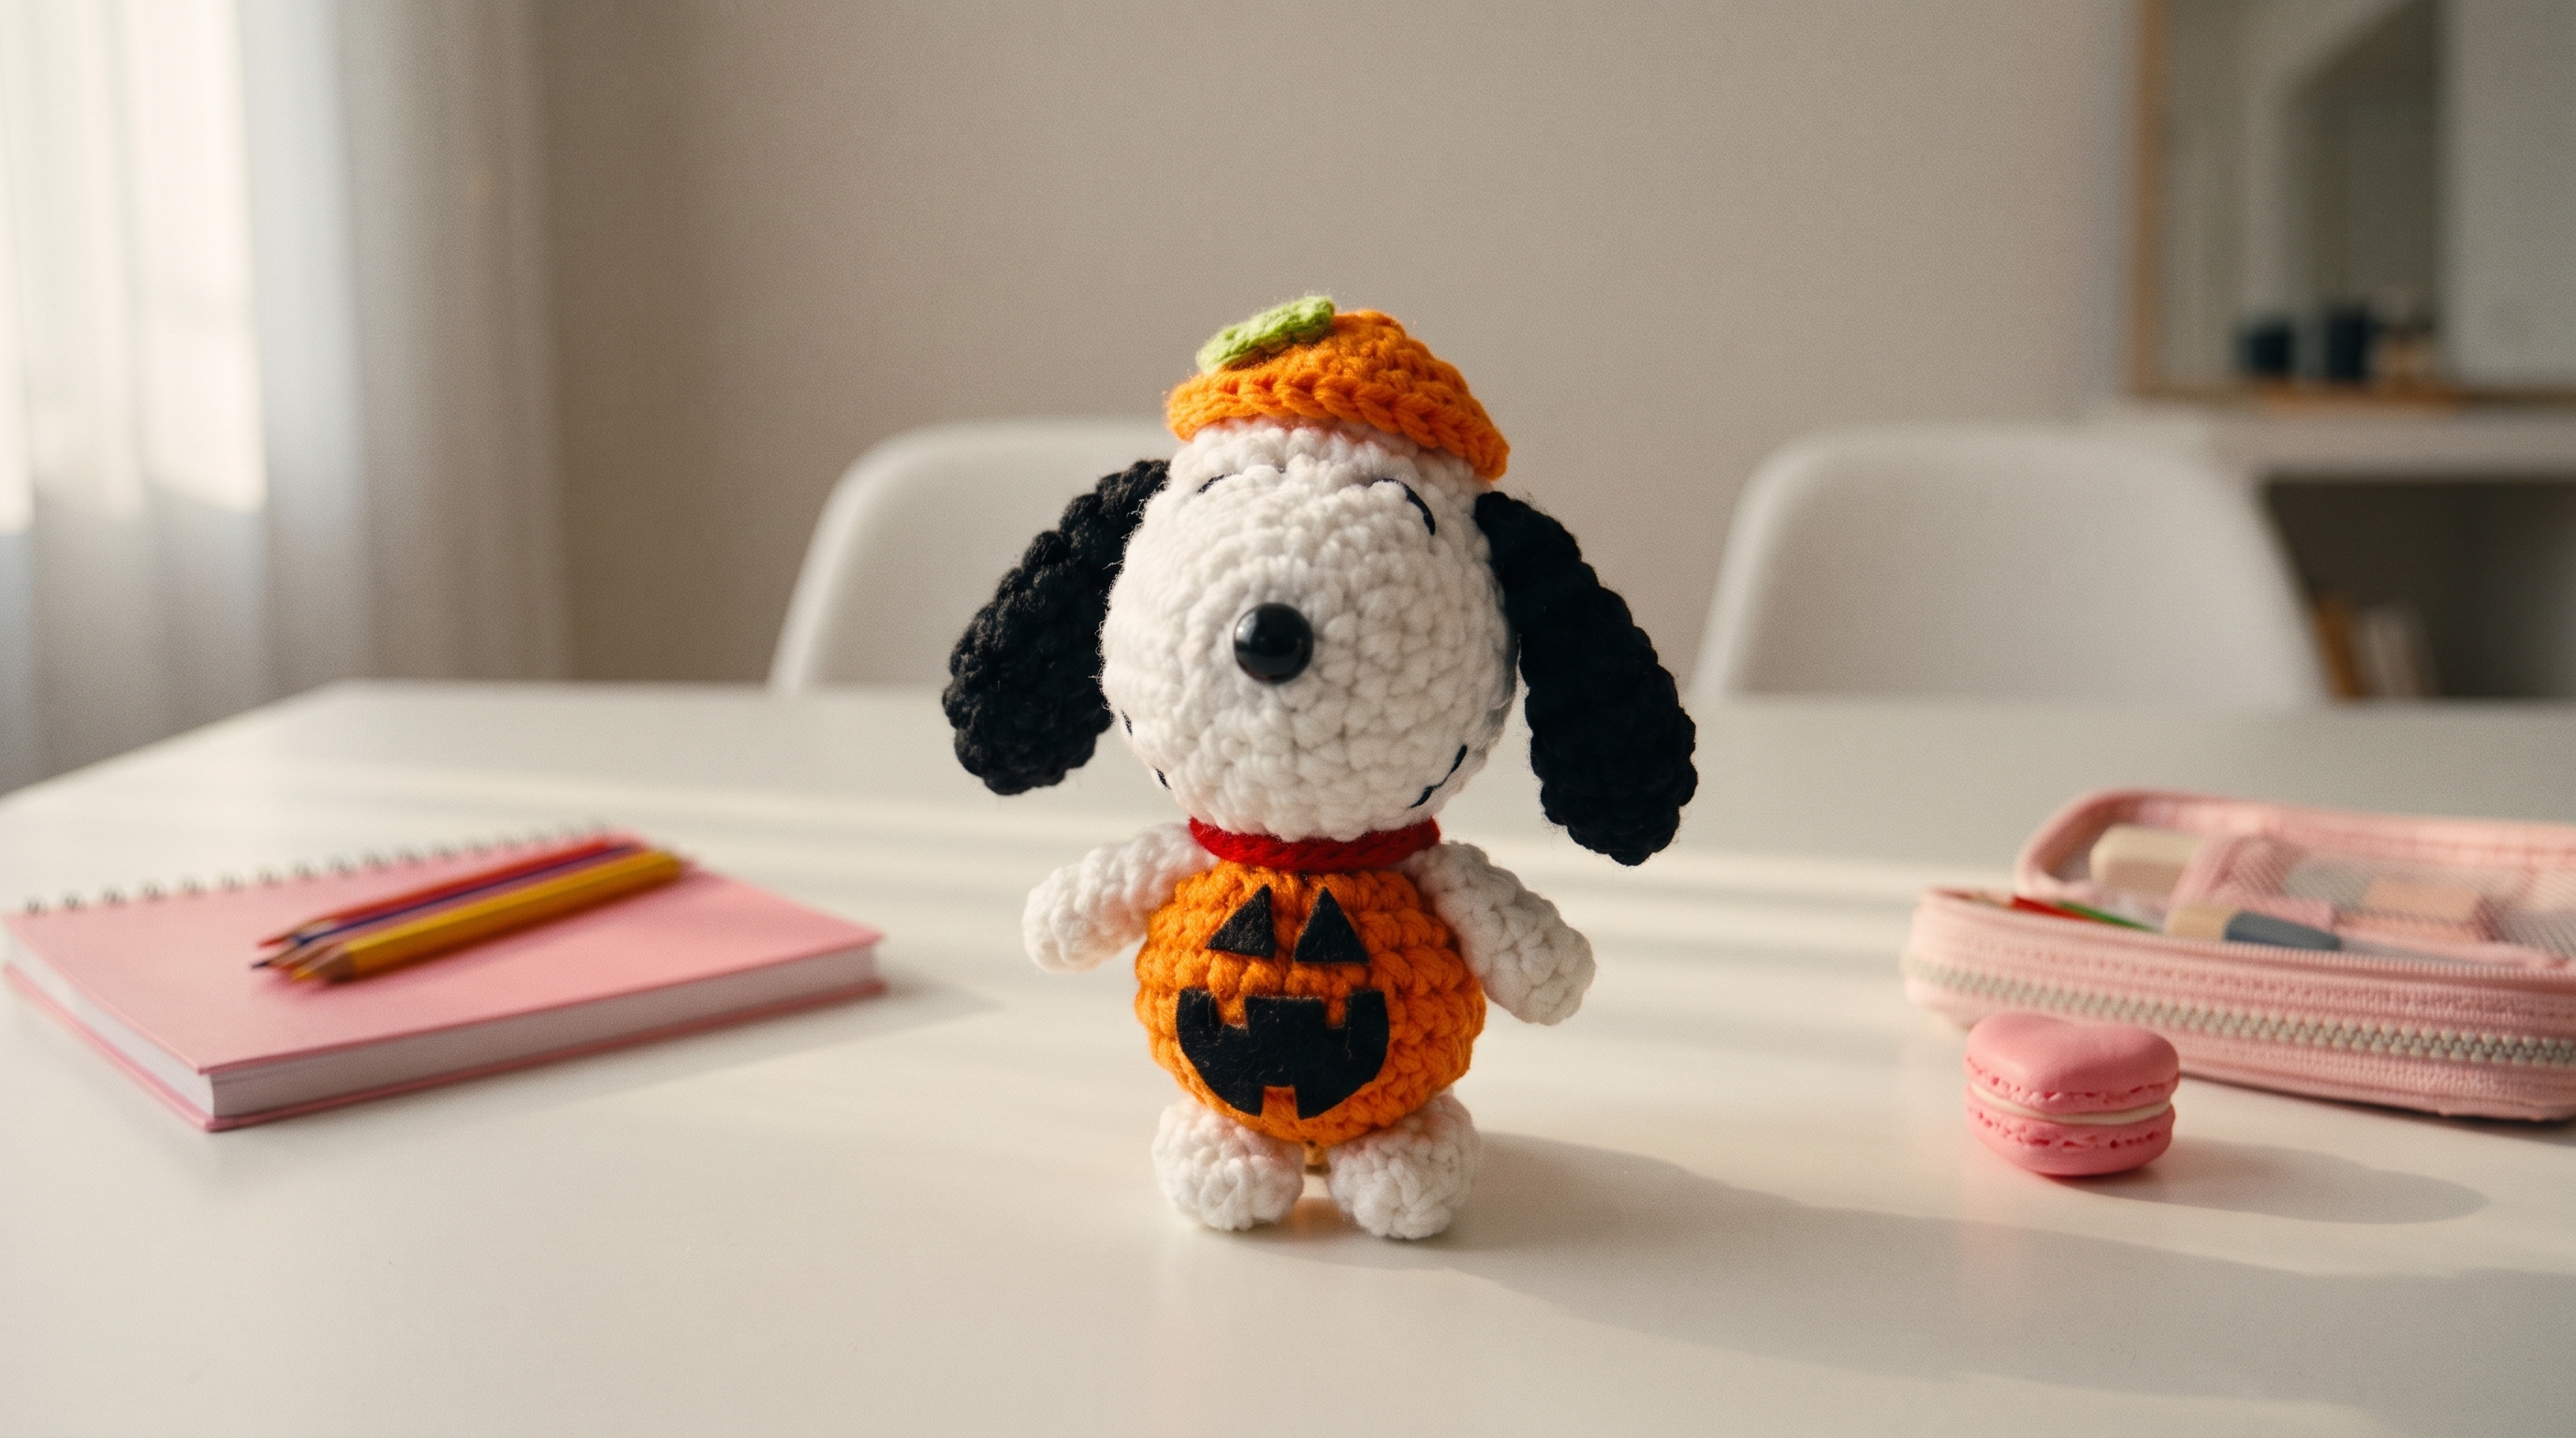
Pumpkin Pup
Difficulty: Easy to intermediate (basic shapes, plus a few small parts to sew on)
Finished Size: About 6 inches (15 cm) tall in DK weight yarn.
Time to Complete: 4 to 5 hours.
What You Will Need
Yarn:
- White (W), for the head, arms, and feet
- Black (K), for the ears
- Orange (O), for the body and the cap
- Red (R), for the collar
- Green (G), a tiny scrap, for the leaf
- Tip: Use a DK weight cotton or cotton blend yarn. Cotton gives crisp stitches that hide the stuffing. Use a smaller hook than usual so your stitches stay tight.
Tools:
- 3.0 mm (D/3) crochet hook
- 12 mm black safety nose (or a 12 mm black safety eye, or a black bead)
- Black felt for the jack-o'-lantern face, or black yarn for embroidering it
- Poly-fil or fiberfill stuffing
- Yarn needle with a large eye for sewing and embroidering
- Black embroidery thread or yarn for the eyes and smile
- Fabric glue or a sewing needle and thread (for the felt)
- Stitch markers
- Sharp scissors
- Straight pins for placing the pieces before sewing
The Basics (US Terms)
- MR = magic ring
- ch = chain
- sc = single crochet
- inc = increase (work 2 single crochets into the same stitch)
- dec = decrease (work 2 single crochets together, invisible decrease is best)
- sl st = slip stitch
- hdc = half double crochet
- W, K, O, R, G = white, black, orange, red, green
- Unless stated otherwise, pieces are worked in continuous rounds. Use a stitch marker to mark the first stitch of each round.
Let Us Get Started
The pup is made of a head, a body, two ears, two arms, two feet, a cap, and a collar. Then add the face and the pumpkin tummy.
Part 1: The Head
Worked with white yarn.
- Round 1: Work 6 sc into a magic ring. (6 stitches)
- Round 2: Inc in every stitch around. (12 stitches)
- Round 3: (1 sc, inc) repeat 6 times. (18 stitches)
- Round 4: (2 sc, inc) repeat 6 times. (24 stitches)
- Round 5: (3 sc, inc) repeat 6 times. (30 stitches)
- Round 6: (4 sc, inc) repeat 6 times. (36 stitches)
- Rounds 7 to 12: Work 1 sc in every stitch around. (36 stitches)
- Round 13: (4 sc, dec) repeat 6 times. (30 stitches)
- Round 14: (3 sc, dec) repeat 6 times. (24 stitches)
- Before you close the head, insert the safety nose in the center front, between rounds 8 and 9. Secure it tightly on the inside.
- Stuff the head firmly so it is nice and round.
- Round 15: (2 sc, dec) repeat 6 times. (18 stitches)
- Round 16: (1 sc, dec) repeat 6 times. (12 stitches)
- Round 17: Dec 6 times. (6 stitches)
- Cut the yarn, leaving a long tail. Pull the tail through the front loops of the last 6 stitches and pull tight to close. Weave in the end.
Part 2: The Body
Worked with orange yarn.
- Round 1: Work 6 sc into a magic ring. (6 stitches)
- Round 2: Inc in every stitch around. (12 stitches)
- Round 3: (1 sc, inc) repeat 6 times. (18 stitches)
- Round 4: (2 sc, inc) repeat 6 times. (24 stitches)
- Round 5: (3 sc, inc) repeat 6 times. (30 stitches)
- Rounds 6 to 9: Work 1 sc in every stitch around. (30 stitches)
- Round 10: (3 sc, dec) repeat 6 times. (24 stitches)
- Round 11: (2 sc, dec) repeat 6 times. (18 stitches)
- Stuff the body firmly, making sure the bottom is nice and flat so the pup sits upright.
- Round 12: (1 sc, dec) repeat 6 times. (12 stitches)
- Cut the yarn, leaving a long tail for sewing. Leave the 12 stitches open for attaching the head.
Part 3: The Ears (Make 2)
Worked with black yarn. Start at the tip.
- Round 1: Work 6 sc into a magic ring. (6 stitches)
- Round 2: (1 sc, inc) repeat 3 times. (9 stitches)
- Round 3: (2 sc, inc) repeat 3 times. (12 stitches)
- Round 4: (3 sc, inc) repeat 3 times. (15 stitches)
- Rounds 5 to 9: Work 1 sc in every stitch around. (15 stitches)
- Round 10: (3 sc, dec) repeat 3 times. (12 stitches)
- Rounds 11 to 12: Work 1 sc in every stitch around. (12 stitches)
- Cut the yarn, leaving a long tail for sewing. Do not stuff. Pinch the ear flat, so it looks like a long, floppy oval.
Part 4: The Arms (Make 2)
Worked with white yarn.
- Round 1: Work 6 sc into a magic ring. (6 stitches)
- Round 2: (1 sc, inc) repeat 3 times. (9 stitches)
- Rounds 3 to 6: Work 1 sc in every stitch around. (9 stitches)
- Round 7: (1 sc, dec) repeat 3 times. (6 stitches)
- Stuff very lightly.
- Cut the yarn, leaving a long tail for sewing. Leave the end open.
Part 5: The Feet (Make 2)
Worked with white yarn.
- Round 1: Work 6 sc into a magic ring. (6 stitches)
- Round 2: Inc in every stitch around. (12 stitches)
- Round 3: Work 1 sc in every stitch around. (12 stitches)
- Round 4: (2 sc, dec) repeat 3 times. (9 stitches)
- Rounds 5 to 6: Work 1 sc in every stitch around. (9 stitches)
- Stuff firmly.
- Cut the yarn, leaving a long tail for sewing. Leave the end open.
Part 6: The Pumpkin Cap
Worked with orange yarn.
- Round 1: Work 6 sc into a magic ring. (6 stitches)
- Round 2: Inc in every stitch around. (12 stitches)
- Round 3: (1 sc, inc) repeat 6 times. (18 stitches)
- Round 4: (2 sc, inc) repeat 6 times. (24 stitches)
- Round 5: (3 sc, inc) repeat 6 times. (30 stitches)
- Rounds 6 to 7: Work 1 sc in every stitch around. (30 stitches)
- Join with a sl st to the next stitch and fasten off, leaving a long tail for sewing. Do not stuff.
The Leaf (green):
- Ch 6. Sl st in the 2nd ch from the hook, sc in the next ch, hdc in the next ch, sc in the next ch, sl st in the last ch.
- Fasten off, leaving a long tail for sewing.
Part 7: The Collar
Worked flat with red yarn.
- Foundation: Ch 21.
- Row 1: Sc in the 2nd ch from the hook and in each chain across. (20 stitches)
- Row 2: Ch 1, turn. Sc in each stitch across. (20 stitches)
- Fasten off, leaving a long tail for sewing.
Assembly and Finishing
This is where your pup comes to life. Take your time pinning before you sew.
Making the Face:
- With black embroidery thread, embroider two closed, sleepy eyes on the head, about 10 stitches apart and a few rounds above the nose. Make each eye a small curved line, like a gentle upside-down smile.
- Embroider a small smile on each side of the nose, curving up toward the cheeks, using a few tiny stitches.
- Pull the stitches snug, but not tight enough to pucker the face. Weave in the ends on the inside.
Attaching the Ears:
- Pin an ear on each side of the head, with the open end at the top. Place them about 4 rounds below the top, and angle them down and slightly outward, so they hang like long floppy ears.
- Sew the top of each ear to the head along its open end, using small stitches. Leave the rest of each ear free so it can flop.
Attaching the Cap:
- Pin the cap on top of the head, tilted slightly to one side.
- Sew all the way around the edge of the cap with the long tail, going through the head with small stitches.
- Sew the leaf to the top of the cap, slightly off-center.
Attaching the Head:
- Pin the head on top of the body, tilted very slightly forward.
- Using the long tail from the body, whip stitch all the way around, so the head feels firm and does not wobble. Add a bit more stuffing in the neck before closing, if needed.
Adding the Collar:
- Wrap the collar around the neck, where the head meets the body.
- Sew the two short ends together at the back, then tack the collar to the body with a few small stitches.
Attaching the Arms and Feet:
- Pin the arms on the sides of the body, just below the head, angled slightly outward.
- Sew the top of each arm on firmly, and leave the hands free.
- Pin the feet to the bottom front of the body, about 4 stitches apart, with the toes pointing forward.
- Sew each foot on firmly, going around twice, so the pup can stand.
Adding the Jack-o'-Lantern Face:
- Felt option: Cut two small triangles (about 1/2 inch or 1.2 cm wide) for the eyes, one tiny triangle for the nose, and a wide zigzag mouth (about 1.5 inches or 4 cm wide) from the black felt.
- Arrange them on the front of the body, with the eyes near the top, the nose just below, and the mouth lower down. Glue or sew them on with small stitches.
- Yarn option: Embroider the same shapes with black yarn, using small straight stitches to fill each shape.
- Weave in all remaining ends.
A Few Friendly Tips
- Keep it snug: Keep your tension tight and even. Loose stitches let the stuffing show through, and tight stitches make the pup look neat and chunky.
- Firm neck: Stuff the neck area firmly. A firm neck keeps the big head from drooping.
- Standing strong: If he tips over, add a little more stuffing to the feet and the bottom of the body, and sew the feet a little further apart.
- Make it your own: Try a different costume, such as a ghost sheet, a witch hat, or a bumblebee outfit. Or leave out the costume and make a plain white pup with a red collar.
- Size up: For a bigger pup, use chunky yarn and a larger hook, with the same stitch counts.
- Safe for little ones: For babies and toddlers, skip the safety nose and embroider it with black yarn instead. Embroider the jack-o'-lantern face instead of using felt.
I hope you enjoy making this happy little Halloween pup. He is such a fun project and makes a wonderful handmade gift.
If you run into any trouble or just want to share how your pup turned out, please reach out. I love seeing what you create.
Happy crocheting and happy Halloween!