October 1, 2026
Cozy Shell Snail
Slow down, sip something warm, and make a tiny friend who is in no rush at all. This little snail has a chunky, textured tan shell and a soft gray body that stretches out long and sleepy, with two curious tentacles pointing up to say hello. It is a gentle, relaxing project that works up quickly, and it looks adorable sitting on a desk, a bookshelf, or a windowsill next to your favorite notebook.
Jump to pattern instructions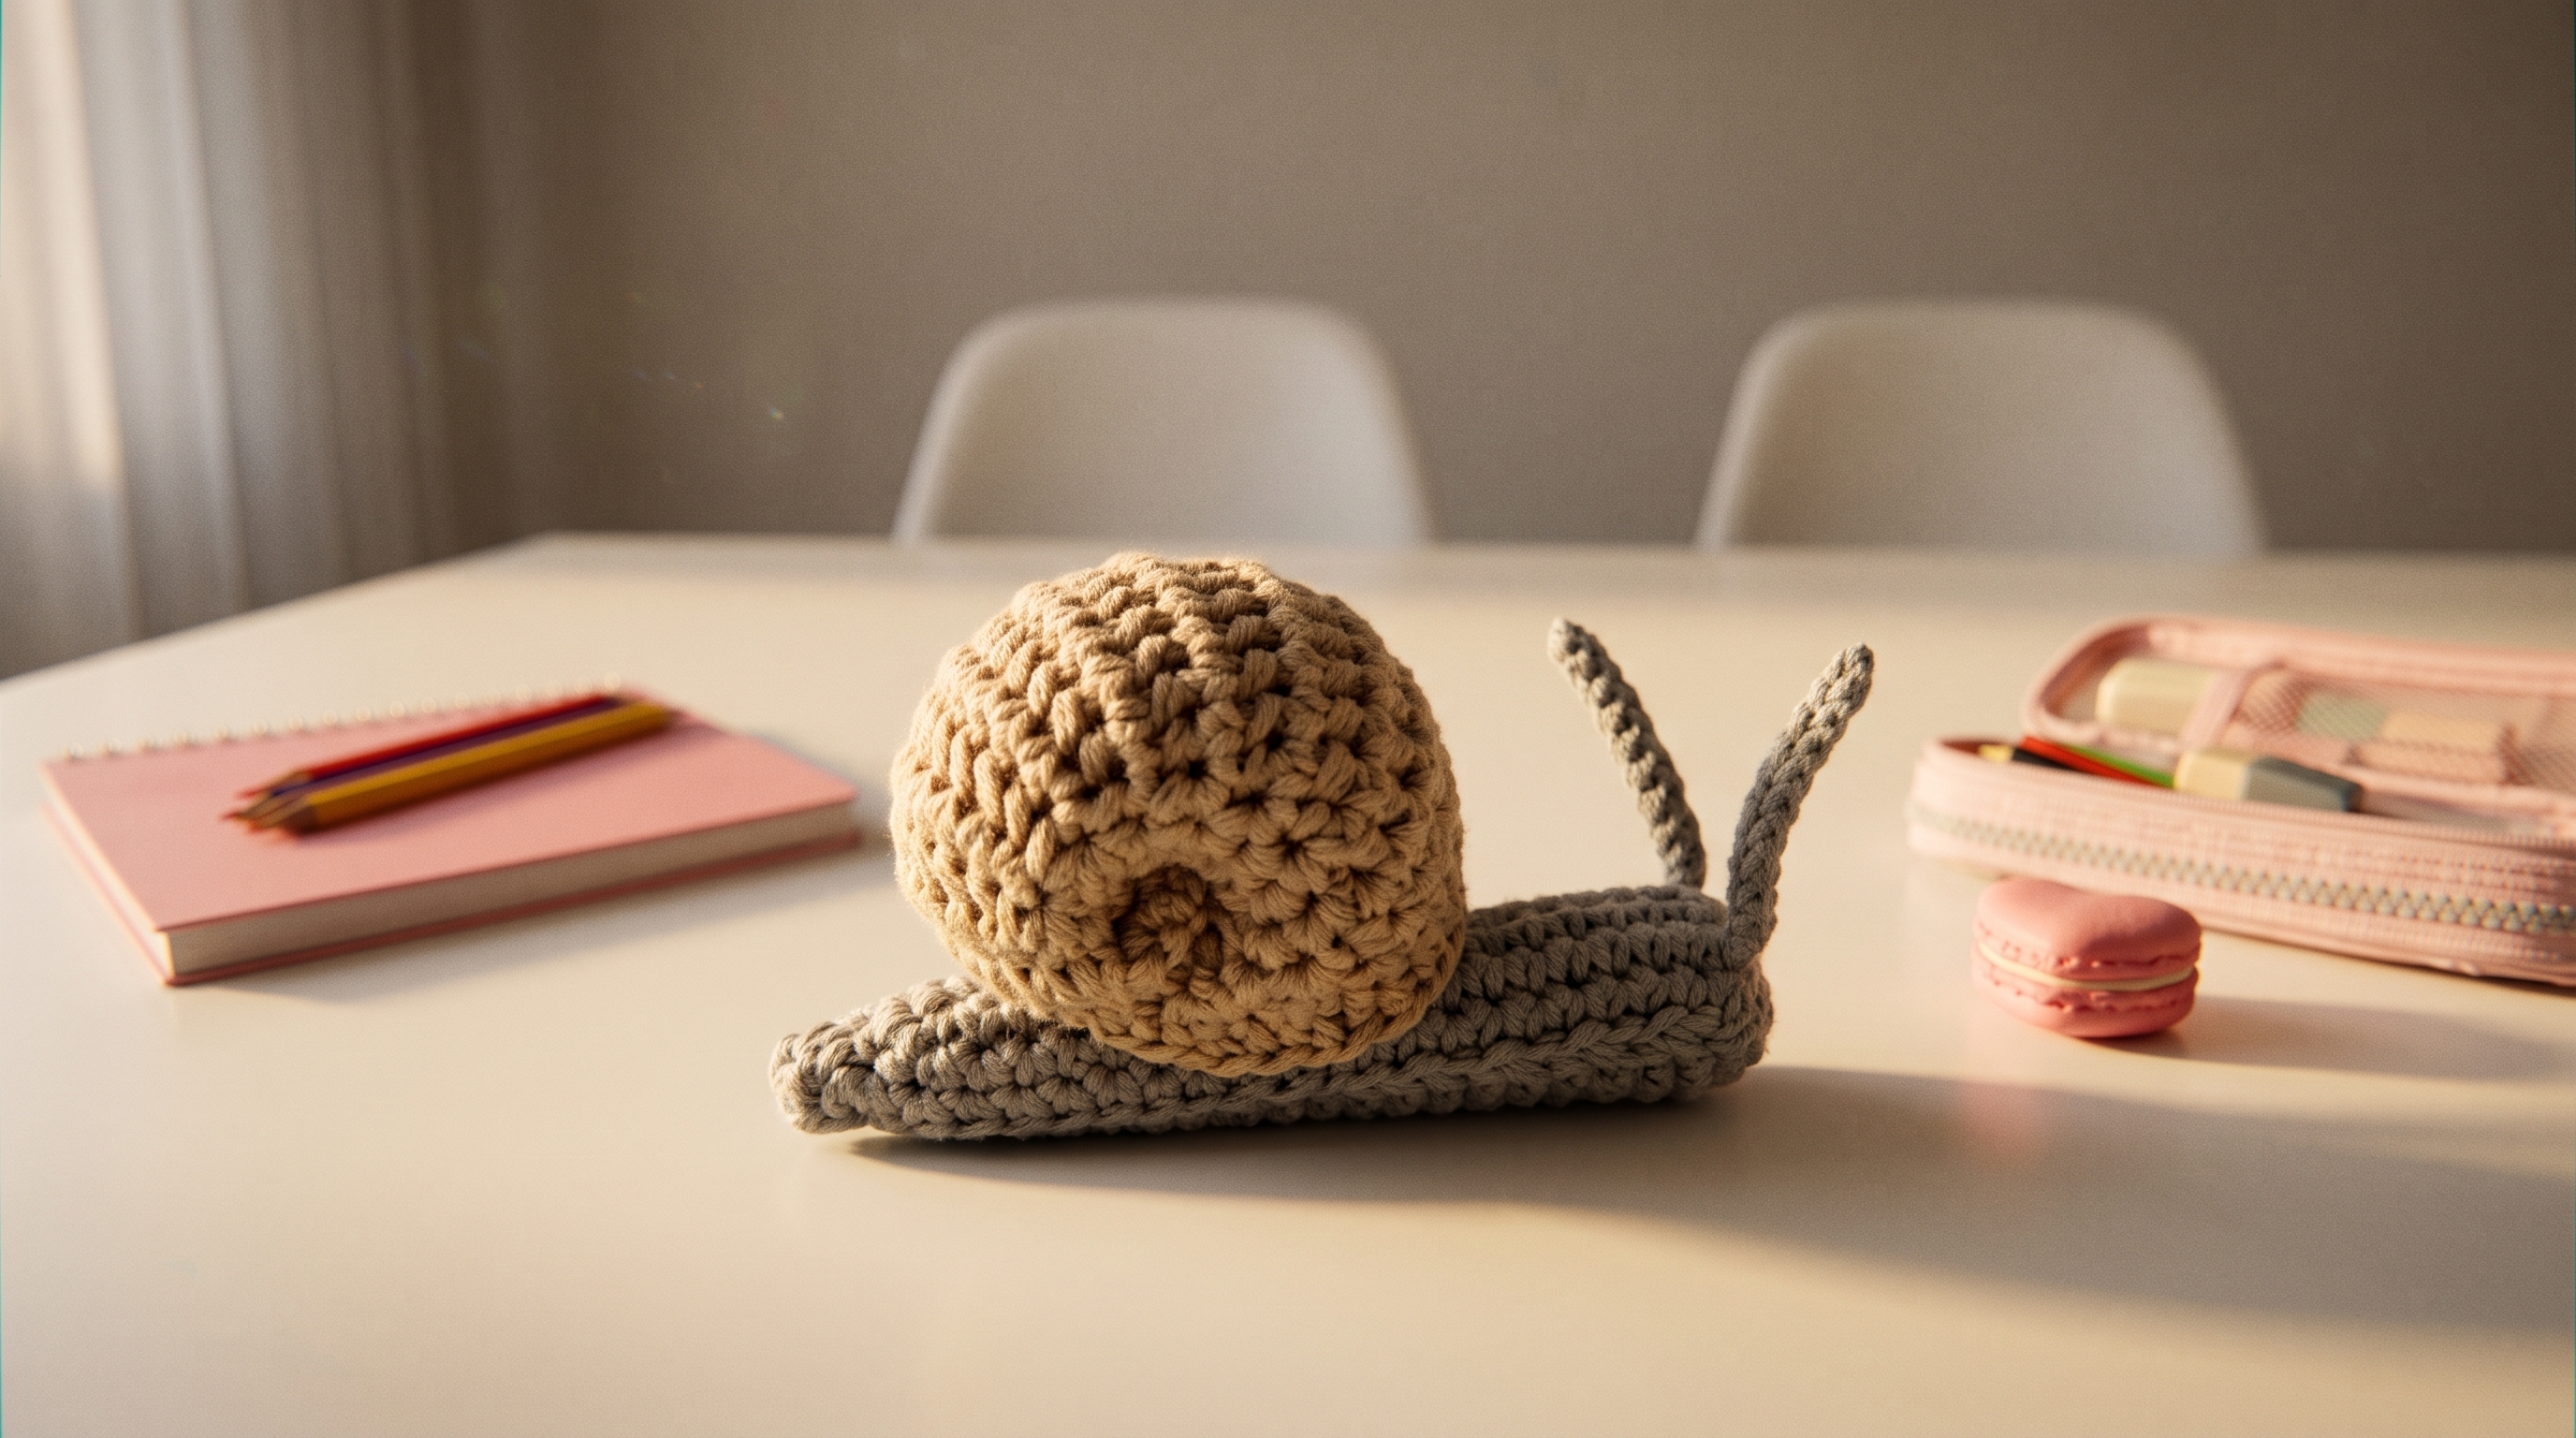
Difficulty: Beginner friendly (a lovely project for practicing basic amigurumi shaping)
Finished Size: About 5 inches long and 3 inches tall.
Time to Complete: 2 to 3 hours.
What You Will Need
Yarn:
- Tan or light brown (for the shell)
- Gray (for the body and tentacles)
- Tip: Use a DK or light worsted weight cotton yarn. Cotton gives the shell that crisp, chunky texture and holds its shape beautifully.
Tools:
- 3.5 mm (E/4) crochet hook. Go down a size if your stuffing peeks through.
- Poly-fil or fiberfill stuffing
- Yarn needle with a large eye for sewing and weaving in ends
- Stitch markers
- Sharp scissors
- Optional: a little extra tan yarn for embroidering the shell swirl
The Basics (US Terms)
- MR = magic ring
- sc = single crochet
- inc = increase (work 2 single crochets into the same stitch)
- dec = decrease (work 2 single crochets together, invisible decrease is best)
- All pieces are worked in continuous rounds. Use a stitch marker to mark the first stitch of each round.
Let Us Get Started
We will make four small pieces, the body, the shell, and two tentacles, and then sew them together.
Part 1: The Body
Worked with gray yarn. Start at the tail tip.
- Round 1: Work 6 sc into a magic ring. (6 stitches)
- Round 2: (1 sc, inc) repeat 3 times. (9 stitches)
- Round 3: Work 1 sc in every stitch around. (9 stitches)
- Round 4: (2 sc, inc) repeat 3 times. (12 stitches)
- Rounds 5 to 6: Work 1 sc in every stitch around. (12 stitches)
- Round 7: (3 sc, inc) repeat 3 times. (15 stitches)
- Rounds 8 to 19: Work 1 sc in every stitch around. (15 stitches) This long stretch makes the stretched-out, sleepy body.
- Round 20: (3 sc, dec) repeat 3 times. (12 stitches)
- Rounds 21 to 22: Work 1 sc in every stitch around. (12 stitches) This is the neck and head area.
- Stuff the body lightly. Keep the tail tip very thin and fill the rest evenly, but do not overstuff so it can lie flat.
- Round 23: Dec 6 times. (6 stitches)
- Cut the yarn, leaving a long tail. Thread it through the front loops of the last 6 stitches and pull tight to close. Weave in the end.
- Gently press the body flat against the table so the bottom becomes the snail's flat foot.
Part 2: The Shell
Worked with tan yarn.
- Round 1: Work 6 sc into a magic ring. (6 stitches)
- Round 2: Inc in every stitch around. (12 stitches)
- Round 3: (1 sc, inc) repeat 6 times. (18 stitches)
- Round 4: (2 sc, inc) repeat 6 times. (24 stitches)
- Round 5: (3 sc, inc) repeat 6 times. (30 stitches)
- Rounds 6 to 10: Work 1 sc in every stitch around. (30 stitches)
- Round 11: (3 sc, dec) repeat 6 times. (24 stitches)
- Round 12: (2 sc, dec) repeat 6 times. (18 stitches)
- Stuff the shell firmly so it is nice and round.
- Round 13: (1 sc, dec) repeat 6 times. (12 stitches)
- Round 14: Dec 6 times. (6 stitches)
- Cut the yarn, leaving a long tail for sewing. Pull the tail through the front loops of the last 6 stitches and pull tight to close. Do not cut the tail yet.
Part 3: The Tentacles (Make 2)
Worked with gray yarn.
- Round 1: Work 5 sc into a magic ring. (5 stitches)
- Rounds 2 to 12: Work 1 sc in every stitch around. (5 stitches)
- Cut the yarn, leaving a long tail for sewing. Do not stuff. The tentacles are meant to be soft and a little floppy, so they can curve and lean in different directions.
Assembly and Finishing
Take your time pinning the pieces in place before you sew.
Adding the Shell Swirl (optional):
- Find the center of the shell, which is the magic ring side. Place this on the side of the shell that will face outward.
- Using the same tan yarn, embroider a small spiral starting at the center and winding outward for about two turns, using a simple backstitch. This gives the shell its sweet snail swirl.
Attaching the Shell:
- Place the shell on top of the body, toward the back and middle, so the tail stretches out behind it and the head peeks out in front.
- Pin it in place, then use the long tail from the shell to sew around the base of the shell, going through the top stitches of the body. Sew all the way around so it feels secure.
Attaching the Tentacles:
- Pin the two tentacles on top of the head, about 4 stitches apart, near the front end of the body.
- Using the long tails, sew them on firmly. Angle one a little forward and one slightly back for a playful, curious look.
- Weave in all remaining ends.
A Few Friendly Tips
- Keep it snug: Keep your tension tight and even, especially on the shell. Loose stitches let the stuffing show through, and a firm shell holds that lovely round shape.
- Flat foot: If your snail wobbles, press the body flat and add a few tiny stitches along the bottom to hold the shape. You can also use a little less stuffing in the lower half.
- Make it your own: Try a pastel shell with a cream body, or a bright shell with a darker body. Tiny black bead eyes on the tentacle tips are also an adorable option. If the snail is for a young child, embroider any details instead of using beads.
- Size up: For a bigger snail, use chunky yarn and a larger hook with the same stitch counts.
I hope you enjoy making this slow and sweet little friend. It is such a calming project, and it makes a perfect handmade gift.
If you run into any trouble or just want to share how your snail turned out, please reach out. I love seeing what you create.
Happy crocheting!