October 19, 2026
Beary Cozy Pouch
This fluffy little bear head is a pouch in disguise. The soft, curly camel-brown "teddy" yarn makes it look like a real plush toy, with round ears, two shiny black eyes, a cream muzzle, and a big black nose. A zipper hides along the flat bottom, so it can hold pencils, makeup, chargers, or a few small treasures. It is worked flat in simple rows with a few decreases, so the shaping is easy, and the yarn does all the work. Pour something warm, pick the softest brown yarn you can find, and let us make a bear to cuddle.
Jump to pattern instructions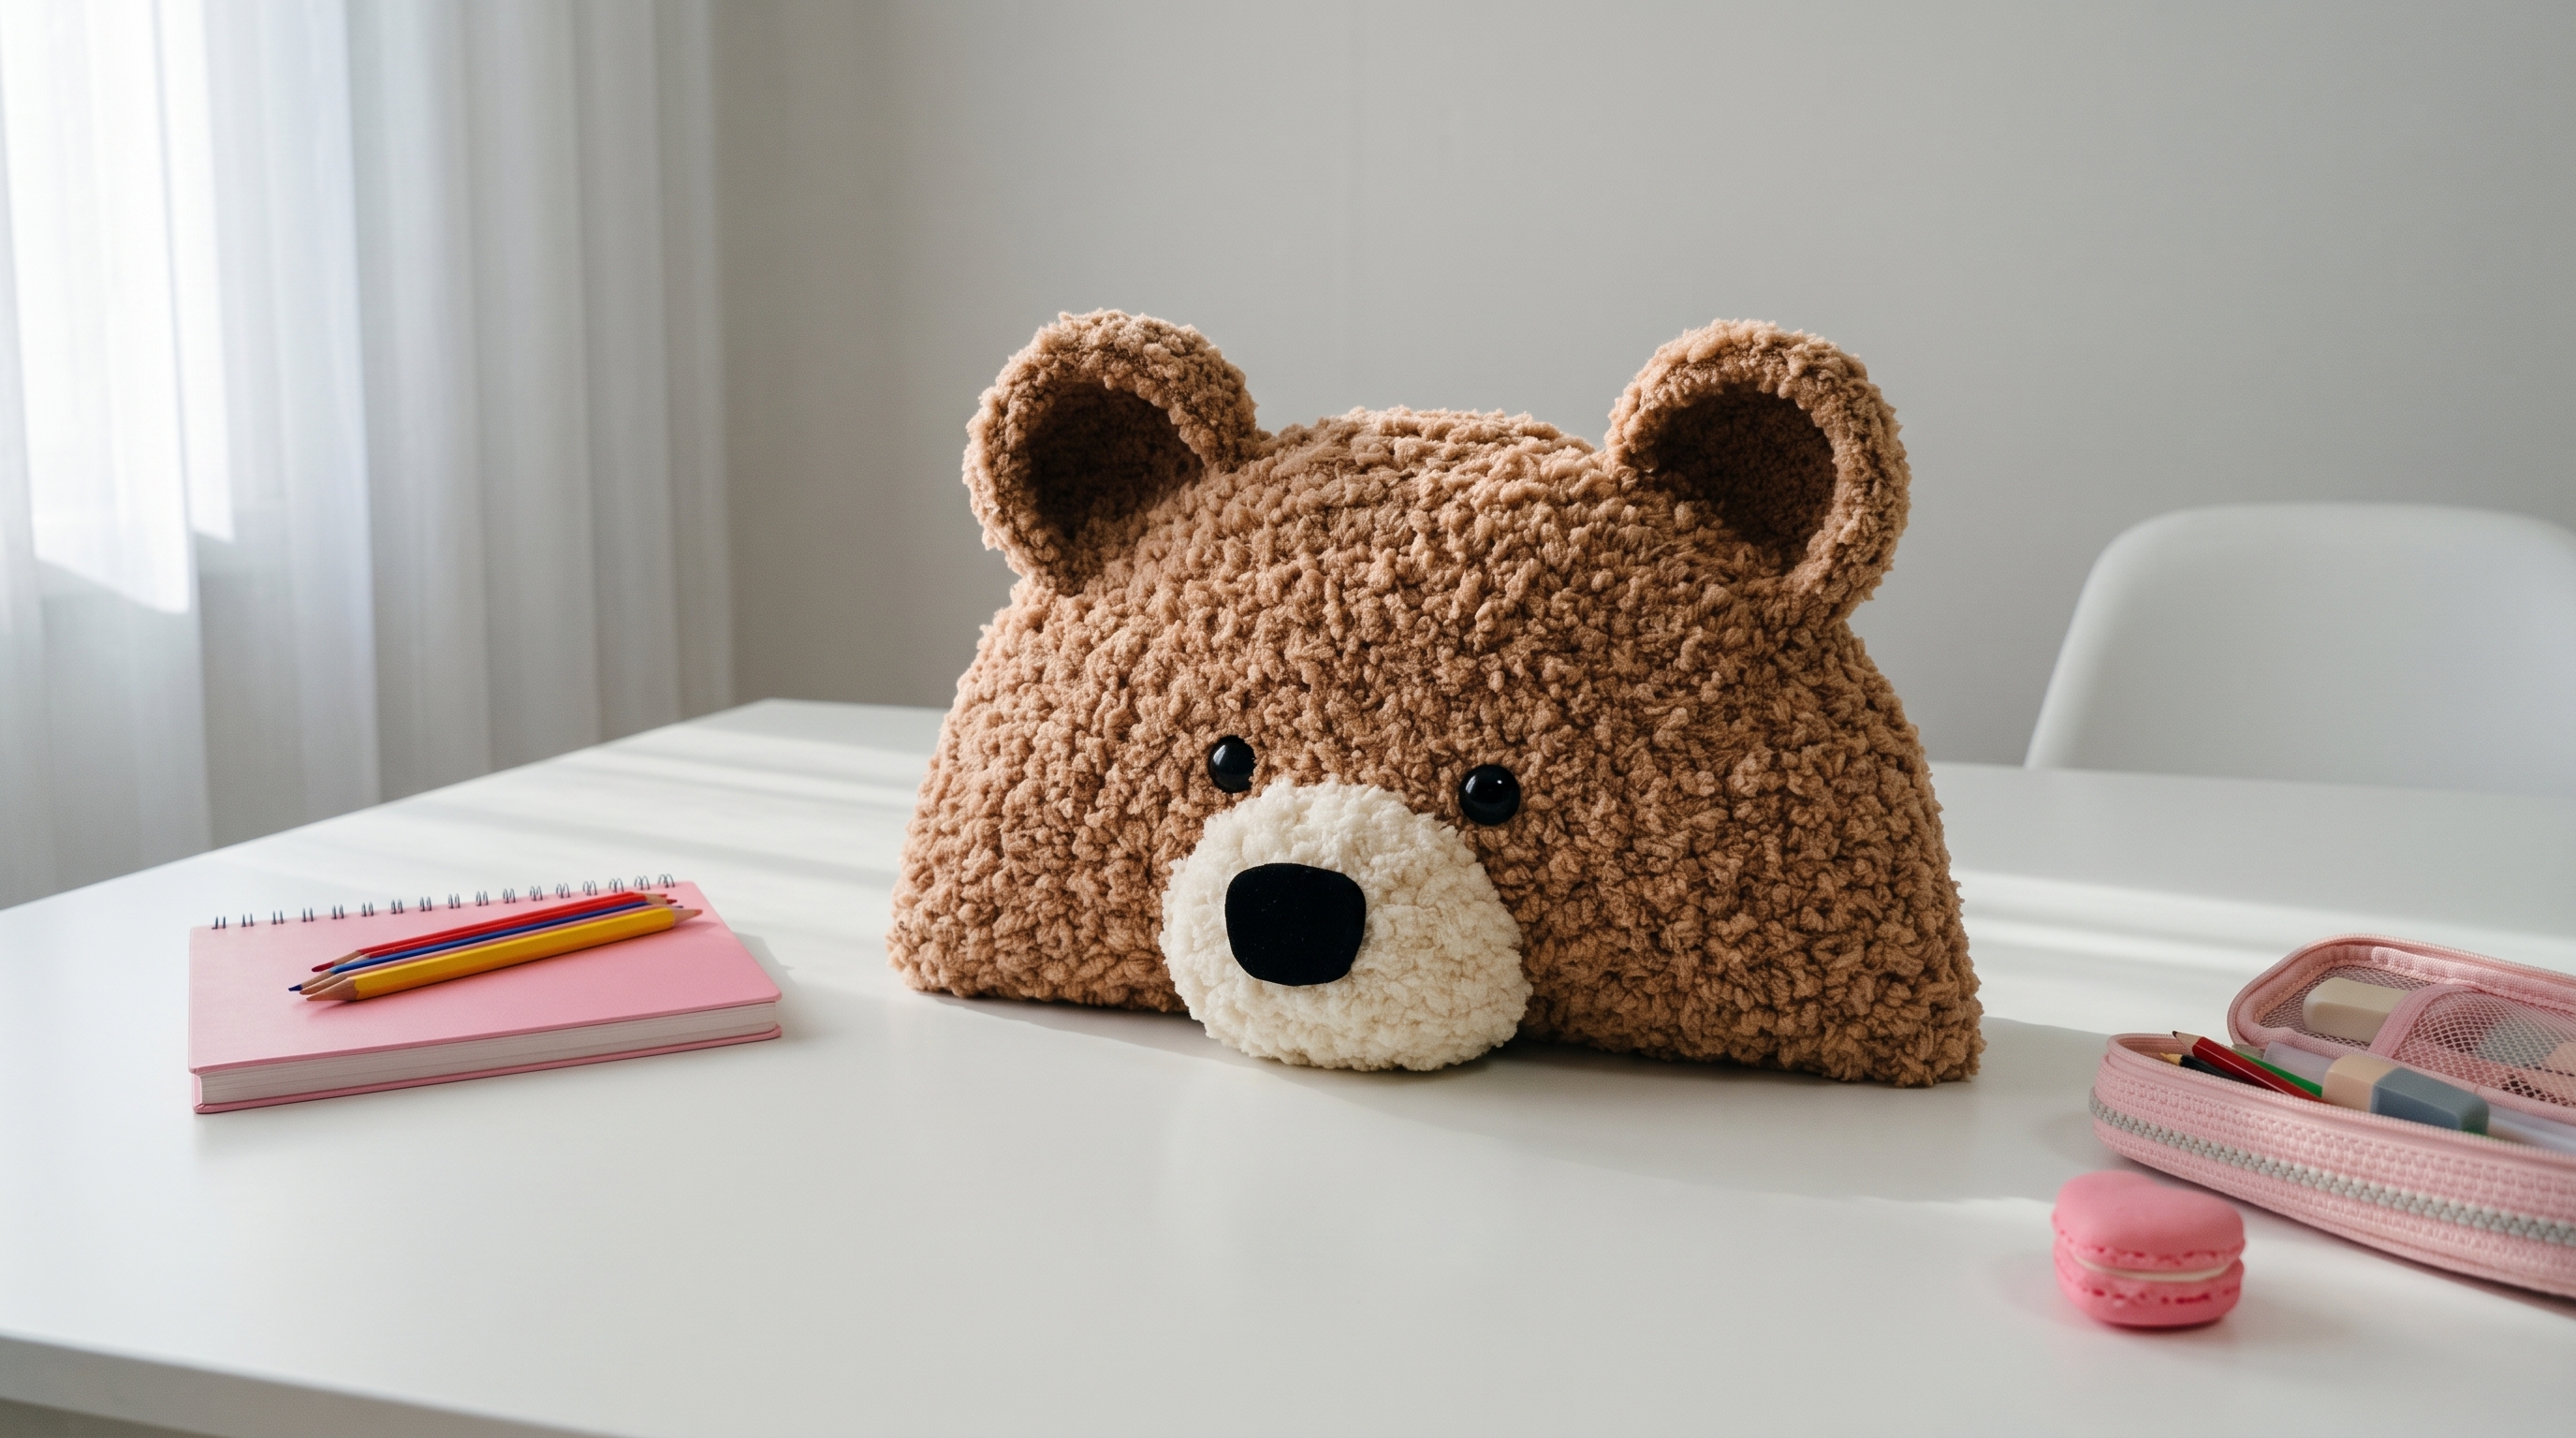
Beary Cozy Pouch
Difficulty: Easy (basic stitches, plus a little sewing and a zipper)
Finished Size: About 12 inches (30 cm) wide and 6 inches (15 cm) tall, plus the ears, which add another 1.5 inches (4 cm).
Time to Complete: 3 to 4 hours.
What You Will Need
Yarn:
- Camel or light brown teddy (bouclé or sherpa style) yarn (T), about 120 yards (110 m), for the front and back panels and the ears
- Cream teddy yarn (C), about 20 yards (18 m), for the muzzle
- Dark brown yarn (D), about 10 yards (9 m), for the inner ears
- Black yarn (K), about 5 yards (4.5 m), for the nose
- Tip: Teddy yarn is bulky and curly, which makes it hard to see your stitches. Work in bright light, use a stitch marker on the first stitch of every row, and count at the end of each row. The stitches are easier to feel than to see, so slow down and go by touch.
Tools:
- 5.5 mm (I/9) crochet hook. Go up or down a size if your gauge does not match.
- 1 nylon zipper, 12 inches (30 cm) long, in brown or a color that matches your yarn
- 2 black safety eyes, 12 mm, or black beads
- Poly-fil or fiberfill stuffing (a small amount, for the muzzle only)
- Yarn needle with a large eye for sewing
- Sewing needle and strong thread, for the zipper
- Stitch markers
- Sharp scissors
- Straight pins
- Optional: a piece of cotton fabric for lining, about 26 x 8 inches (66 x 20 cm)
Gauge: 12 stitches and 12 rows in single crochet = 4 x 4 inches (10 x 10 cm). Please make a swatch, since the gauge decides whether the pouch fits your zipper.
The Basics (US Terms)
- MR = magic ring
- ch = chain
- sc = single crochet
- inc = increase (work 2 single crochets into the same stitch)
- dec = decrease (work 2 single crochets together, invisible decrease is best)
- sc2tog = single crochet 2 together (the same as a decrease)
- sl st = slip stitch
- st(s) = stitch(es)
- T, C, D, K = camel, cream, dark brown, black
- The panels are worked flat in rows. Ch 1 at the start of each row does not count as a stitch. The ears, muzzle, and nose are worked in continuous rounds. Use a stitch marker to mark the first stitch of each round.
Let Us Get Started
We will make two matching half-circle panels, two ears with inner ears, a muzzle, and a nose. Then we will sew it all together with a zipper along the flat bottom.
Part 1: The Panels (Make 2)
Worked with camel yarn. Start at the flat bottom edge.
- Foundation: Ch 37.
- Row 1: Sc in the 2nd ch from the hook and in each chain across. (36 stitches)
- Rows 2 to 18: Follow the table below. Each row begins with ch 1 and a turn.
| Row | Stitches at the end | What to do | |---|---|---| | 2 to 3 | 36 | Sc in each stitch across. | | 4 | 34 | Sc2tog, sc across to the last 2 stitches, sc2tog. | | 5 to 6 | 34 | Sc in each stitch across. | | 7 | 32 | Sc2tog, sc across to the last 2 stitches, sc2tog. | | 8 | 32 | Sc in each stitch across. | | 9 | 30 | Sc2tog, sc across to the last 2 stitches, sc2tog. | | 10 | 30 | Sc in each stitch across. | | 11 | 28 | Sc2tog, sc across to the last 2 stitches, sc2tog. | | 12 | 26 | Sc2tog, sc across to the last 2 stitches, sc2tog. | | 13 | 24 | Sc2tog, sc across to the last 2 stitches, sc2tog. | | 14 | 22 | Sc2tog, sc across to the last 2 stitches, sc2tog. | | 15 | 18 | Sc2tog twice, sc across to the last 4 stitches, sc2tog twice. | | 16 | 16 | Sc2tog, sc across to the last 2 stitches, sc2tog. | | 17 | 12 | Sc2tog twice, sc across to the last 4 stitches, sc2tog twice. | | 18 | 6 | Sc2tog across. |
- Fasten off, leaving a long tail. Pull the tail through the last 6 stitches, and pull tight to close the top. Weave in the end. Each panel is a half circle, about 12 inches (30 cm) wide and 6 inches (15 cm) tall. Count your stitches at the end of every row, since the teddy yarn hides the stitches.
- Gently steam or press the panels, with a damp cloth between the iron and the yarn, so they lie flat. Do not press too hard, or the fluff will flatten.
Part 2: The Ears (Make 2)
Worked with camel yarn.
- Round 1: Work 6 sc into a magic ring. (6 stitches)
- Round 2: Inc in every stitch around. (12 stitches)
- Round 3: (1 sc, inc) repeat 6 times. (18 stitches)
- Round 4: Work 1 sc in every stitch around. (18 stitches)
- Join with a sl st to the next stitch and fasten off, leaving a long tail for sewing. Do not stuff. The ear is a flat disc, about 2.25 inches (5.5 cm) across.
The inner ears (make 2, in dark brown):
- Round 1: Work 6 sc into a magic ring. (6 stitches)
- Round 2: Inc in every stitch around. (12 stitches)
- Join with a sl st to the next stitch and fasten off, leaving a long tail for sewing. The inner ear is about 1.25 inches (3 cm) across.
Part 3: The Muzzle
Worked with cream yarn.
- Round 1: Work 6 sc into a magic ring. (6 stitches)
- Round 2: Inc in every stitch around. (12 stitches)
- Round 3: (1 sc, inc) repeat 6 times. (18 stitches)
- Round 4: (2 sc, inc) repeat 6 times. (24 stitches)
- Rounds 5 to 6: Work 1 sc in every stitch around. (24 stitches)
- Round 7: (2 sc, dec) repeat 6 times. (18 stitches)
- Stuff the muzzle lightly, so it is soft and round.
- Round 8: (1 sc, dec) repeat 6 times. (12 stitches)
- Round 9: Dec 6 times. (6 stitches)
- Cut the yarn, leaving a long tail for sewing. Pull the tail through the front loops of the last 6 stitches, and pull tight to close.
Part 4: The Nose
Worked with black yarn.
- Round 1: Work 6 sc into a magic ring. (6 stitches)
- Round 2: Inc in every stitch around. (12 stitches)
- Round 3: Work 1 sc in every stitch around. (12 stitches)
- Join with a sl st to the next stitch and fasten off, leaving a long tail for sewing. Do not stuff. Pinch the disc slightly, so it is a rounded oval, about 1.25 inches (3 cm) wide.
Assembly and Finishing
This is where your bear comes to life. Take your time pinning before you sew.
Adding the Face (front panel only):
- Lay one panel flat, with the flat edge at the bottom, and call this the front panel.
- Pin the muzzle in the center, with the bottom edge about 1 inch (2.5 cm) above the flat bottom edge, so it sits low and round.
- Pin the nose on the top of the muzzle, slightly overlapping the muzzle's upper edge, as in the photo.
- Place the eyes about 4 inches (10 cm) apart, centered, and about 4 inches (10 cm) above the flat bottom edge, just above the muzzle. If you are using safety eyes, push the posts through the panel, and fasten the washers on the inside.
- Sew the muzzle on with the long tail, using small stitches around the edge, and take the stitches through the top loops only. Sew the nose on the same way.
Attaching the Ears:
- Sew each inner ear to the center of an ear disc, with small stitches around the edge.
- Pin the ears to the curved top edge of the front panel, about 3 inches (7.5 cm) from the center on each side, so that they sit at about 10 o'clock and 2 o'clock. The lower half of each ear should overlap the front of the panel by about 1/2 inch (1.2 cm).
- Sew each ear on firmly with the long tail, going around the lower half of the ear, so the top half stands up and curves slightly forward.
Sewing in the Zipper:
- Close the zipper, and lay it face up along the flat bottom edge of the front panel. The zipper teeth should sit just inside the foundation chain edge.
- Pin the zipper tape in place, and sew it on with a sewing needle and strong thread, using a small backstitch. Sew through the zipper tape and the panel, but not the fluff.
- Place the back panel on the other side of the zipper in the same way, with the flat edges lined up, and the right sides of both panels facing out. Pin and sew it on the same way.
- Open the zipper at least halfway, so you can turn the pouch right side out later.
Joining the Panels:
- With the zipper open, place the front and back panels with their wrong sides together, and line up the curved edges.
- Using camel yarn and the yarn needle, whip stitch the curved edges together, going through the outer loops of both panels. Start at one zipper end, and go around the curve to the other end. Catch the ears in the seam, and sew over them twice.
- Sew the zipper ends to the panels with a few extra stitches, so they do not poke out.
- Weave in all remaining ends, and fluff the teddy yarn with your fingers.
Adding the Lining (optional):
- Fold the fabric in half with the right sides together, so it measures 13 x 8 inches (33 x 20 cm). Cut it into a half circle, following the curve of one of the panels, plus 3/8 inch (1 cm) all around.
- Sew the curved edge with a 3/8 inch (1 cm) seam, leaving the flat edge open.
- Press the flat edge under 3/8 inch (1 cm), and slide the lining into the pouch, with the wrong sides together. Hand sew the flat edge to the zipper tape with small stitches.
A Few Friendly Tips
- Swatch first: Make a 4 x 4 inch swatch, and check your gauge. If your swatch is too small, go up a hook size. If it is too big, go down.
- Count as you go: Count your stitches at the end of every row, and use stitch markers at the edges. In teddy yarn, it is easy to lose a stitch.
- Seeing the stitches: If you cannot see the loops, hold the panel up to a window, or place a light cloth behind it. You can also slide your hook under the top two loops by feel.
- Neat decreases: Work each sc2tog loosely. Tight decreases make the sides look bumpy, and the half circle will not lie flat.
- Sturdier pouch: Sew a lining, and add a half-circle of plastic canvas between the lining and the crochet. This helps the pouch keep its shape.
- Roomier pouch: To add depth, make a strip of camel yarn 3 inches (7.5 cm) wide, long enough to go around the curved edge (about 20 inches or 51 cm), and sew it between the two panels.
- Make it a pillow: Skip the zipper, sew the bottom edge closed, and stuff the bear firmly with fiberfill for a bear-head cushion. Add 2 extra rows to each panel to make it plumper.
- Make it your own: Try a white polar bear with a pink nose, a cream bear with a bow, a black panda with white patches, or a pink bear with a tiny scarf.
- Size up or down: For a smaller pouch, use a 4.5 mm hook and worsted weight teddy yarn, and make the foundation chain 25 stitches. For a bigger pouch, use jumbo teddy yarn and a 8.0 mm hook.
- Safe for little ones: For babies and toddlers, skip the safety eyes and embroider the eyes with black yarn. Sew the ears, muzzle, and nose on with extra stitches. Do not give a zipper to a baby.
- Care: Spot clean with a damp cloth, or hand wash gently with the zipper closed, and lay flat to dry. Fluff the yarn with a soft brush when it is dry.
I hope you enjoy making this soft little bear. He is such a quick, cuddly project, and he makes a wonderful handmade gift.
If you run into any trouble or just want to share how your bear turned out, please reach out. I love seeing what you create.
Happy crocheting!