October 19, 2026
Crabby Crossbody Pouch
Say hello to the happiest little crab on the beach. He has a plump round shell in deep berry red, two big pinchers raised in a cheerful wave, stubby little legs, and two wide white eyes with sleepy smiles. Best of all, he is a real bag. A zipper hides in the top of his shell, and a long braided pink strap clips on so he can ride on your shoulder. It works up from two simple circles, so it is a fun project for practicing amigurumi shaping. Pour something warm, pick your favorite sea creature colors, and let us catch a crab.
Jump to pattern instructions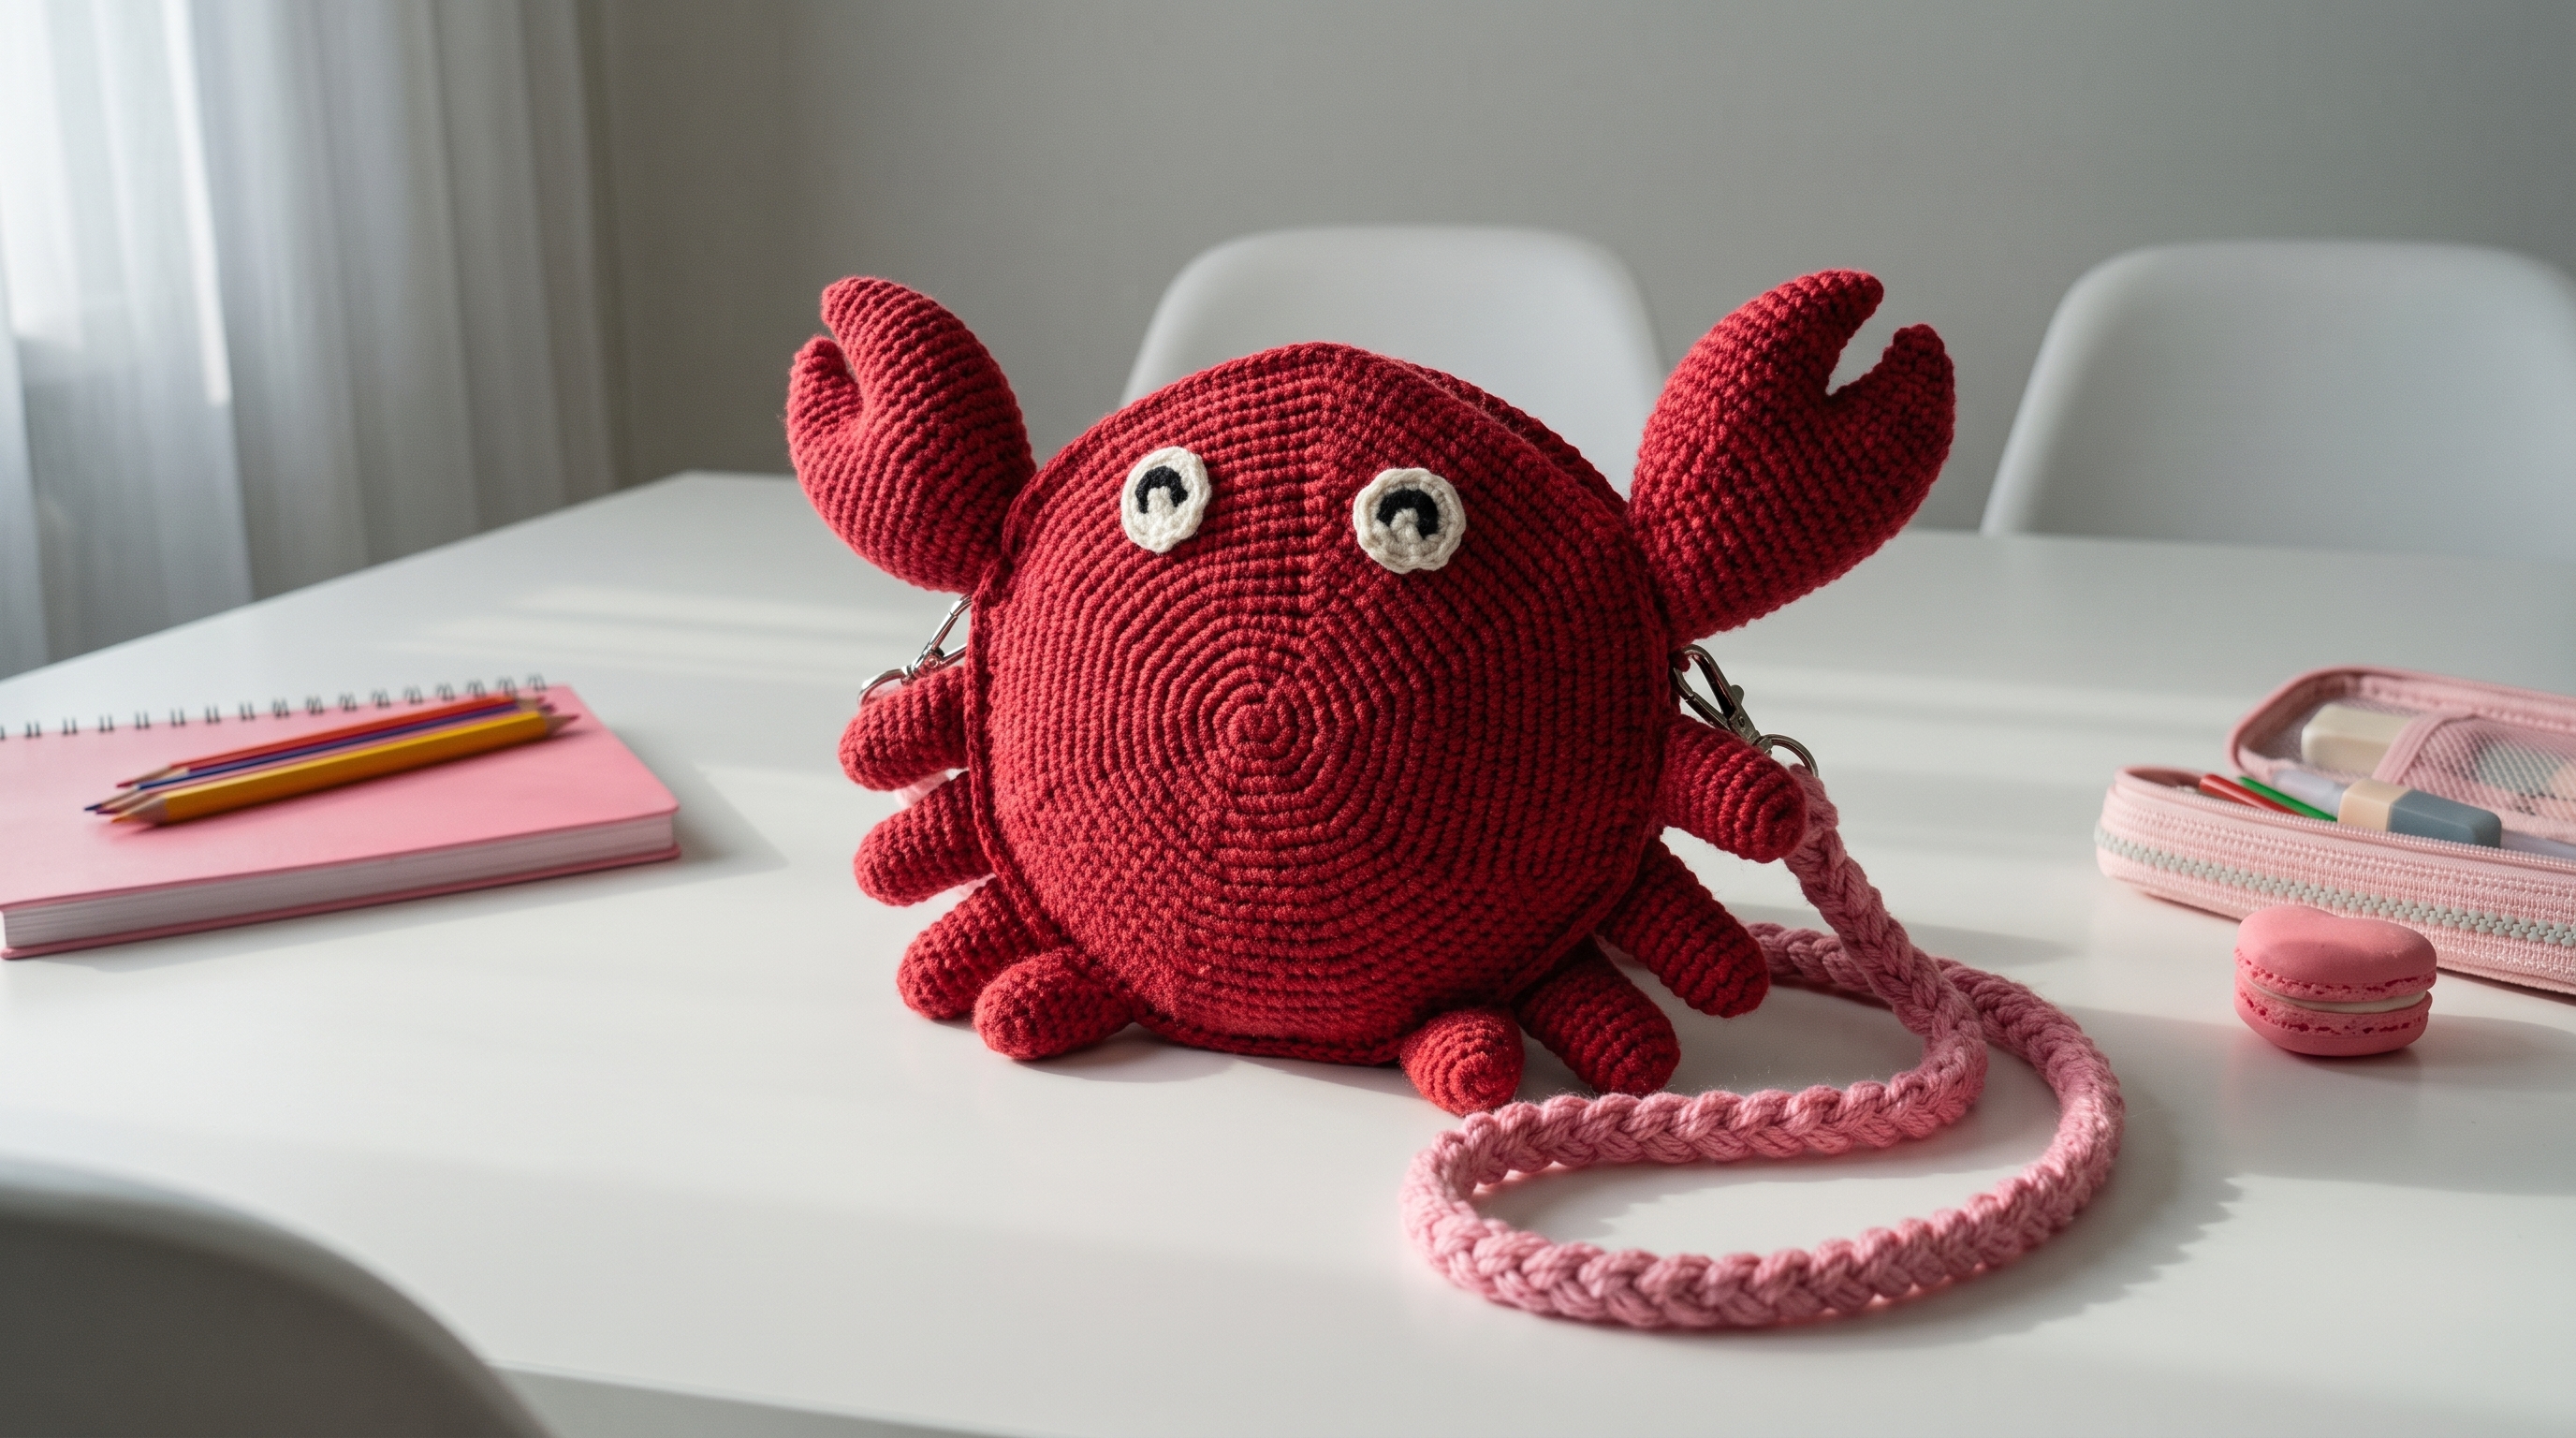
Crabby Crossbody Pouch
Difficulty: Intermediate (basic stitches, plus sewing in a zipper and braiding a strap)
Finished Size: The body is about 5.5 inches (14 cm) wide and 5 inches (13 cm) tall. With the claws, the crab is about 8 inches (20 cm) wide. The strap is about 40 inches (100 cm) long.
Time to Complete: 6 to 8 hours.
What You Will Need
Yarn:
- Berry red or raspberry (R), about 250 yards (230 m), for the body, legs, and claws
- Pink (P), about 120 yards (110 m), for the strap and the top loops
- White (W), about 15 yards (14 m), for the eyes
- Black (K), a small scrap, for the eye details
- Tip: Use a DK weight 100% cotton yarn. Cotton makes a sturdy bag that keeps its shape, and gives crisp stitches. A smaller hook than usual keeps the fabric tight, so keys and coins cannot poke through.
Tools:
- 3.0 mm (D/3) crochet hook
- 1 closed-end zipper, about 5 inches (12 cm) long, in a matching red
- 2 swivel lobster clasps, about 1 inch (2.5 cm) wide
- Poly-fil or fiberfill stuffing (a small amount, for the legs and claws only)
- Yarn needle with a large eye for sewing and embroidering
- Sewing needle and strong thread, for the zipper
- Stitch markers
- Sharp scissors
- Straight pins
- Optional: a piece of cotton fabric for lining, about 12 x 8 inches (30 x 20 cm), and fabric glue
Gauge: 6 stitches and 7 rows in single crochet = 1 x 1 inch (2.5 x 2.5 cm). Gauge is not critical, but a tight fabric makes a stronger bag.
The Basics (US Terms)
- MR = magic ring
- ch = chain
- sc = single crochet
- inc = increase (work 2 single crochets into the same stitch)
- dec = decrease (work 2 single crochets together, invisible decrease is best)
- sl st = slip stitch
- R, P, W, K = red, pink, white, black
- All pieces are worked in continuous rounds. Use a stitch marker to mark the first stitch of each round.
Let Us Get Started
The crab is made of two body panels, six legs, two claws, two eyes, a braided strap, and two small loops for the clasps.
Part 1: The Body Panels (Make 2)
Worked with red yarn, from the center out.
- Round 1: Work 6 sc into a magic ring. (6 stitches)
- Round 2: Inc in every stitch around. (12 stitches)
- Round 3: (1 sc, inc) repeat 6 times. (18 stitches)
- Round 4: (2 sc, inc) repeat 6 times. (24 stitches)
- Round 5: (3 sc, inc) repeat 6 times. (30 stitches)
- Round 6: (4 sc, inc) repeat 6 times. (36 stitches)
- Round 7: (5 sc, inc) repeat 6 times. (42 stitches)
- Round 8: (6 sc, inc) repeat 6 times. (48 stitches)
- Round 9: (7 sc, inc) repeat 6 times. (54 stitches)
- Round 10: (8 sc, inc) repeat 6 times. (60 stitches)
- Round 11: (9 sc, inc) repeat 6 times. (66 stitches)
- Round 12: (10 sc, inc) repeat 6 times. (72 stitches)
- Round 13: (11 sc, inc) repeat 6 times. (78 stitches)
- Round 14: (12 sc, inc) repeat 6 times. (84 stitches)
- Round 15: (13 sc, inc) repeat 6 times. (90 stitches)
- Round 16: (14 sc, inc) repeat 6 times. (96 stitches)
- Round 17: (15 sc, inc) repeat 6 times. (102 stitches)
- Round 18: (16 sc, inc) repeat 6 times. (108 stitches)
- Join with a sl st to the next stitch and fasten off. Weave in the ends. Each panel should be a flat circle, about 5.5 inches (14 cm) across. If it curls up like a bowl, you are working too tightly. If it ruffles, you are working too loosely, so go down a hook size.
- Block both panels flat. They need to be the same size, so they line up when you sew them together.
Part 2: The Legs (Make 6)
Worked with red yarn.
- Round 1: Work 6 sc into a magic ring. (6 stitches)
- Round 2: (1 sc, inc) repeat 3 times. (9 stitches)
- Rounds 3 to 6: Work 1 sc in every stitch around. (9 stitches)
- Stuff lightly.
- Cut the yarn, leaving a long tail for sewing. Leave the end open. For the look in the photo, make the front legs a little longer, with 7 rounds, and the back legs shorter, with 5 rounds.
Part 3: The Claws (Make 2)
Worked with red yarn.
- Round 1: Work 6 sc into a magic ring. (6 stitches)
- Round 2: Inc in every stitch around. (12 stitches)
- Round 3: (1 sc, inc) repeat 6 times. (18 stitches)
- Rounds 4 to 8: Work 1 sc in every stitch around. (18 stitches)
- Round 9: (1 sc, dec) repeat 6 times. (12 stitches)
- Stuff firmly.
- Round 10: Dec 6 times. (6 stitches)
- Cut the yarn, leaving a long tail for sewing. Pull the tail through the front loops of the last 6 stitches and pull tight to close. Do not cut the tail yet.
The pincer split:
- Pinch the rounded top of the claw flat, so the closed end is at the top.
- With a long piece of red yarn, make a line of backstitches down the center of the flat top, about 1 inch (2.5 cm) long, pulling each stitch tight so the claw indents and makes a notch.
- Fasten off on the inside, and weave in the ends. The notch separates the claw into two lobes, so it looks like a pincer.
Part 4: The Eyes (Make 2)
Worked with white yarn.
- Round 1: Work 6 sc into a magic ring. (6 stitches)
- Round 2: Inc in every stitch around. (12 stitches)
- Round 3: (1 sc, inc) repeat 6 times. (18 stitches)
- Join with a sl st to the next stitch and fasten off, leaving a long tail for sewing. Flatten the little circle.
- With black yarn, embroider a small curved line across the lower half of each eye, like a happy squint. Make it about 6 stitches wide, curved like a smile, and fill it in with a second layer of stitches to make it thicker.
- Add 2 tiny straight stitches at each outer corner, for lashes.
Part 5: The Braided Strap
Worked with pink yarn.
- Hold 2 strands of pink yarn together, and make 3 chain strands, each with 150 chains. Fasten off each one, leaving a 4 inch (10 cm) tail.
- Tie the three strands together at the top, about 2 inches (5 cm) from the ends, with a tight overhand knot, so the strands cannot slip.
- Braid the 3 strands tightly, all the way down. Tie another knot at the bottom, about 2 inches (5 cm) from the ends.
- The braid should be about 40 inches (100 cm) long. If you want a longer or shorter strap, add or remove chains in each strand.
- Trim the tails to 1.5 inches (4 cm), and sew each end through the ring of a lobster clasp. Wrap the tails around the knot a few times, and stitch them to the braid. For the bulky knot at each end, as in the photo, wrap the knot with a few turns of pink yarn, and sew it down.
The clasp loops (make 2):
- With pink yarn, ch 14. Join with a sl st to the first chain, to make a loop. Fasten off, leaving a 6 inch (15 cm) tail.
- Make a second loop the same way.
Assembly and Finishing
This is where your crab comes together. Take your time pinning before you sew.
Adding the Face:
- Pin the eyes on the front panel, about 4 stitches apart, in the upper part of the crab, about 2.5 inches (6 cm) from the top edge.
- Sew each eye on with the long tail, going around the edge with small stitches.
- With red yarn, embroider a tiny smile in the center of the face, about 1 inch (2.5 cm) below the eyes, if you like.
Attaching the Claws:
- Pin one claw on each side of the front panel, near the top, with the pinchers pointing up and slightly outward.
- Sew each claw on with the long tail, going around the base. The claws sit on the edge of the panel, so the bottom half of each claw overlaps the edge by about 1/2 inch (1.2 cm).
Attaching the Legs:
- Pin 3 legs on each side of the front panel, along the lower edge, about 1 inch (2.5 cm) apart, with the open end against the panel.
- Place them so they stick out slightly past the edge of the panel, and point downward and outward.
- Sew each leg on with the long tail, going around twice.
Making the Bag:
- Place the front panel on the back panel, with the wrong sides together, and the legs, claws, and eyes on the outside. Line up the edges.
- Find the top of the crab, between the two claws. Mark 28 stitches at the top, which is the opening for the zipper.
- Using red yarn and the yarn needle, whip stitch through both panels, starting at the edge of the opening, and sew all the way around the bottom, back up to the other edge of the opening. Leave the 28 stitches at the top open.
- Sew the 2 clasp loops to the sides of the opening, at the top corners, about 1/2 inch (1.2 cm) down from each edge. Sew them firmly through both panels.
Sewing in the Zipper:
- Close the zipper, and lay it across the top opening, with the pull facing out.
- Pin the zipper tape to the edge of the front panel, along the opening. Sew it on with a sewing needle and strong thread, using a small backstitch about 1/8 inch (3 mm) from the zipper teeth.
- Pin and sew the other side of the zipper tape to the back panel in the same way.
- Open the zipper to check that it slides smoothly, and that the sides of the opening line up.
Adding the Lining (optional):
- Fold the fabric in half and cut it into two circles, each about 5.5 inches (14 cm) across. Add a 3/8 inch (1 cm) seam allowance all around.
- Sew the circles together with a 3/8 inch (1 cm) seam, leaving the top 4.5 inches (11 cm) open.
- Press the opening edges under, and slide the lining into the bag, with the wrong sides together.
- Sew the opening edges to the zipper tape with small stitches.
Adding the Strap:
- Clip the lobster clasps onto the 2 loops at the top of the bag.
- Weave in all remaining ends.
A Few Friendly Tips
- Keep it snug: Keep your tension tight and even. Tight stitches make a sturdy bag that keeps its shape.
- Flat panels: If your panels curl, block them, and add a round with no increases. If they ruffle, take out an increase in a few rounds.
- Even circles: Count your stitches at the end of each round. Each round should have 6 more stitches than the round before.
- Sewing the zipper: Use a thimble if the stitches feel tight, and sew slowly. A bit of fabric glue under the zipper tape holds it in place while you sew.
- Sturdier bag: Sew a lining, and add a circle of plastic canvas between the lining and the crochet panel. This helps the bag stay flat and round.
- Different strap: For a shorter strap, make the braid 22 inches (56 cm) long, for a handheld wristlet. For a stronger strap, use a purchased cotton cord.
- Make it your own: Try a sunny orange crab, a teal crab, a pink crab with a bow, or an octopus with 8 legs.
- Size up: For a bigger bag, use worsted weight yarn and a 4.0 mm hook, with the same stitch counts, and add 4 more rounds to each panel.
- Safe for little ones: The eyes are embroidered and sewn on, so there are no small parts. Check that the legs and claws are firmly attached, and use a lining if the bag will hold small items.
- Care: Spot clean, or hand wash gently, with the zipper closed. Lay flat to dry.
I hope you enjoy making this happy little crab. He is such a fun project and makes a wonderful handmade gift.
If you run into any trouble or just want to share how your crab turned out, please reach out. I love seeing what you create.
Happy crocheting!