October 19, 2026
Sausage Dog in a Sweater
Meet the longest, loveliest little pup on the shelf. He has a golden tan body, a cream and gray striped sweater wrapped around his middle, floppy ears, a shiny black nose, and a tiny red beret perched on his head. His eyes are closed in a sweet little doze, and his skinny tail curves up behind him. He is made from one long tube and a few simple pieces, so he works up quickly and is great for practicing stripes. He makes a cozy desk buddy, a pencil case stand-in, or a gift for any dachshund lover. Pour something warm, grab your softest tan yarn, and let us make a very long friend.
Jump to pattern instructions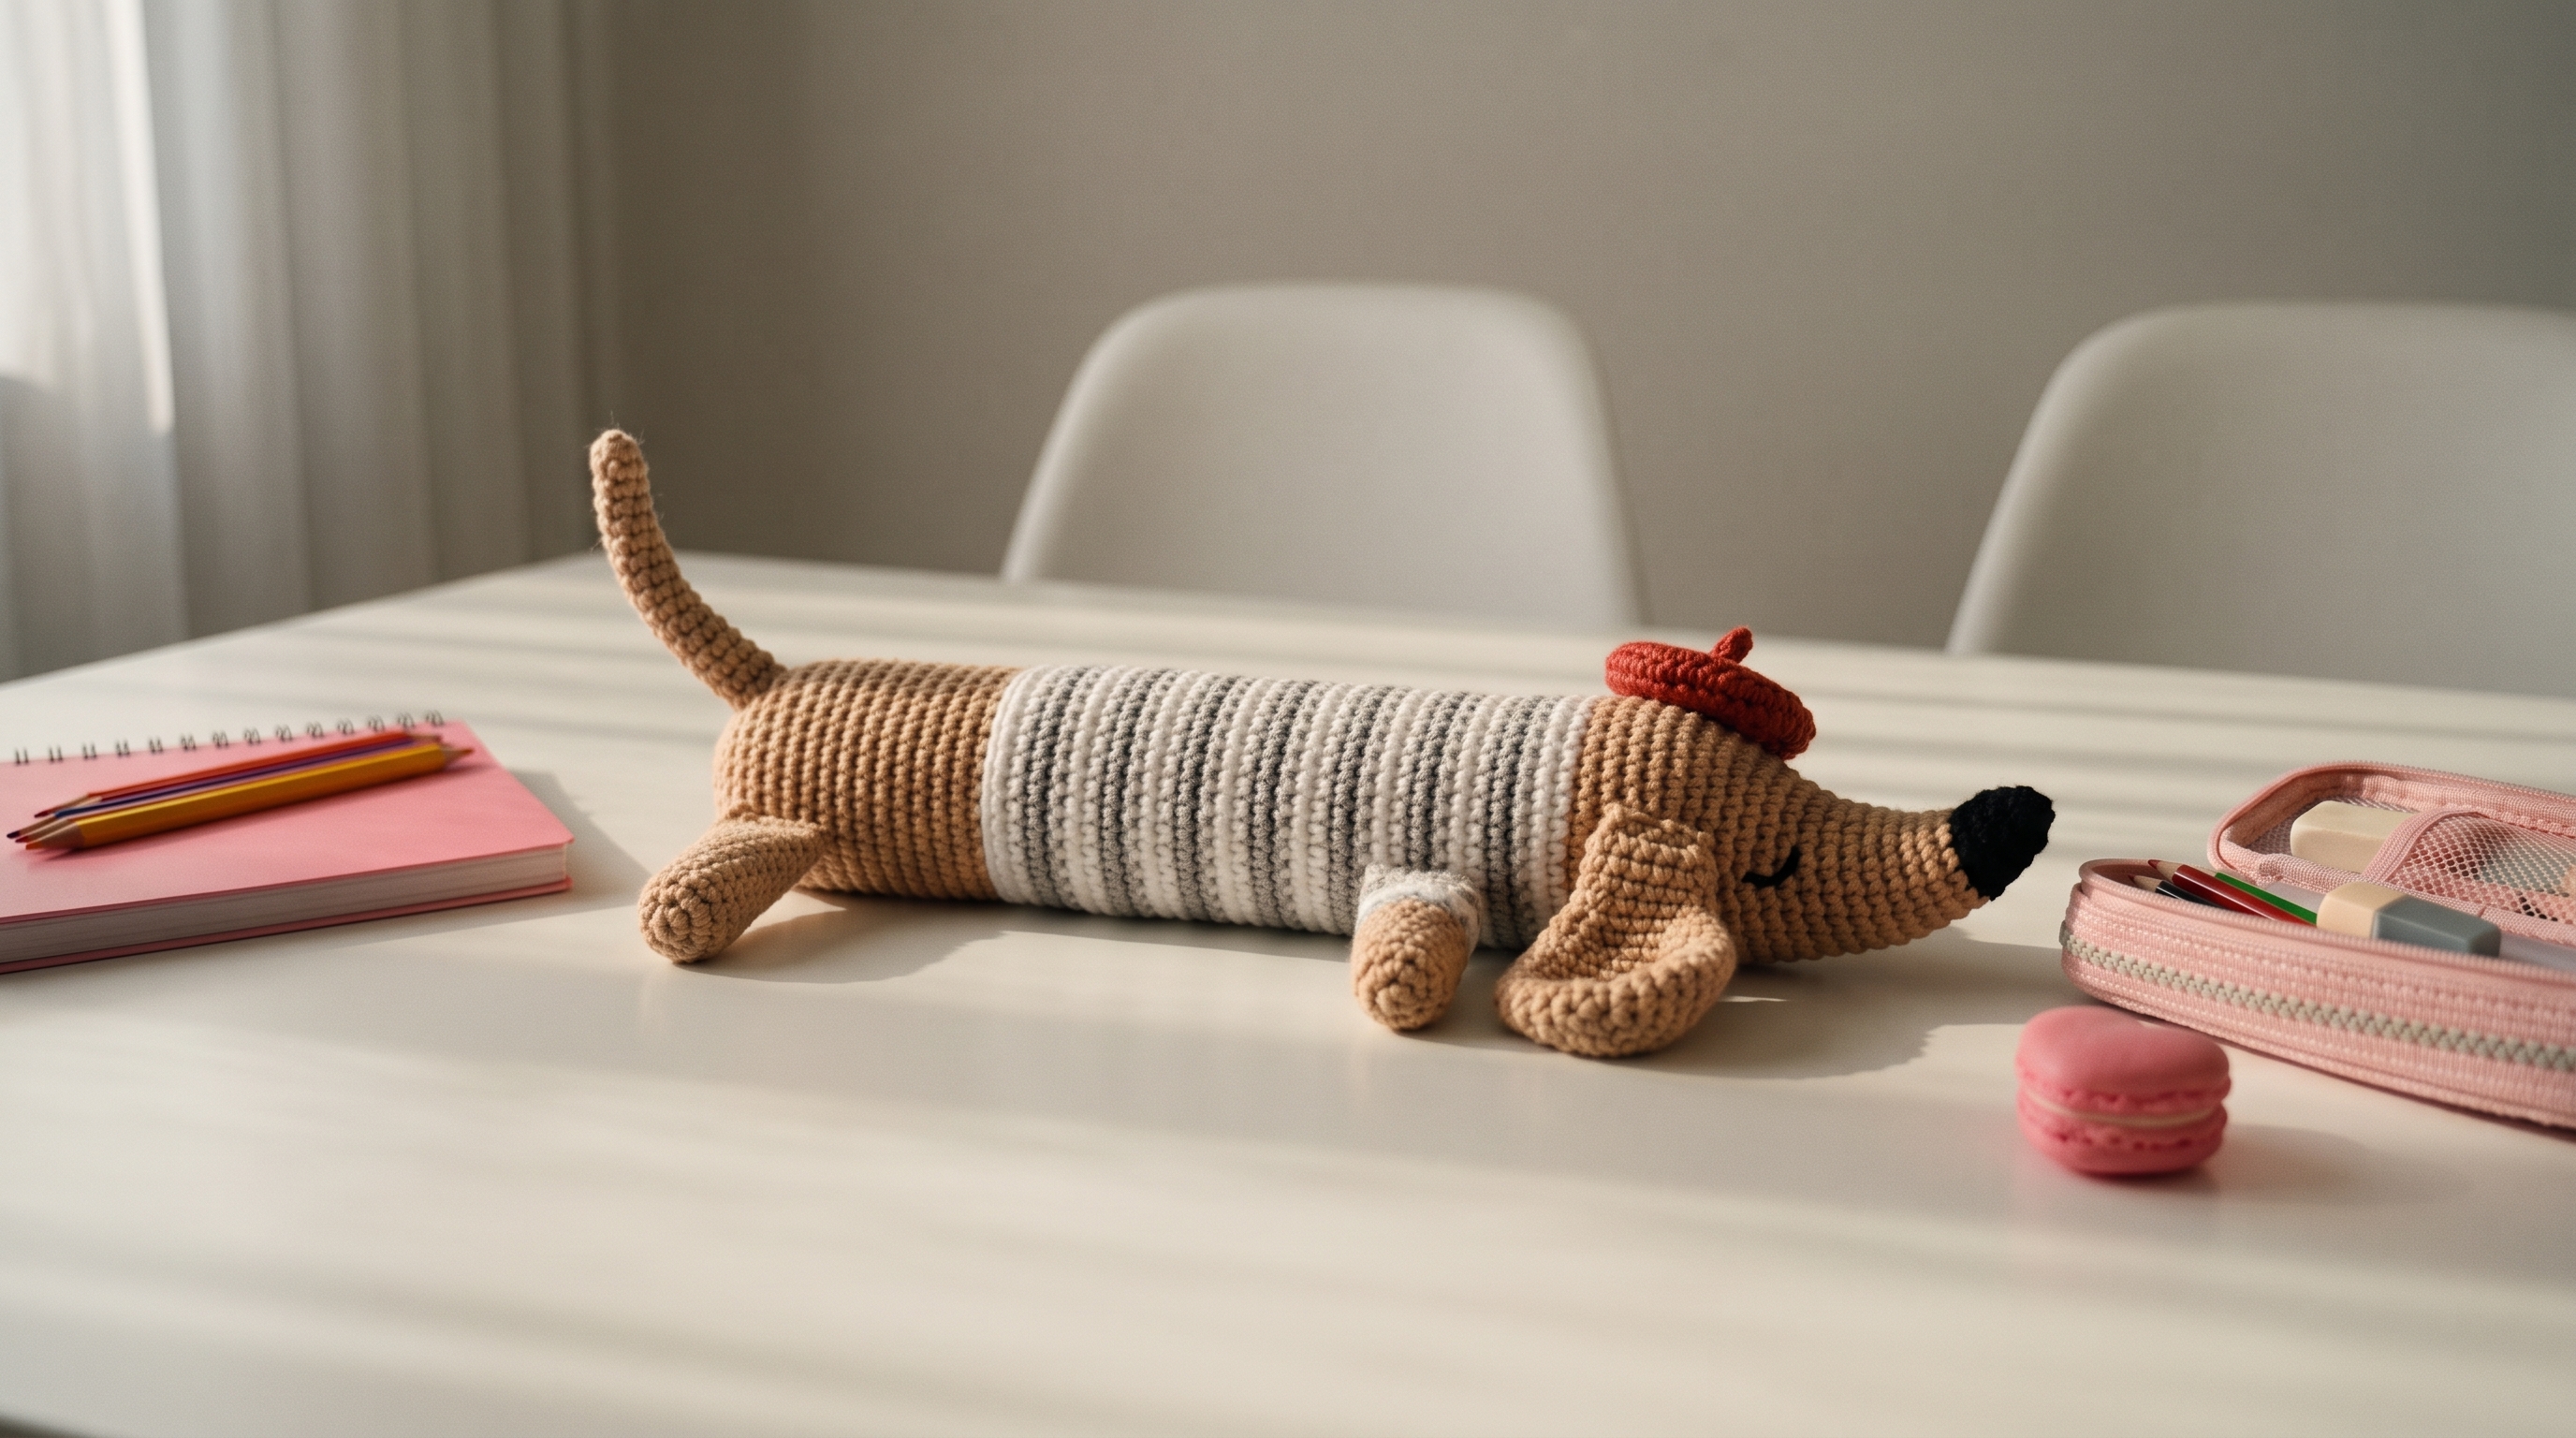
Sausage Dog in a Sweater
Difficulty: Easy (basic shapes, plus simple stripes and a little embroidery)
Finished Size: About 11 inches (28 cm) long and 2.5 inches (6 cm) tall, in DK weight yarn.
Time to Complete: 4 to 5 hours.
What You Will Need
Yarn:
- Tan or caramel (T), about 100 yards (91 m), for the body, head, legs, ears, and tail
- Cream (C), about 50 yards (46 m), for the sweater stripes and the sleeve cuffs
- Gray (G), about 25 yards (23 m), for the thin sweater stripes
- Black (K), a small scrap of about 5 yards (4.5 m), for the nose
- Red (R), about 10 yards (9 m), for the beret
- Tip: Use a DK weight 100% cotton yarn. Cotton gives crisp stitches that make the stripes look neat and hide the stuffing. Use a smaller hook than usual, so your stitches stay tight.
Tools:
- 3.0 mm (D/3) crochet hook
- Poly-fil or fiberfill stuffing
- Black embroidery thread or yarn, for the eyes
- Yarn needle with a large eye for sewing and embroidering
- Stitch markers
- Sharp scissors
- Straight pins for placing the pieces before sewing
- Optional: a little blush for the cheeks
The Basics (US Terms)
- MR = magic ring
- ch = chain
- sc = single crochet
- inc = increase (work 2 single crochets into the same stitch)
- dec = decrease (work 2 single crochets together, invisible decrease is best)
- sl st = slip stitch
- BLO = back loop only
- T, C, G, K, R = tan, cream, gray, black, red
- All pieces are worked in continuous rounds. Use a stitch marker to mark the first stitch of each round.
- When changing colors, pull the new color through on the last stitch of the previous round.
Let Us Get Started
The pup is made of a long body, a head, two ears, four legs, a tail, and a tiny beret.
Part 1: The Body
Worked with tan, cream, and gray yarn. Start at the rear end.
- Round 1 (T): Work 6 sc into a magic ring. (6 stitches)
- Round 2: Inc in every stitch around. (12 stitches)
- Round 3: (1 sc, inc) repeat 6 times. (18 stitches)
- Rounds 4 to 11: Work 1 sc in every stitch around. (18 stitches) This is the tan rear end. Start stuffing as you go, packing the stuffing firmly so the tube stays round.
- The sweater (Rounds 12 to 44): Work 1 sc in every stitch around, changing colors as follows. Repeat this 3 round stripe pattern 11 times:
- 1 round gray (G)
- 2 rounds cream (C) Change colors at the start of each round. Carry the unused color loosely up the inside of the tube, and cut it if the gap is more than 3 rounds. The little jog where each round starts will hide at the back.
- Rounds 45 to 49 (T): Change to tan. Work 1 sc in every stitch around. (18 stitches) This is the chest and neck.
- Stuff the body firmly, making sure it is a smooth, even tube.
- Round 50: (1 sc, dec) repeat 6 times. (12 stitches)
- Rounds 51 to 52: Work 1 sc in every stitch around. (12 stitches)
- Cut the yarn, leaving a long tail for sewing. Leave the 12 stitches open for attaching the head.
Part 2: The Head
Worked with black and tan yarn. Start at the nose.
- Round 1 (K): Work 6 sc into a magic ring. (6 stitches)
- Round 2: Inc in every stitch around. (12 stitches)
- Rounds 3 to 4 (T): Change to tan. Work 1 sc in every stitch around. (12 stitches)
- Round 5: (1 sc, inc) repeat 6 times. (18 stitches)
- Rounds 6 to 7: Work 1 sc in every stitch around. (18 stitches)
- Round 8: (2 sc, inc) repeat 6 times. (24 stitches)
- Rounds 9 to 12: Work 1 sc in every stitch around. (24 stitches)
- Round 13: (2 sc, dec) repeat 6 times. (18 stitches)
- Stuff the head firmly, packing the snout well so it keeps its long shape.
- Round 14: (1 sc, dec) repeat 6 times. (12 stitches)
- Cut the yarn, leaving a long tail for sewing. Leave the 12 stitches open for attaching the head to the body.
Part 3: The Ears (Make 2)
Worked with tan yarn.
- Round 1: Work 6 sc into a magic ring. (6 stitches)
- Round 2: (1 sc, inc) repeat 3 times. (9 stitches)
- Round 3: (2 sc, inc) repeat 3 times. (12 stitches)
- Rounds 4 to 8: Work 1 sc in every stitch around. (12 stitches)
- Round 9: (2 sc, dec) repeat 3 times. (9 stitches)
- Cut the yarn, leaving a long tail for sewing. Do not stuff. Pinch the ear flat, so it looks like a long, floppy oval.
Part 4: The Legs (Make 4)
Worked with tan yarn. For the front legs, finish with cream cuffs.
- Round 1 (T): Work 6 sc into a magic ring. (6 stitches)
- Round 2: (1 sc, inc) repeat 3 times. (9 stitches)
- Rounds 3 to 6: Work 1 sc in every stitch around. (9 stitches)
- Stuff the paw lightly.
- Front legs only, Rounds 7 to 8 (C): Change to cream. Work 1 sc in every stitch around. (9 stitches) This is the sweater cuff. For the back legs, work Rounds 7 to 8 in tan instead.
- Cut the yarn, leaving a long tail for sewing. Leave the end open.
Part 5: The Tail
Worked with tan yarn.
- Round 1: Work 5 sc into a magic ring. (5 stitches)
- Rounds 2 to 14: Work 1 sc in every stitch around. (5 stitches)
- Stuff very lightly, just enough to hold its shape.
- Cut the yarn, leaving a long tail for sewing. Leave the end open. Bend the tail gently into a curve, and tack it with a stitch or two on the inside to hold the curve.
Part 6: The Beret
Worked with red yarn.
- Round 1: Work 6 sc into a magic ring. (6 stitches)
- Round 2: Inc in every stitch around. (12 stitches)
- Round 3: (1 sc, inc) repeat 6 times. (18 stitches)
- Round 4: (2 sc, inc) repeat 6 times. (24 stitches)
- Round 5: Work 1 sc in every stitch around. (24 stitches)
- Round 6: Work 1 sc in the BLO of every stitch around. (24 stitches) This leaves a little ridge, which gives the beret its flat, rounded edge.
- Round 7: (2 sc, dec) repeat 6 times. (18 stitches)
- Round 8: (1 sc, dec) repeat 6 times. (12 stitches)
- Join with a sl st to the next stitch and fasten off, leaving a long tail for sewing. Do not stuff.
- The stem: With red yarn, ch 4. Sl st in the 2nd ch from the hook, sc in the next ch, sl st in the last ch. Fasten off, leaving a tail, and sew it to the center of the top of the beret.
Assembly and Finishing
This is where your pup comes to life. Take your time pinning before you sew.
Making the Face:
- With black embroidery thread, embroider a closed, sleepy eye on each side of the head, about 8 rounds from the nose and a little above the center. Make each eye a small curved line, about 4 stitches wide, curving down at the middle, like a gentle smile turned upside down.
- Add 2 or 3 tiny straight stitches at the outer corner of each eye, for lashes.
- If you like, brush a little blush under each eye.
- Pull the stitches snug, but not tight enough to pucker the face. Weave in the ends on the inside.
Attaching the Head:
- Pin the head to the open end of the body, with the snout pointing straight forward and the head tilted very slightly down.
- Sew all the way around with the long tail from the body, using a whip stitch. Add more stuffing before you close, if needed, to make the neck firm.
Attaching the Ears:
- Pin an ear on each side of the head, about 4 rounds behind the eyes, with the top edge near the top of the head.
- Sew each ear on along its top edge only, using small stitches, so the rest of the ear hangs down and flops.
Attaching the Legs:
- Pin the front legs under the body, about 2 inches (5 cm) behind the head, one on each side, with the cream cuffs at the body.
- Pin the back legs under the body, about 1 inch (2.5 cm) from the rear end, one on each side.
- Sew each leg on firmly, going around twice. Angle the legs so the paws point forward, and splay them slightly outward, so the pup lies flat on a table.
Attaching the Tail:
- Pin the tail to the rear end of the body, at the top of the last round, with the curve pointing up.
- Sew it on firmly with the long tail.
Adding the Beret:
- Place the beret on top of the head, tilted to one side, between the ears.
- Sew all the way around the edge with the long tail, going through the head with small stitches.
- Weave in all remaining ends.
A Few Friendly Tips
- Keep it snug: Keep your tension tight and even. Loose stitches let the stuffing show through, and tight stitches make the stripes look neat.
- Stuff the tube evenly: Stuff in small pieces as you go, instead of all at once. A lumpy tube is hard to fix after you close it.
- Neat stripes: Change colors at the same spot each round, and work the first stitch of the round with the new color. This keeps the jog in a straight line, which you can hide by the legs.
- Standing or lying: For a pup who sits up, add 4 more rounds of tan after the stripes, and sew the head higher. For a pup who stands, sew the legs straight down and add more stuffing to the legs.
- Make it your own: Try a black and tan dachshund, a gray sweater with pink stripes, a tiny scarf, or a little bone in his mouth.
- Pencil case: For a pencil case, work the body with a 4.0 mm hook and worsted weight yarn, leave the rear end open, and sew a zipper into it.
- Size up: For a bigger pup, use chunky yarn and a larger hook, with the same stitch counts.
- Safe for little ones: Since all the details are embroidered, this pup is safe for small children. Sew the ears, legs, and beret on with extra stitches.
- Care: Spot clean, or hand wash gently, and lay flat to dry.
I hope you enjoy making this long, sleepy little pup. He is such a fun, quick project and makes a wonderful handmade gift.
If you run into any trouble or just want to share how your pup turned out, please reach out. I love seeing what you create.
Happy crocheting!