October 19, 2026
Bubbling Cauldron Buddies
Two tiny cauldrons are cooking up something sweet. One is a soft gray pot with big round eyes, a little smile, and a purple potion bubbling over the top, and the other is a velvety black pot filled with lime green bubbles. Both are plump and round with stubby little feet, so they sit up all on their own. They are worked in squishy chenille yarn from simple spheres, so they are quick to make and perfect for a Halloween shelf, a desk decoration, or a gift for a little witch. Pour something warm, grab your spookiest colors, and let us stir up a potion.
Jump to pattern instructions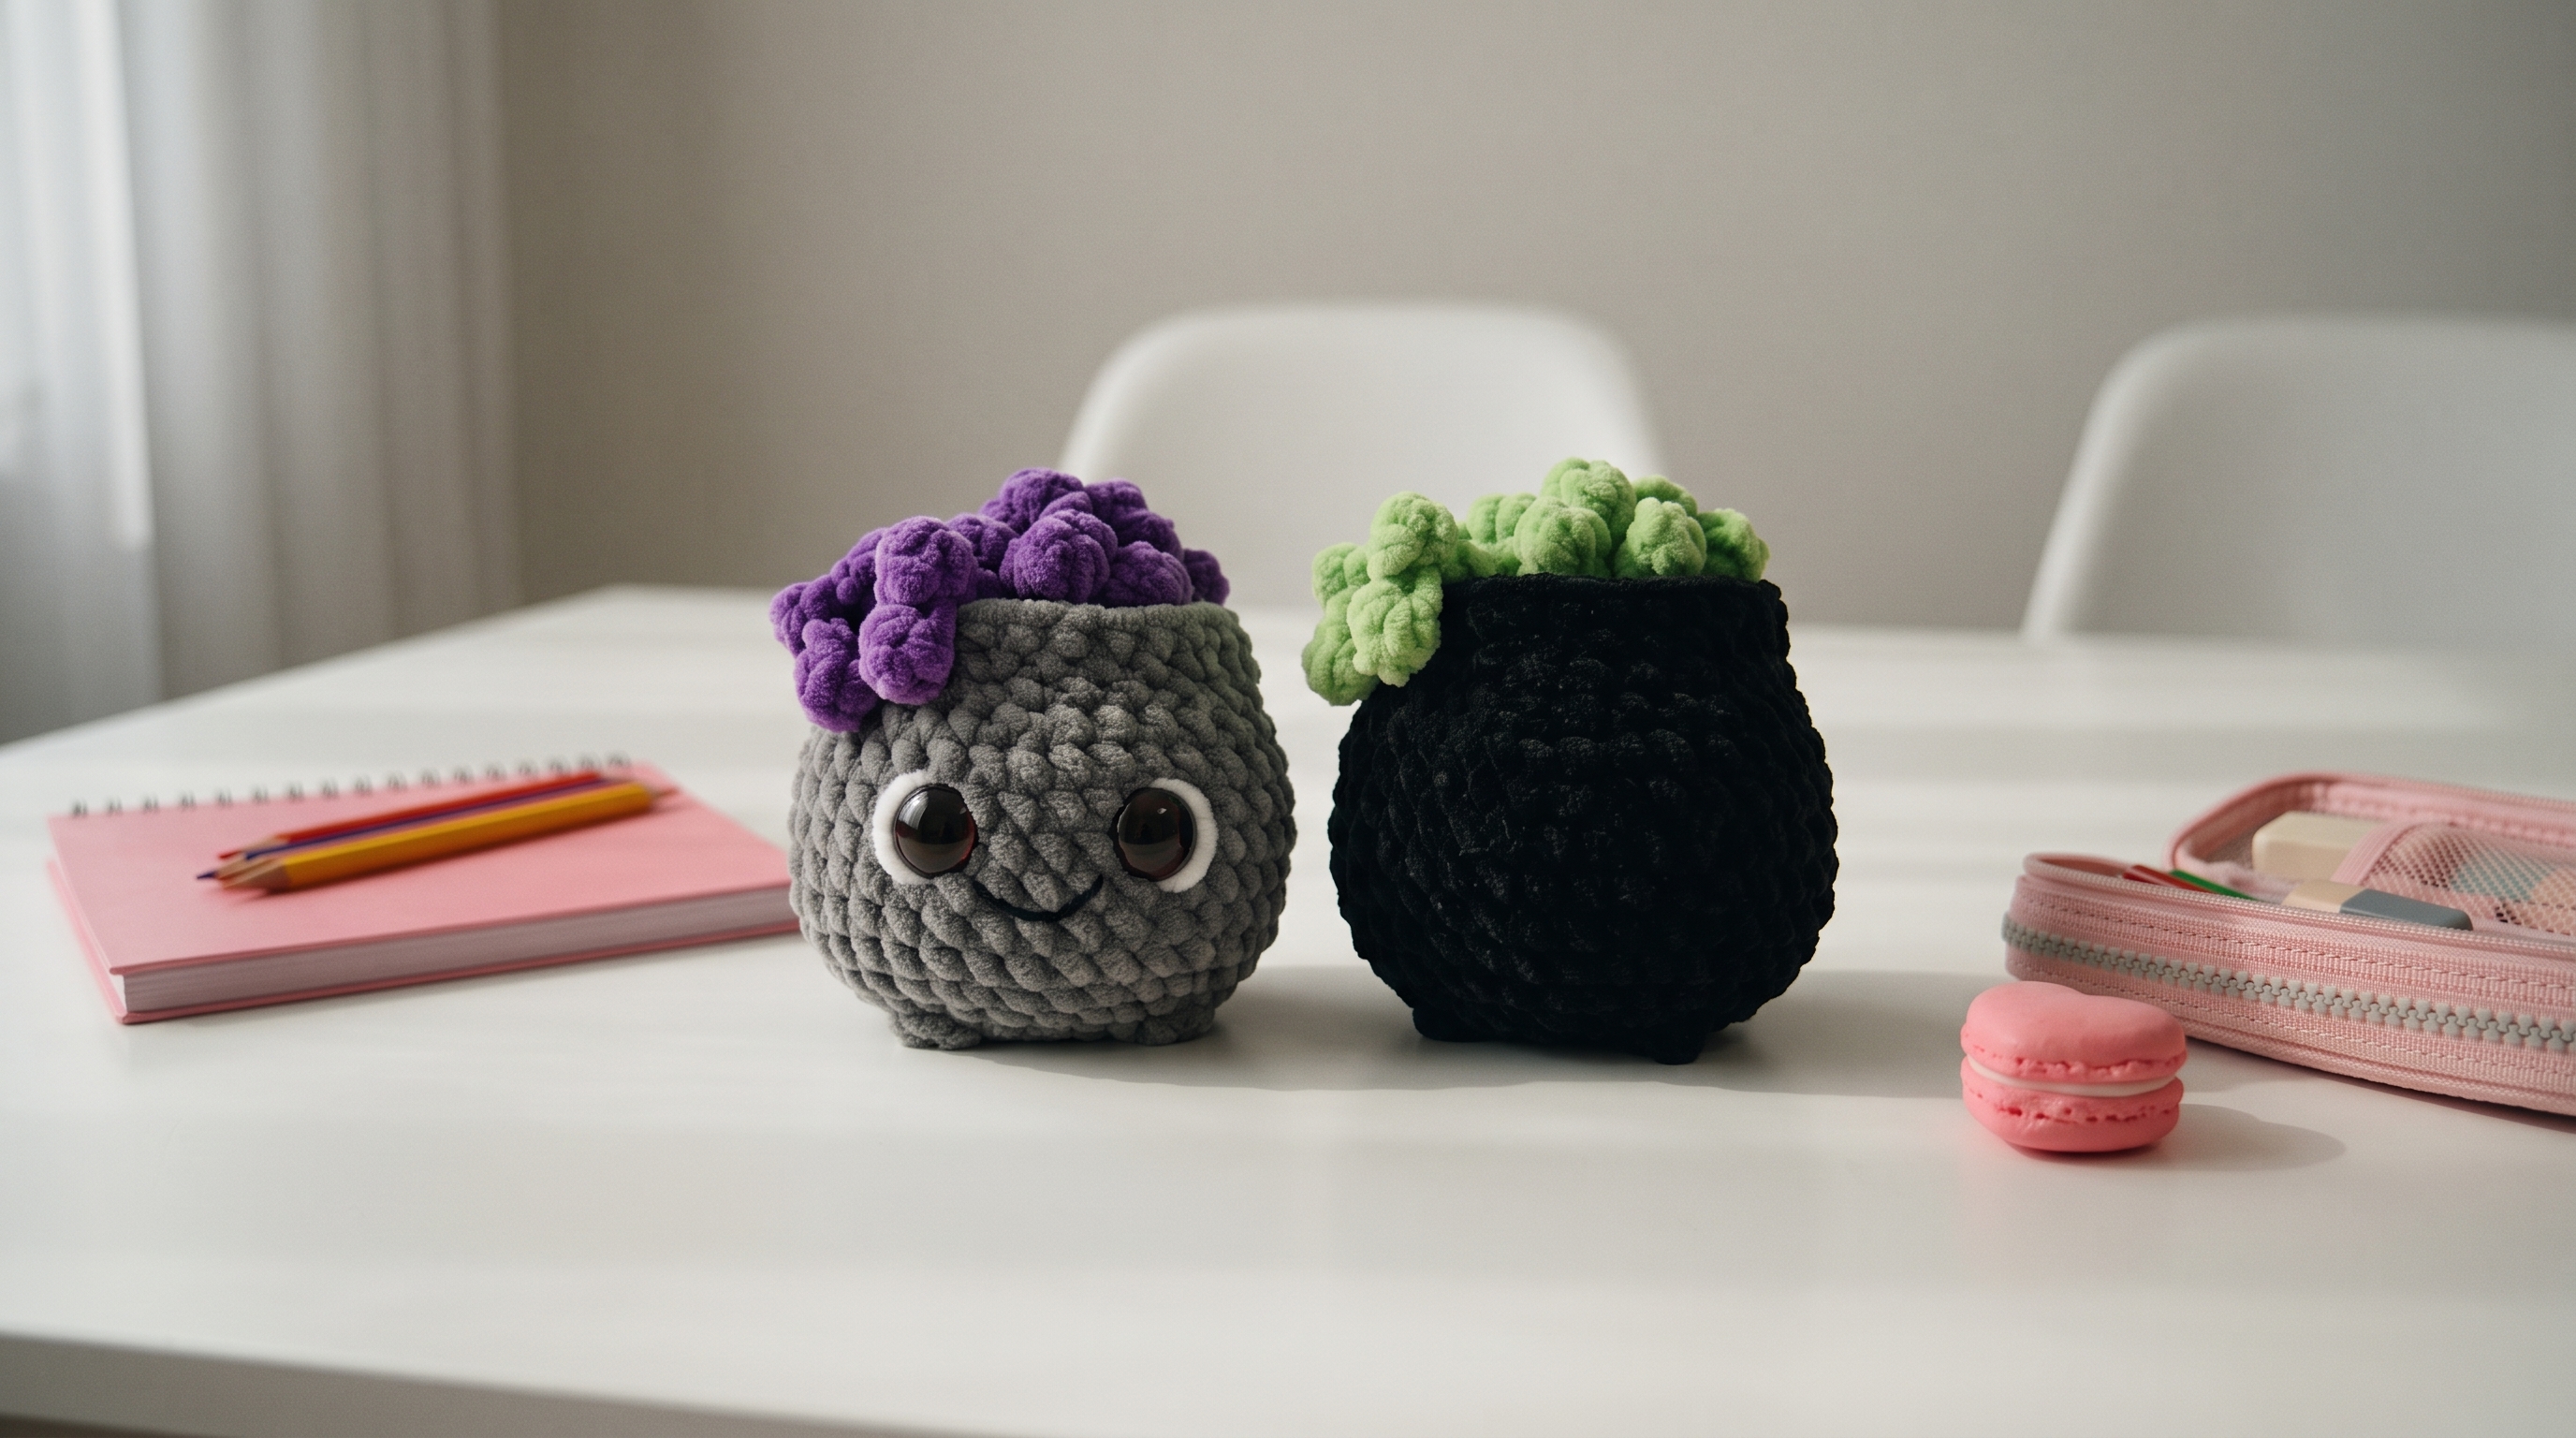
Bubbling Cauldron Buddies
Difficulty: Easy (basic shapes, plus lots of tiny bubbles to sew on)
Finished Size: Each cauldron is about 3.5 inches (9 cm) tall and 4.5 inches (11 cm) wide, not including the bubbles, in chunky chenille yarn.
Time to Complete: About 2 hours per cauldron.
What You Will Need
Yarn (for one cauldron):
- Gray or black chenille or velvet yarn (G), about 60 yards (55 m), for the pot and the feet
- Purple or lime green chenille or velvet yarn (P), about 40 yards (37 m), for the potion lid and the bubbles
- White, a tiny scrap, for the eye rings (gray cauldron only)
- Dark brown or black embroidery thread, for the smile (gray cauldron only)
- Tip: The photo shows a soft chenille or velvet yarn, which gives that plush, squishy look. For this yarn, use a 4.0 to 4.5 mm hook, and work in good light. Dark chenille is hard to see, so count your stitches at the end of every round. You can also use DK weight cotton with a 3.0 mm hook for a smaller, firmer cauldron.
Tools:
- 4.0 mm (G/6) or 4.5 mm (7) crochet hook for chenille yarn
- 12 mm brown or black safety eyes (1 pair, for the gray cauldron), or large black beads
- Poly-fil or fiberfill stuffing
- Yarn needle with a large eye for sewing and embroidering
- Stitch markers
- Sharp scissors
- Straight pins for placing the pieces before sewing
The Basics (US Terms)
- MR = magic ring
- sc = single crochet
- inc = increase (work 2 single crochets into the same stitch)
- dec = decrease (work 2 single crochets together, invisible decrease is best)
- sl st = slip stitch
- BLO = back loop only
- G, P = gray (or black), potion color (purple or green)
- All pieces are worked in continuous rounds. Use a stitch marker to mark the first stitch of each round.
Let Us Get Started
Each cauldron is made of a round pot, a potion lid, three little feet, and a handful of bubbles. The gray cauldron also gets a face.
Part 1: The Pot
Worked with gray (or black) yarn. Start at the bottom.
- Round 1: Work 6 sc into a magic ring. (6 stitches)
- Round 2: Inc in every stitch around. (12 stitches)
- Round 3: (1 sc, inc) repeat 6 times. (18 stitches)
- Round 4: (2 sc, inc) repeat 6 times. (24 stitches)
- Round 5: (3 sc, inc) repeat 6 times. (30 stitches)
- Round 6: (4 sc, inc) repeat 6 times. (36 stitches)
- Rounds 7 to 11: Work 1 sc in every stitch around. (36 stitches) This is the belly of the pot. If you are making the gray cauldron with safety eyes, place them now between rounds 8 and 9, about 10 stitches apart. Secure them tightly on the inside.
- Round 12: (4 sc, dec) repeat 6 times. (30 stitches)
- Rounds 13 to 14: Work 1 sc in every stitch around. (30 stitches)
- Round 15: (3 sc, dec) repeat 6 times. (24 stitches)
- Round 16: Work 1 sc in every stitch around. (24 stitches)
- Stuff the pot firmly, so it is nice and round, packing the stuffing up to just below the opening.
- Join with a sl st to the next stitch and fasten off, leaving a long tail. Weave in the end. Leave the 24 stitch opening at the top. The potion lid will sit inside it.
Part 2: The Potion Lid
Worked with purple (or green) yarn.
- Round 1: Work 6 sc into a magic ring. (6 stitches)
- Round 2: Inc in every stitch around. (12 stitches)
- Round 3: (1 sc, inc) repeat 6 times. (18 stitches)
- Round 4: (2 sc, inc) repeat 6 times. (24 stitches)
- Join with a sl st to the next stitch and fasten off, leaving a long tail for sewing. Do not stuff.
- Place the lid in the opening of the pot, and sew it all the way around with the tail, through the front loops of the last round of the pot and the lid. Sink it slightly, so the pot has a rim around the potion.
Part 3: The Feet (Make 3)
Worked with gray (or black) yarn.
- Round 1: Work 6 sc into a magic ring. (6 stitches)
- Round 2: Inc in every stitch around. (12 stitches)
- Round 3: Work 1 sc in every stitch around. (12 stitches)
- Round 4: Dec 6 times. (6 stitches)
- Stuff very lightly.
- Cut the yarn, leaving a long tail for sewing. Pull the tail through the front loops of the last 6 stitches and pull tight to close.
Part 4: The Bubbles
Worked with purple (or green) yarn. Make about 8 small bubbles and 4 large bubbles per cauldron.
Small bubble:
- Round 1: Work 6 sc into a magic ring. (6 stitches)
- Round 2: Inc in every stitch around. (12 stitches)
- Round 3: Work 1 sc in every stitch around. (12 stitches)
- Round 4: Dec 6 times. (6 stitches)
- Stuff lightly, so it is a plump ball.
- Cut the yarn, leaving a long tail for sewing. Pull the tail through the front loops of the last 6 stitches and pull tight to close. Do not cut the tail yet.
Large bubble:
- Round 1: Work 6 sc into a magic ring. (6 stitches)
- Round 2: Inc in every stitch around. (12 stitches)
- Round 3: (1 sc, inc) repeat 6 times. (18 stitches)
- Rounds 4 to 5: Work 1 sc in every stitch around. (18 stitches)
- Round 6: (1 sc, dec) repeat 6 times. (12 stitches)
- Stuff lightly, so it is a plump ball.
- Round 7: Dec 6 times. (6 stitches)
- Cut the yarn, leaving a long tail for sewing. Pull the tail through the front loops of the last 6 stitches and pull tight to close. Do not cut the tail yet.
Part 5: The Eye Rings (Gray cauldron only, make 2)
Worked with white yarn.
- Round 1: Work 6 sc into a magic ring. (6 stitches)
- Round 2: Inc in every stitch around. (12 stitches)
- Join with a sl st to the next stitch and fasten off, leaving a long tail for sewing. Flatten the little disc.
Assembly and Finishing
This is where your cauldrons come to life. Take your time pinning before you sew.
Making the Face (gray cauldron):
- If you did not place safety eyes earlier, sew 12 mm black beads on the pot now, between rounds 8 and 9, about 10 stitches apart.
- Slide an eye ring behind each eye (or sew it around the eye), and sew it on with the long tail, so the white peeks out around the eye.
- With dark brown or black embroidery thread, embroider a small smile between the eyes, about 4 stitches wide and 2 rounds below them. Make a gentle curve, using a few tiny stitches.
- Pull the stitches snug, but not tight enough to pucker the pot. Weave in the ends on the inside. The black cauldron has no face, so you can skip this step, or add a face if you like.
Attaching the Feet:
- Place the pot upside down, and pin 3 feet around the bottom, about 3 stitches from the center, evenly spaced.
- Sew each foot on firmly with its tail, going around twice. Check that the pot sits upright and does not wobble.
Adding the Bubbles:
- Pin the large bubbles around the rim, over the edge of the lid, spaced about 1 inch (2.5 cm) apart. Let some bubbles hang slightly over the rim, so the potion looks like it is bubbling over.
- Fill the gaps and the center of the lid with the small bubbles, and let some sit on top of others, so the pile looks bumpy and full.
- Sew each bubble on with its tail, going through the lid and the rim with small stitches. Push the tail through to the inside and weave it in.
- For the look in the photo, pile the bubbles higher on one side of the cauldron.
- Weave in all remaining ends.
A Few Friendly Tips
- Counting chenille: Chenille yarn is hard to see, so use a stitch marker in every round, and count at the end of each round. A light-colored table or cloth helps you see the stitches.
- Keep it snug: Keep your tension tight and even. Loose stitches let the stuffing show through, especially with velvet yarn.
- Firm stuffing: Stuff the pot firmly, so it keeps its round shape. A soft pot looks flat.
- Standing strong: If a cauldron tips over, sew the feet a little further apart, and add more stuffing to the bottom of the pot.
- Different potions: Try orange bubbles for a pumpkin brew, pink bubbles for a love potion, or white bubbles for foam.
- Make it a container: For a cauldron that holds treats, skip the stuffing and the lid, and work the pot up to Round 16 with a few extra rounds for height. Stuff only the bottom, and fill the top with candy. Add a handle by chaining 30 and sewing it to the sides.
- Add a handle: For a hanging cauldron, ch 24 in the pot color, fasten off, and sew each end to the sides of the rim.
- Size up: For a bigger cauldron, use jumbo chenille yarn and a 6.0 mm hook, with the same stitch counts.
- Make it your own: Try a cauldron with a ghost face, an orange pot with black bubbles, or a tiny wand sticking out of the potion.
- Safe for little ones: For babies and toddlers, skip the safety eyes and embroider the eyes with black yarn. Sew the feet and bubbles on with extra stitches.
- Care: Spot clean, or hand wash gently, and lay flat to dry. Shake the toy gently after finishing, since chenille can shed a little at first.
I hope you enjoy making these happy little cauldrons. They are such quick, squishy projects, and they make wonderful handmade gifts.
If you run into any trouble or just want to share how your cauldrons turned out, please reach out. I love seeing what you create.
Happy crocheting and happy Halloween!