October 1, 2026
Garden Granny Pillow
There is nothing cozier than a handmade pillow, and this one feels like a little flower garden you can hug. Each cream-framed granny square holds its own blooming flower in rich navy, rust, peach, and dusty rose, so every square is a small happy surprise. It is a wonderful way to use up scrap yarn, and the finished pillow looks beautiful on a couch, a bed, or a reading chair. Grab your favorite warm drink, and let us stitch a garden together.
Jump to pattern instructions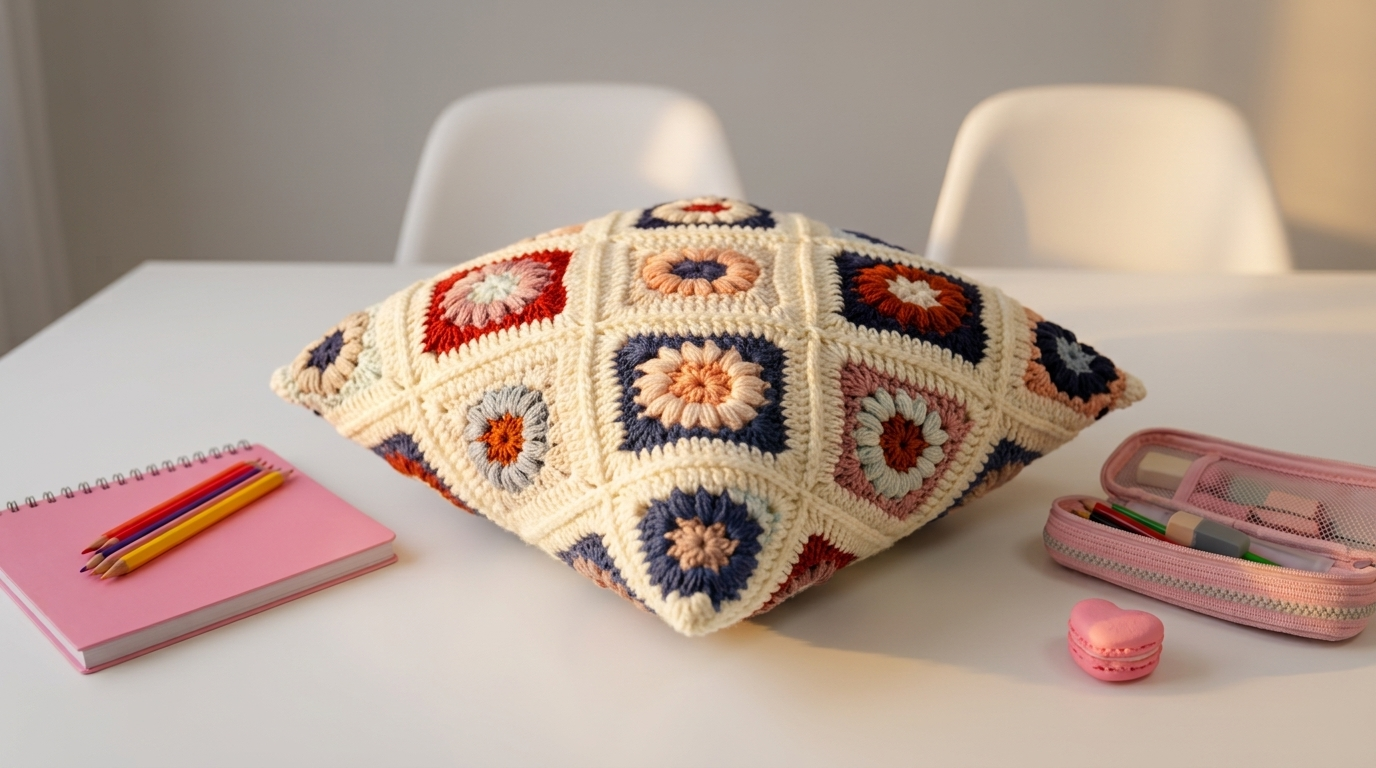
Garden Granny Pillow
Difficulty: Beginner friendly (if you can make a magic ring and a double crochet, you can make this)
Finished Size: About 12 inches square, made for a 12 inch (30 cm) pillow form.
Time to Complete: 10 to 12 hours, in easy, relaxing sessions.
What You Will Need
Yarn:
- Cream (for the square borders, joins, and edging), about 250 to 300 g
- Navy (for backgrounds and centers)
- Rust red (for flowers and backgrounds)
- Burnt orange (for centers)
- Peach (for flowers)
- Dusty pink (for flowers and backgrounds)
- Sage gray-blue (for flowers and centers)
- Tip: Use a DK or light worsted weight cotton yarn. Cotton gives crisp stitches that make the flowers stand out. The colored yarns only need small amounts of each, so scraps are perfect.
Tools:
- 3.5 mm (E/4) crochet hook
- 12 inch (30 cm) pillow form
- Yarn needle with a large eye for joining and weaving in ends
- Stitch markers
- Sharp scissors
- Blocking mats and pins (optional but very helpful)
The Basics (US Terms)
- MR = magic ring
- ch = chain
- sc = single crochet
- dc = double crochet
- sl st = slip stitch
- st(s) = stitch(es)
- sp = space
- Each round is joined with a slip stitch. Fasten off at the end of every round when you change colors.
Let Us Get Started
You will make 18 flower squares, 9 for the front and 9 for the back. Each square uses four colors:
- Color A = flower center
- Color B = flower petals
- Color C = square background
- Cream = border
The Flower Square (Make 18)
- Round 1 (Color A): Work 12 sc into a magic ring. Join with a sl st to the first sc and fasten off. (12 stitches)
- Round 2 (Color B): Join in any stitch. Ch 3 (counts as a dc), dc in the same stitch. Work 2 dc in each of the next 11 stitches. Join with a sl st to the top of the beginning ch 3 and fasten off. (24 dc) This round makes the full, ruffled flower around the center.
- Round 3 (Color C): Join in any stitch. Ch 3 (counts as a dc), dc in each of the next 2 stitches. (2 dc, ch 2, 2 dc) in the next stitch for the corner, dc in each of the next 5 stitches. Repeat from * 2 more times. Work (2 dc, ch 2, 2 dc) in the next stitch for the last corner, dc in each of the last 2 stitches. Join with a sl st to the top of the beginning ch 3 and fasten off. (4 corners, 9 dc on each side)
- Round 4 (Cream): Join in any corner ch-2 sp. Ch 3 (counts as a dc), dc in the same space, ch 2, 2 dc in the same space for the first corner. Dc in each of the next 9 stitches, then (2 dc, ch 2, 2 dc) in the next corner space. Repeat from * 2 more times. Dc in each of the last 9 stitches. Join with a sl st to the top of the beginning ch 3 and fasten off. (4 corners, 13 dc on each side)
- Weave in all ends. Each square should measure about 3.75 inches.
Color Combinations
Use these six combinations, or mix your own. Make 3 of each.
| Combo | Color A (Center) | Color B (Petals) | Color C (Background) | |---|---|---|---| | 1 | Cream | Rust red | Navy | | 2 | Sage gray-blue | Dusty pink | Rust red | | 3 | Burnt orange | Peach | Navy | | 4 | Rust red | Sage gray-blue | Dusty pink | | 5 | Burnt orange | Sage gray-blue | Cream | | 6 | Navy | Peach | Cream |
Assembly and Finishing
This is where your garden comes together. Take your time laying everything out before you join.
Laying Out the Squares:
- Block your squares if you like, so they are all the same size and the corners are crisp.
- Lay out 9 squares in a 3 by 3 grid. Spread the colors out so no two matching backgrounds touch, either side by side or diagonally.
- Repeat to make a second layout for the back.
Joining the Squares:
- Using cream yarn and a yarn needle, hold two squares with right sides facing up. Whip stitch them together through the back loops only, from corner to corner.
- Join the squares into three strips of three, then join the three strips together. Make sure the corners meet neatly in the middle.
- Repeat for the second panel.
Making the Raised Seams (optional):
- To get the pretty raised cream grid shown in the photo, work a line of slip stitches in cream over each seam on the right side of the panel.
- Follow the seam line, keeping your stitches loose and even so the fabric does not pucker.
Closing the Pillow:
- Place the two panels with wrong sides together, lining up the edges.
- With cream yarn, join in a corner. Work 1 sc through both layers in every stitch along three sides, working 3 sc into each corner so the corners stay square.
- Insert the pillow form, pushing it well into the corners.
- Continue working sc through both layers along the last side to close the pillow. Fasten off and weave in the end.
A Few Friendly Tips
- Keep your gauge: Squares that are all the same size make joining much easier. If a square comes out smaller, block it gently to match the others.
- Weave as you go: With this many color changes, weave in ends right after finishing each square. It saves a lot of work later.
- Color planning: Lay out all your squares before joining, and take a photo. Seeing the whole layout helps you spot spots where colors clump together.
- Make it your own: Try a soft pastel palette, warm autumn colors, or a single color for the flowers and a different color for every background.
- Size it up: Make 4 by 4 squares per side for a larger lounge pillow or a small throw.
I hope you enjoy making this blooming little pillow. It is such a satisfying project, and every square feels like a tiny gift to yourself.
If you run into any trouble or just want to share how your pillow turned out, please reach out. I love seeing what you create.
Happy crocheting!