September 9, 2026
Heart Granny Square Tote Bag – A Romantic & Retro Crochet Project
Carry your love everywhere with this charming Heart Granny Square Tote Bag! Featuring a classic 3x3 grid of vintage-inspired heart motifs in deep red and cream, this bag is the perfect blend of retro nostalgia and modern style. With its sturdy handles and spacious interior, it’s a delightful intermediate project that’s perfect for everyday use, grocery runs, or a special date night.
Jump to pattern instructions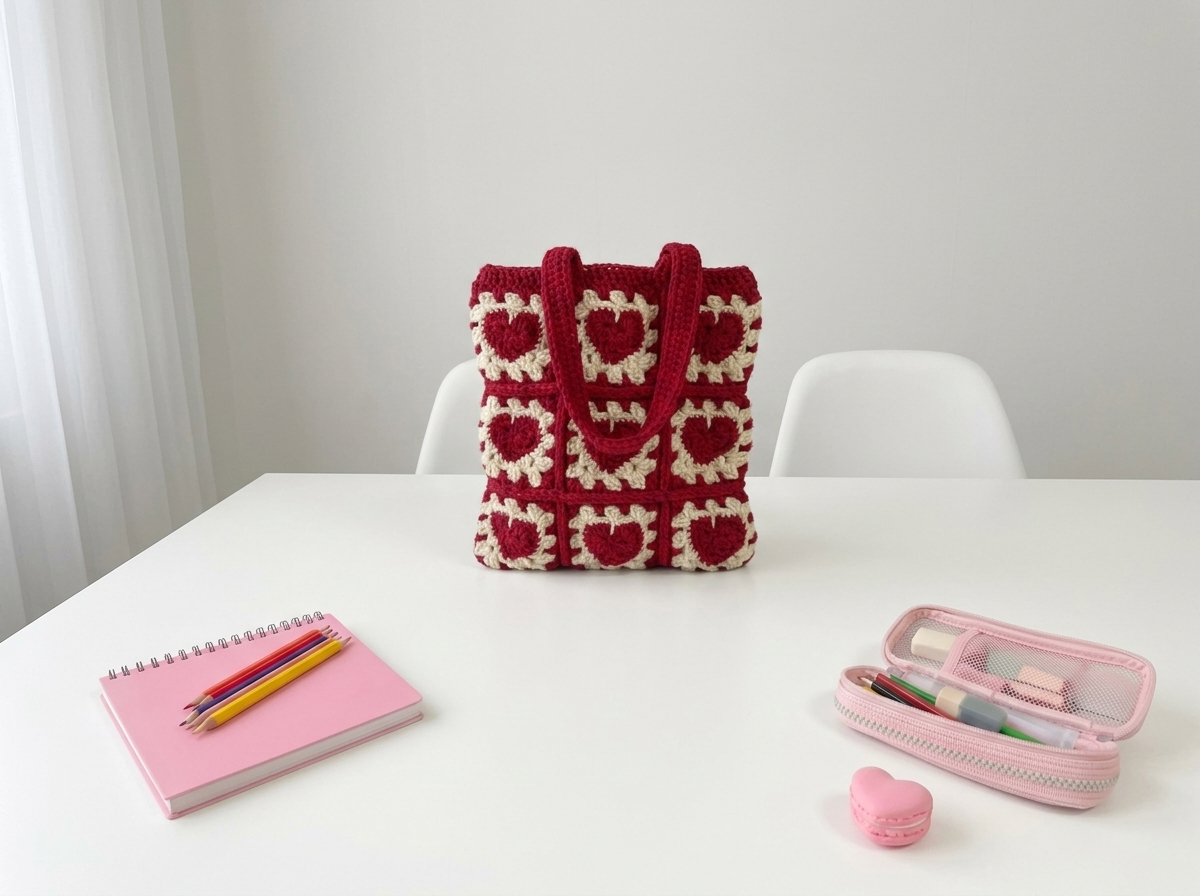
Heart Granny Square Tote Bag – Complete Step-by-Step Pattern
1. Gathering Your Supplies
To get that structured, durable look seen in the photo, a sturdy cotton or acrylic-cotton blend yarn is ideal. It holds its shape well and can handle the weight of your daily essentials.
- Yarn: Worsted weight (Size 4) cotton yarn (e.g., Lily Sugar'n Cream, Paintbox Cotton Aran).
- Color A (Deep Red/Burgundy): Approx. 200g (for the hearts, borders, and handles).
- Color B (Cream/Off-White): Approx. 100g (for the background of the squares).
- Hook: 4.5 mm (US 7) or 5.0 mm (US H/8) (choose the size that gives you a firm, non-stretchy fabric).
- Notions: Tapestry needle for weaving in ends and sewing, scissors, stitch markers, and a measuring tape.
- Finished Size: Approximately 30 cm x 30 cm (12" x 12"), excluding handles.
What you'll master: Color changing, working modular squares, and constructing a sturdy, functional bag.
2. Abbreviations & Special Techniques
Let’s quickly review a few terms. If you're new to Granny Squares, this is the perfect project to practice!
- MR: Magic ring
- ch: Chain
- sc: Single crochet
- hdc: Half double crochet
- dc: Double crochet
- sl st: Slip stitch
- sp: Space (the gap created by chains in the previous row)
- Cluster: 3 dc worked into the same space.
- Whip Stitch: A simple sewing technique used to join pieces together by looping the yarn over the edges.
3. The Heart Granny Square (Make 9)
We’ll create a classic square motif featuring a sweet heart in the center. You can use a specific heart chart, or follow this simplified "Heart Center" method.
- Round 1 (The Heart - Color A):
- Ch 4. Sc in 2nd ch from hook, hdc in next ch, 3 dc in last ch. Working down the opposite side of the starting chain: hdc in next ch, sc in next ch. Sl st to join to form a small heart shape.
- Fasten off Color A.
- Round 2 (Squaring it off - Color B):
- Join Cream yarn in any stitch of the heart.
- Work sc evenly around the entire heart, placing 3 sc in the top dips and the bottom point to keep it flat. You should have approx. 20-24 sts. Sl st to join.
- Round 3 (The Border - Color A):
- Join Red yarn in any corner space (or create a corner by ch 3).
- Ch 3 (counts as first dc), 2 dc in same sp (corner made).
- Ch 1, [3 dc, ch 2, 3 dc] in next corner space.
- Repeat around: Ch 1, 3 dc in next corner space.
- Sl st to join.
- Fasten off and weave in ends.
Pro Tip: Make all 9 squares before assembling. It’s much easier to manage your yarn ends this way!
What you'll master: Consistent tension in granny squares and clean color changes.
4. Assembling the Bag Body
Now for the magic moment where your squares turn into a bag!
- Layout: Arrange your 9 squares into a 3x3 grid (3 squares wide, 3 squares tall).
- Joining: Place two squares together with right sides facing up. Using your tapestry needle and Red yarn, whip stitch the squares together through the back loops only. This creates a flat, sturdy seam that looks like a decorative ridge.
- Sewing: Join all squares into three horizontal rows first. Then, join the three rows together vertically to form the main body of the bag.
- The Bottom & Sides: Once the 3x3 panel is complete, fold it in half (or sew the sides and bottom if you made a flat panel). For this design, it looks like a flat panel folded up, or sewn on three sides. Let's sew the two side seams and the bottom seam securely.
What you'll master: Visualizing geometric patterns and executing strong, invisible seams.
5. The Sturdy Handles
The handles need to be strong to hold the weight of your bag. We’ll make two thick, flat straps.
- Instructions (Make 2):
- With Red yarn, Ch 40 (or measure across your shoulder for desired length).
- Row 1: Sc in 2nd ch from hook and each ch across. (39 sc).
- Row 2: Ch 1, turn. Sc in each st across.
- Row 3: Ch 1, turn. Sc in each st across.
- Row 4: Ch 1, turn. Sc in each st across. (You want a strap about 1 cm thick).
- Finishing: Fasten off, leaving a very long tail for sewing.
What you'll master: Creating durable, load-bearing accessories.
6. Attaching the Handles & Top Rim
To give the bag a professional finish and secure the handles, we’ll add a top border.
- Positioning: Pin the handles to the inside top edge of the bag. They should be attached to the top row of squares, spaced evenly (usually about one square-width apart from the side seams).
- Sewing: Using the long tails, sew the handles securely to the bag, going through all layers. Reinforce with an "X" stitch for extra strength.
- The Top Rim: Join Red yarn at the top corner of the bag. Work a round of Single Crochet (sc) evenly around the entire top opening. When you reach the handles, work sc over the base of the handle to encase it and make it seamless.
- Finishing: Sl st to join. Fasten off and weave in all ends.
What you'll master: Integrating handles seamlessly and creating a polished, structured edge.
Final Section: Where to Go from Here
Congratulations! You’ve just crafted a beautiful, romantic Heart Granny Square Tote Bag. This project is a fantastic way to use up stash yarn and practice your square-making skills.
From here, try experimenting with different color palettes to create a whole collection! You could make a "pastel" version with pinks and mint, or a "bold" version with black and yellow. You could even line the bag with a cute floral fabric to give it extra structure and protect your belongings. Happy crocheting, and enjoy your stylish new handmade accessory! 💖