October 5, 2026
Little Pumpkin Bucket Hat
This cheerful hat looks like a fresh-picked pumpkin. A smooth, round orange crown ends in a pretty ruffled brim that bounces with every step, and a little curly green stem on top finishes the look. It is made from basic stitches, with the crown worked flat in the round from the top down, and the ruffle comes from one simple row of increases. It works up in an afternoon, so it is perfect for pumpkin patch trips, Halloween costumes, or just brightening a gray autumn day. Pour something warm, grab your brightest orange yarn, and let us stitch a pumpkin you can wear.
Jump to pattern instructions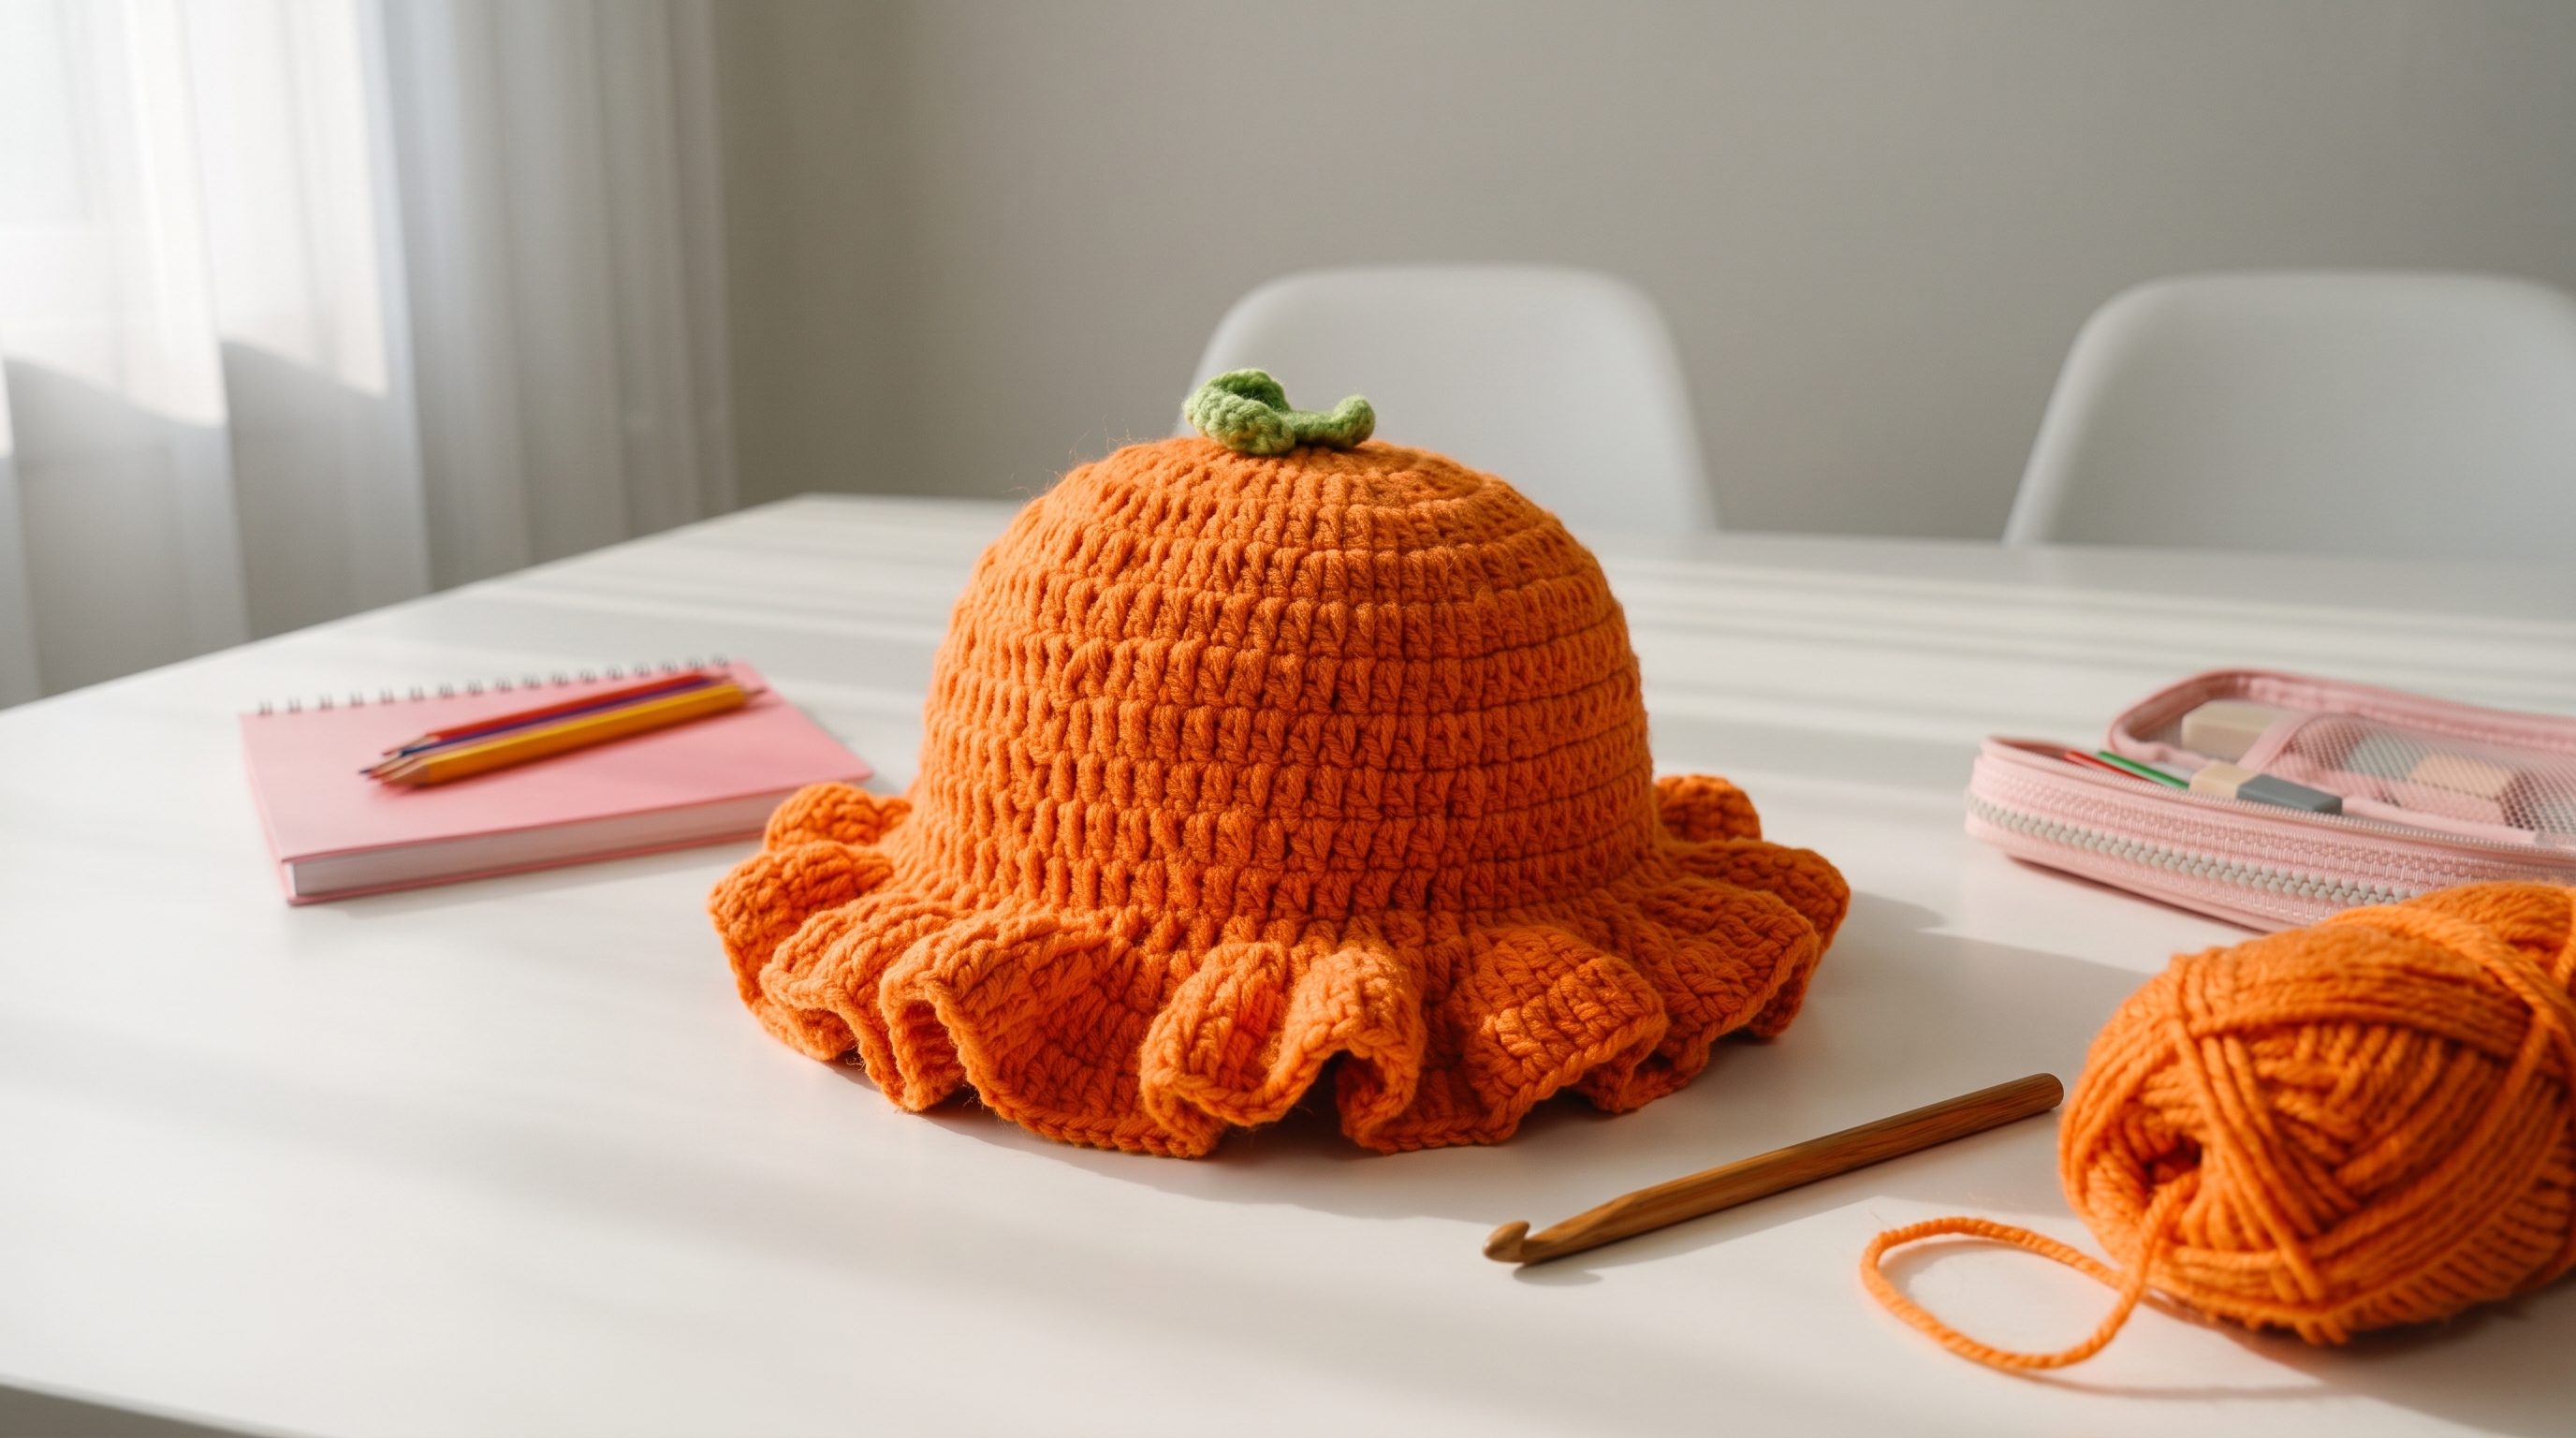
Little Pumpkin Bucket Hat
Difficulty: Easy (basic stitches, with a simple ruffle)
Finished Size: Adult medium, fits a 21 to 22 inch (53 to 56 cm) head. About 5 inches (13 cm) tall for the crown, plus a 2 inch (5 cm) ruffle. Sizing for kids and babies is in the tips.
Time to Complete: 2 to 3 hours.
What You Will Need
Yarn:
- Orange (O), about 150 yards (137 m)
- Light green (G), a small scrap of about 10 yards (9 m), for the stem
- Tip: Use a worsted weight cotton blend or soft acrylic yarn. A cotton blend gives crisp stitches and a nice structure for the ruffle. Pick a smooth yarn so the stitches show clearly.
Tools:
- 4.5 mm (7) crochet hook. Go up or down a size if your gauge does not match.
- Yarn needle with a large eye for sewing and weaving in ends
- Stitch markers
- Sharp scissors
- Straight pins
- Blocking mats and pins (optional but helpful)
Gauge: 15 stitches and 16 rounds in single crochet = 4 x 4 inches (10 x 10 cm). Please make a swatch, since the gauge decides how the hat fits.
The Basics (US Terms)
- MR = magic ring
- ch = chain
- sc = single crochet
- hdc = half double crochet
- inc = increase (work 2 stitches into the same stitch)
- sl st = slip stitch
- st(s) = stitch(es)
- The hat is worked in continuous rounds, from the top down. Use a stitch marker to mark the first stitch of each round, and move it up as you go.
- Some rounds say "join with a sl st." For those rounds, join to the first stitch of the round, then continue in a spiral.
Let Us Get Started
We will make the crown first, then the ruffle, then the stem.
Part 1: The Crown
Worked with orange yarn.
- Round 1: Work 6 sc into a magic ring. (6 stitches)
- Round 2: Inc in every stitch around. (12 stitches)
- Round 3: (1 sc, inc) repeat 6 times. (18 stitches)
- Round 4: (2 sc, inc) repeat 6 times. (24 stitches)
- Round 5: (3 sc, inc) repeat 6 times. (30 stitches)
- Round 6: (4 sc, inc) repeat 6 times. (36 stitches)
- Round 7: (5 sc, inc) repeat 6 times. (42 stitches)
- Round 8: (6 sc, inc) repeat 6 times. (48 stitches)
- Round 9: (7 sc, inc) repeat 6 times. (54 stitches)
- Round 10: (8 sc, inc) repeat 6 times. (60 stitches)
- Round 11: (9 sc, inc) repeat 6 times. (66 stitches)
- Round 12: (10 sc, inc) repeat 6 times. (72 stitches)
- Round 13: (11 sc, inc) repeat 6 times. (78 stitches) The flat circle should now measure about 5 inches (13 cm) across. If it curls up like a bowl, you are pulling too tight. If it ruffles, you are working too loosely.
- Rounds 14 to 20: Work 1 sc in every stitch around. (78 stitches) This makes the sides of the crown. To make the hat taller or shorter, add or remove rounds here, so the crown measures about 5 inches (13 cm) from the top.
- Round 21: Work 1 sc in every stitch around. Join with a sl st to the first stitch. Do not fasten off. (78 stitches)
Part 2: The Ruffle Brim
Worked with orange yarn, continuing from the crown.
- Round 22: Ch 1. Inc in every stitch around. Join with a sl st to the first stitch. (156 stitches) This round doubles the stitches, so the extra fabric ripples into ruffles.
- Round 23: Ch 1. Sc in every stitch around. Join with a sl st. (156 stitches)
- Round 24: Ch 2 (does not count as a stitch). Hdc in every stitch around. Join with a sl st to the top of the first hdc. (156 stitches)
- Round 25: Ch 2. Hdc in every stitch around. Join with a sl st to the top of the first hdc. (156 stitches)
- Round 26: Ch 1. Sc in every stitch around. Join with a sl st and fasten off. (156 stitches)
- Weave in the ends. The ruffle should be about 2 inches (5 cm) deep. If you would like it fuller, work Round 22 as 3 sc in every other stitch, for 195 stitches, and add the extra stitches to Rounds 23 to 26.
Part 3: The Stem
Worked with green yarn.
- Foundation: Ch 14, leaving a 6 inch (15 cm) tail at the start for sewing.
- Row 1: Work 2 sc in the 2nd ch from the hook, then work 2 sc in each chain across. (26 stitches) The extra stitches make the chain twist into a little curl.
- Fasten off, leaving a long tail for sewing.
- Gently twist the stem between your fingers, and let it curl. For a leafier stem, make a tiny leaf. Ch 6. Sl st in the 2nd ch from the hook, sc in the next ch, hdc in the next ch, sc in the next ch, sl st in the last ch. Fasten off, leaving a tail, and sew it next to the stem.
Assembly and Finishing
This is where your pumpkin comes together. Take your time, and try the hat on before you finish.
Attaching the Stem:
- Find the center of the crown, at the magic ring. Pin the stem there, with the curl facing up and slightly to one side.
- Using the tails, sew the base of the stem to the crown with small, firm stitches. Take the stitches through both the base of the stem and the crown, so it stays upright.
- Weave in all remaining ends.
Blocking:
- Pin the hat to a rounded form, such as a bowl or a balloon, and lightly steam or mist the crown. Do not press down on the ruffle, so it keeps its waves.
- Let it dry fully.
- Fluff the ruffle with your fingers, and arrange it into soft waves, with the folds evenly spaced around the brim.
A Few Friendly Tips
- Swatch first: Make a 4 x 4 inch swatch in single crochet, and check your gauge. If you have too many stitches per inch, go up a hook size. If you have too few, go down.
- Count as you go: Count your stitches at the end of each increase round. Each round should have 6 more stitches than the one before.
- Even ruffles: If the ruffle looks uneven, make sure you worked exactly 2 stitches in each stitch in Round 22. Counting the stitches at the end of the round should give you 156.
- Adjusting the size:
- Baby (16 inch or 41 cm head): Stop increasing after Round 9 (54 stitches), work even for 6 rounds, then work the ruffle with 108 stitches after the increase round.
- Child (19 inch or 48 cm head): Stop increasing after Round 11 (66 stitches), work even for 6 rounds, then work the ruffle with 132 stitches after the increase round.
- Large adult (23 inch or 58 cm head): Add Round 14 as (12 sc, inc) 6 times for 84 stitches, work even for 8 rounds, then work the ruffle with 168 stitches after the increase round.
- Cozy lining: For a chilly day, sew a layer of soft fleece or cotton fabric inside the crown.
- Make it your own: Try a white pumpkin hat with a green stem, a black witch hat version, a purple ruffle, or a yellow sunflower hat with brown stitches in the center.
- Care: Machine wash gently on a cool setting, and lay flat to dry. Reshape the ruffle with your fingers while it is damp.
I hope you enjoy making this happy little pumpkin hat. It is such a quick, satisfying project, and it makes a wonderful handmade gift for anyone who loves fall.
If you run into any trouble or just want to share how your hat turned out, please reach out. I love seeing what you create.
Happy crocheting and happy Halloween!