September 2, 2026
Big Teddy Bear Amigurumi – A Cozy & Cuddly Crochet Pattern
Bring this sweet, classic teddy bear to life! Standing at about 33 cm tall, this pattern features traditional amigurumi shaping, seamlessly attached limbs, and adorable embroidered facial details. It’s a heartwarming, intermediate-friendly project perfect for gifting or adding a touch of coziness to your handmade collection.
Jump to pattern instructions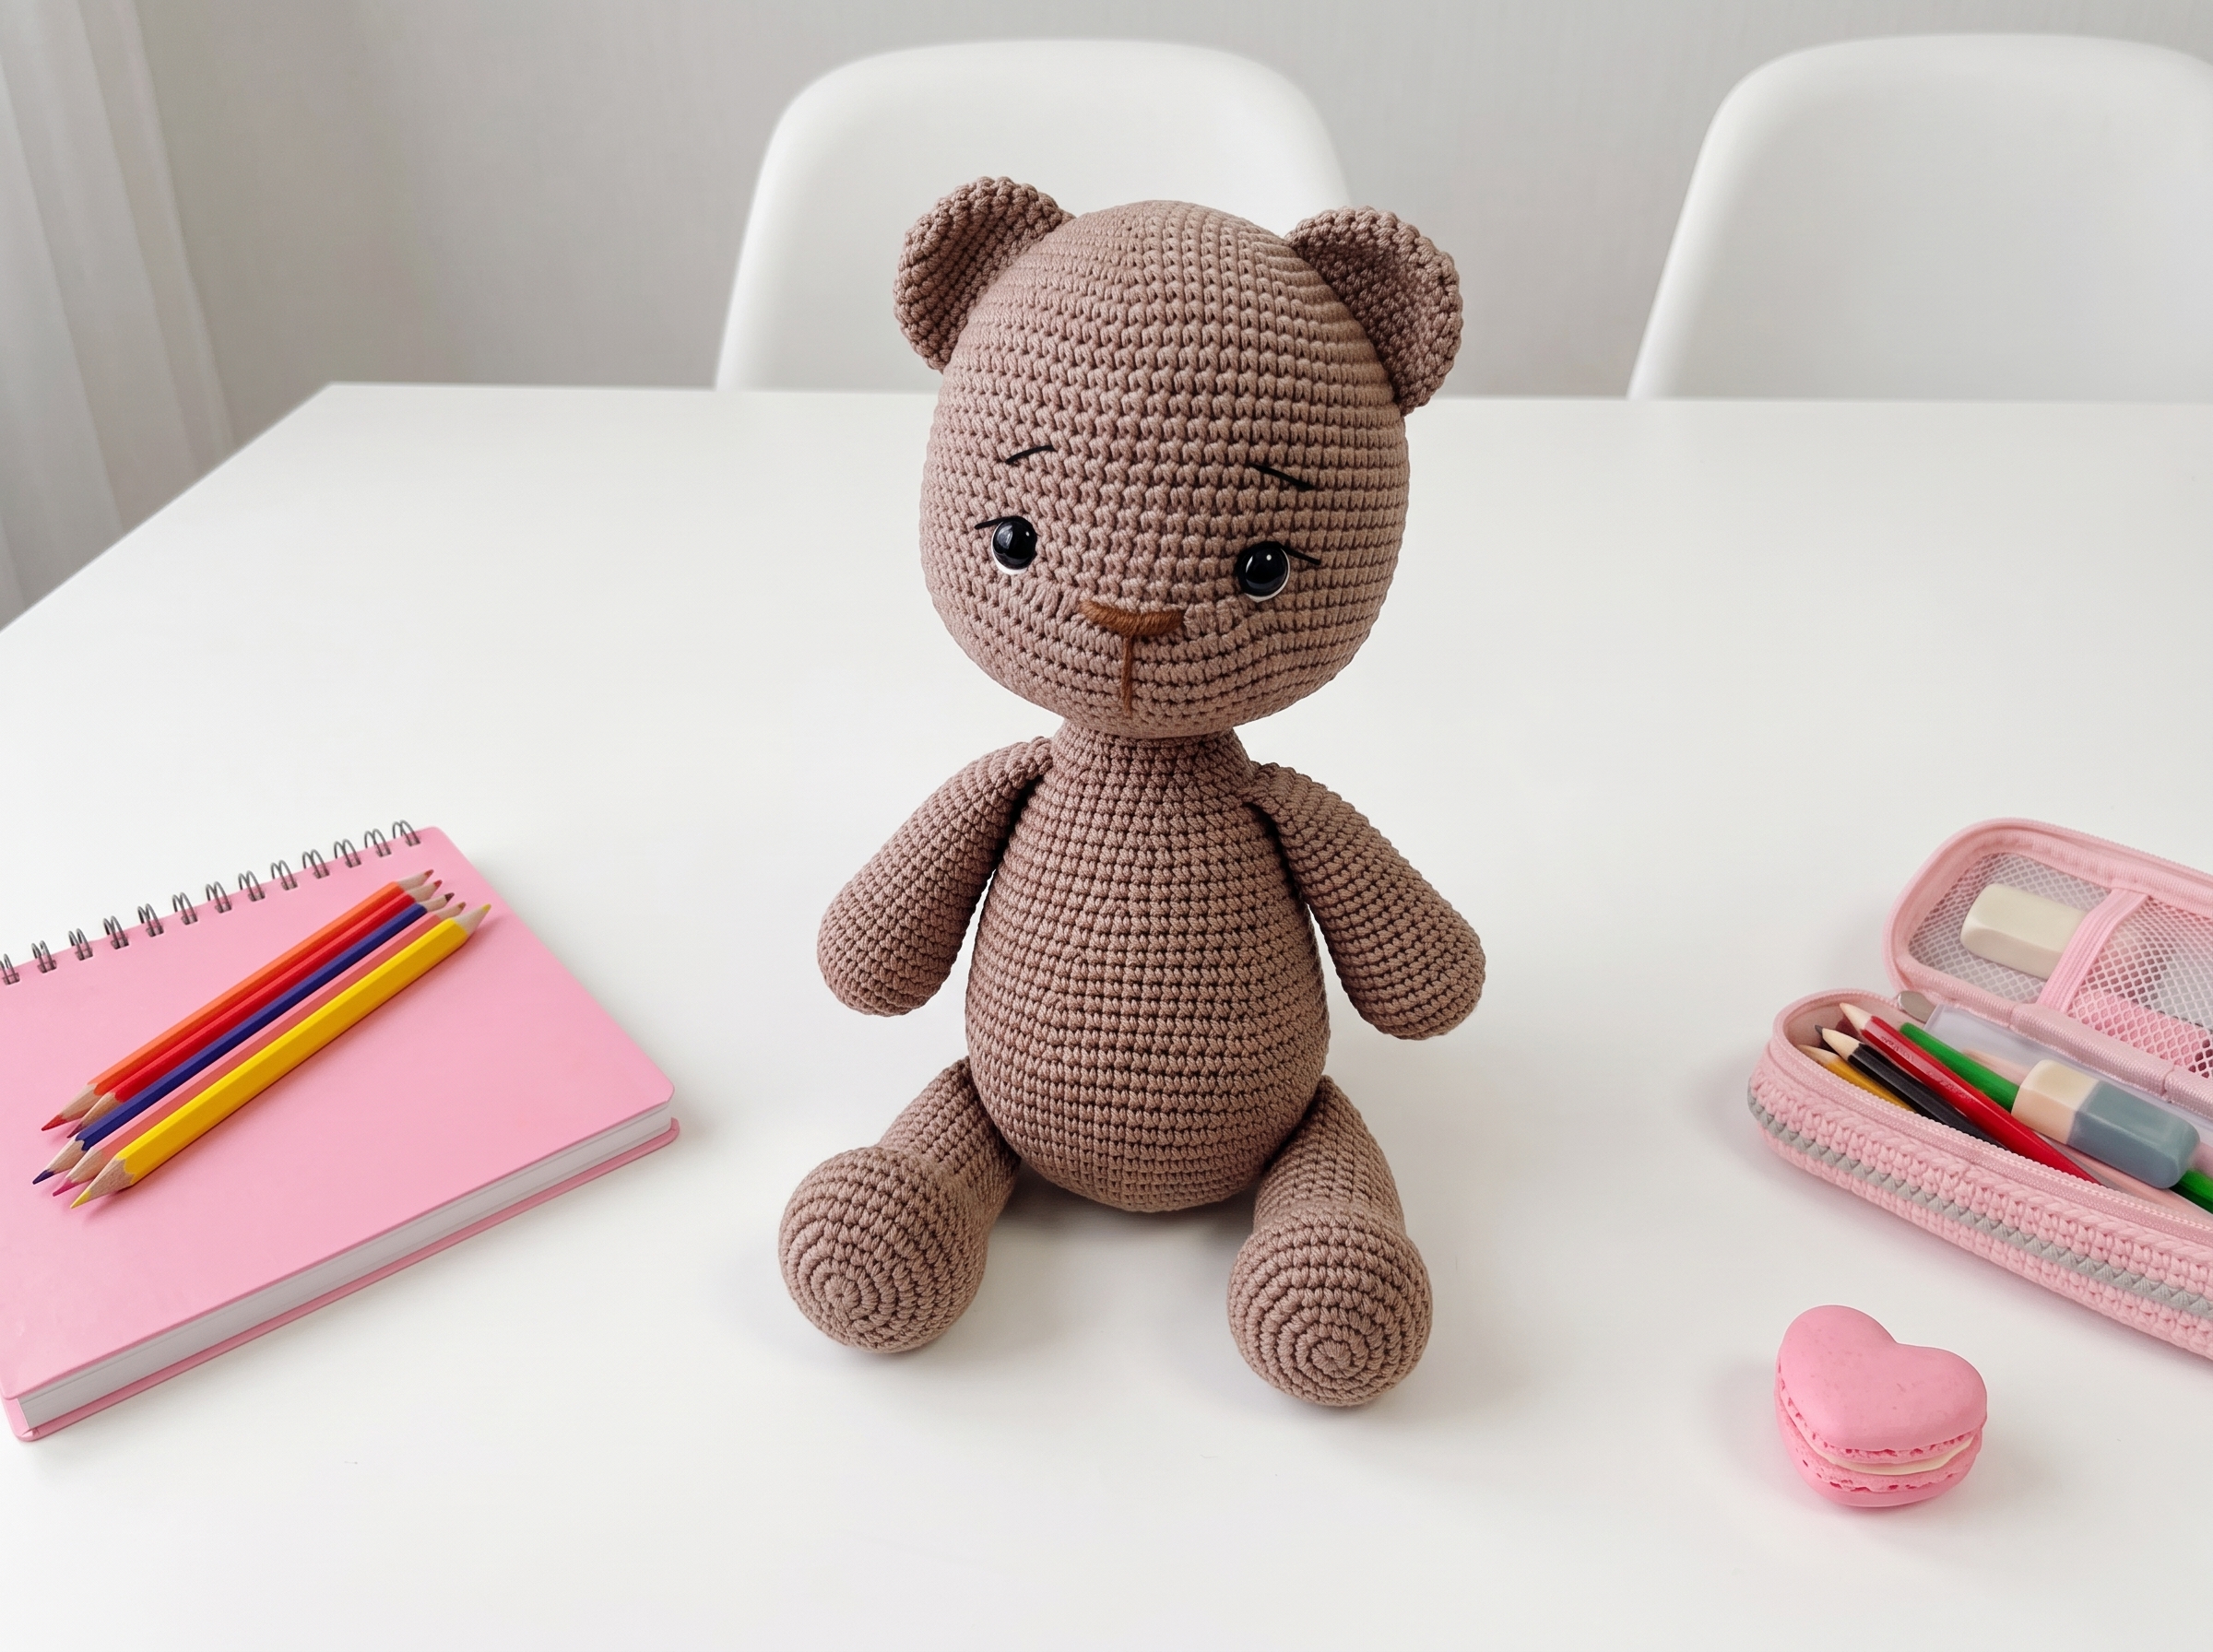
Big Teddy Bear – Complete Step-by-Step Pattern
1. Materials & Abbreviations
Let’s gather our supplies! Using a smooth, high-quality cotton blend will give your bear beautiful stitch definition and a lovely, huggable feel.
- Yarn: YarnArt Jeans #71 (approx. 2 skeins). You'll also need small amounts of black, brown, and white embroidery floss for the facial details.
- Hook: 2.0 mm (or the size needed to achieve a tight, stuff-proof gauge).
- Notions: 14–16 mm safety eyes, poly-fil stuffing, tapestry needle, and scissors.
- Abbreviations:
- MR – magic ring
- sc – single crochet
- inc – increase (2 sc in one stitch)
- dec – decrease (2 sc crocheted together)
- sl st – slip stitch
What you'll master: Proper tool selection, gauge management, and familiarization with standard international crochet abbreviations.
2. Head
The head is worked in a continuous spiral, building up to a beautifully rounded shape before gradually decreasing to form the neck.
- R1: 6 sc in MR (6)
- R2: 6 inc (12)
- R3: (1 sc, inc) x 6 (18)
- R4: (2 sc, inc) x 6 (24)
- R5: (3 sc, inc) x 6 (30)
- R6: (4 sc, inc) x 6 (36)
- R7: (5 sc, inc) x 6 (42)
- R8: (6 sc, inc) x 6 (48)
- R9: (7 sc, inc) x 6 (54)
- R10: (8 sc, inc) x 6 (60)
- R11: (9 sc, inc) x 6 (66)
- R12: (10 sc, inc) x 6 (72)
- R13-25: 72 sc (72) [13 rows]
- R26: 32 sc, 8 inc using hdc (80)
- Important detail: Insert 14–16 mm safety eyes between R24 and R25, spaced exactly 9 stitches apart.
- R27-30: 80 sc (80) [4 rows]
- R31: (8 sc, dec) x 8 (72)
- R32: (7 sc, dec) x 8 (64)
- R33: (6 sc, dec) x 8 (56)
- R34: (5 sc, dec) x 8 (48)
- R35: (4 sc, dec) x 8 (40)
- R36: (3 sc, dec) x 8 (32)
- R37: (2 sc, dec) x 8 (24)
- Finishing: Sl st, cut yarn, and leave a long tail for sewing.
What you'll master: Spiral increase sequences, precise safety eye placement, and structured decreasing for spherical shaping.
3. Ears (Make 2)
Simple, perky little ears that fold over just right to give the bear that classic teddy look.
- R1: 8 sc in MR (8)
- R2: 8 inc (16)
- R3: (1 sc, inc) x 8 (24)
- R4-7: 24 sc (24) [4 rows]
- Finishing: Fold the piece in half and work 12 sc through both layers to close it flat. Sl st, cut yarn, and leave a long tail for sewing. Attach to the head starting from row 6 downwards.
What you'll master: Working small, flat shapes and utilizing tension to create dimensional forms.
4. Legs (Make 2)
The legs feature a shaped foot that transitions smoothly into a sturdy leg, finished with a neat fold-and-sew method.
- R1: 8 sc in MR (8)
- R2: 8 inc (16)
- R3: (1 sc, inc) x 8 (24)
- R4: (2 sc, inc) x 8 (32)
- R5: (3 sc, inc) x 8 (40)
- R6-9: 40 sc (40) [4 rows]
- R10: 12 sc, 8 dec, 12 sc (32)
- R11: 8 sc, 8 dec, 8 sc (24)
- R12-27: 24 sc (24) [16 rows]
- Finishing: Fold the top opening in half and work 12 sc through both layers to close it flat. Sl st, cut yarn, and leave a long tail for sewing.
What you'll master: Progressive limb decreasing and flat-folding techniques for seamless closures.
5. Arms (Make 2)
These arms are wonderfully chunky and will look so cute hugging or hanging by the bear's sides.
- R1: 6 sc in MR (6)
- R2: 6 inc (12)
- R3: (1 sc, inc) x 6 (18)
- R4: (2 sc, inc) x 6 (24)
- R5-7: 24 sc (24) [3 rows]
- R8: (2 sc, dec) x 6 (18)
- R9-24: 18 sc (18) [16 rows]
- Finishing: Fold the top opening in half and work 9 sc through both layers to close it flat. Sl st, cut yarn, and leave a long tail for sewing.
What you'll master: Creating uniform, lightly stuffed tubular limbs.
6. Body
The body is worked from the bottom up, seamlessly integrating the legs and arms as you go for a sturdy, poseable core.
- R1: 6 sc in MR (6)
- R2: 6 inc (12)
- R3: (1 sc, inc) x 6 (18)
- R4: (2 sc, inc) x 6 (24)
- R5: (3 sc, inc) x 6 (30)
- R6: (4 sc, inc) x 6 (36)
- R7: (5 sc, inc) x 6 (42)
- R8: (6 sc, inc) x 6 (48)
- R9: (7 sc, inc) x 6 (54)
- R10: (8 sc, inc) x 6 (60)
- R11: (9 sc, inc) x 6 (66)
- R12: (10 sc, inc) x 6 (72)
- R13-18: 72 sc (72) [6 rows]
- R19: (10 sc, dec) x 6 (66)
- R20-21: 66 sc (66) [2 rows]
- R22: (9 sc, dec) x 6 (60)
- R23-24: 60 sc (60) [2 rows]
- R25: (8 sc, dec) x 6 (54)
- R26-27: 54 sc (54) [2 rows]
- R28: (7 sc, dec) x 6 (48)
- R29-30: 48 sc (48) [2 rows]
- R31: (6 sc, dec) x 6 (42)
- R32: 42 sc (42)
- R33: (5 sc, dec) x 6 (36)
- R34: 36 sc (36)
- Important detail: Attach the arms here by crocheting through the arm and body stitches simultaneously.
- R35: (4 sc, dec) x 6 (30)
- R36: 30 sc (30)
- R37: (3 sc, dec) x 6 (24)
- R38-39: 24 sc (24) [2 rows]
- Finishing: Sl st, cut yarn, and hide the end.
What you'll master: Seamless multi-piece joining, structured torso decreasing, and mid-round limb attachment.
7. Assembly & Finishing
Now for the magic moment where your teddy bear truly comes to life!
- Sewing: Attach the legs to the body around row 14, and the arms around row 34. Sew the ears to the top of the head.
- Yarn Sculpting: Use a long tapestry needle and strong thread to pull the muzzle inward, creating a sweet, indented snout.
- Facial Embroidery: Using your embroidery floss, stitch a cute little nose, delicate eyelashes, expressive eyebrows, and bright white eye highlights.
- Final Fluff: Give your bear a gentle hug, adjust the stuffing, and admire your handiwork!
What you'll master: Multi-step structural assembly, yarn sculpting for expressive facial features, and professional finishing techniques.
Final Section: Where to Go from Here
Congratulations! By completing this Big Teddy Bear, you’ve practiced foundational spiral shaping, clever limb integration, and expressive surface detailing. This project is a fantastic confidence-builder and makes an absolutely heartwarming gift.
From here, try experimenting with different yarn colorways to create a whole "forest friends" collection, or adapt the body pattern to design custom outfits (like a tiny scarf or hat!) for your new amigurumi companion. Happy crocheting!