October 5, 2026
Boo Tote
This roomy black tote looks like it was made for trick-or-treating, library runs, and cozy autumn errands. Soft, sturdy black stitches are scattered with tiny white ghosts, each with a sleepy smile and two dot eyes, floating across the front like they are playing hide and seek. The top splits into two rounded handles that sit side by side, so it is easy to carry on your arm. It is made from two flat panels, so there is no tricky shaping, and the little ghosts are simply stitched on a chart. Pour something warm, put on a good movie, and let us make a bag full of friendly haunts.
Jump to pattern instructions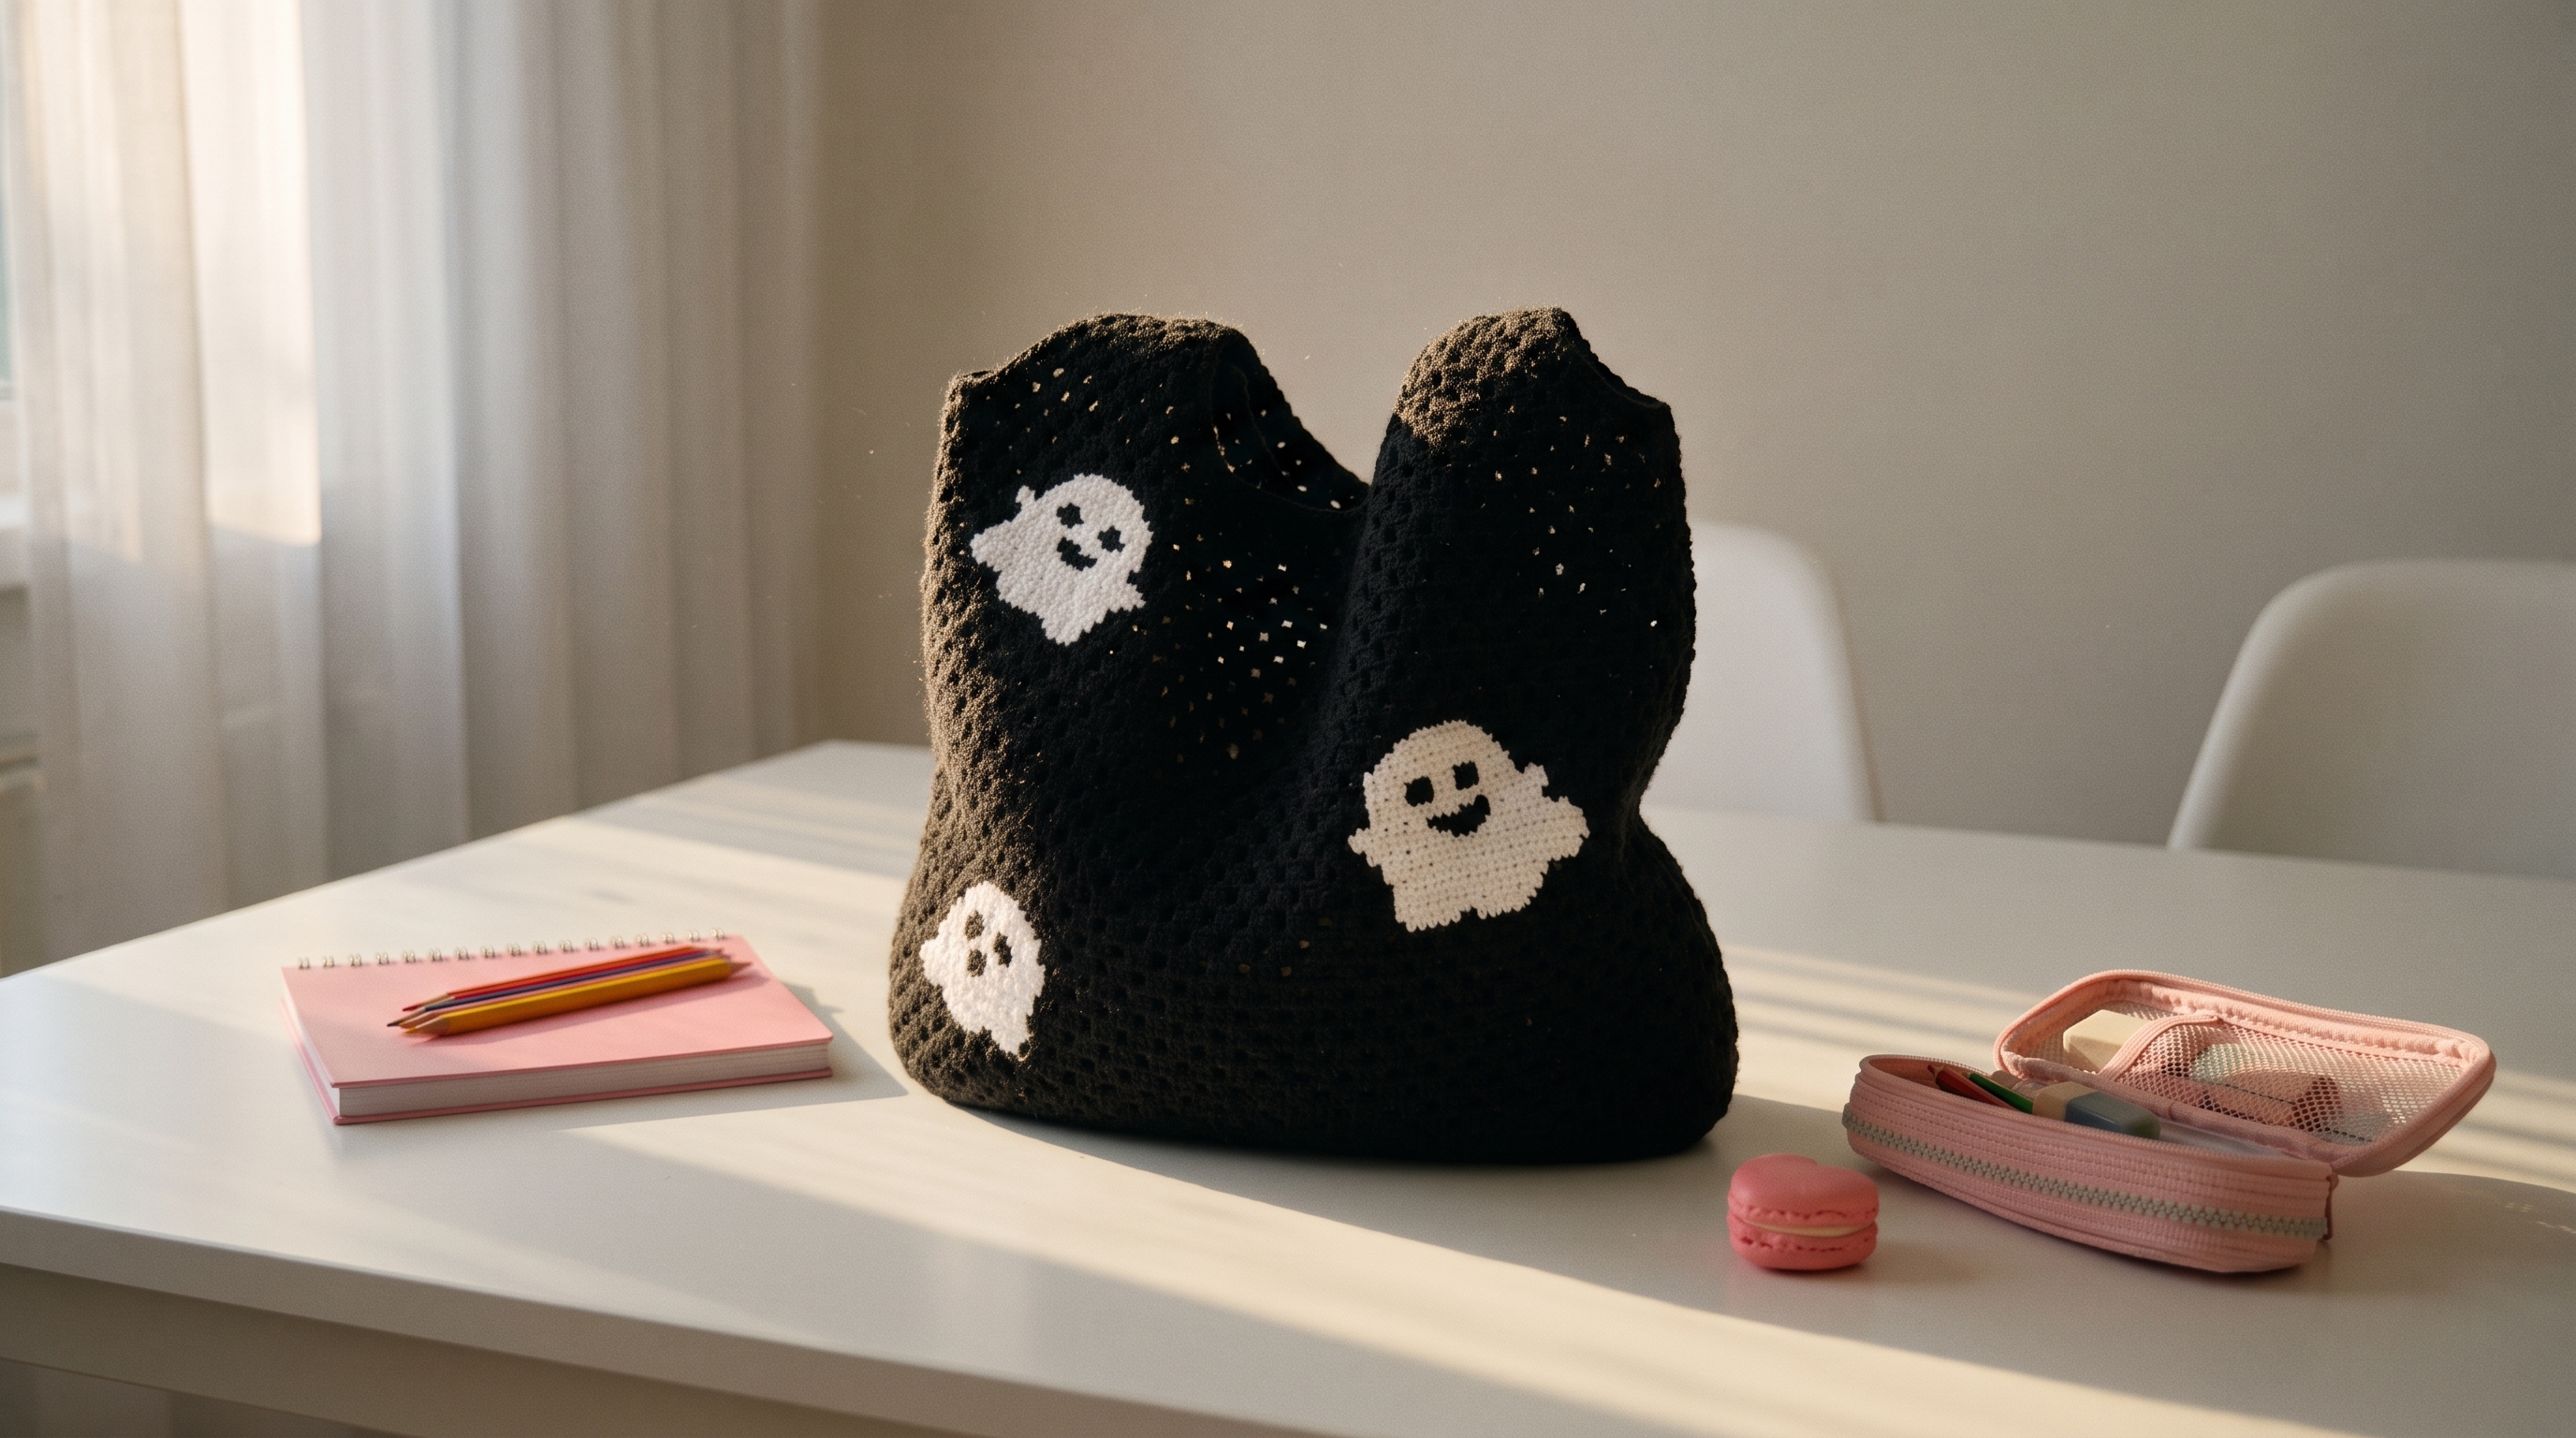
Boo Tote
Difficulty: Easy to intermediate (basic stitches, plus a small chart for the ghosts)
Finished Size: About 14 inches (36 cm) wide, 12 inches (30 cm) tall, and 4 inches (10 cm) deep, plus the handles, which add another 5 inches (13 cm).
Time to Complete: 8 to 10 hours.
What You Will Need
Yarn:
- Black (K), about 450 yards (410 m)
- White (W), about 40 yards (37 m), for the ghosts
- Tip: Use a worsted weight 100% cotton yarn. Cotton makes a sturdy bag that holds its shape and does not stretch out under the weight of your things. Hold the yarn double for a thicker bag if you like.
Tools:
- 4.0 mm (G/6) crochet hook
- Yarn needle with a large eye for sewing, embroidering, and weaving in ends
- Stitch markers
- Sharp scissors
- Straight pins
- Blocking mats and pins
- Optional: a piece of cotton fabric for lining, about 30 x 14 inches (76 x 36 cm), and a sewing needle and thread
Gauge: 16 stitches and 18 rows in single crochet = 4 x 4 inches (10 x 10 cm). Please make a swatch, since the gauge decides how big your bag is.
The Basics (US Terms)
- ch = chain
- sc = single crochet
- sc2tog = decrease (work 2 single crochets together)
- sl st = slip stitch
- RS / WS = right side / wrong side
- st(s) = stitch(es)
- K, W = black, white
- You will make 2 flat panels. Row 1 of each panel is the right side. Ch 1 at the start of each row does not count as a stitch.
Let Us Get Started
Part 1: The Front Panel
Worked with black yarn.
The body:
- Foundation: Ch 57.
- Row 1 (RS): Sc in the 2nd ch from the hook and in each chain across. (56 stitches)
- Rows 2 to 54: Ch 1, turn. Sc in each stitch across. (56 stitches)
The handles:
The top splits into two handles with a dip in the middle. Each handle is worked separately.
- Row 55 (RS), Handle 1: Ch 1, turn. Sc in the first 16 stitches. Turn. Leave the rest of the stitches unworked. (16 stitches)
- Rows 56 to 72: Ch 1, turn. Sc in each stitch across. (16 stitches)
- Row 73: Ch 1, turn. Sc2tog, sc across to the last 2 stitches, sc2tog. (14 stitches)
- Row 74: Ch 1, turn. Sc2tog, sc across to the last 2 stitches, sc2tog. (12 stitches)
- Row 75: Ch 1, turn. Sc2tog, sc across to the last 2 stitches, sc2tog. (10 stitches)
- Row 76: Ch 1, turn. Sc2tog, sc across to the last 2 stitches, sc2tog. (8 stitches)
- Fasten off and weave in the ends.
- Handle 2: With the right side facing, skip the next 24 stitches, and join black in the next stitch. Work Rows 55 to 76 the same way as Handle 1 over the last 16 stitches. Fasten off and weave in the ends. The 24 stitches in the middle stay open, which makes a gentle dip between the two handles.
Part 2: The Back Panel
Worked with black yarn.
- Work the back panel exactly the same as the front panel, including both handles.
- Weave in the ends.
The Ghost Chart
Each ghost is 11 stitches wide and 10 rows tall. The chart is read from the bottom up, and the same chart is used for every ghost. 1 means a white stitch, and 0 means a black stitch (leave it black).
| Row | Chart (11 stitches) | |---|---| | 10 (top) | 0 0 0 1 1 1 1 1 0 0 0 | | 9 | 0 0 1 1 1 1 1 1 1 0 0 | | 8 | 0 1 1 1 1 1 1 1 1 1 0 | | 7 (eyes) | 0 1 1 0 1 1 1 0 1 1 0 | | 6 | 0 1 1 1 1 1 1 1 1 1 0 | | 5 (smile corners) | 0 1 1 0 1 1 1 0 1 1 0 | | 4 (smile) | 0 1 1 1 0 0 0 1 1 1 0 | | 3 (arms) | 1 1 1 1 1 1 1 1 1 1 1 | | 2 | 1 1 1 1 1 1 1 1 1 1 1 | | 1 (bottom) | 1 1 0 1 1 0 1 1 0 1 1 |
In the 0 spots in rows 7, 5, and 4, the black yarn shows through, which makes the dot eyes and the smile.
Where to put the ghosts:
| Ghost | Stitches (from the left) | Rows (from the bottom) | Panel | |---|---|---|---| | A (big) | 34 to 44 | 14 to 23 | Front | | B | 8 to 18 | 34 to 43 | Front | | C | 6 to 16 | 4 to 13 | Front | | D | 30 to 40 | 30 to 39 | Back | | E | 10 to 20 | 12 to 21 | Back |
Count the stitches and rows on the right side of the panel, with the foundation chain at the bottom. Make the ghosts different sizes by changing the hook, or leave some ghosts off for a quieter look.
Adding the Ghosts
There are two ways to add the ghosts. Pick the one you like.
Option 1: Duplicate stitch (easiest, recommended).
- Thread a long piece of white yarn on the yarn needle.
- Bring the needle up through the center of the bottom right stitch of the ghost, from back to front.
- Slide the needle under both legs of the black stitch above it, and pull the yarn through.
- Insert the needle back into the center of the stitch where you started, and bring it out through the center of the next stitch to the left.
- Repeat for each white stitch in the chart, covering the black stitch with a white "V." Work row by row, from the bottom up.
- Pull the stitches snug, but not too tight, so the white stitches sit smoothly and do not pucker.
- Weave in the ends on the back of the panel.
Option 2: Intarsia while you crochet.
- While working the panel, change to white at the first white stitch in each ghost row.
- Use a separate small ball or bobbin of white for each ghost, and a separate piece of black for each side of the ghost.
- Work the last stitch before each color change until 2 loops remain on the hook, then pull the new color through.
- Twist the old and new colors around each other at the back to avoid holes. Do not carry the yarn across the back, since black will show through the white.
Assembly and Finishing
This is where your bag comes together. Take your time pinning before you sew.
Blocking:
- Pin both panels flat on blocking mats, and gently steam or spray them with water. Let them dry fully.
- Blocking evens out the stitches and makes the sides lie flat, which makes seaming much easier.
Joining the Panels:
- Place the front and back panels with the right sides together.
- Using black yarn and the yarn needle, whip stitch the bottom edge, matching the stitches across. Then sew each side edge, up to the start of the handles (Row 54).
- Turn the bag right side out.
Boxing the Corners:
- Pinch each bottom corner flat, so the side seam lines up with the bottom seam and forms a triangle.
- Measure 2 inches (5 cm) from the tip of the triangle, and sew straight across.
- Trim the extra fabric, if you like, or fold the triangle inside. This gives the bag a flat base, so it stands up on its own.
Joining the Handles:
- Hold the front Handle 1 and the back Handle 1 together, with the right sides facing out.
- Using black yarn, sew the top edge of the handles together with a whip stitch. Then sew the sides, to make a closed loop that you can slide your arm through.
- Repeat for Handle 2. Weave in all remaining ends.
Adding the Lining (optional):
- Fold the fabric in half with the right sides together, so it measures 15 x 14 inches (38 x 36 cm). Sew the two sides with a 3/8 inch (1 cm) seam, and leave the top open.
- Box the corners the same way as the bag.
- Press the top edge under 3/8 inch (1 cm), and slide the lining into the bag, with wrong sides together.
- Hand sew the top of the lining to the inside of the bag, just below the handles, with small stitches.
A Few Friendly Tips
- Swatch first: Make a 5 x 5 inch swatch, and check your gauge. If you have too many stitches per inch, go up a hook size. If you have too few, go down.
- Count as you go: Count your stitches at the end of every few rows, and use stitch markers at the edges of the handles, to keep them even.
- Sturdier bag: Hold the yarn double and use a 5.0 mm hook, or sew a piece of plastic canvas in the bottom, between the lining and the crochet.
- Neat ghosts: Pin a paper copy of the chart next to your work, and tick off each row as you go. It is easy to lose your place in white stitches on black.
- Glow-in-the-dark ghosts: Use a glow-in-the-dark white cotton for the ghosts, and they will shine softly after dark.
- Make it your own: Try a purple or orange bag, bats or pumpkins instead of ghosts, or a different face on each ghost.
- Size up or down: For a smaller bag, make the foundation chain 41 stitches wide, and work 40 rows before the handles. For a larger bag, make it 73 stitches wide, and work 64 rows before the handles.
- Care: Spot clean, or machine wash gently on a cool setting, and lay flat to dry. Wash inside out, and turn the ghosts to the inside to protect them.
I hope you enjoy making this sweet little ghost tote. It is a quick, satisfying project, and it makes a wonderful handmade gift.
If you run into any trouble or just want to share how your bag turned out, please reach out. I love seeing what you create.
Happy crocheting and happy Halloween!