October 5, 2026
Marmalade Ruffle Clutch
This little clutch is a cup of marmalade in bag form. Warm orange cotton is stitched into layer upon layer of wavy ruffles, with a smooth, tidy top band that tucks right into a shiny antique gold kiss-lock frame. The little round clasp snaps shut with a satisfying click, so it is perfect for your phone, lip balm, keys, or a few treasures. The ruffles look fancy, but they are just one simple trick worked in the leftover loops, so each row grows quickly. Pour something warm, pick your favorite shade, and let us make a pretty purse.
Jump to pattern instructions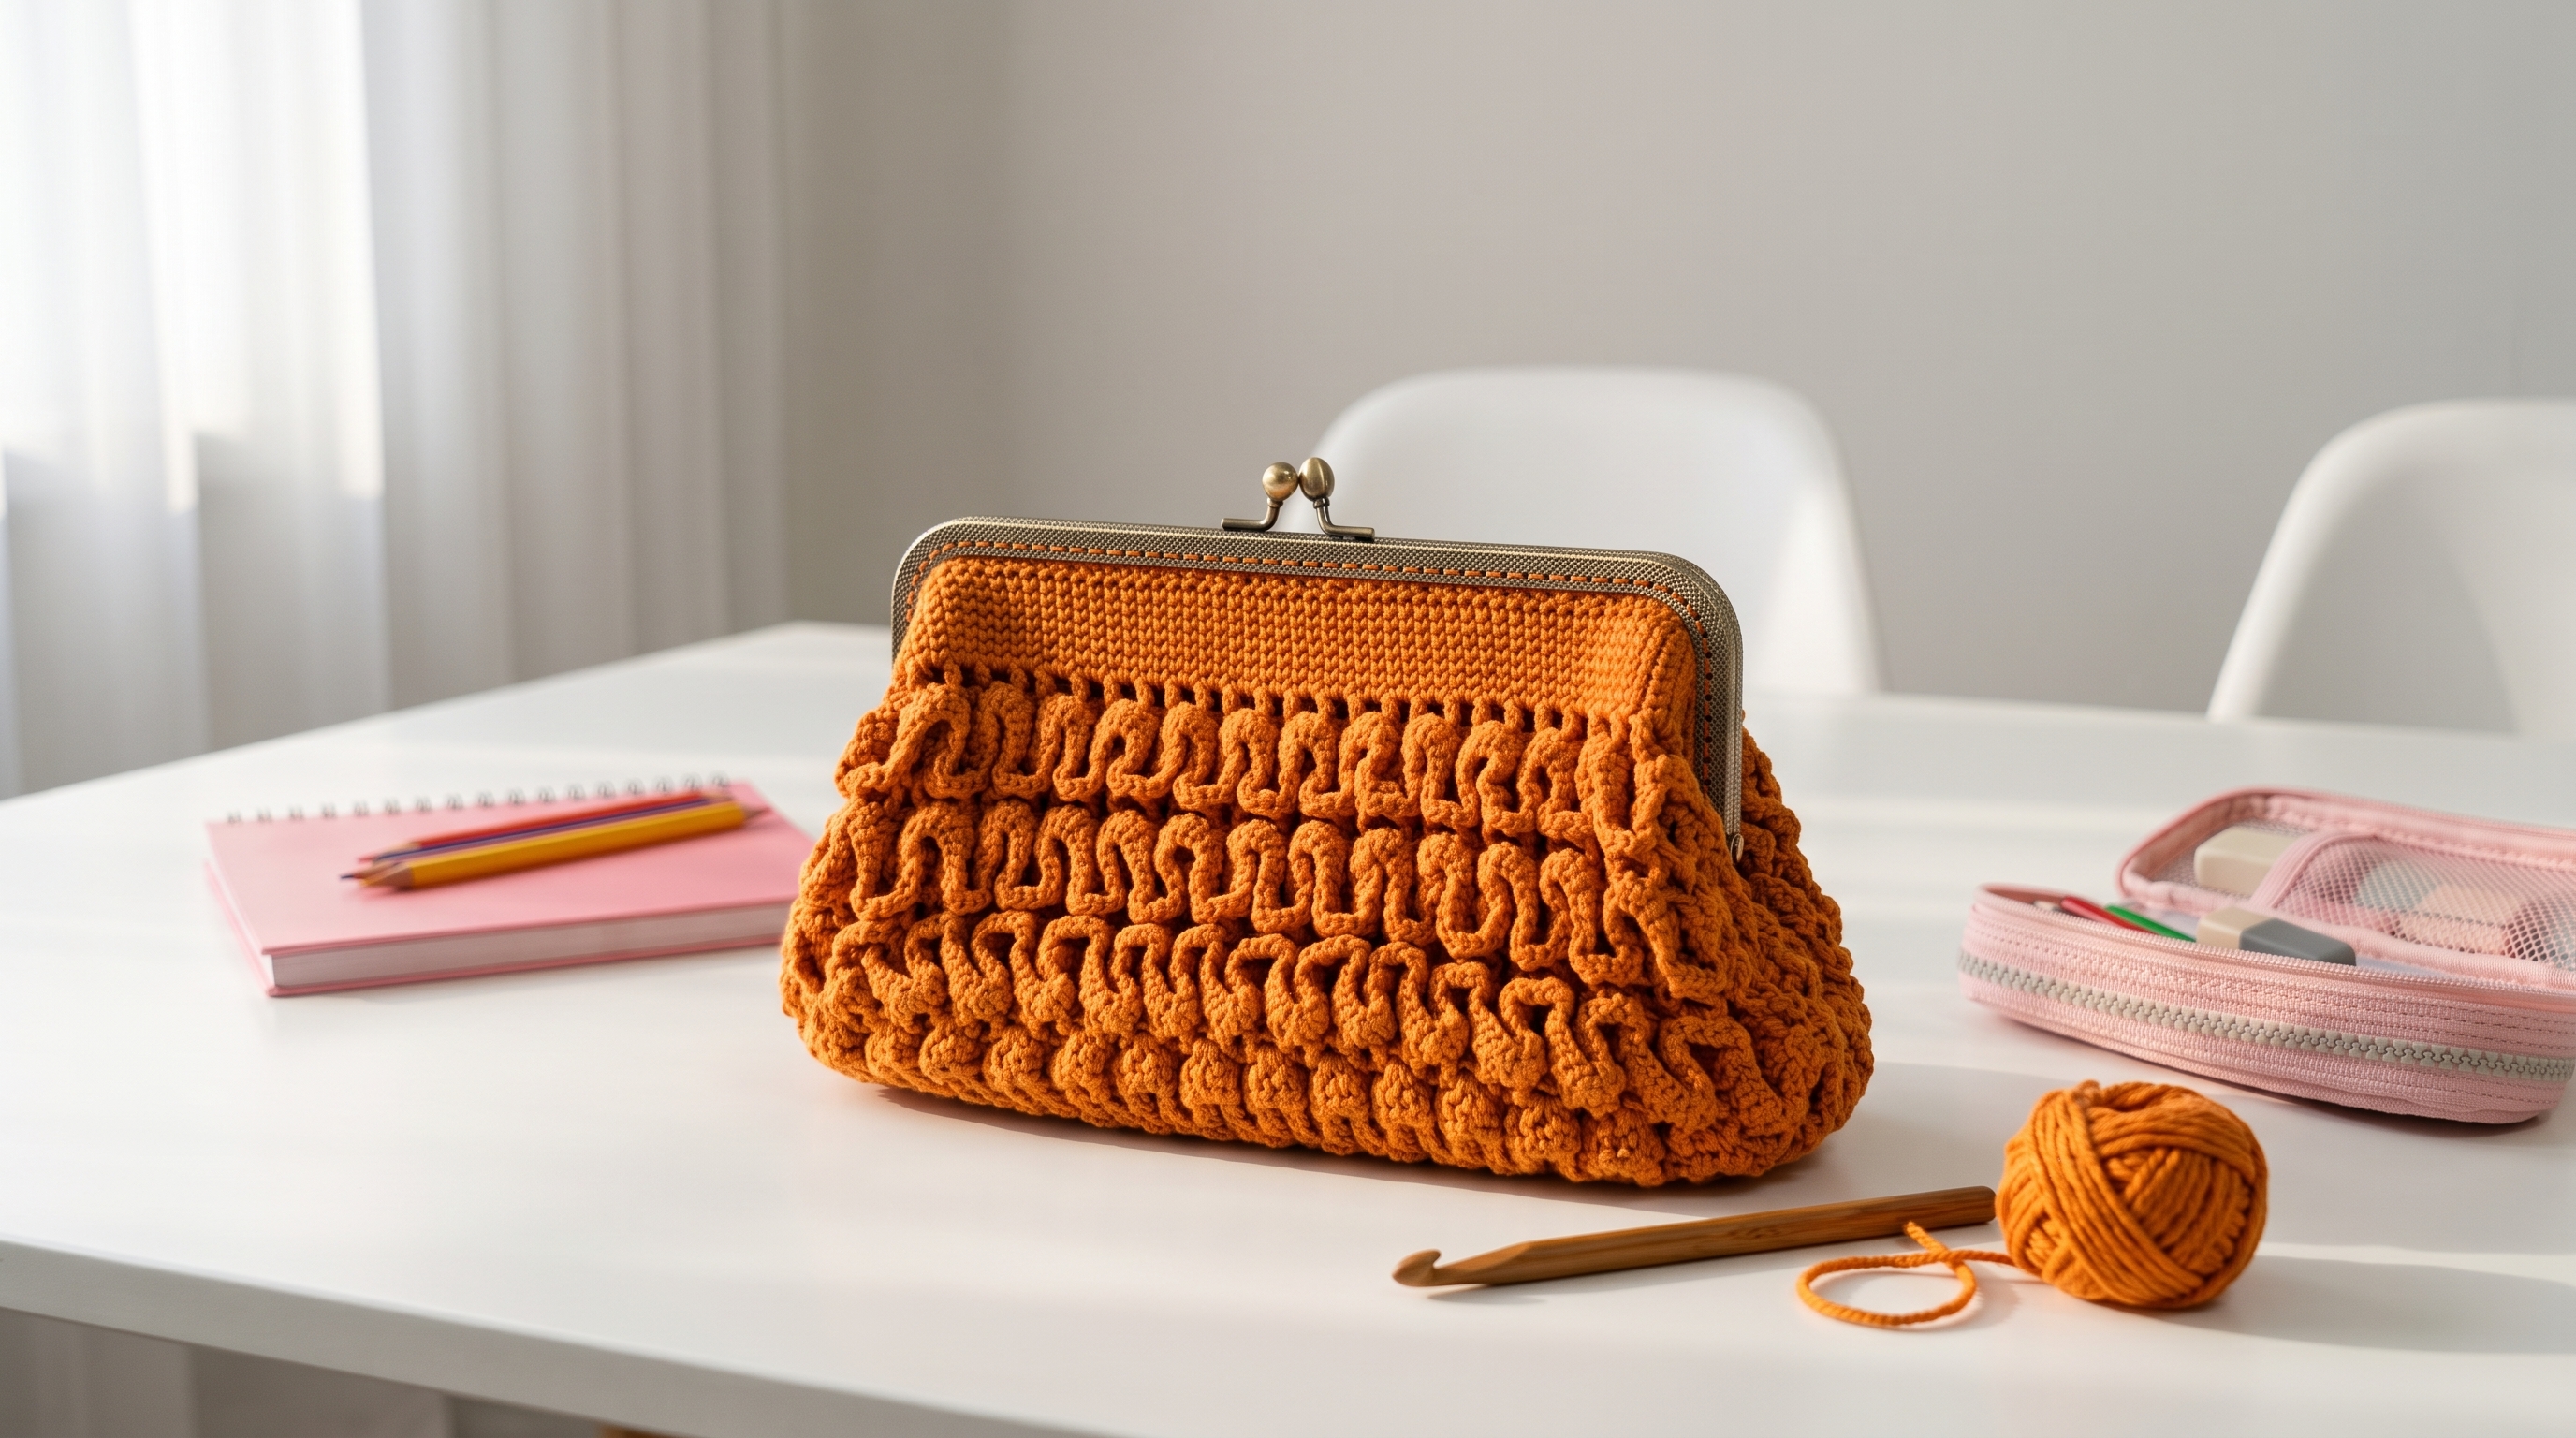
Marmalade Ruffle Clutch
Difficulty: Intermediate (basic stitches, plus working into leftover loops and sewing in a metal frame)
Finished Size: About 10 inches (25 cm) wide at the base, 8 inches (20 cm) wide at the top, and 6 inches (15 cm) tall, including the frame.
Time to Complete: 7 to 9 hours.
What You Will Need
Yarn:
- Orange or marmalade (O), about 350 yards (320 m)
- Tip: Use a DK weight 100% cotton yarn. Cotton gives the ruffles crisp definition and makes a sturdy bag that holds its shape. Choose a smooth, tightly twisted cotton, since a fuzzy yarn hides the wave texture.
Tools:
- 3.5 mm (E/4) crochet hook
- 1 kiss-lock purse frame with sew-in holes, 8 inches (20 cm) wide and about 3 inches (7.5 cm) tall, in antique gold
- Yarn needle with a large eye for sewing and weaving in ends
- Strong sewing thread and a sewing needle that fits the frame holes (optional, see Assembly)
- Stitch markers
- Sharp scissors
- Straight pins
- Optional: a piece of cotton fabric for lining, about 24 x 9 inches (60 x 23 cm), and fabric glue
Gauge: 20 stitches and 22 rows in single crochet = 4 x 4 inches (10 x 10 cm). Please make a swatch, since the gauge decides whether the top band fits your frame.
The Basics (US Terms)
- ch = chain
- sc = single crochet
- dc = double crochet
- sc2tog = decrease (work 2 single crochets together)
- inc = increase (work 2 single crochets into the same stitch)
- sl st = slip stitch
- BLO = back loop only
- FLO = front loop only
- RS / WS = right side / wrong side
- st(s) = stitch(es)
- You will make 2 identical panels, one for the front and one for the back. Row 1 of each panel is the right side. Ch 1 at the start of each row does not count as a stitch.
The Ruffle Trick
The ruffles are made in two steps.
- The ridge row: On a right side row, work single crochets in the back loops only. This leaves a row of unworked front loops that sit on the front of the fabric, like a little shelf.
- The ruffle: After the panel is finished, join yarn at the right edge of each ridge row, and work 2 double crochets in each front loop. The extra stitches have nowhere to go, so they bunch into pretty, wavy ruffles that hang down over the rows below.
You will work the ruffles at the end, so you do not need to stop and start while making the panel.
Let Us Get Started
Part 1: The Panel (Make 2)
The rounded base:
- Foundation: Ch 49.
- Row 1 (RS): Sc in the 2nd ch from the hook and in each chain across. (48 stitches)
- Row 2 (WS): Ch 1, turn. Inc in the first stitch, sc across to the last stitch, inc in the last stitch. (50 stitches)
- Row 3 (RS): Ch 1, turn. Sc in each stitch across. (50 stitches)
- Row 4 (WS): Ch 1, turn. Inc in the first stitch, sc across to the last stitch, inc in the last stitch. (52 stitches) The increases make the bottom corners softly rounded when the panels are sewn together.
The ruffle blocks:
The body of the bag is made of 6 blocks, with 4 rows each. Each block narrows the panel by 2 stitches, so the sides taper in toward the top. Each block starts with a ridge row, which will hold a ruffle later.
For each block, work these 4 rows:
- Row A (RS, ridge row): Ch 1, turn. Sc in the BLO of every stitch across.
- Row B (WS): Ch 1, turn. Sc2tog, sc across to the last 2 stitches, sc2tog. (2 fewer stitches)
- Row C (RS): Ch 1, turn. Sc in each stitch across.
- Row D (WS): Ch 1, turn. Sc in each stitch across.
| Block | Rows | Stitches at start | Stitches at end | |---|---|---|---| | 1 | 5 to 8 | 52 | 50 | | 2 | 9 to 12 | 50 | 48 | | 3 | 13 to 16 | 48 | 46 | | 4 | 17 to 20 | 46 | 44 | | 5 | 21 to 24 | 44 | 42 | | 6 | 25 to 28 | 42 | 40 |
Rows 5, 9, 13, 17, 21, and 25 are the ridge rows. Put a stitch marker on the first stitch of each one, so you can find them later.
The top band:
- Rows 29 to 42: Ch 1, turn. Sc in each stitch across. (40 stitches)
- Fasten off, leaving a long tail. Weave in the other ends. The band should be about 2.5 inches (6 cm) tall. It is the smooth section that tucks into the frame.
Part 2: The Ruffles (6 per panel)
Worked with the right side facing, in the front loops left by each ridge row.
- Start with the lowest ridge row (Row 5). Hold the panel with the right side facing you and the foundation chain at the bottom.
- Join yarn with a sl st in the first front loop at the right edge of the ridge row. The front loops sit in a line, right across the fabric.
- Ruffle row: Ch 3 (counts as a dc), then work 1 more dc in the same loop. Work 2 dc in each remaining front loop across. (104 stitches for the first ruffle)
- Fasten off and weave in the ends on the wrong side.
- Repeat for the ridge rows at Rows 9, 13, 17, 21, and 25, working 2 dc in each front loop each time.
| Ridge row | Front loops | Ruffle stitches | |---|---|---| | 5 | 52 | 104 | | 9 | 50 | 100 | | 13 | 48 | 96 | | 17 | 46 | 92 | | 21 | 44 | 88 | | 25 | 42 | 84 |
The ruffles will droop down over the rows below. Flip each ruffle down, so it hangs over the next ridge row, like layers of petals.
- If your ruffles feel too stiff or bulky, work hdc instead of dc. If they feel too flat, work 3 dc in every other loop for extra fullness.
Assembly and Finishing
This is where the clutch comes together. Take your time, and check the frame before you sew.
Blocking:
- Gently wet block both panels. Pin the top band and the sides flat, but leave the ruffles unpinned so they stay puffy.
- Let the panels dry completely.
Joining the Panels:
- Place the two panels with right sides together, with the top bands at the top.
- Using the yarn needle and yarn, whip stitch along the bottom edge and up each side, stopping at the first row of the top band (Row 29). Sew through the edge stitches, and match the rows on each side.
- Stitch the bottom corners with small stitches, so the rounded corners hold their shape.
- Turn the bag right side out. Gently push out the corners.
Adding the Lining (optional):
- Fold the fabric in half with right sides together, so it measures 12 x 9 inches (30 x 23 cm). Sew the two sides with a 3/8 inch (1 cm) seam, and leave the top open.
- Press the top edge down by 3/8 inch (1 cm) all around.
- Slide the lining into the bag, with wrong sides together, and the pressed edge at the top of the top band. Use a few small hand stitches to attach the lining to the inside of the top band, just below the frame. Ruffles will cover the stitches.
Sewing in the Frame:
- Open the frame, and check that the metal channel is clean. Use pliers carefully, if the frame needs to be opened or adjusted.
- Find the center of the top edge of the front panel and the center of the frame. Slide the top edge of the front panel into the channel of the frame, until it sits snugly against the hinge.
- If you are using glue, apply a thin line of fabric glue in the channel first. Press the edge in, and let it dry for 5 to 10 minutes.
- Using the sewing thread, or a strand of yarn if the holes are big enough, sew through each hole of the frame. Use a backstitch, going through the band each time. Start at the center and work out to each side, then repeat for the back panel.
- Make small, tight stitches. Check the frame each time you sew, to be sure the clasp aligns and closes cleanly.
- Weave in all remaining ends.
Final Touches:
- Fluff the ruffles with your fingers, so they lie in soft waves, with the tops tucked slightly under.
- If the bag looks flat, stuff a piece of tissue paper inside for a day or two to help it keep its shape.
A Few Friendly Tips
- Swatch first: Make a swatch of 20 stitches, and measure it. If the bag top is too wide for your frame, go down a hook size. If it is too narrow, go up.
- Front loops: If you cannot see the front loops, hold the panel up to a window, or place a dark cloth underneath. They are easy to find once you know where to look.
- Flatter or fuller: For a flatter bag, work the ruffles in hdc, or leave off the 2 highest ruffles. For a fuller bag, add a seventh block and ruffle.
- Frame fit: The top band should be exactly as wide as the frame. If it is a little narrow, add a stitch to each row. If it is a little wide, remove a stitch.
- Sturdier bag: Stitch a piece of plastic canvas, cut to fit the bottom, between the lining and the crochet. This helps the bag keep its shape.
- Make it your own: Try sage green for a spring look, black for evening, or cream for a bridal clutch. You can also add a short chain strap by sewing a chain of 120 stitches to the frame's side rings.
- Care: Spot clean gently with a damp cloth, and avoid soaking the frame. If you must wash, hand wash the bag before adding the lining, and lay flat to dry.
I hope you enjoy making this pretty little clutch. It looks like a store-bought bag, but every ruffle is made by you, and it makes a wonderful gift.
If you run into any trouble or just want to share how your clutch turned out, please reach out. I love seeing what you create.
Happy crocheting!