August 28, 2026
Classic 35 cm Amigurumi Barbie Doll – Complete Pattern with Dress & Bunny Bag
Bring this timeless, elegant doll to life! This comprehensive pattern guides you through creating a beautiful 35 cm Barbie complete with a custom crocheted dress, a sweet bow, and an adorable little bunny-ear purse. Perfect for intermediate crafters ready to master yarn sculpting, seamless color changes, and wearable doll accessories.
Jump to pattern instructions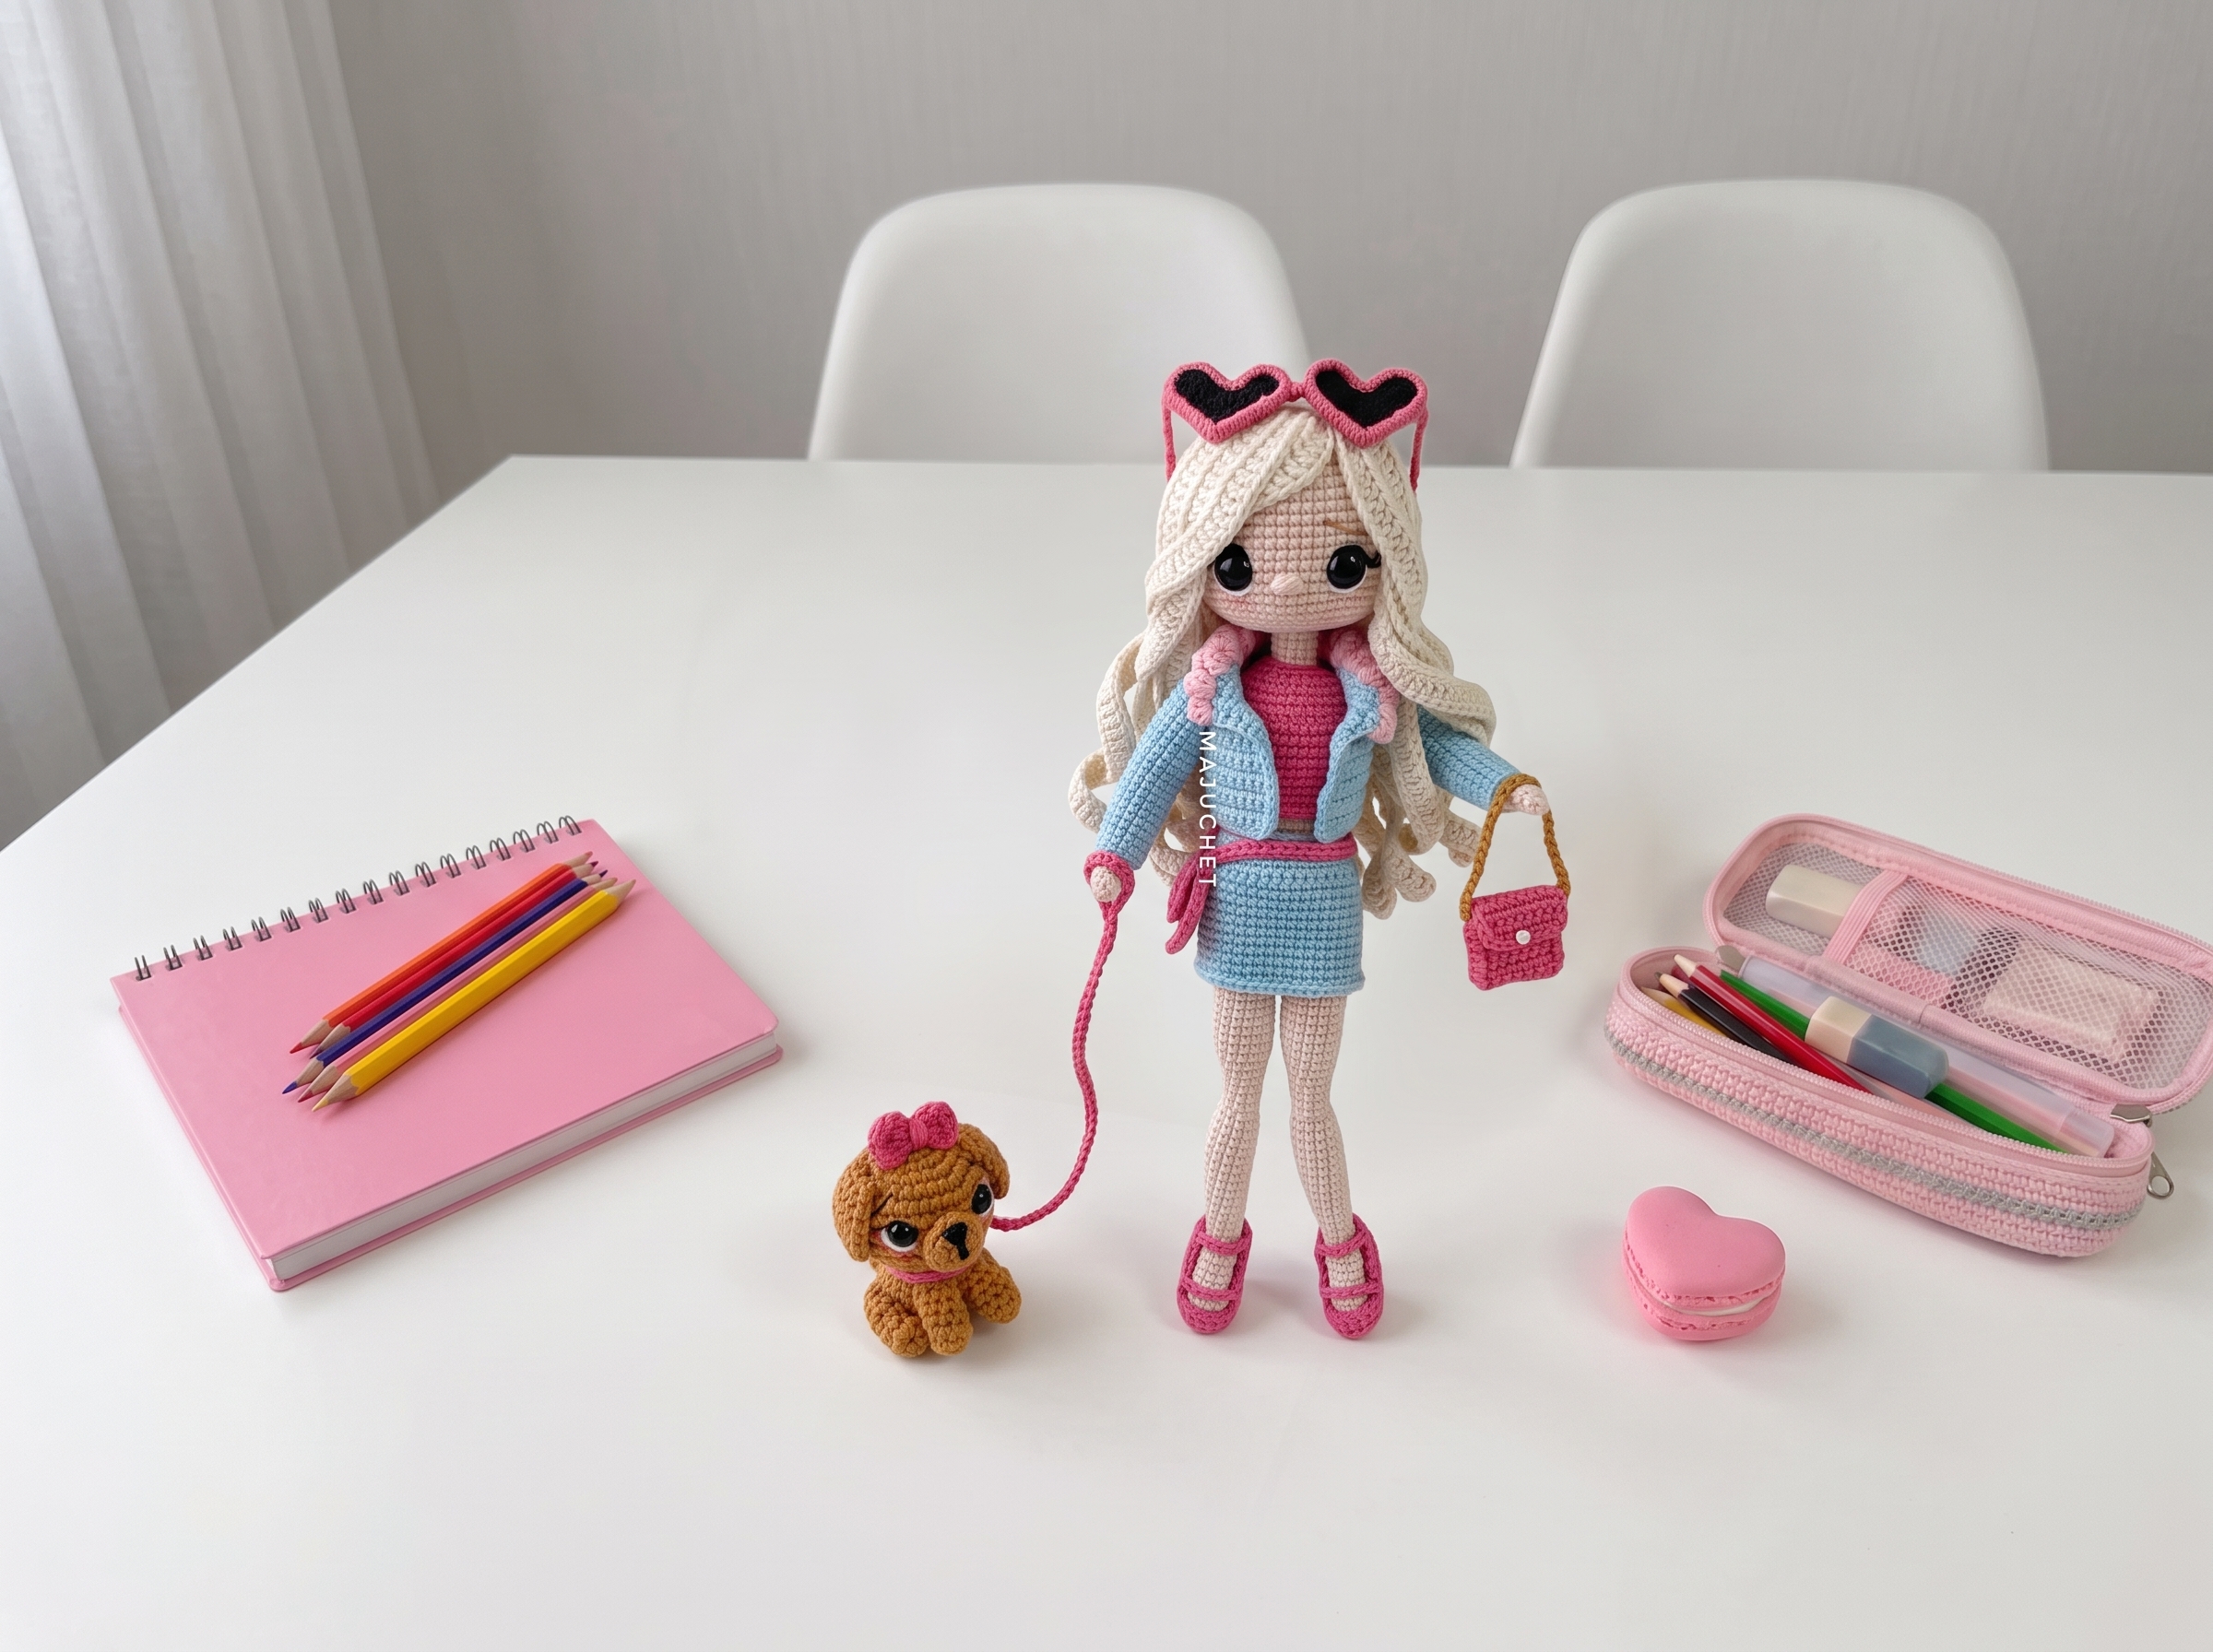
Classic Amigurumi Barbie – Complete Step-by-Step Pattern
1. Gathering Your Supplies
Let’s get everything ready! Using a smooth, premium cotton yarn will give your doll beautiful stitch definition, making all those lovely clothing details truly pop.
- Yarn: Premium light worsted/campana weight cotton (e.g., Korean brand or similar).
- Skin tone (approx. 70g)
- Red (approx. 80g, for shoes and dress accents)
- White (approx. 23g, for dress, bag, and leg accents)
- Light Gray (approx. 70g, for shoe uppers)
- Brown (a small amount for hair, or use synthetic doll hair)
- Black and orange embroidery floss (for facial details and bag)
- Hook: 3.00 mm (and a 2.5 mm hook for the initial chain if you tend to crochet tightly).
- Notions: 12 mm black safety eyes (or embroidery thread if you prefer a softer look), poly-fil stuffing, tapestry needle, scissors, stitch markers, and optional 2.0 mm thick wire (110 cm) for posability.
- Finished Size: Approximately 35 cm (13.8 inches) tall.
What you'll master: Selecting the right yarn for crisp stitch definition and preparing for multi-part doll assembly.
2. The Head & Facial Features
The head is worked in a continuous spiral. We’ll use a clever yarn-sculpting technique to give her expressive, dimensional eyes and a sweet, protruding nose.
- R1: 8 sc in MR (8)
- R2: 8 inc (16)
- R3: (1 sc, inc) x 8 (24)
- R4: (3 sc, inc) x 6 (30)
- R5: 2 sc, inc, (4 sc, inc) x 5, 2 sc (36)
- R6: (5 sc, inc) x 6 (42)
- R7: 3 sc, inc, (6 sc, inc) x 5, 3 sc (48)
- R8: (7 sc, inc) x 6 (54)
- R9: 4 sc, inc, (8 sc, inc) x 5, 4 sc (60)
- R10-19: 60 sc (60) [10 rows]
- Important detail: Place a stitch marker to mark the nose position. Insert 12 mm safety eyes between R19 and R20, spaced 11 stitches apart.
- R20: 21 sc, (inc, 2 sc) x 3, 21 sc, (2 sc, inc) x 3, 21 sc (66)
- R21-24: 66 sc (66) [4 rows]
- R25: (9 sc, dec) x 6 (60)
- R26: 4 sc, dec, (8 sc, dec) x 5, 4 sc (54)
- R27: (7 sc, dec) x 6 (48)
- R28: 3 sc, dec, (6 sc, dec) x 5, 3 sc (42)
- R29: (5 sc, dec) x 6 (36)
- R30: 2 sc, dec, (4 sc, dec) x 5, 2 sc (30)
- R31: (3 sc, dec) x 6 (24)
- R32: 24 sc in BLO (24) (These front loops will be used later to attach the head to the body!)
- R33: (1 sc, dec) x 6 (12)
- R34: 6 dec (6)
- Finishing: Fasten off, leaving a long tail. Stuff the head firmly, keeping a neat, rounded shape.
Yarn Sculpting the Face:
- Eyes: Thread a long tapestry needle with double black thread. Weave it under the safety eyes and pull gently to create lovely, expressive eye sockets. Tie off securely at the back of the head.
- Nose: Between R20 and R21, right at your marker, make a small, raised nose by repeating horizontal stitches 5-6 times. Pull the ends tight and knot securely at the back.
What you'll master: Spiral increase sequences, strategic safety eye placement, and basic yarn sculpting for realistic facial definition.
3. Legs & Body (With Cute Shoes!)
Here’s where the magic happens! We’ll build the legs from the feet up, featuring a fun color change from red soles to gray uppers to white legs, and then seamlessly join them to crochet the torso in one continuous piece.
Right Leg (Start with Red):
- R1: 8 sc in MR (8)
- R2: 8 inc (16)
- R3: (1 sc, inc) x 8 (24)
- R4: (3 sc, inc) x 6 (30)
- R5: 2 sc, inc, (4 sc, inc) x 5, 2 sc (36)
- R6: 36 sc in BLO (36)
- R7-10: 36 sc (36) [4 rows]
- Change to Gray Yarn.
- R11: 36 sc in BLO (36) (Note: The pattern suggests working the gray upper by decreasing: 10 sc, 8 dec, 10 sc = 28 sts. Adjust to maintain a snug shoe fit).
- R12-14: Work gray yarn, decreasing gradually to shape the ankle (ending with ~18 sts).
- Change to White Yarn.
- R15-19: 18 sc (18) [5 rows]
- R20: (2 sc, inc) x 6 (24)
- R21: 24 sc in BLO (24)
- R22-25: 24 sc (24) [4 rows]
- Finishing: Fasten off and cut the yarn. Stuff the leg firmly.
Left Leg:
- Work exactly the same as the Right Leg through R25. Do not cut the yarn! We will continue directly into the body.
Joining & Body (White Yarn):
- R26 (Joining): Work 8 sc on the left leg, ch 3, work 24 sc across the front of the right leg, ch 3, work 16 sc on the right leg, and 3 sc to join (54 sts total). Place a marker at the back center.
- R27-32: 54 sc (54) [6 rows]
- R33: (7 sc, dec) x 6 (48)
- R34-35: 48 sc (48) [2 rows]
- R36: (6 sc, dec) x 6 (42)
- R37: 42 sc (42)
- Change to Gray Yarn (for the top of the pants/skirt area).
- R38: 42 sc in BLO (42)
- R39: (5 sc, dec) x 6 (36)
- R40-47: 36 sc (36) [8 rows]
- R48: (4 sc, dec) x 6 (30)
- R49-51: 30 sc (30) [3 rows]
- R52: (3 sc, dec) x 6 (24)
- R53: 24 sc (24)
- Finishing: Fasten off, leaving a long tail for attaching the head.
- Pro Tip: If you want a posable doll, insert a 2.0 mm wire through the body and legs before closing, bending the ends securely inside the feet.
What you'll master: Seamless multi-piece joining, clean mid-project color changes, and structured torso decreasing.
4. Arms & Ears
These simple, un-stuffed pieces add natural drape and charm to the doll.
Arms (Make 2, Skin Tone):
- R1: 6 sc in MR (6)
- R2: 6 inc (12)
- R3: (1 sc, inc) x 6 (18)
- R4-6: 18 sc (18) [3 rows]
- R7: 3 dec, 12 sc (15)
- R8-9: 15 sc (15) [2 rows]
- R10: 2 dec, 11 sc (13)
- R11-21: 13 sc (13) [11 rows]
- R22: 6 dec, 1 sc (7)
- Finishing: Fasten off, leaving a long tail. Do not stuff. Sew to the body around rows 38-39.
Ears (Make 2, Skin Tone):
- R1: 6 sc in MR (6)
- R2: (1 sc, inc) x 3 (9)
- R3: (2 sc, inc) x 3 (12)
- R4: (3 sc, inc) x 3 (15)
- R5: (4 sc, inc) x 3 (18)
- R6: 18 sc (18)
- R7: (5 sc, inc) x 3 (21)
- R8-12: 21 sc (21) [5 rows]
- R13: (5 sc, dec) x 3 (18)
- R14: (4 sc, dec) x 3 (15)
- R15: (3 sc, dec) x 3 (12)
- Finishing: Fasten off, leaving a long tail. Do not stuff. Sew to the sides of the head, aligning the back pin with the center of the nose.
What you'll master: Creating uniform, slender appendages and working flat, un-stuffed shapes for natural articulation.
5. The Outfit & Accessories
No Barbie is complete without a fabulous wardrobe!
The Dress (Red or your choice of color):
- R1: Ch 41. Starting in the 2nd ch from hook: 40 sc. Turn.
- R2: Ch 2 (counts as first dc), 4 dc, [3 dc in next st], 8 dc, [3 dc in next st], 10 dc, [3 dc in next st], 8 dc, [3 dc in next st], 5 dc. Turn. (This creates the flared skirt and armhole shaping).
- R3-4: Continue working dc rows, increasing at the armholes and skirt hem as indicated in the pattern to create a beautiful A-line silhouette.
- R5: Create armholes by chaining and skipping stitches across the front and back.
- Collar: Attach white yarn at the neckline and work a delicate shell stitch border (sc, ch 3, 2 dc2tr, ch 3, sc) for a classic, feminine touch.
The Bunny Bag (White):
- Base: Ch 8. Work in an oval shape, increasing at the ends to create a flat, elegant oval (front and back pieces).
- Assembly: Join the front and back pieces with 20 sl sts around the top edge.
- Ears: Ch 5, work 3 sc, 3 dc in the last st, 3 sc. Sew to the top of the bag.
- Strap: Ch 40 and attach to the sides of the bag.
- Details: Embroider tiny black eyes and an orange nose on the front of the bag for maximum cuteness!
The Hair Bow (Red):
- Ch 40, join with a sl st to form a ring. Work 10 rows of 40 sc.
- Finishing: Cut a 50 cm tail. Pinch the center of the rectangle, wrap the tail around the middle 7-8 times to create a bow shape, and secure it to the back of the doll's head.
What you'll master: Flat-panel garment construction, creating functional armholes, and assembling multi-part accessories.
6. Final Assembly & Finishing
Now for the most rewarding part: bringing your Barbie to life!
- Head to Body: Align the head centrally on the body. Sew securely using the long tail and the unworked front loops from Head R32.
- Limbs: Sew the arms to the upper sides of the body. Ensure the legs are positioned so she can stand or sit gracefully.
- Facial Details: Embroider delicate eyelashes, diagonal eyebrows (3 stitches wide, 2 rows above the eyes), and a sweet, tiny smile. Add a hint of blush to the cheeks with pastel chalk or acrylic paint.
- Hair: If using yarn hair, attach a circular base to the top of the head and work long chains of double crochets for flowing locks. If using synthetic hair, glue or sew the wefts in place, styling a chic fringe and a neat ponytail.
- Dress Up: Slide the dress over her head, fasten the collar, and drape the adorable bunny bag over her shoulder.
What you'll master: Multi-step structural assembly, surface embroidery for expressive facial features, and professional finishing techniques for wearable doll accessories.
Final Section: Where to Go from Here
Congratulations! By completing this classic Barbie doll, you have mastered foundational spiral shaping, seamless limb joining, intricate color changes, and custom garment design. This project is a fantastic confidence-builder and makes an absolutely heartwarming gift.
From here, try experimenting with different yarn colorways to create a whole "fashion line" of dolls, or adapt the dress and bag patterns to design custom outfits for other amigurumi figures in your collection. Happy crocheting, and enjoy your beautiful new handmade companion!