September 19, 2026
Daisy Notebook Cover & Pencil Holder – A Sweet & Functional Crochet Project
Protect your favorite journal in style with this adorable Daisy Notebook Cover! Featuring a soft pink wrap, a secure button closure, a built-in pocket for your pens, and cute white daisy appliqués, this project is the perfect accessory for students and journalers alike. It’s a beginner-friendly make that fits standard A5 notebooks.
Jump to pattern instructions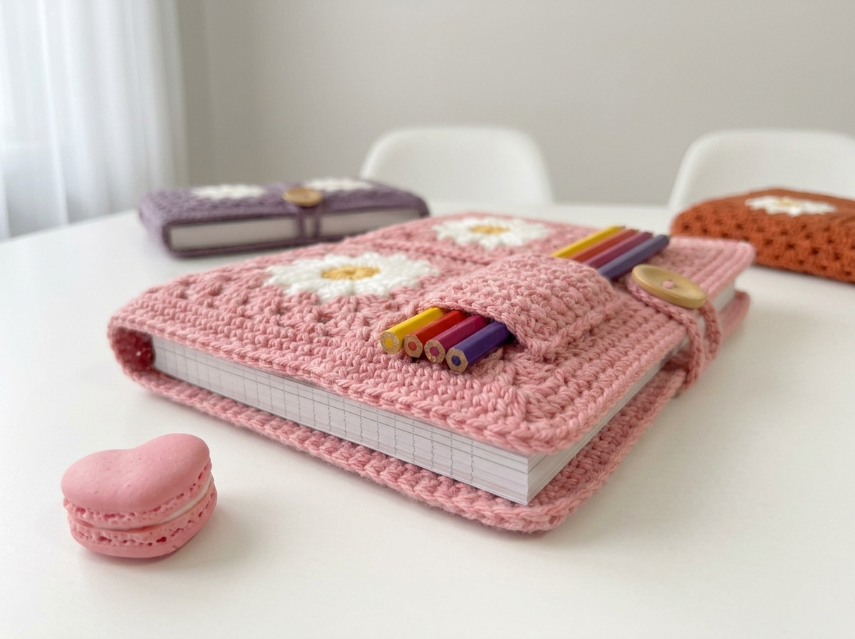
Daisy Notebook Cover & Pencil Holder – Complete Step-by-Step Pattern
1. Gathering Your Supplies
To make this cover sturdy enough to protect a book, a cotton or acrylic blend yarn is best.
- Yarn: Worsted weight (Size 4) yarn.
- Dusty Pink: Main color (approx. 100g).
- White: For daisy petals (small amount).
- Yellow: For daisy centers (tiny amount).
- Hook: 4.0 mm (US G/6) or 4.5 mm (US 7).
- Notions:
- 1 Wooden button (approx. 15-20 mm).
- Tapestry needle.
- Scissors.
- Stitch markers.
- To measure: Your notebook (this pattern is for a standard A5 size, approx. 14.8 cm x 21 cm).
What you'll master: Creating a custom-fit book cover, adding functional pockets, and making floral appliqués.
2. Abbreviations & Special Techniques
- ch: Chain
- sc: Single crochet
- hdc: Half double crochet
- dc: Double crochet
- sl st: Slip stitch
- MR: Magic ring
- st(s): Stitch(es)
3. The Main Cover Body (Pink)
We will create one long piece that wraps around the back, spine, and front of the book.
- Measurements: Measure your notebook.
- Width: (Back width + Spine width + Front width) + 2 cm for ease. (Approx. 32-35 cm).
- Height: Notebook height + 2 cm for ease. (Approx. 23 cm).
- Foundation: Ch 45 (adjust to match your width measurement).
- Row 1: Hdc in the 3rd ch from the hook and each ch across. Turn.
- Rows 2-30: Ch 2 (counts as first hdc), hdc in each st across. Turn.
- Note: Work until the piece is tall enough to cover your notebook height.
- Finishing: Fasten off. This is your main wrap.
What you'll master: Creating a large, rectangular fabric panel.
4. The Closure Flap (Pink)
This flap extends from the back cover to hold the book shut.
- Instructions: You can crochet this separately and sew it on, or continue from the main body. Let's do it separately for ease.
- Foundation: Ch 15 (width of the flap).
- Rows 1-10: Hdc in each st across. Turn.
- Buttonhole Row: Ch 2, hdc in next 3 sts, ch 2 (skip 2 sts), hdc in next 4 sts. Turn.
- Row 11: Hdc across (working 2 hdc into the ch-2 space).
- Finishing: Fasten off, leaving a long tail. Sew this flap to the top edge of the "Back Cover" section of your main body.
What you'll master: Creating a buttonhole and attaching a flap.
5. The Pencil Pocket (Pink)
This little pocket holds your favorite pens or pencils.
- Instructions: Ch 15.
- Rows 1-4: Hdc in each st across. Turn.
- Finishing: Fasten off, leaving long tails.
- Placement: Pin this pocket to the front cover section of your main body, near the top edge. Leave the top open!
- Sewing: Sew the sides and bottom of the pocket to the cover. Do not sew the top shut.
What you'll master: Creating a functional pocket.
6. The Daisy Appliqués (Make 3)
These add the perfect touch of spring!
White Petals:
- R1: MR. Ch 3 (counts as dc), 2 dc in ring. Ch 3, sl st in ring. (This is one petal).
- Repeat: Repeat this sequence 5 times to make 5 petals.
- Finishing: Sl st to join. Fasten off.
Yellow Center:
- Instructions: MR 6 sc. Fasten off, leaving a tail.
- Assembly: Sew the yellow circle into the center of the white petals.
What you'll master: Creating quick floral motifs.
7. Assembly & Finishing
- Fold & Check: Fold your main body around your notebook to ensure the fit is good. The flap should reach the front cover easily.
- Attach Button: Sew the wooden button onto the front cover, aligning it with the buttonhole on the flap.
- Attach Daisies: Arrange your 3 daisies on the front cover and the flap. Sew them securely in place.
- Weave in Ends: Hide all your loose yarn tails on the inside of the cover.
What you'll master: Final assembly and styling.
Final Section: Where to Go from Here
Congratulations! You’ve just crafted a beautiful Daisy Notebook Cover. This project is a fantastic way to protect your journals and keep your pens handy.
From here, try experimenting with different flowers! You could make a "Sunflower" cover with yellow and brown, or a "Lavender" cover with purple spikes. You could even make a matching pencil case! Happy crocheting!