August 30, 2026
Gertrude Hat – A Cozy, Textured Knit with Clever Short-Row Shaping
Wrap yourself in cozy elegance with the Gertrude hat! Featuring a chic rolled brim, clever German short-row shaping for a snug, custom fit around the ears, and a beautiful cable motif framed by half-patent ribbing, this hat is a dreamy, rewarding project for knitters who love textured, handmade accessories.
Jump to pattern instructions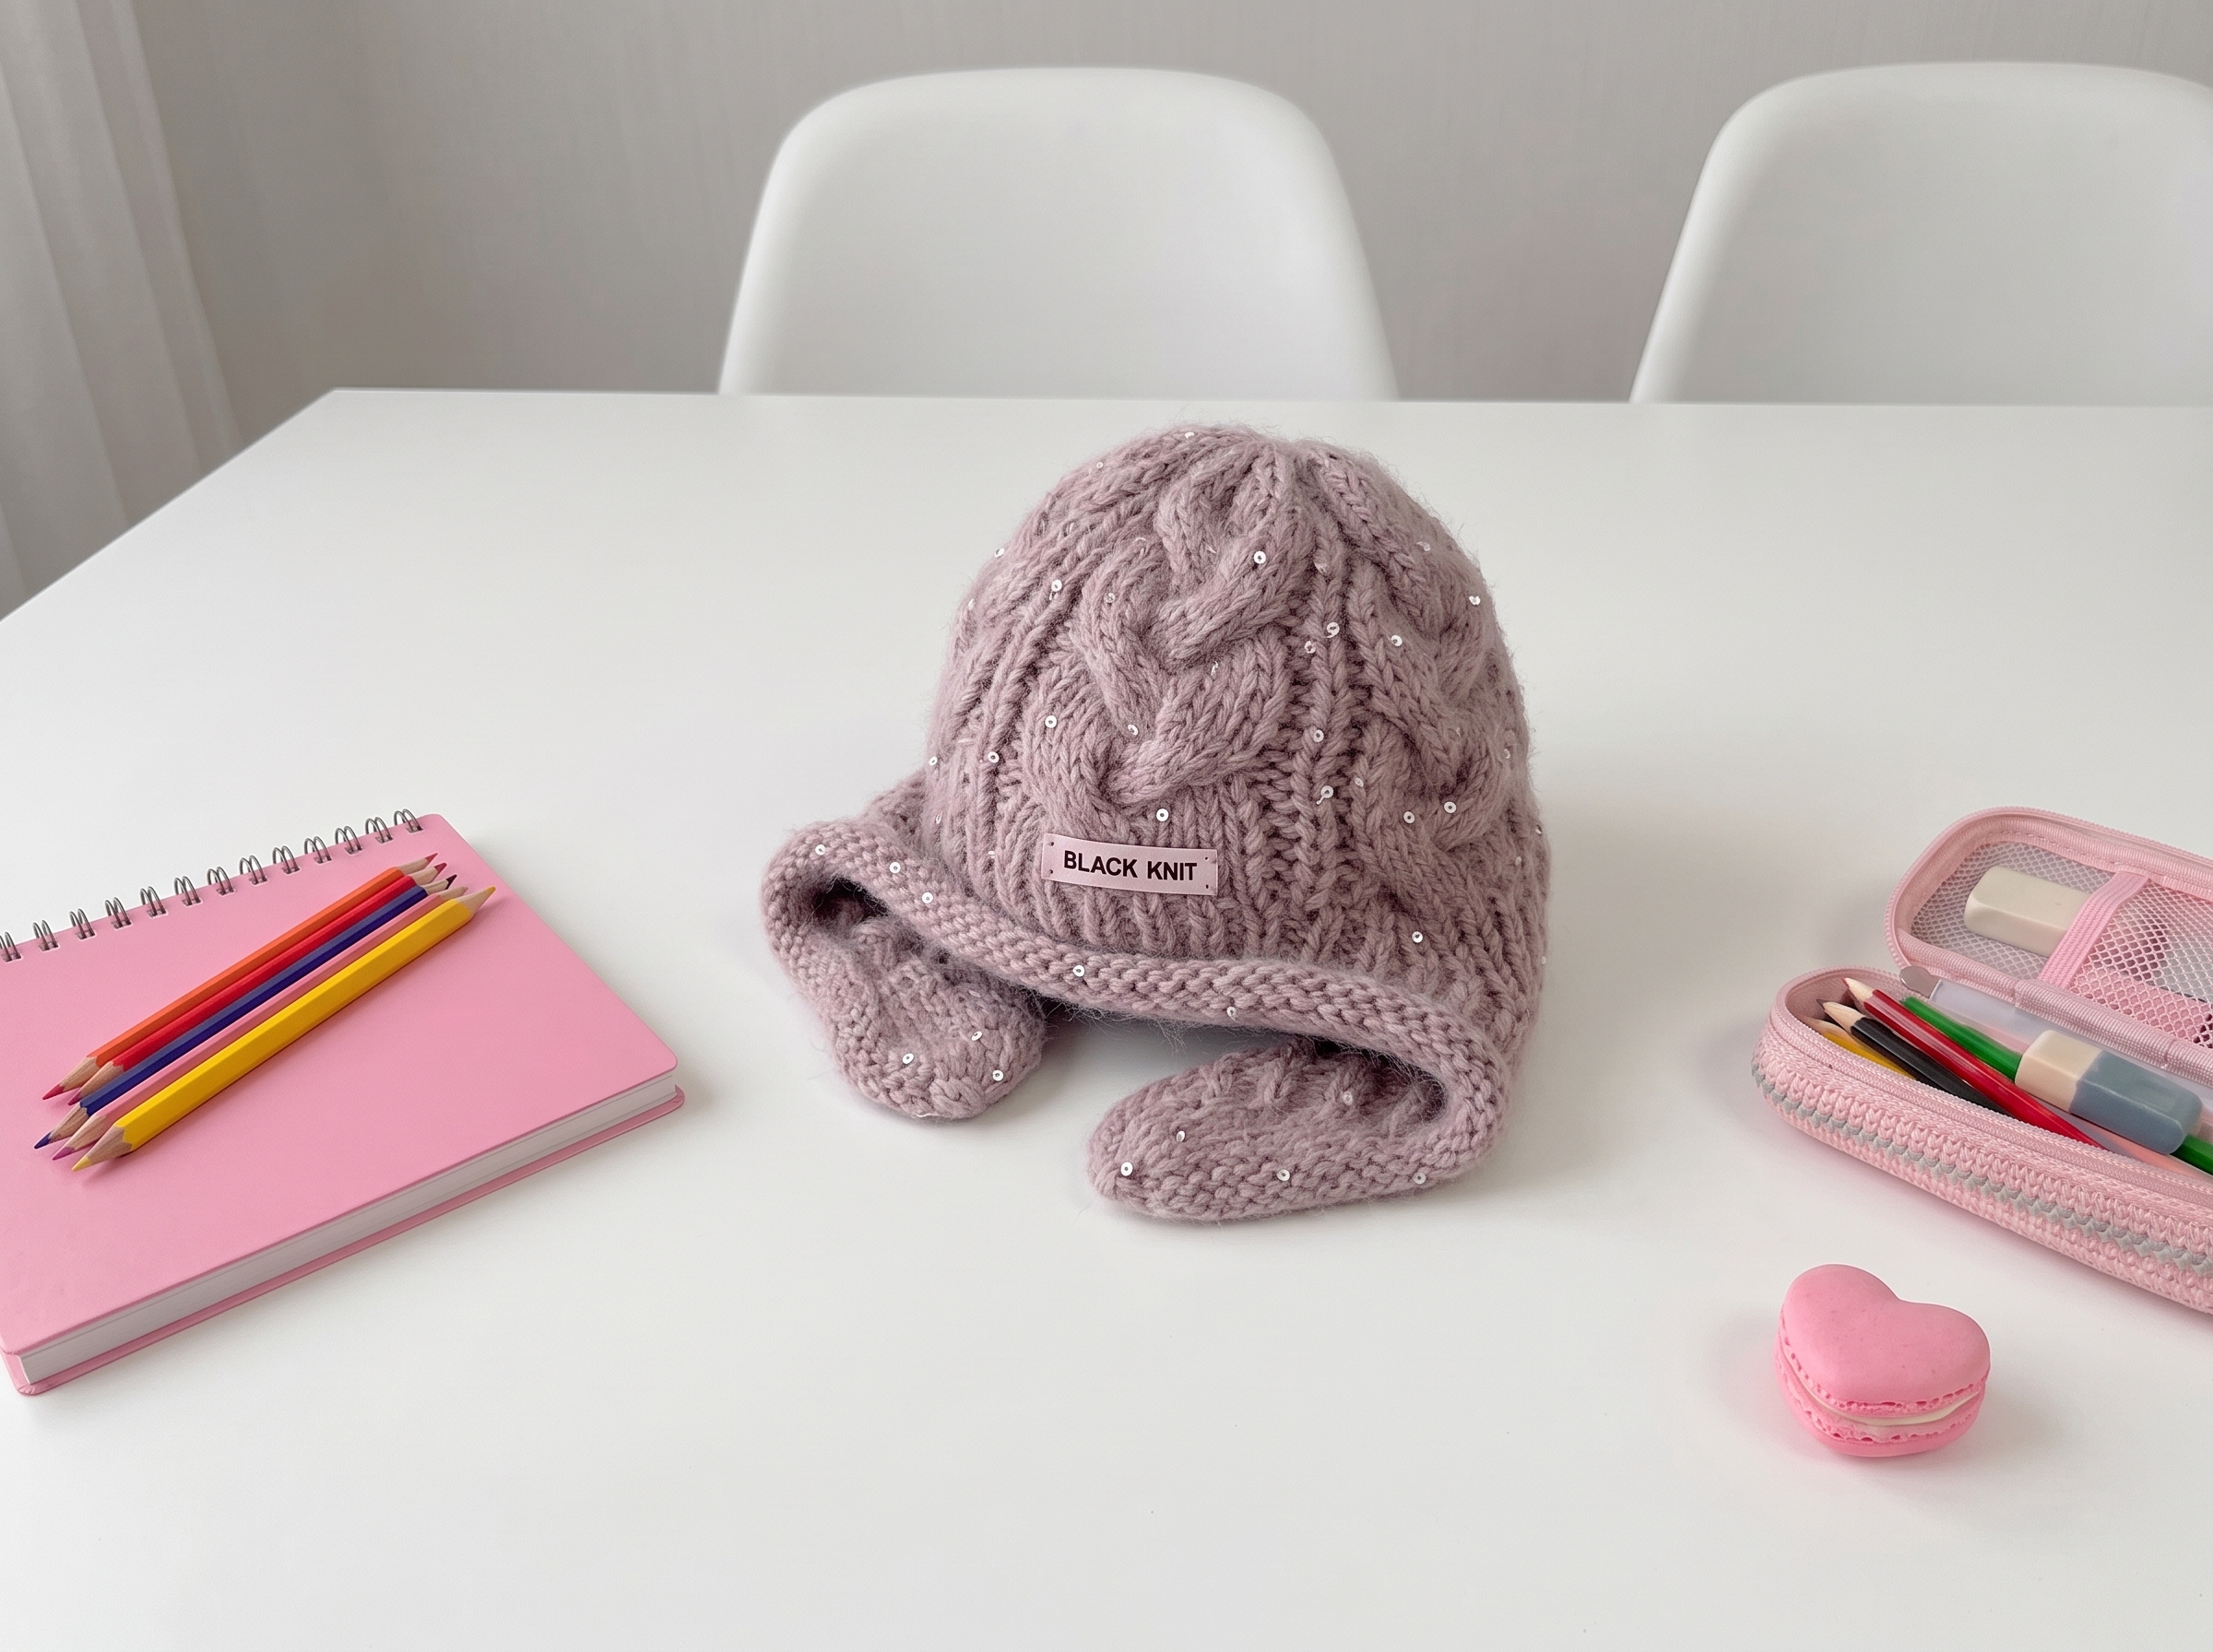
Gertrude Hat – Complete Step-by-Step Pattern
Grab your favorite fluffy yarn and a warm cup of tea! The Gertrude hat is designed to be both incredibly warm and stylish. The magic of this pattern lies in its flat-knit beginning, which uses short rows to create a perfect, gap-free fit around the ears before joining in the round for a gorgeous cable motif. Let’s dive in!
1. Gathering Your Supplies
Because this hat relies on a beautiful, fuzzy halo, choosing the right yarn makes all the difference.
- Yarn: A fluffy, lightweight yarn is highly recommended (e.g., angora, alpaca, merino blended with mohair, or cashmere).
- Meterage: Approx. 250–400m per 50g.
- Example used: Mink down (350m/50g) held in 3 strands, plus a supplementary thread and a touch of viscose with sequins (800m/100g) for a subtle sparkle.
- Needles: 5.0 mm circular needles (80–100 cm length).
- Notions: Stitch markers, a tapestry needle, scissors, and a cable needle (or a double-pointed needle).
- Gauge: 16 stitches × 23 rows = 10 × 10 cm (4" × 4") in stockinette stitch, after wet blocking.
- Friendly Tip: Please, please knit a swatch and block it! Fluffy yarns behave differently after their first bath, and you want your hat to fit perfectly.
2. Abbreviations & Special Techniques
Don't let these terms intimidate you; they are just the tools we use to shape the hat beautifully!
- лиц. (k): knit
- изн. (p): purl
- кром. (selvedge): slip the first stitch of every row, purl the last stitch.
- ДП (Double Stitch / German Short Row): The magic of short rows! Slip a stitch, bring the yarn forward, slip the stitch back, and pull the yarn tight to create a "double" loop. On the return row, you'll knit or purl both legs of this loop together to hide the turn seamlessly.
- Cable Cross (Перехлест): Slip stitches to a cable needle, hold in front (for a left twist) or back (for a right twist), knit the next stitches, then knit the stitches from the cable needle.
- Half-Patent Ribbing: A textured, stretchy rib that alternates a standard knit/purl with a stitch worked into the row below for extra depth.
3. The Rolled Brim (Валик)
We start by knitting flat to create a sturdy, stylish rolled brim that won't stretch out over time. This instruction is the same for both sizes; the only difference is the starting stitch count.
- Cast On: 87 stitches (for Size 1: 52–54 cm) or 97 stitches (for Size 2: 56–58 cm).
- Rows 1–12 (approx. 5–7 cm): Work in stockinette stitch flat (knit on Right Side rows, purl on Wrong Side rows).
- Transition: On the final Wrong Side row of the brim, if you are holding multiple strands, you can drop one to transition into the main body.
- Ribbing Setup: Work 3 rows of 1x1 ribbing (k1, p1) on the Right Side.
4. Ear Shaping with Short Rows
This is where the hat gets its custom, tailored fit! We use German short rows to add a little extra fabric right where your ears sit, preventing that dreaded "gap" at the sides of the neck.
- Marker Placement: Place markers to divide your stitches.
- Size 1: 19 sts, marker, 10 sts, marker, 14 sts (center), marker, 15 sts, marker, 10 sts, marker, 19 sts.
- Size 2: 19 sts, marker, 14 sts, marker, 15 sts (center), marker, 16 sts, marker, 14 sts, marker, 19 sts.
- The Short Row Dance: Starting on a Wrong Side row, you will work back and forth, creating a Double Stitch (ДП) at each turn.
- Tempo: Turn 1 stitch before the marker until you reach it, then switch to turning 2 stitches before the next marker.
- Don't panic if it looks a little messy! The magic happens in the "smoothing row" at the end, where you knit or purl the double stitches together with their neighbors, making the turns completely invisible.
- Joining: Once the short rows are complete, you will work a final connecting row that joins the work, and from this point on, you will knit in the round! Place a new Beginning of Round (BOR) marker.
5. The Main Body: Cables & Ribbing
Now for the most satisfying part: watching that beautiful cable pattern emerge!
- Setup: The pattern is divided into repeating motifs. Each motif consists of a central cable (either 12 or 15 stitches, depending on your size) framed by 3 stitches of half-patent ribbing.
- Knitting the Round: Follow the provided chart for the cable crosses (usually happening every 6th or 8th row). Between the crosses, simply maintain your half-patent ribbing.
- Pro Tip: Try the hat on after the 5th cable cross! The decrease section at the top takes up about 3–5 cm of height, so make sure the body is long enough for your liking before you start decreasing.
6. Crown Decreases (Макушка)
Time to close up the top! The decreases are strategically placed to taper the hat smoothly without leaving a large, awkward hole at the crown.
- The Sequence: You will systematically decrease stitches within the cable panels and the ribbing. The pattern provides a clear, row-by-row guide (e.g., knitting 2 stitches together, then knitting a few stitches, then decreasing again).
- The Final Pull: As the stitch count gets very small (down to just a few stitches per panel), you will do a final round of aggressive decreases. Cut the yarn, leaving a long tail. Thread this tail onto a tapestry needle, weave it through the remaining live stitches, pull it tight like a drawstring, and secure it firmly on the inside.
7. Finishing & Wet Blocking
This is the grand finale, and arguably the most satisfying part of the process!
- Weave in Ends: Take your time weaving in all those tails on the wrong side using a tapestry needle.
- Wash & Block: Submerge your finished hat in cool water (no more than 30°C / 86°F) with a gentle wool wash. Soak for 20–30 minutes.
- Dry: Gently press the water out. Never wring or twist fluffy yarn! Roll the hat in a clean towel to absorb excess moisture, then lay it flat on a dry towel or blocking mat. Gently pat it into shape, fluffing up the cables and letting the fibers bloom. Let it air dry completely.
Final Section: Where to Go from Here
Take a deep breath and admire your handiwork! By completing the Gertrude hat, you’ve conquered flat-to-round transitions, mastered the slightly intimidating (but totally manageable!) German short rows, and executed beautiful cable crosses.
These skills are incredibly versatile. Now that you know how to shape a hat for a custom fit, try experimenting with different yarn weights! A chunky, single-ply wool would make this an incredibly cozy winter beanie, while a lighter, sequined mohair would make it the perfect, glamorous accessory for a chilly spring evening. Happy knitting, and enjoy your beautiful new handmade staple!