September 1, 2026
Glutton Bear on Skis – A Fun & Cozy Amigurumi Crochet Pattern
Bring this adorable, chubby winter bear to life! Featuring a cute rounded tummy, tiny skis, and a sweet little face, this pattern is a delightful project for crafters looking to create a fun, seasonal amigurumi friend.
Jump to pattern instructions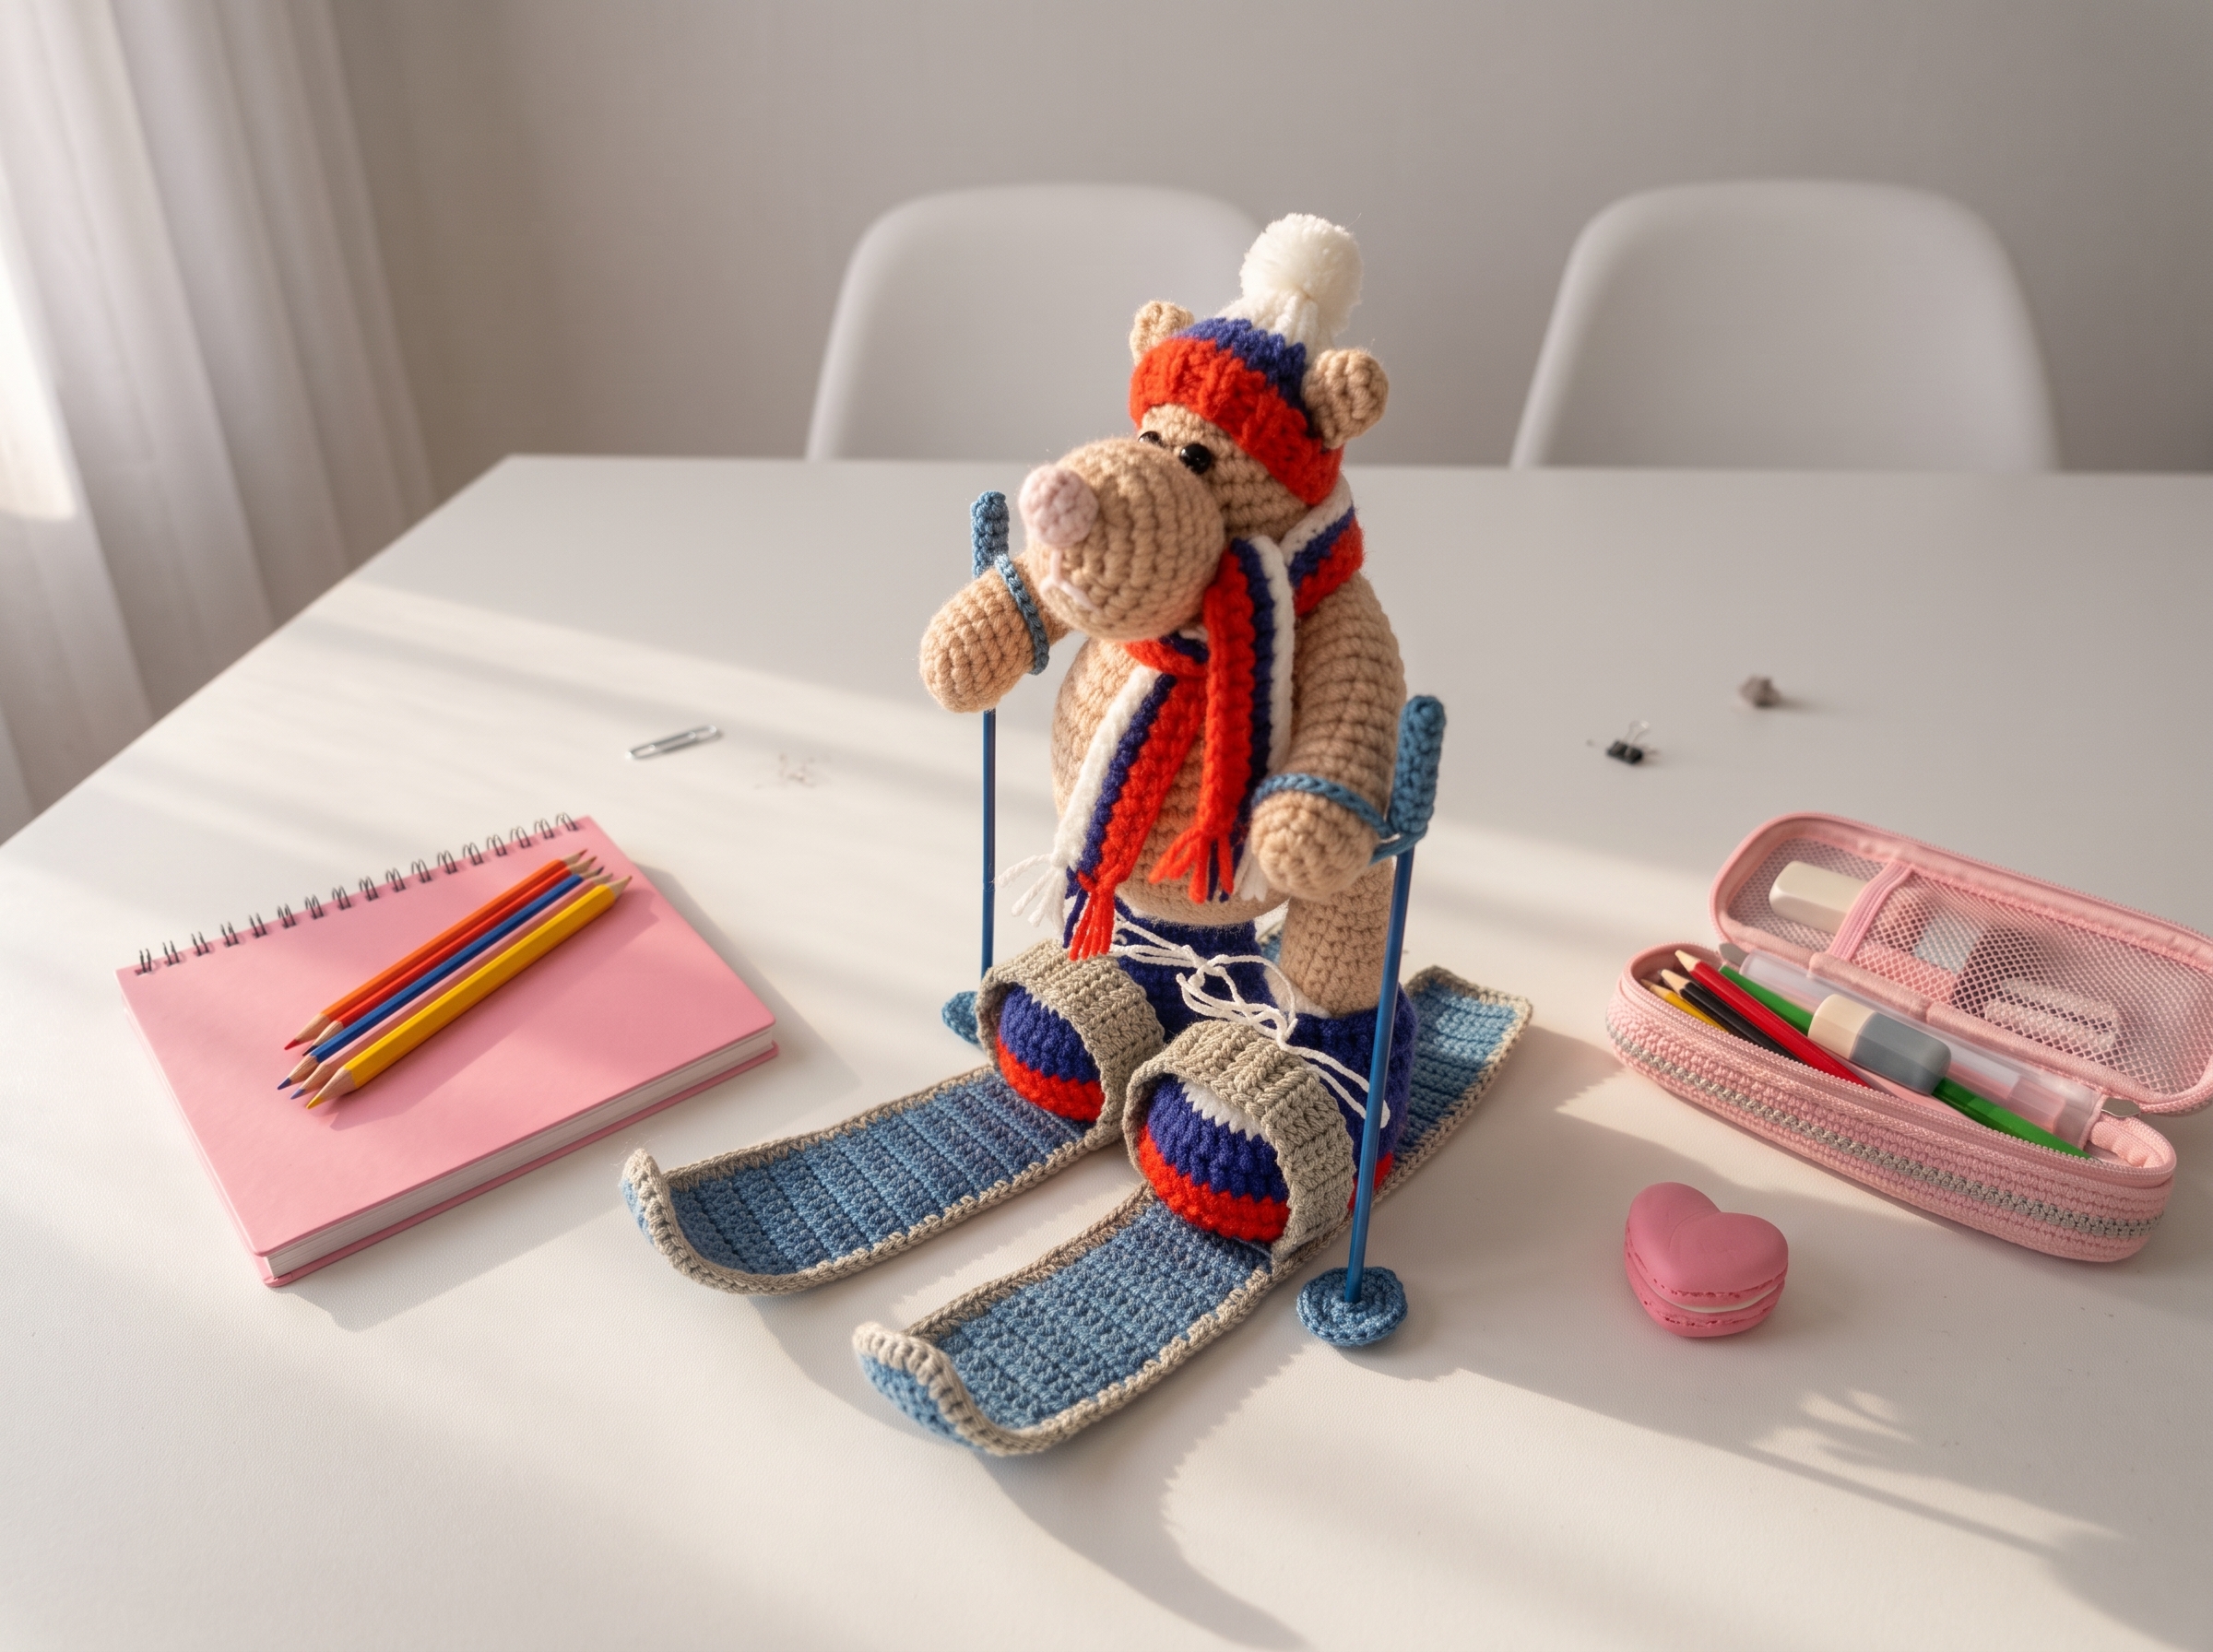
Glutton Bear on Skis – Complete Step-by-Step Pattern
Original design by Tatyana Averina (@tanuska_toys). Let’s get our hooks ready and bring this little guy to life!
1. Materials & Abbreviations
- Yarn: Main color (e.g., yellow, brown, or white), plus a tiny bit of pink for cheeks/paws.
- Hook: 3.0 mm (the finished bear will be approx. 18–20 cm tall).
- Notions: 6 mm safety eyes, poly-fil stuffing, tapestry needle, scissors, and black embroidery floss for the nose.
- Abbreviations:
- MR – magic ring
- ch – chain
- sc – single crochet
- inc – increase (2 sc in one stitch)
- dec – decrease (2 sc crocheted together)
What you'll master: Proper tool selection, gauge management, and familiarization with standard international crochet abbreviations.
2. Body (Main Color)
The body is worked in continuous rounds from the bottom up, featuring a clever decrease sequence to create that signature chubby bear tummy.
- R1: Ch 2, work 6 sc in the 2nd ch from hook (6)
- R2: 6 inc (12)
- R3: (1 sc, inc) x 6 (18)
- R4: (2 sc, inc) x 6 (24)
- R5: (3 sc, inc) x 6 (30)
- R6: (4 sc, inc) x 6 (36)
- R7: (5 sc, inc) x 6 (42)
- R8: (6 sc, inc) x 6 (48)
- R9: (7 sc, inc) x 6 (54)
- R10-16: 54 sc (54) [7 rows]
- R17: 11 sc, (dec, 1 sc) x 10, dec, 11 sc (43)
- Pro Tip: Place a stitch marker at the beginning of this row to keep your decreases perfectly centered for the tummy!
- R18: 43 sc (43)
- R19: 10 sc, (dec, 1 sc) x 6, dec, 10 sc (35)
- R20: 35 sc (35)
- R21: (5 sc, dec) x 5 (30)
- R22-23: 30 sc (30) [2 rows]
- R24: (3 sc, dec) x 6 (24)
- R25-30: 24 sc (24) [6 rows]
- R31: (2 sc, dec) x 6 (18)
- R32: (1 sc, dec) x 6 (12)
- Finishing: Stuff the body firmly, paying special attention to forming a neat, rounded tummy. Fasten off and weave in the end.
What you'll master: Spiral increase sequences, structured decreasing for a rounded belly, and consistent stuffing techniques.
3. Legs (Make 2, Main Color)
The legs feature a shaped foot that transitions smoothly into a sturdy leg, finished with a neat fold-and-sew method.
- R1: Ch 11. Starting in the 2nd ch from hook: 9 sc, 3 sc in the last st, turn, work 8 sc down the opposite side, inc (22)
- R2: inc, 8 sc, 3 inc, 8 sc, 2 inc (28)
- Note: If this yields 30 sts depending on your tension, simply adjust to match your gauge, aiming for ~28 sts.
- R3: 1 sc, inc, 8 sc, (1 sc, inc) x 2, 8 sc, (1 sc, inc) x 2 (36)
- R4: 2 sc, inc, 9 sc, inc, 1 sc, inc, 2 sc, inc, 1 sc, inc, 9 sc, inc, 4 sc (40). Stuff the sole lightly.
- R5-6: 40 sc (40) [2 rows]
- R7: 12 sc, 8 dec, 14 sc (32) (Keep these decreases centered at the back of the heel)
- R8: 32 sc (32)
- R9: 7 sc, 9 dec, 6 sc, dec (22)
- R10: 7 sc, 4 dec, 7 sc (18)
- R11: 6 sc, 3 sc together, 6 sc (15)
- R12-23: 15 sc (15) [12 rows]
- R24: (dec, 1 sc) x 5 (10)
- R25: 5 dec (5)
- Finishing: Fasten off and hide the end.
What you'll master: Oval foundation chaining, progressive limb decreasing, and partial stuffing for a natural, stable drape.
4. Ears (Make 2, Main Color)
Simple, perky little ears that fold over just right.
- R1: 6 sc in MR (6)
- R2: 6 inc (12)
- R3-4: 12 sc (12) [2 rows]
- Finishing: Fold the piece in half and work 6 sc through both layers to close it flat. Fasten off, leaving a long tail for sewing.
What you'll master: Working small, flat shapes and utilizing tension to create dimensional forms.
5. Snout (Main Color or Pink)
A cute, protruding muzzle that adds instant personality to the bear's face.
- R1: 6 sc in MR (6)
- R2: 6 inc (12)
- R3: (1 sc, inc) x 6 (18)
- R4-5: (2 sc, inc) x 6 (24)
- R6: 24 sc (24)
- Finishing: Leave a long tail for sewing. Do not stuff heavily, as you will be sculpting it later.
What you'll master: Rapid radial expansion and preparing pieces for yarn sculpting.
6. Assembly & Finishing
Now for the magic moment where your bear truly comes to life!
- Eyes: Insert the 6 mm safety eyes between R11 and R12, spaced about 6 sc apart.
- Snout & Sculpting: Sew the snout between R17 and R23. Use a long tapestry needle and strong thread to pull the snout inward, creating a cute, indented muzzle. Tie off securely at the back of the head.
- Ears: Sew the ears to the top of the head, positioning them symmetrically to your liking.
- Face Details: Embroider a little black nose on the center of the snout. You can also add tiny eyebrows or blush the cheeks with dry pastels for extra charm.
- Tummy Sculpting: Use a long needle and thread to make a few gentle pull-throughs at the lower front of the body to emphasize that cute, rounded tummy.
- Skis & Poles (Optional): Craft tiny skis from stiff felt or cardboard, and use thin wire or pipe cleaners for ski poles to complete the adorable winter sports look!
What you'll master: Multi-step structural assembly, yarn sculpting for expressive facial features, and professional finishing techniques.
Final Section: Where to Go from Here
Congratulations! By completing this Glutton Bear on Skis, you’ve practiced foundational spiral shaping, clever foot construction, and expressive surface detailing. This project is a fantastic confidence-builder and makes an absolutely heartwarming winter gift.
From here, try experimenting with different yarn colorways to create a whole "winter sports" collection, or adapt the body pattern to design custom outfits (like a tiny scarf or hat!) for other amigurumi animals in your collection. Happy crocheting!