August 28, 2026
Jisoo the Doll – A Charming Amigurumi Crochet Pattern
Bring this stylish, sweet little doll to life! Featuring a beautifully detailed wardrobe with a ruffled dress, a cozy little jacket, and gorgeous flowing hair, this pattern is a joyful, intermediate-friendly project. It’s the perfect way to practice seamless construction, yarn sculpting, and creating custom doll accessories.
Jump to pattern instructions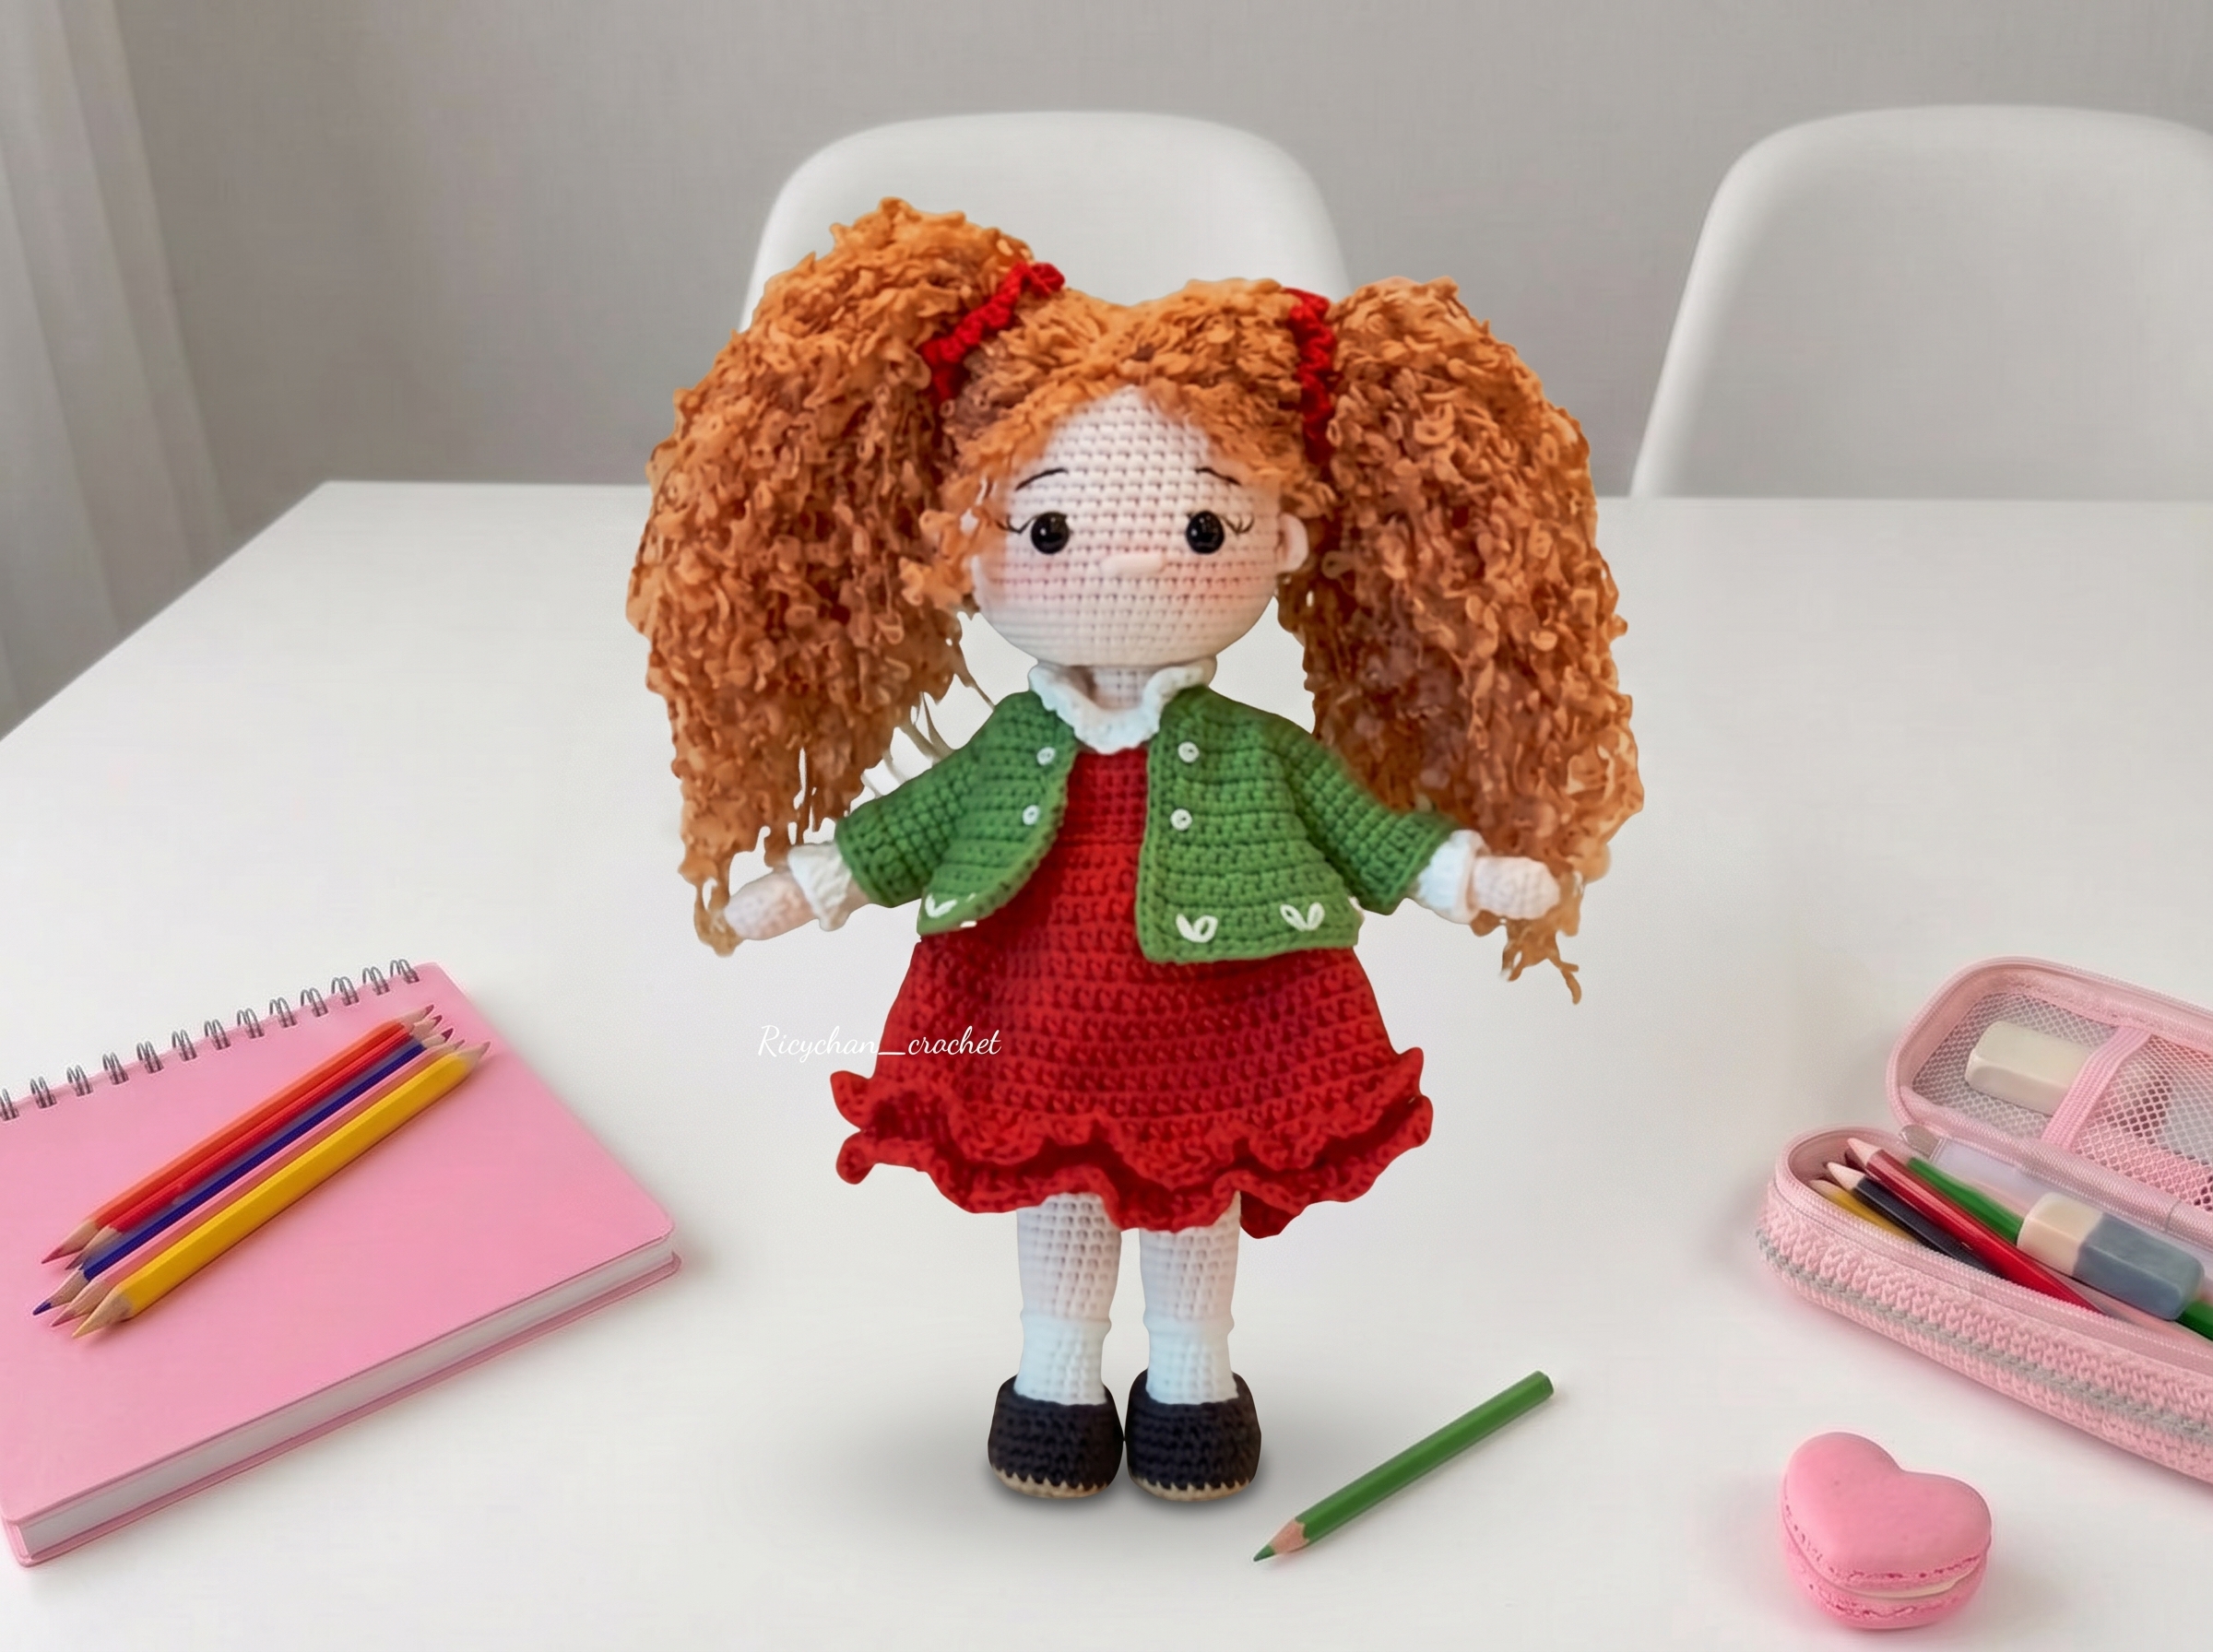
Jisoo the Doll – Complete Step-by-Step Pattern
1. Gathering Your Supplies
Let’s get everything ready! Using a smooth, high-quality cotton blend will give your doll beautiful stitch definition, making all those lovely clothing details truly pop.
- Yarn: Sport weight or light worsted cotton (e.g., YarnArt Jeans, Catania, or Susan’s Family 4ply). You'll need small amounts of Skin, White, Dark Red (for the dress), Dark Green (for the jacket), and a contrasting color for the hair.
- Hook: 2.0 mm (or the size needed to achieve a tight, stuff-proof gauge).
- Notions: 9 mm safety eyes (or embroidered eyes), 8 mm button, soft wire (optional, for poseable limbs), poly-fil stuffing, tapestry needle, scissors, stitch markers, and a dab of fabric glue.
What you'll master: Selecting the right yarn for crisp stitch definition and preparing for multi-part doll assembly.
2. Arms & Ears
We’ll start with the smaller details. These little arms feature a sweet little bobble stitch to create a thumb, and we'll keep the stuffing very light so they have a natural, relaxed drape.
Arms (Make 2, Skin Color):
- R1: 6 sc in MR (6)
- R2: 6 inc (12)
- R3-4: 12 sc (12) [2 rows]
- R5: 1 bobble stitch (3 dc with a common top), 11 sc (12)
- R6: (dec, 4 sc) x 2 (10)
- R7: (3 sc, dec) x 2 (8)
- R8: (3 sc, inc) x 2 (10)
- R9: 10 sc. Change to White yarn.
- R10-26: 10 sc (10) [17 rows]
- Finishing: Fasten off. Stuff very lightly into the top of the arm. If you're using wire for poseability, insert it now.
Ears (Make 2, Skin Color):
- Instructions: Leave a long tail for sewing. Ch 4. Starting in the 3rd ch from the hook: 4 hdc in one st, ch 1, sl st in the last st.
- Finishing: Fasten off, leaving a long tail. These are tiny, so don't stuff them!
What you'll master: Executing clean bobble stitches and working tiny, flat appliqué shapes.
3. Legs & Body
Here’s where the magic happens! We’ll build the legs from the feet up, then seamlessly join them to crochet the torso in one continuous piece.
Legs (Make 2, starting with White for the shoes):
- R1: Ch 7. Starting in the 2nd ch from hook: inc, 4 sc, 6 sc in the last st, 4 sc, inc (24)
- R2: 2 inc, 4 sc, 6 inc, 4 sc, 2 inc (28)
- R3: inc, 7 sc, (sc, inc) x 6, 7 sc, inc (36)
- R4: 36 sc
- R5: 36 sc in BLO (Back Loop Only)
- R6-9: 36 sc (36) [4 rows]
- R10: Center the front of the shoe: 8 sc, skip 1 st, sl st to the side, turn.
- R11-18: 8 sc, sl st to the side, turn [8 rows] (This shapes the top of the shoe)
- R19: 19 sc around the entire perimeter of the shoe.
- R20: 19 sc in BLO. Change to Skin color.
- R21-52: Work straight, increasing strategically to shape the calf and thigh, ending with 24 sc. (Note: Follow the specific increase rows in your pattern to get that perfect doll-leg curve!)
- Leg 2: Work exactly the same as Leg 1, but do not fasten off at the end. We are going to join them!
Joining & Body (Skin Color):
- R1 (Joining): 24 sc around Leg 1, ch 2, 24 sc around Leg 2, ch 2. Place a marker at the back center. (52 sts total)
- R2-12: 52 sc (52) [11 rows]
- R13-27: Begin decreasing gently to shape the waist and torso, ending with 36 sc.
- R28 (Attach Arms): 7 sc, work 5 sc through the left arm and body together, 14 sc across the front, work 5 sc through the right arm and body together, 5 sc. (36 sts)
- R29-40: Continue decreasing up to the neck, ending with 12 sc.
- Finishing: Fasten off, leaving a long tail. Stuff the body firmly, especially the lower half, to give the doll a sturdy, seated posture.
What you'll master: Seamless multi-piece joining, shaping organic curves, and mid-round limb attachment.
4. Head & Facial Sculpting
The head is worked in a continuous spiral to build a perfectly round foundation. Ricychan’s patterns are famous for their expressive faces, and we’ll achieve that with a little yarn sculpting!
- R1: 8 sc in MR (8)
- R2: 8 inc (16)
- R3: (1 sc, inc) x 8 (24)
- R4: (3 sc, inc) x 6 (30)
- R5: 2 sc, inc, (4 sc, inc) x 5, 2 sc (36)
- R6: (5 sc, inc) x 6 (42)
- R7: 3 sc, inc, (6 sc, inc) x 5, 3 sc (48)
- R8: (7 sc, inc) x 6 (54)
- R9: 4 sc, inc, (8 sc, inc) x 5, 4 sc (60)
- R10-19: 60 sc (60) [10 rows]
- R20: 21 sc, (inc, 2 sc) x 3, place a contrasting stitch marker here for the nose, (2 sc, inc) x 3, 21 sc (66)
- R21-24: 66 sc (66) [4 rows]
- R25: (9 sc, dec) x 6 (60)
- R26-31: Continue decreasing smoothly down to 18 sc.
- R32: 18 sc in BLO (This creates a ridge for attaching the head later!)
- R33-34: Decrease down to 6 sc. Fasten off and weave the tail through the front loops to cinch the hole closed.
The Magic of Sculpting: Before closing the head completely, thread a long tapestry needle with strong black thread. Weave it under the safety eyes and pull gently to create lovely, expressive eye sockets. Tie it off securely at the back of the head.
What you'll master: Spiral increase sequences, precise safety eye placement, and basic yarn sculpting for realistic facial definition.
5. The Hair
Don't let the length of this section intimidate you! Once you get into the rhythm of chaining and slip-stitching, the hair comes together surprisingly fast, and the result is absolutely gorgeous.
Hair Base:
- R1-7: Work in continuous rounds, increasing from 6 sc up to 42 sc to create a cap that fits the top of the head.
The Strands:
- Without cutting the yarn, you will work directly into the edge of the base.
- Long Strands: Ch 40. Starting in the 2nd ch from the hook, work 38 dc back down the chain. Skip 1 st on the base, sl st into the next st. Repeat this 20 times around the back and sides.
- Short Strands (Bangs): Ch 12, work 11 sc back down, sl st to the base. Repeat across the front hairline.
- Finishing: Weave in all ends securely. You can use a tiny dab of fabric glue at the base of the strands to keep them perfectly in place.
What you'll master: Radial expansion, chaining long textured strands, and attaching multiple repetitive elements seamlessly in the round.
6. The Wardrobe
A doll isn't complete without a fabulous outfit! We’ll make a sweet dress, a cozy little jacket, and tiny shoes.
The Dress (Dark Red):
- Worked flat, then joined in the round. It features a fitted bodice with strategic increases for a flared, ruffled skirt. The hem is finished with a delicate chain-space edge that looks like tiny little loops.
The Short Jacket (Dark Green):
- Worked flat in rows. It’s essentially a tiny rectangle with armholes shaped by skipping stitches. The collar is finished with a sweet, ruffled edge.
The Shoes:
- You actually already made the base of the shoes in R1-5 of the Legs! To finish them, simply embroider a tiny strap across the top using the contrasting yarn, and secure it with a tiny 8 mm button on the side.
What you'll master: Flat-panel garment construction, creating functional armholes, and adding custom, scaled-down accessories.
7. Assembly & Finishing
Now for the most rewarding part: bringing your doll’s personality to life!
- Head to Body: Sew the head securely to the top of the body using the long tail and the BLO ridge from R32.
- Facial Details: Embroider the nose (a small, raised cluster of stitches) right at your marker. Add delicate eyelashes, tiny eyebrows, and a sweet, subtle smile. A light dusting of pink pastel chalk on the cheeks adds the perfect touch of life!
- Hair & Ears: Position the hair cap on the head. Tuck the little ears underneath the hair on the sides. Sew or glue the hair securely in place, styling the bangs just how you like them.
- Dress Up: Slide the dress and jacket onto your doll. Fasten the tiny shoe straps, and tie the little hairband around her head.
What you'll master: Multi-step structural assembly, surface embroidery for expressive facial features, and professional finishing techniques for wearable doll accessories.
Final Section: Where to Go from Here
Congratulations! By completing Jisoo the Doll, you have mastered foundational spiral shaping, clever integrated limb construction, and intricate garment detailing. This project is a fantastic confidence-builder and makes an absolutely heartwarming gift.
From here, try experimenting with different yarn colorways to create a whole "friend group" of dolls, or adapt the dress and jacket patterns to design custom outfits for other amigurumi figures in your collection. Happy crocheting, and enjoy your beautiful new handmade companion!