August 27, 2026
Jumper Belle – A Cozy, Seamless Raglan Sweater in Luxurious Mink Down
Wrap yourself in pure comfort with the Jumper Belle! This beautifully designed, top-down raglan sweater features a flawless seamless construction, a perfectly fitted German short-row yoke, and an elegant textured pattern on the front. Knitted in luxurious mink down (or a similar angora blend), it’s a dreamy, intermediate-friendly project that will become an instant wardrobe staple.
Jump to pattern instructions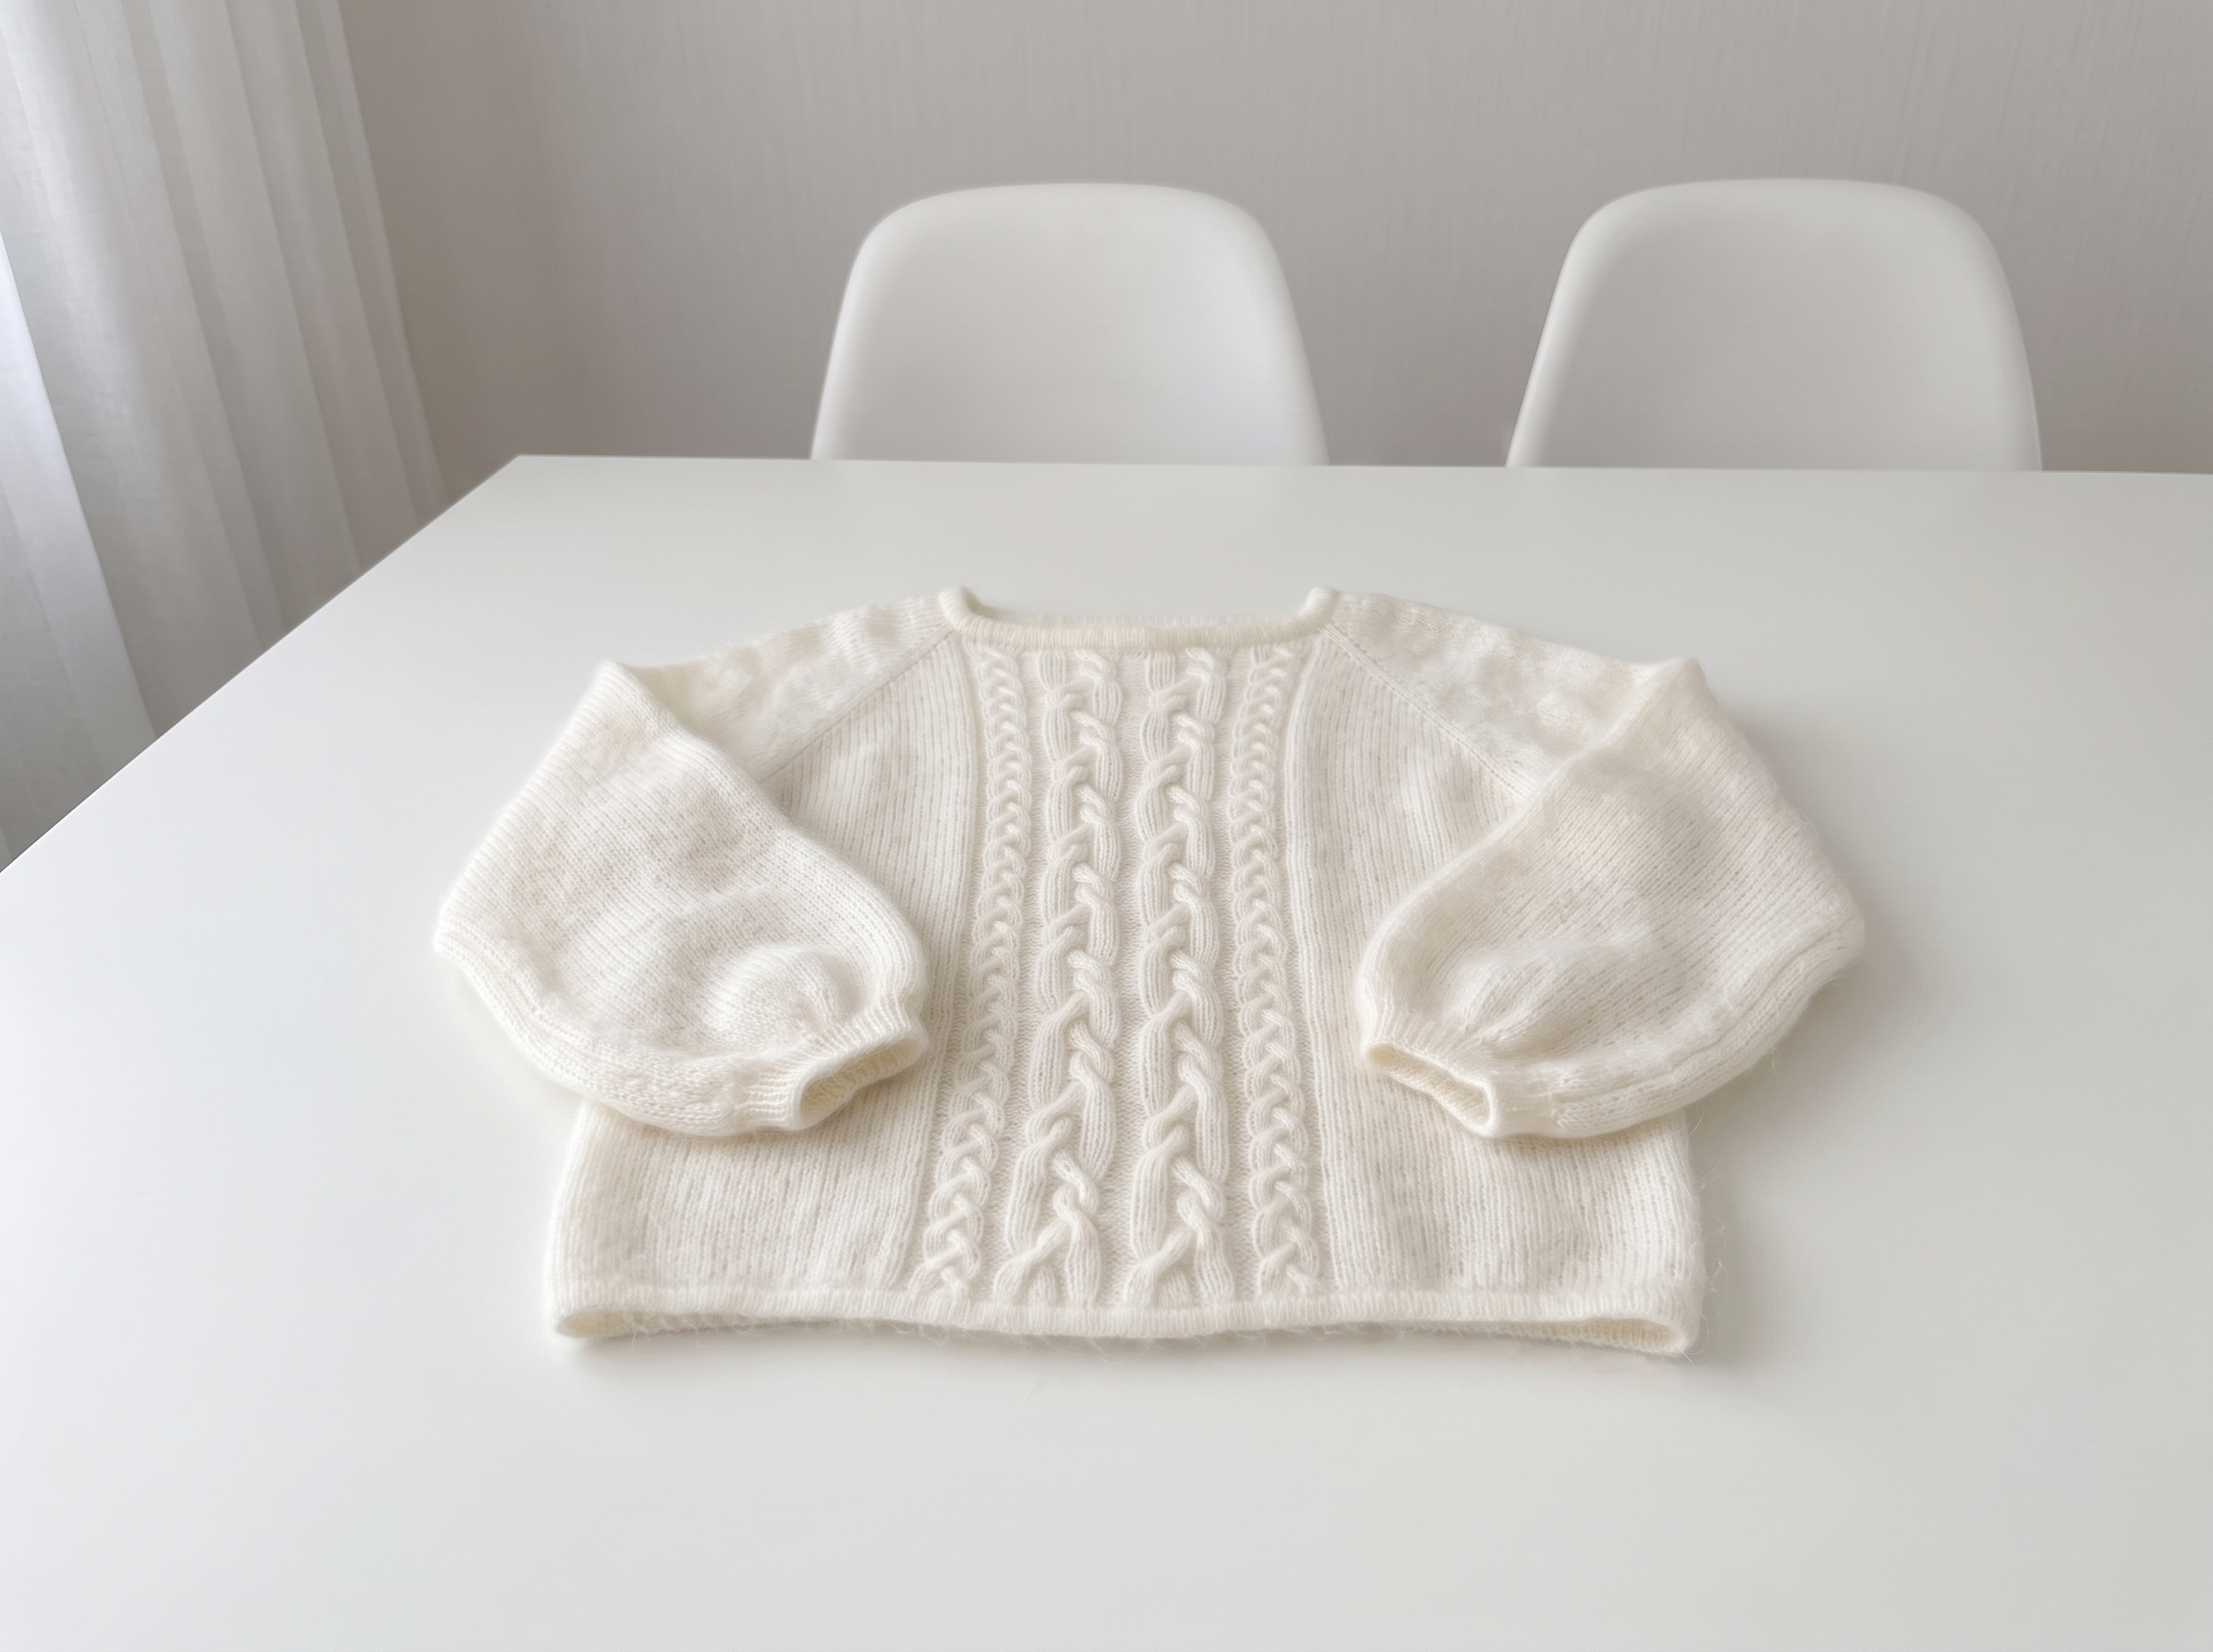
Jumper Belle – Complete Step-by-Step Knitting Pattern
Grab your favorite cozy yarn and a warm cup of tea! We’re going to knit this sweater from the top down, which means you can try it on as you go and adjust the length of the body or sleeves to perfectly suit your style. Let’s dive in!
1. Gathering Your Supplies
Using the right materials is the secret to achieving that professional, boutique-quality finish.
- Yarn: Mink Down (Пух норки) 350m / 50g (or a similar high-quality angora blend).
- Yardage: 4 to 6 skeins, depending on your size.
- Needles:
- 4.0 mm circular needles (100–120 cm length) for the main body.
- 4.0 mm circular needles (40 cm length) or DPNs for the sleeves.
- 3.0 mm circular needles for the neckline, cuffs, and hem.
- Notions: Stitch markers, a tapestry needle, waste yarn (or a crochet hook) for the provisional cast-on, and a thin stretch thread (optional, for neckline stability).
Gauge: 23–24 stitches × 33–34 rows = 10 × 10 cm (4" × 4") in stockinette stitch on 4.0 mm needles, after blocking. Pro Tip: Always knit a swatch, wash it, and block it just like you would the finished sweater. Mink down blooms beautifully after washing, and your gauge will settle into its true, cozy self!
2. Abbreviations & Special Techniques
Don't let these terms intimidate you; they are just the tools we use to shape the sweater beautifully!
- K / P: Knit / Purl
- M1L / M1R: Make 1 Left / Make 1 Right (lifted increases that create invisible, tidy raglan lines).
- DP (Double Point / Двойная петля): The magic of German short rows! You’ll slip a stitch, bring the yarn forward, slip the stitch back, and pull the yarn tight to create a "double" loop. We’ll knit or purl both legs of this loop together later to hide the turn seamlessly.
- Provisional Cast-On: A temporary cast-on using waste yarn, allowing us to pick up live stitches later for a perfectly seamless neckline.
3. The Neckline & Yoke Setup
We start with a provisional cast-on. This might feel like an extra step, but I promise, it’s the secret to a neckline that lies perfectly flat and looks professionally finished!
- Cast On: Using waste yarn and a crochet hook, chain 132 (136, 136, 136, 140, 148) stitches.
- Pick Up Stitches: Switch to your 3.0 mm needles and working yarn. Pick up and knit through the back bumps of the chain. Join in the round, being careful not to twist.
- Neckband: Knit 1 round, then work about 4 cm in stockinette stitch (keep the tension snug but not tight).
- Join the Neckline: Now, the magic happens! Switch to your 4.0 mm needles. Place your live provisional stitches from the waste yarn onto a spare needle. Knit one stitch from the working needle together with one stitch from the provisional needle all the way around. This creates a beautiful, seamless fold at the neck.
Setting up the Raglan: Place markers to divide your stitches for the raglan lines (the raglan stitches themselves are 2 stitches wide).
- Setup Round: 15 (15, 15, 15, 15, 17) K [Left Sleeve], place marker, 2 K [Raglan], place marker, 42 (44, 44, 44, 46, 48) K [Back], place marker, 2 K [Raglan], place marker, 15 (15, 15, 15, 15, 17) K [Right Sleeve], place marker, 2 K [Raglan], place marker, 52 (54, 54, 54, 56, 58) K [Front]. (Note: The Beginning of Round marker sits just before the first sleeve section).
4. The German Short Row Yoke (The "Rostok")
To ensure the back of the sweater sits higher than the front (preventing that dreaded saggy neckline), we’ll use German short rows. At the same time, we’ll start our raglan increases!
- Row 1 (RS): K1, M1R, slip marker, P2 (raglan), slip marker, M1L. Knit across the Back. M1R, slip marker, P2, slip marker, M1L. Knit 4 stitches, then turn your work.
- Row 2 (WS): Create a DP on the first stitch. Purl back to the Beginning of Round marker. Purl 3 stitches, then turn.
- Row 3 (RS): Create a DP. Knit 2, slip marker, K2, M1R, slip marker, P2, slip marker, M1L. Knit across the Back. M1R, slip marker, P2, slip marker, M1L. Knit 4, knit the DP together, knit 4, then turn.
- Row 4 (WS): Create a DP. Purl back to the previous DP, purl the DP together, purl 4, then turn.
Keep repeating this pattern, working a few more stitches past the previous turn each time, while continuing your M1L and M1R increases at every raglan line.
Once you’ve worked all the way across the front and back sections, you’ll work one final round that knits all the way around, neatly knitting the remaining DPs together. Don't worry if the raglan lines look a little loose right now; blocking will work its absolute magic!
5. The Body
Now that the yoke is complete, it’s time to separate the sleeves and let the sweater take shape.
- Separating: Knit across the Back stitches + 1 raglan stitch. Place the Sleeve stitches on waste yarn. Cast on 0 (0, 4, 4, 8, 12) stitches for the underarm. Knit across the Front stitches + 1 raglan stitch. Place the second Sleeve on waste yarn. Cast on the same number of underarm stitches. Join in the round and place your new Beginning of Round marker at the center of the new underarm.
- Knitting the Body: Work straight down in stockinette stitch (or your chosen front texture pattern) until the sweater measures about 47 (49, 51, 53, 56, 58) cm from the cast-on edge, or until it’s about 2 cm shorter than your desired final length (remember, it will grow slightly after blocking!).
The Hem (False Kitchener Stitch):
- Switch to 3.0 mm needles.
- Work 8 rounds of stockinette stitch.
- Work 1 round of Purl (this is your fold line).
- Work 7 more rounds of stockinette stitch.
- Finishing: Fold the hem to the inside (Wrong Side). Using your tapestry needle, neatly sew the live stitches to the corresponding purl bumps on the fold line. This creates a stretchy, incredibly polished hem that won't curl!
6. The Sleeves
We’ll pick up stitches directly from the underarm, giving us total control over the sleeve length and fit.
- Pick Up: Starting at the center of the underarm cast-on, pick up and knit 0 (0, 2, 2, 4, 6) stitches from the underarm, knit across the held sleeve stitches, then pick up the remaining 0 (0, 2, 2, 4, 6) underarm stitches. Join in the round.
- Sleeve Cap Short Rows: To give the sleeve a beautiful, natural drape at the shoulder, work a few German short rows at the top of the sleeve, gradually incorporating all the stitches until you are knitting in a continuous round.
- Shaping: Work straight down, decreasing 2 stitches (one on each side of the center underarm marker) every 11th round until you reach your desired sleeve length.
- The Cuff: Switch to 3.0 mm needles. Work a round of decreases to snug up the circumference, then work your preferred cuff (e.g., 1x1 or 2x2 ribbing) for about 6 cm. Bind off loosely and stretchily.
7. The Magic of Blocking (VTO)
This is the most satisfying step! Washing and blocking is what transforms a "homemade" knit into a "handcrafted" masterpiece.
- Fill a basin with cool water (max 30°C / 86°F) and a gentle wool wash. Submerge the sweater and let it soak for 20–30 minutes.
- Gently press the water out. Never wring or twist mink down! Roll the sweater in a clean towel and press firmly to absorb excess moisture.
- Lay the sweater flat on a dry towel or blocking mat. Gently pat and stretch it into its final measurements.
- Let it air dry completely. Note: Mink down will "bloom" and soften significantly, and the sweater may shrink slightly in length (about 1.5–3 cm). This is completely normal and accounted for in the pattern!
Final Section: Where to Go from Here
Take a deep breath and admire your handiwork. You’ve just conquered provisional cast-ons, German short rows, seamless raglan shaping, and professional hem finishing. The Jumper Belle is a true testament to your growing skills.
Now that you’ve mastered this top-down construction, the possibilities are endless! Try adapting this exact same blueprint to create a lightweight summer version in cotton, or add a pop of color with striped sleeves. However you choose to wear it, you’ve earned every cozy moment in this beautiful sweater. Happy knitting!