August 29, 2026
Mini Bunny with a Heart – A Sweet & Quick Amigurumi Pattern
Get ready to fall in love with this adorable Mini Bunny! Standing at just about 10 cm tall (not including those sweet little ears), this tiny Valentine’s-ready bunny features a cute little "sweater" stripe, floppy ears, and a tiny red heart to hold. It’s a wonderfully quick, confidence-boosting project that makes the perfect handmade gift or a delightful addition to your amigurumi collection.
Jump to pattern instructions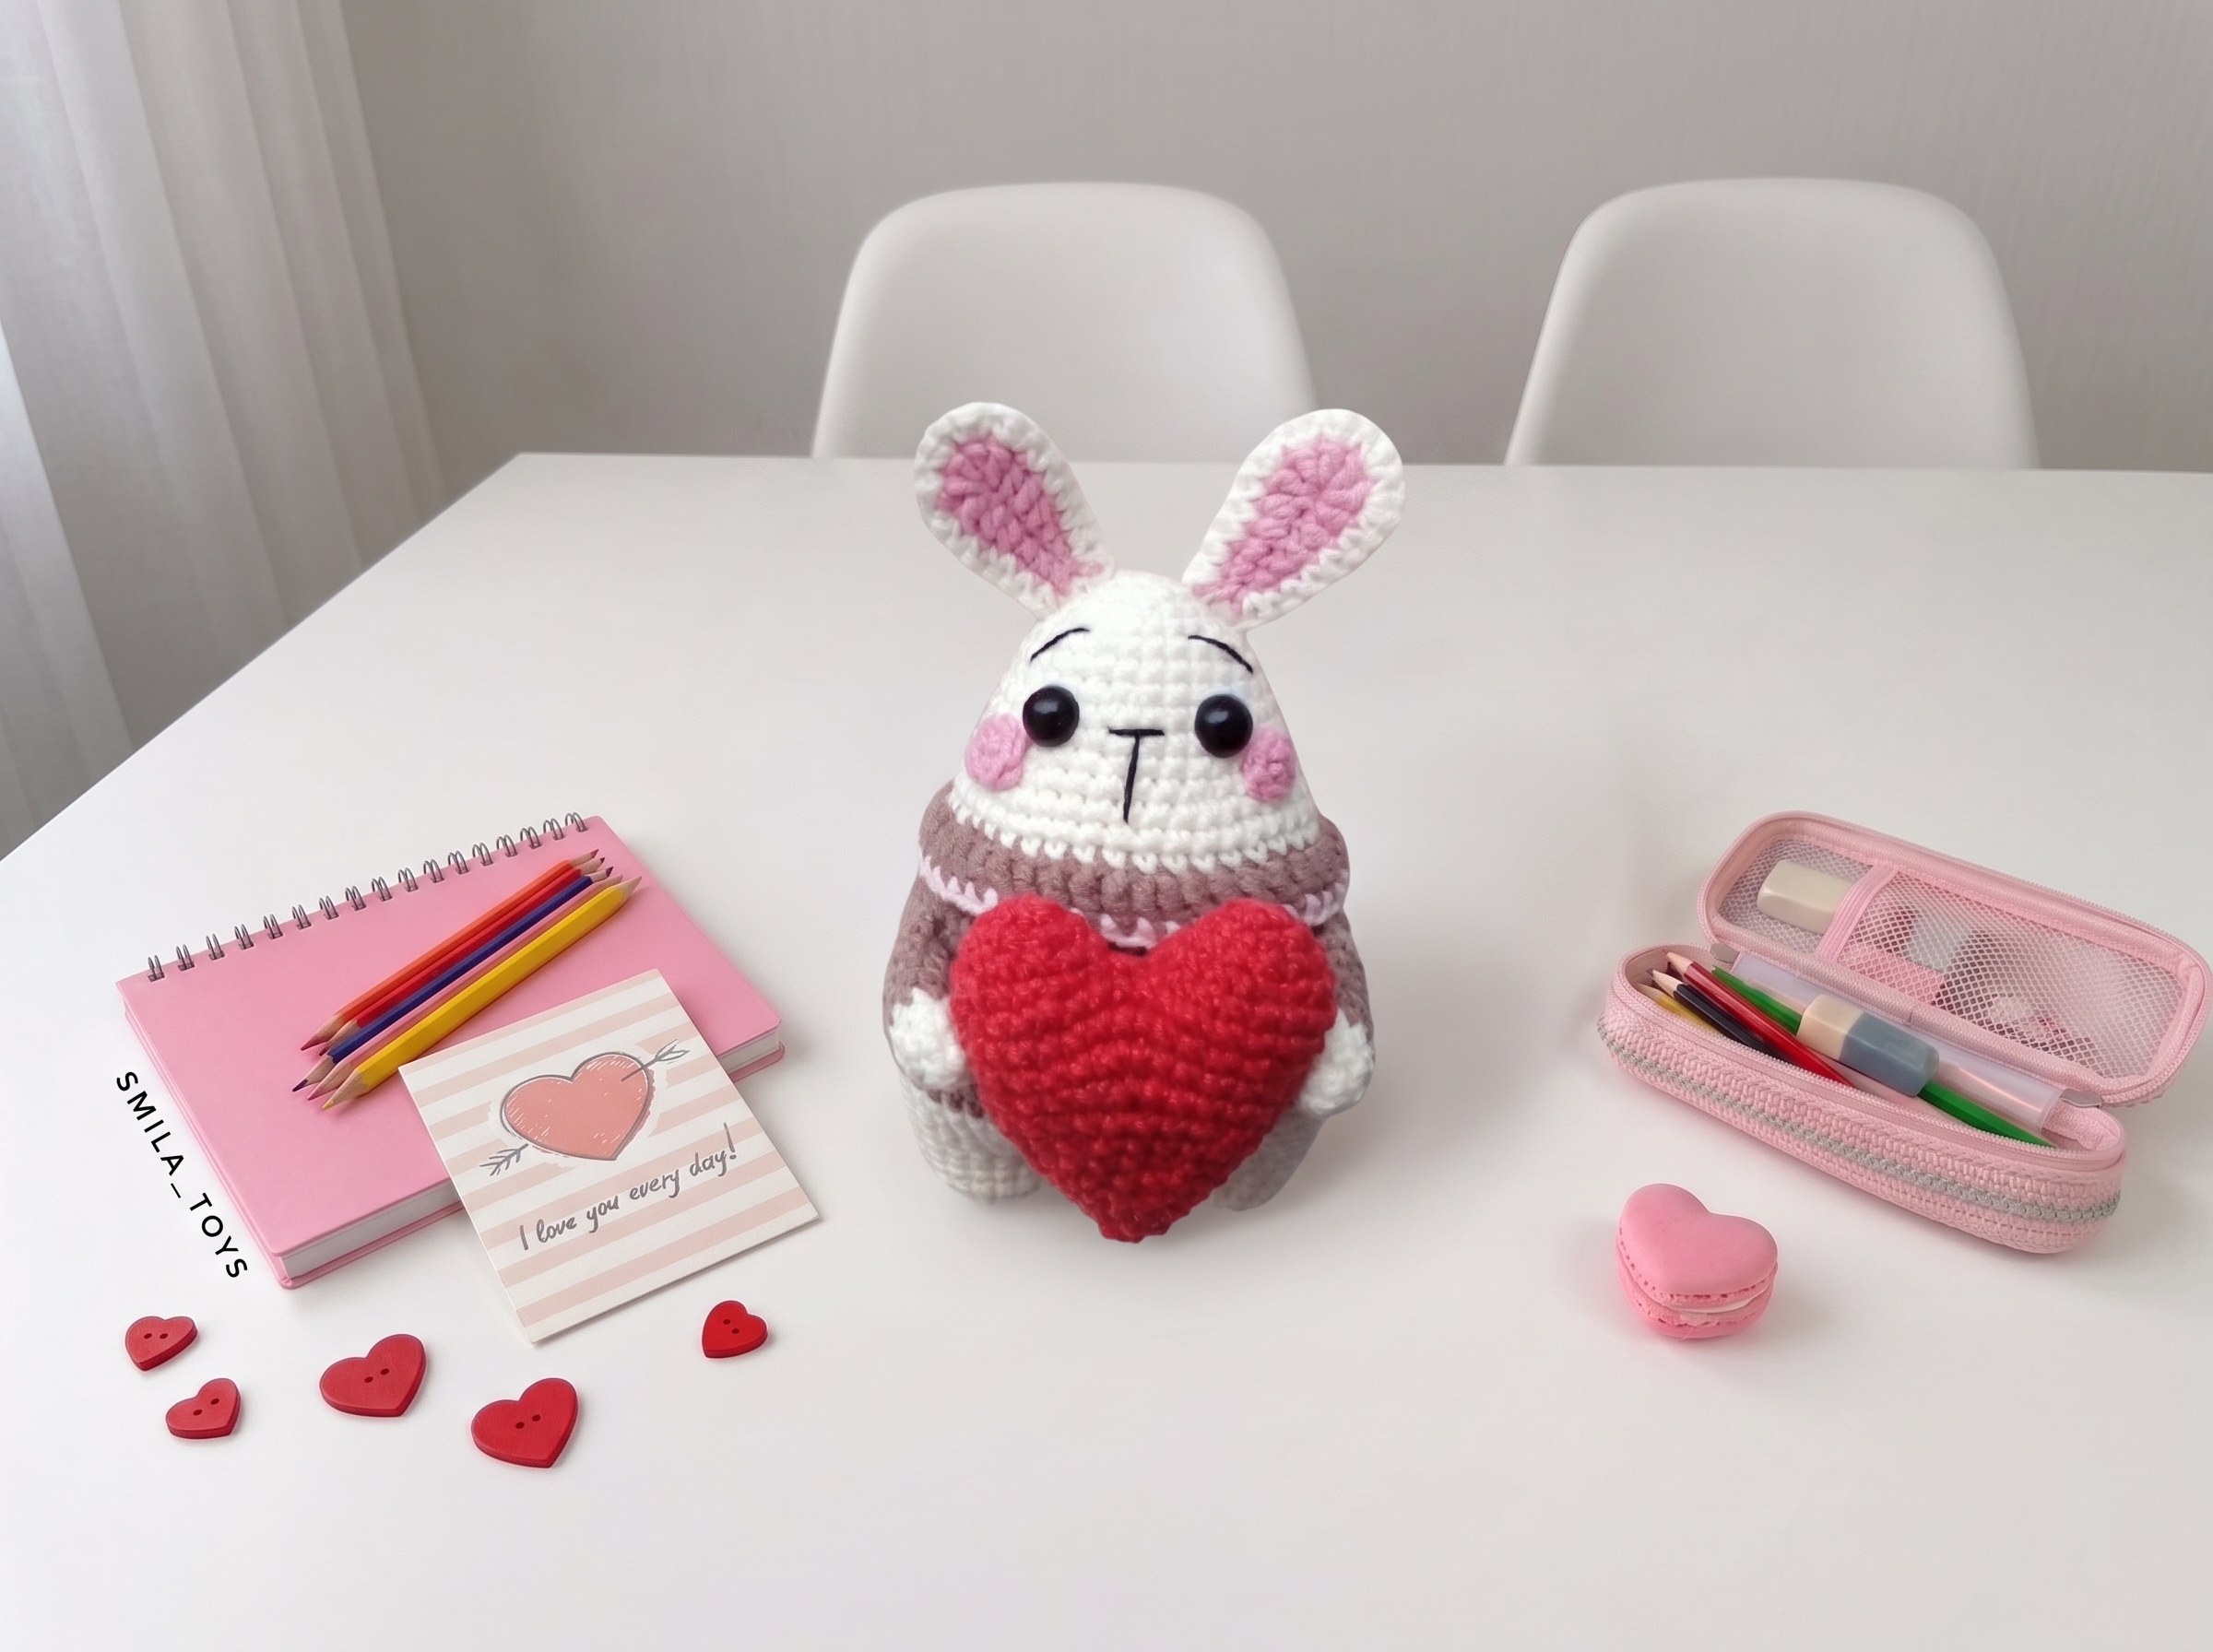
Mini Bunny with a Heart – Complete Step-by-Step Pattern
Original design by the talented Lyudmila Kuropatova (@smila_toys). Let’s grab our hooks and make some magic!
1. Gathering Your Supplies
Because this little bunny is so tiny, using a smooth, lightweight cotton blend will give you the best stitch definition and the cutest final result.
- Yarn: Alize Cotton Gold (or any similar semi-cotton, approx. 100g / 150m).
- Milk (Color 01): For the main body, head, and outer ears.
- Coffee: For the cute little "sweater" detail.
- Light Pink: For the sweater stripe, inner ears, and cheeks.
- Red: A tiny scrap for the heart.
- Hook: 2.0 mm – 2.5 mm (or whatever size gives you a tight, stuff-proof gauge).
- Notions: 6–8 mm safety eyes, poly-fil stuffing, tapestry needle, scissors, stitch marker, and a little bit of matching embroidery floss for the face.
What you'll master: Clean color changes, seamless limb joining, and working with fine yarns for delicate details.
2. Abbreviations & Special Stitches
Let’s quickly review a few terms. If you're new to any of these, don't worry—you'll be a pro by the time we reach the ears!
- MR: Magic Ring
- ch: chain
- sc: single crochet
- hdc: half double crochet
- dc: double crochet
- sl st: slip stitch
- inc: increase (2 sc in one stitch)
- dec: decrease (2 sc crocheted together invisibly)
- BLO: back loop only
3. Arms (Make 2)
These little arms are designed to look like they’re peeking out of a cozy sweater!
- R1 (Milk): 6 sc in MR (6)
- R2: (1 sc, inc) x 3 (9)
- R3: 9 sc (9)
- Change to Sweater Color (Coffee):
- R4-8: 9 sc (9) [5 rows]
- Finishing: Fold the arm flat and work 4 sc through both layers to close the top. Fasten off, leaving a long tail for sewing. Do not stuff.
What you'll master: Creating flat, seamless closures for tiny appendages.
4. Legs, Body & Head (Worked as One Piece)
Here’s where the magic happens! We’ll start with the feet, join them seamlessly, and crochet all the way up to the top of the head in one continuous piece.
Legs:
- R1 (Milk): 6 sc in MR (6)
- R2: 6 inc (12)
- R3: (1 sc, inc) x 6 (18)
- R4-6: 18 sc (18) [3 rows]
- Note: Make two legs. On the second leg, do not cut the yarn. We are going to join them right now!
Joining & Body:
- R7: Chain 3. Work 18 sc around the first leg, 3 sc along the chain, 18 sc around the second leg, and 3 sc along the opposite side of the chain. (42 sts total)
- R8: (6 sc, inc) x 6 (48)
- R9: (7 sc, inc) x 6 (54)
- R10: (8 sc, inc) x 6 (60)
- R11: 60 sc (60)
- Change to Coffee (for the sweater):
- R12-13: 60 sc (60) [2 rows]
- R14 (The Sweater Stripe!): Work a fun little pattern: (1 sc in Light Pink, 3 sc in Coffee) repeated 15 times around. (60)
- R15: 2 sc in Coffee, (1 sc in Light Pink, 3 sc in Coffee) repeated 14 times, 1 sc in Light Pink, 1 sc in Coffee.
- Note: Fasten off the Light Pink yarn. Continue with Coffee.
- R16: (8 sc, dec) x 6 (54)
- R17: 54 sc (54)
- R18: (7 sc, dec) x 6 (48)
- R19: 48 sc (48)
- R20: (6 sc, dec) x 6 (42)
- R21-22: 42 sc (42) [2 rows]
- Change back to Milk (for the face):
- R23: 42 sc in BLO (42) (This creates a neat ridge for the head transition!)
- R24-25: 42 sc (42) [2 rows]
- R26: (5 sc, dec) x 6 (36)
- R27-29: 36 sc (36) [3 rows]
- R30: (4 sc, dec) x 6 (30)
- R31-32: 30 sc (30) [2 rows]
- R33: (3 sc, dec) x 6 (24)
- R34: (2 sc, dec) x 6 (18)
- R35: (1 sc, dec) x 6 (12)
- R36: 6 dec (6)
- Finishing: Fasten off, leaving a long tail. Stuff the body and head firmly, paying special attention to keeping the cheeks round and plump. Weave the tail through the front loops of the last 6 stitches and pull tight to close.
What you'll master: Seamless multi-piece joining, strategic color changes, and structured decreasing for a perfectly round head.
5. Ears (Make 4, then join in pairs)
Floppy ears are a must for any bunny! We’ll make a pink inner ear and a milk outer ear, then crochet them together for a polished look.
- R1 (Light Pink): Chain 8. Starting in the 2nd ch from the hook: 1 sl st, 2 sc, 3 hdc, 5 hdc in the last chain. Now, working down the opposite side of the chain: 3 hdc, 2 sc, 1 sl st. (17 sts)
- Finishing: Fasten off. Make a second identical pink piece.
- Outer Ear: Repeat the exact same steps using Milk yarn, but do not fasten off at the end.
- Joining: Place the pink piece and the milk piece together (wrong sides facing). Working through both layers, crochet a round of sc around the entire edge. Add 5 inc evenly spaced around the curved top to keep it flat and ruffled. Fasten off, leaving a tail for sewing. Repeat for the second ear.
What you'll master: Working into foundation chains and creating clean, two-toned appliqués.
6. Cheeks (Make 2)
These tiny blush spots add so much personality!
- Instructions (Light Pink): 6 sc in MR. Fasten off, leaving a long tail for sewing.
7. The Little Heart
No Valentine’s bunny is complete without a tiny heart to hold!
- R1 (Red): 6 sc in MR (6)
- R2: 6 inc (12)
- R3: 12 sc (12)
- R4: (1 sc, inc) x 6 (18)
- Note: Make two identical flat circles. On the second one, do not cut the yarn.
- R5: Join the two pieces together by working 1 sc in each stitch around both layers (36 sts total).
- R6: 36 sc (36)
- R7: (4 sc, dec) x 6 (30)
- R8-9: 30 sc (30) [2 rows]
- R10: (3 sc, dec) x 6 (24)
- R11: 24 sc (24)
- R12: (2 sc, dec) x 6 (18)
- R13: 18 sc (18)
- R14: (1 sc, inc) x 6 (Wait, this is actually a decrease round to taper the bottom! Let's do: (1 sc, dec) x 6 = 12) (Corrected for shaping)
- R15: 12 sc (12)
- R16: 6 dec (6)
- Finishing: Stuff lightly, pull the tail tight to close the bottom point, and hide the end.
What you'll master: Joining flat pieces to create a 3D object and shaping a tapered point.
8. Assembly & Finishing
Now for the most rewarding part: bringing your Mini Bunny to life!
- Arms: Sew the arms to the sides of the body, right around rows 16–19.
- Ears: Pin the ears to the head between rows 33–35. Sew them securely in place, letting the tips flop forward just a bit for maximum cuteness.
- Eyes: Insert the 6–8 mm safety eyes between rows 28–29, spaced exactly 5 sc apart.
- Face Embroidery: This is where the magic happens! Use your embroidery floss to stitch a tiny, sweet nose and a little smiling mouth. Add delicate eyebrows above the eyes.
- Cheeks: Sew the tiny pink circles just below and slightly outward from the eyes for a rosy, innocent look.
- The Heart: Sew the little red heart securely into the bunny's paws, or right onto the front of its "sweater."
What you'll master: Precise feature placement, surface embroidery for expressive faces, and final assembly.
Final Section: Where to Go from Here
Congratulations! You’ve just crocheted an absolutely irresistible Mini Bunny. Because this pattern is so quick and uses minimal yarn, it’s the perfect project for using up scraps, making last-minute gifts, or creating a whole parade of tiny friends.
From here, try experimenting with different color combinations to create a "spring pastel" bunny or a "winter cozy" bunny with a tiny crocheted scarf. Don't forget to share your finished bunnies with the community—seeing your handmade creations come to life is the best part of this journey. Happy crocheting!