September 1, 2026
Miniature Ballerina Doll – A Delicate Amigurumi Crochet Pattern
Bring this elegant, pocket-sized ballerina to life! Featuring intricate pointe shoes, a beautifully ruffled layered dress, and delicate, flowing hair, this pattern is a deeply rewarding project for advanced crafters ready to master fine-gauge crochet and detailed doll assembly.
Jump to pattern instructions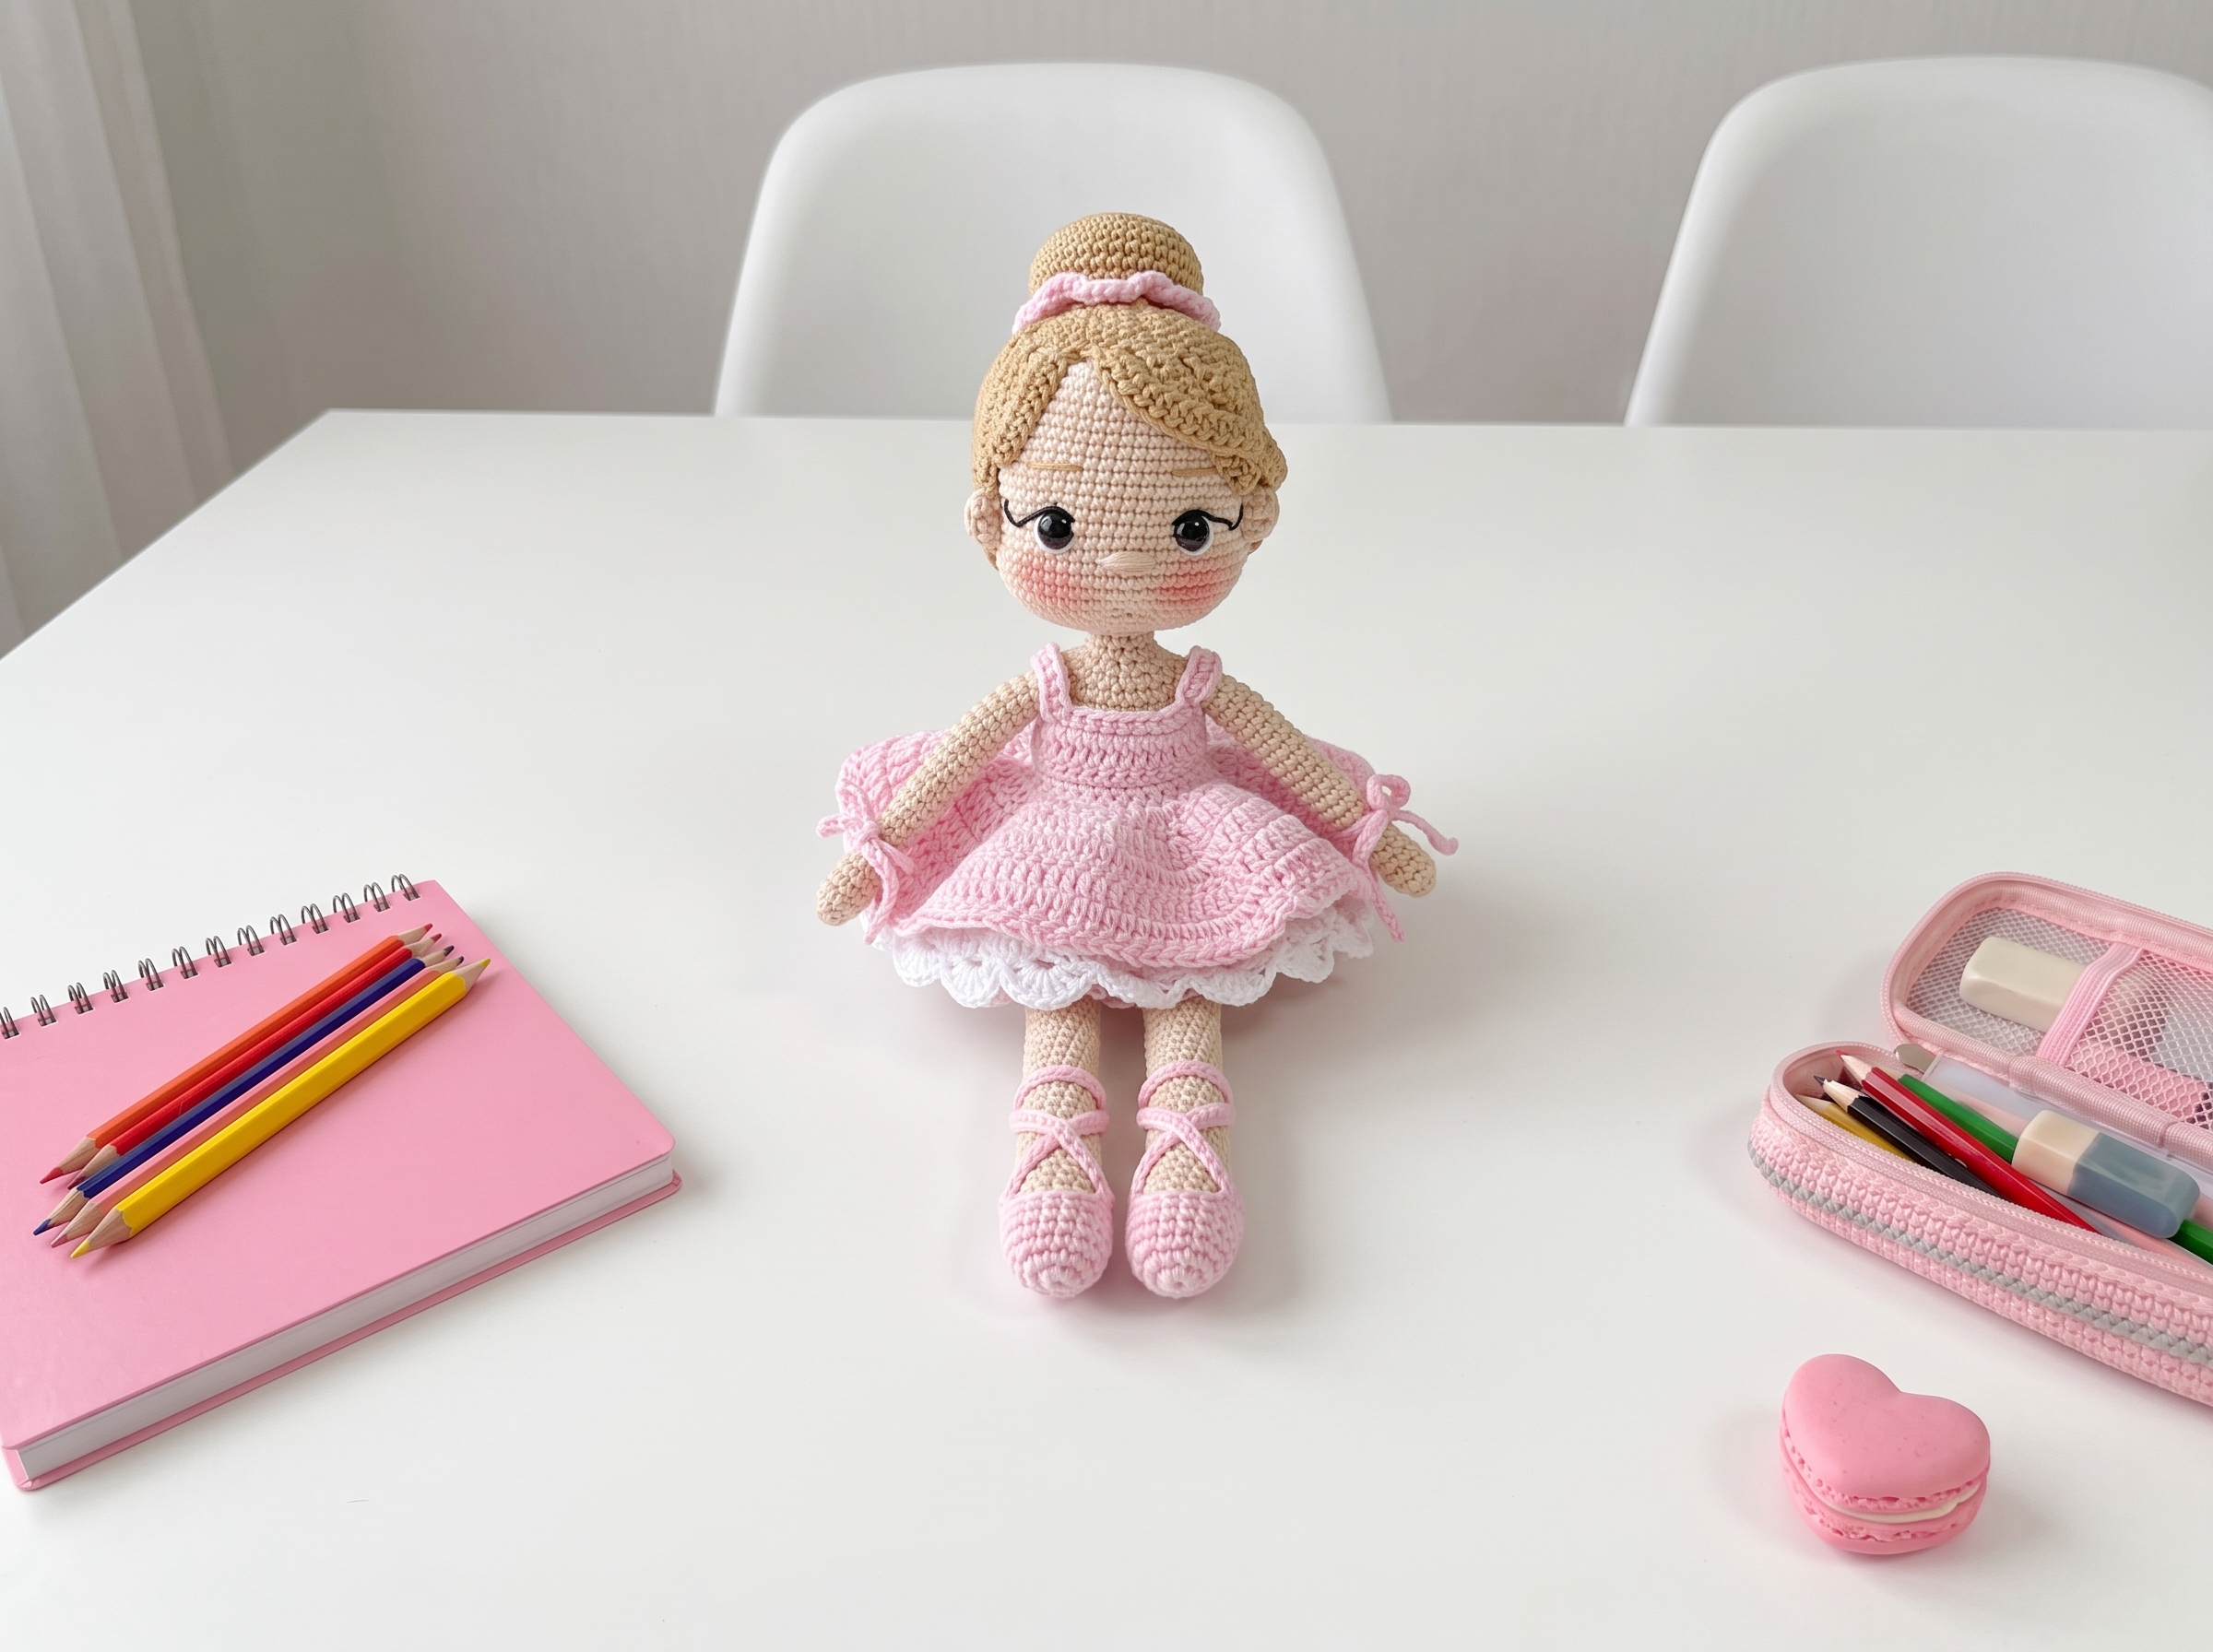
Miniature Ballerina Doll – Complete Step-by-Step Pattern
Original design translated by «Страна Амигурумия». Let’s grab our finest hooks and create a true miniature masterpiece!
1. Materials & Abbreviations
Because this doll is so tiny and detailed, using a fine, high-quality thread is essential for crisp stitch definition.
- Yarn: 4-ply yarn (e.g., Leylak Suni İpek). You will need small amounts of:
- Flesh (Color 3400): For the head, body, arms, and legs.
- Pink (Color 8017): For the dress and pointe shoes.
- White: For the lower skirt layer.
- Brown (Color 2930): For the hair.
- Black: For embroidery details.
- Hook: 0.5 mm (or the size needed to achieve a very tight, fine gauge).
- Notions: 3 mm safety eyes (or embroidered eyes), poly-fil stuffing, embroidery needle, scissors, a lighter (for sealing thread ends), and fabric glue.
- Abbreviations:
- MR – magic ring
- ch – chain
- sc – single crochet
- hdc – half double crochet
- dc – double crochet
- sl st – slip stitch
- inc – increase (2 sc in one stitch)
- dec – decrease (2 sc crocheted together)
- BLO – back loop only
- FLO – front loop only
What you'll master: Working with ultra-fine threads, maintaining consistent tension, and familiarization with advanced amigurumi abbreviations.
2. Ears & Arms
These tiny details require patience but add immense realism to the doll.
Ears (Make 2, Flesh color):
- R1: 5 sc in MR, ch 1, turn (5)
- R2: 5 sc
- Finishing: Fasten off, leaving a long tail for sewing. Do not stuff.
Arms (Make 2, Flesh color):
- R1: 6 sc in MR (6)
- R2: (1 sc, inc) x 3 (9)
- R3-4: 9 sc (9) [2 rows]
- R5: 1 sc, 3 hdc in 1 st, 7 sc (11)
- R6: 1 sc, dec 3 hdc from previous row together, 7 sc (9)
- R7: 9 sc (9)
- R8: dec, 7 sc (8)
- R9-21: 8 sc (8) [13 rows]
- Finishing: Fasten off. Do not stuff.
What you'll master: Creating miniature, un-stuffed appendages and shaping tiny hands with clustered stitches.
3. Legs & Body
The legs feature a clever flat-turned heel, and the body seamlessly integrates the arms for a clean, professional finish.
Legs (Make 2, Flesh color):
- R1: (1 sc, inc) x 3 (9)
- R2: (2 sc, inc) x 2 (12)
- R3-5: 12 sc (12) [3 rows]
- R6: 6 sc, ch 1, turn
- R7: 6 sc, and 2 sc along the edge of rows 6 & 7, 6 sc, 2 sc along the edge (16 total)
- R8: 16 sc (16)
- R9: (2 sc, dec) x 4 (12)
- R10-29: 12 sc (12) [20 rows]
- R30: 6 dec (6)
- R31: Gather the remaining 6 sc on a needle and pull tight to close.
Body (White, changing to Flesh):
- R1: 12 ch, turn, from 2nd ch from hook: 10 sc, 3 sc in 1 st, 9 sc, 1 inc (24)
- R2: 1 inc, 9 sc, 3 inc, 9 sc, 2 inc (30)
- R3-7: 30 sc (30) [5 rows]
- R8: Change to Flesh color. 30 sc (30)
- R9-15: 30 sc (30) [7 rows]
- R16: (3 sc, dec) x 6 (24)
- R17-18: 24 sc (24) [2 rows]
- R19 (Attach Arms): 6 sc, 4 sc through arm and body together, 8 sc, 4 sc through arm and body together, 2 sc (24). Ensure fingers point straight forward.
- R20: 5 sc, 4 sc through arm, 8 sc, 4 sc through arm, 3 sc (24)
- R21: (2 sc, dec) x 6 (18)
- R22: 9 dec (9)
- R23-27: 9 sc (9) [5 rows]
- Finishing: Stuff the body firmly, gather the remaining 9 sc with a needle, and pull tight. Attach the legs to the base of the body as shown in the pattern photos.
What you'll master: Flat-turned heel shaping, mid-round limb attachment, and structured torso decreasing.
4. Head
The head is worked in a continuous spiral, featuring a clever neck extension that inserts directly into the body for a seamless, wobble-free joint.
- R1 (Flesh): 6 sc in MR (6)
- R2: 6 inc (12)
- R3: (1 sc, inc) x 6 (18)
- R4: (2 sc, inc) x 6 (24)
- R5: (3 sc, inc) x 6 (30)
- R6: 2 sc, inc, (4 sc, inc) x 5, 2 sc (36)
- R7: (5 sc, inc) x 6 (42)
- R8: 3 sc, inc, (6 sc, inc) x 5, 3 sc (48)
- R9: (7 sc, inc) x 6 (54)
- R10-25: 54 sc (54) [17 rows]
- Important detail: Insert 3 mm safety eyes between R20 and R21, spaced 8 sc apart. Do not overstuff the head; it should remain slightly soft to allow for eye indentation.
- R26: (7 sc, dec) x 6 (48)
- R27: (6 sc, dec) x 6 (42)
- R28: (5 sc, dec) x 6 (36)
- R29: (4 sc, dec) x 6 (30)
- R30: (3 sc, dec) x 6 (24)
- R31: (2 sc, dec) x 6 (18)
- R32: (1 sc, dec) x 6 (12)
- R33: 12 sc in BLO (12)
- R34-36: 12 sc (12) [3 rows]
- Finishing: Fasten off, leaving a long tail. Use tweezers to insert the lower neck part (R34-36) into the body. Ensure the head is evenly stuffed and fits snugly.
What you'll master: Spiral increase sequences, precise safety eye placement, and creating a structural neck joint.
5. Hair (Wig & Bangs)
The hair is built on a radial base with long, flowing strands attached seamlessly in the round, creating a beautiful, realistic hairstyle.
Main Wig (Brown color):
- R1: 58 ch, turn, from 2nd ch from hook: 57 sc, sl st to first st to join round, 1 ch (57)
- Strands (П): Work directly into R1, skipping 1 st between each strand and sl st to the next.
- П1-П5: 17 ch, turn, from 2nd ch: 5 sc, 11 hdc, skip 1 st, sl st (16 sts per strand) [5 strands]
- П6-П10: 15 ch, turn, from 2nd ch: 3 sc, 11 hdc, skip 1 st, sl st (14 sts per strand) [5 strands]
- П11-П19: 15 ch, turn, from 3rd ch: 48 hdc, skip 1 st, sl st (48 sts per strand) [9 strands]
- П20-П24: 15 ch, turn, from 2nd ch: 3 sc, 11 hdc, skip 1 st, sl st (14 sts per strand) [5 strands]
- П25-П29: 17 ch, turn, from 2nd ch: 5 sc, 11 hdc, skip 1 st, sl st (16 sts per strand) [5 strands]
- Finishing: Fasten off.
Bangs:
- Join new brown yarn on the opposite side of R1 at the 29th st.
- П1: 18 ch, turn, from 2nd ch: 1 sc, 15 hdc, 1 sc, sl st to next st of R1 (17)
- П2-П4: 15 ch, turn, from 2nd ch: 1 sc, 12 hdc, 1 sc, sl st (14) [3 strands]
- П5-П6: 11 ch, turn, from 2nd ch: 1 sc, 8 hdc, 1 sc, sl st (10) [2 strands]
- Finishing: Fasten off.
What you'll master: Radial expansion, chaining long textured strands, and attaching multiple repetitive elements seamlessly.
6. Pointe Shoes & Dress
No ballerina is complete without her iconic attire!
Pointe Shoes (Make 2, Pink):
- R1: 8 ch, turn, from 2nd ch from hook: 6 sc, 3 sc in 1 st, 5 sc, 1 inc (16)
- R2: 1 inc, 5 sc, 3 inc, 5 sc, 2 inc (22)
- R3: 1 sc, 1 inc, 5 sc, (1 sc, 1 inc) x 3, 5 sc, (1 sc, 1 inc) x 2 (28)
- R4: 28 sc in BLO (28)
- R5: (2 sc, dec) x 7 (21)
- R6: 5 sl st, 31 ch (from 2nd ch from hook: 30 sl st), 11 sl st, 16 ch (from 2nd ch from hook: 15 sl st), 5 sl st. Wrap diagonally to finish the ribbon.
Dress (Pink):
- R1: 37 ch, start from 2nd ch from hook: (1 inc, 5 sc) x 6 (42), 2 ch, turn.
- R2: 6 dc, 5 ch, skip 9 sc, 1 dc inc, 10 dc, 1 dc inc, 5 ch, skip 9 sc, 6 dc, ch 1, turn (36)
- R3-4: 36 sc, ch 1, turn (2 rows)
- R5: 36 sc, 3 ch, turn
- R6: 36 dc inc in BLO (72), 3 ch, turn
- R7: (1 dc, 1 dc inc) x 36, 3 ch, turn (108)
- R8-11: 108 dc, 3 ch, turn (4 rows)
- R11 (Finishing): (2 ch, sc) x 108 (324), finish.
Lower Skirt (White):
- Work into the FLO of R6 of the dress.
- R1: 36 dc inc in FLO (72), 3 ch, turn
- R2: (1 dc, 1 dc inc) x 36, 3 ch, turn (108)
- R3-6: 108 dc, 3 ch, turn (4 rows)
- R7: 108 dc, turn
- R8: (sc, 4 hdc, sc) x 18 (108), finish.
What you'll master: Flat-panel garment construction, creating functional armholes, and assembling multi-part, layered accessories.
7. Hair Decoration & Assembly
Now for the magic moment where your ballerina truly comes to life!
- Face Details: After finishing R25 of the head, embroider the facial features. Use black thread for eyelashes and eyebrows, and white thread to highlight the eyes.
- Ears: Sew the ears to the head between R21 and R23, leaving exactly 5 sc between the eye and the ear.
- Hair: Pin the wig base to the head, ensuring the center of the wig aligns with the center of the head. Sew securely. Style the bangs and gather the back hair into a bun, securing it with the ribbon.
- Hair Ribbon (Pink): 151 ch, turn, from 2nd ch from hook: 60 sc, 30 hdc inc, 60 sc. Fasten off and tie around the hair bun.
- Dress Up: Slide the dress onto the doll and sew the back seam closed.
What you'll master: Multi-step structural assembly, surface embroidery for expressive facial features, and professional finishing techniques for wearable doll accessories.
is a true milestone for any crochet artist. From here, try experimenting with different yarn colorways to create a whole "ballet company" of dancers, or adapt the dress pattern to design custom outfits for other miniature amigurumi dolls in your collection. Happy crocheting, and enjoy your beautiful new handmade companion!