September 14, 2026
Pastel Clouds Granny Stripe Blanket – A Soft & Cozy Crochet Pattern
Wrap yourself in a cloud of pastel goodness! This beautiful blanket features wide, soothing stripes of lavender, baby pink, and mint green. Worked in the classic "Granny Stripe" stitch using plush velvet yarn, it creates a dense, incredibly soft fabric that is perfect for snuggling. This is a beginner-friendly project that works up quickly!
Jump to pattern instructions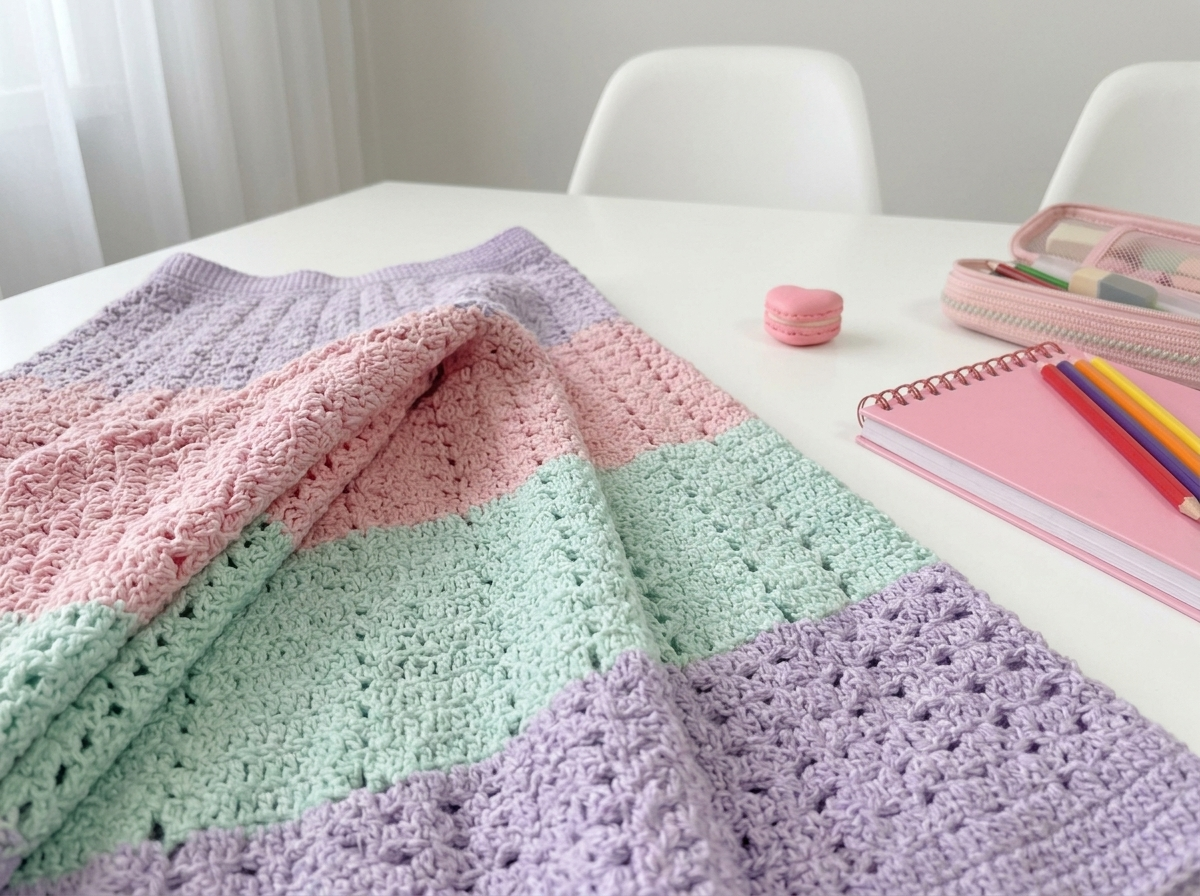
Pastel Clouds Granny Stripe Blanket – Complete Step-by-Step Pattern
1. Gathering Your Supplies
To achieve that ultra-soft, fuzzy look seen in the photo, plush or velvet yarn is the best choice. It hides stitch imperfections and feels amazing against the skin.
- Yarn: Plush/Velvet yarn (e.g., Himalaya Dolphin Baby, YarnArt Dolce, or similar). You will need approx. 3-4 skeins (120g each) of each color:
- Lavender/Purple
- Baby Pink
- Mint Green
- Hook: 5.0 mm or 6.0 mm (Check your yarn label, but a slightly larger hook helps keep the fabric drapey and prevents it from being too stiff).
- Notions: Tapestry needle for weaving in ends, scissors.
- Finished Size: This pattern is easily adjustable. The sample is approx. 100 cm x 120 cm (Throw size).
What you'll master: The classic Granny Stripe stitch, changing colors cleanly for wide stripes, and working with plush yarn.
2. Abbreviations & Special Techniques
- ch: Chain
- dc: Double crochet
- sk: Skip
- sp: Space (the gap between stitches)
- sl st: Slip stitch
- Granny Stripe Cluster: 3 double crochet stitches worked into the same space.
3. The Foundation
We start with a long chain. The number of chains must be a multiple of 3, plus 2 extra chains for the turning.
- Instructions: With Lavender yarn, Ch 101 (or any multiple of 3 + 2, e.g., 134 for a wider blanket).
- Note: Make sure your foundation chain is loose! If it's too tight, the edges of your blanket will curl.
What you'll master: Creating a flexible foundation chain.
4. Row 1: The Setup
- Row 1: Work 3 dc into the 4th chain from the hook (this counts as your first cluster).
- Pattern: [Sk 2 chains, 3 dc into the next chain] across the entire row.
- End of Row: You should end with a cluster of 3 dc. Turn your work.
- Count: You now have a row of clusters separated by small gaps.
What you'll master: Establishing the rhythm of the granny stripe.
5. Row 2 and Beyond: The Granny Stripe
This is the repeating row that creates the beautiful texture. You will work your clusters into the spaces between the clusters of the row below.
- Row 2: Ch 3 (this counts as the first dc of your new cluster). Work 2 dc into the first space (the gap between the first cluster and the second cluster of the previous row). This completes your first cluster of the row.
- Pattern: [3 dc into the next space between clusters] across the entire row.
- End of Row: Work 1 dc into the very last space (or the top of the turning chain from the previous row) to keep the edge straight. Turn your work.
- Repeat: Repeat Row 2 for as many rows as you like for your first color block (e.g., 10-15 rows for a wide stripe).
What you'll master: Working into spaces to create a staggered, brick-like texture.
6. Changing Colors for Stripes
To get those clean, wide blocks of color (Lavender -> Pink -> Green -> Lavender):
- The Switch: On the very last row of your Lavender section, work the row as normal. On the very last stitch of the row (the final yarn over and pull through), pull the Pink yarn through to complete the stitch.
- The Turn: Chain 3 with the new Pink color and turn your work.
- Continue: Continue working Row 2 with the Pink yarn.
- Carrying Yarn (Optional): If your stripes are narrow (less than 4 rows), you can carry the yarn up the side. For wide stripes like in the photo, it's better to cut the yarn and weave in the ends later to prevent bulk on the sides.
Color Sequence Suggestion:
- 12 rows Lavender
- 12 rows Pink
- 12 rows Mint Green
- Repeat until desired length.
What you'll master: Clean color changes and planning a striped design.
7. The Border (Optional but Recommended)
To give the blanket a polished look and hide any uneven side edges, add a simple border.
- Round 1: Join Lavender yarn to any corner. Ch 3. Work 2 dc in the same corner. Work dc evenly down the side, working 3 dc into the end of every "Granny Stripe" row to keep it flat. Work [3 dc, ch 2, 3 dc] in the corner. Repeat around the entire blanket.
- Round 2 (Optional): Sl st around the entire blanket for a neat edge, or work a round of single crochet (sc) in a contrasting color (like White) to frame the pastels.
What you'll master: Adding a professional finish to a large project.
Final Section: Where to Go from Here
Congratulations! You’ve just crafted a dreamy Pastel Clouds Blanket. This project is incredibly satisfying because the plush yarn makes it impossible to see small mistakes, and the repetitive stitch is very relaxing.
From here, try experimenting with different color palettes! You could make a "Sunset" version with oranges and pinks, or a "Forest" version with sage greens and creams. You could even use this same stitch pattern to make a matching pillow cover or a scarf. Happy crocheting, and stay cozy! ️