August 27, 2026
Polo Luna – A Delicate, Seamless Bottom-Up Knitted Blouse
Elevate your handmade wardrobe with this elegant, seamless blouse featuring a beautiful openwork front band, short sleeves, and a flattering shoulder construction. Perfect for intermediate knitters ready to master bottom-up construction, short-row shaping, and the Kitchener stitch.
Jump to pattern instructions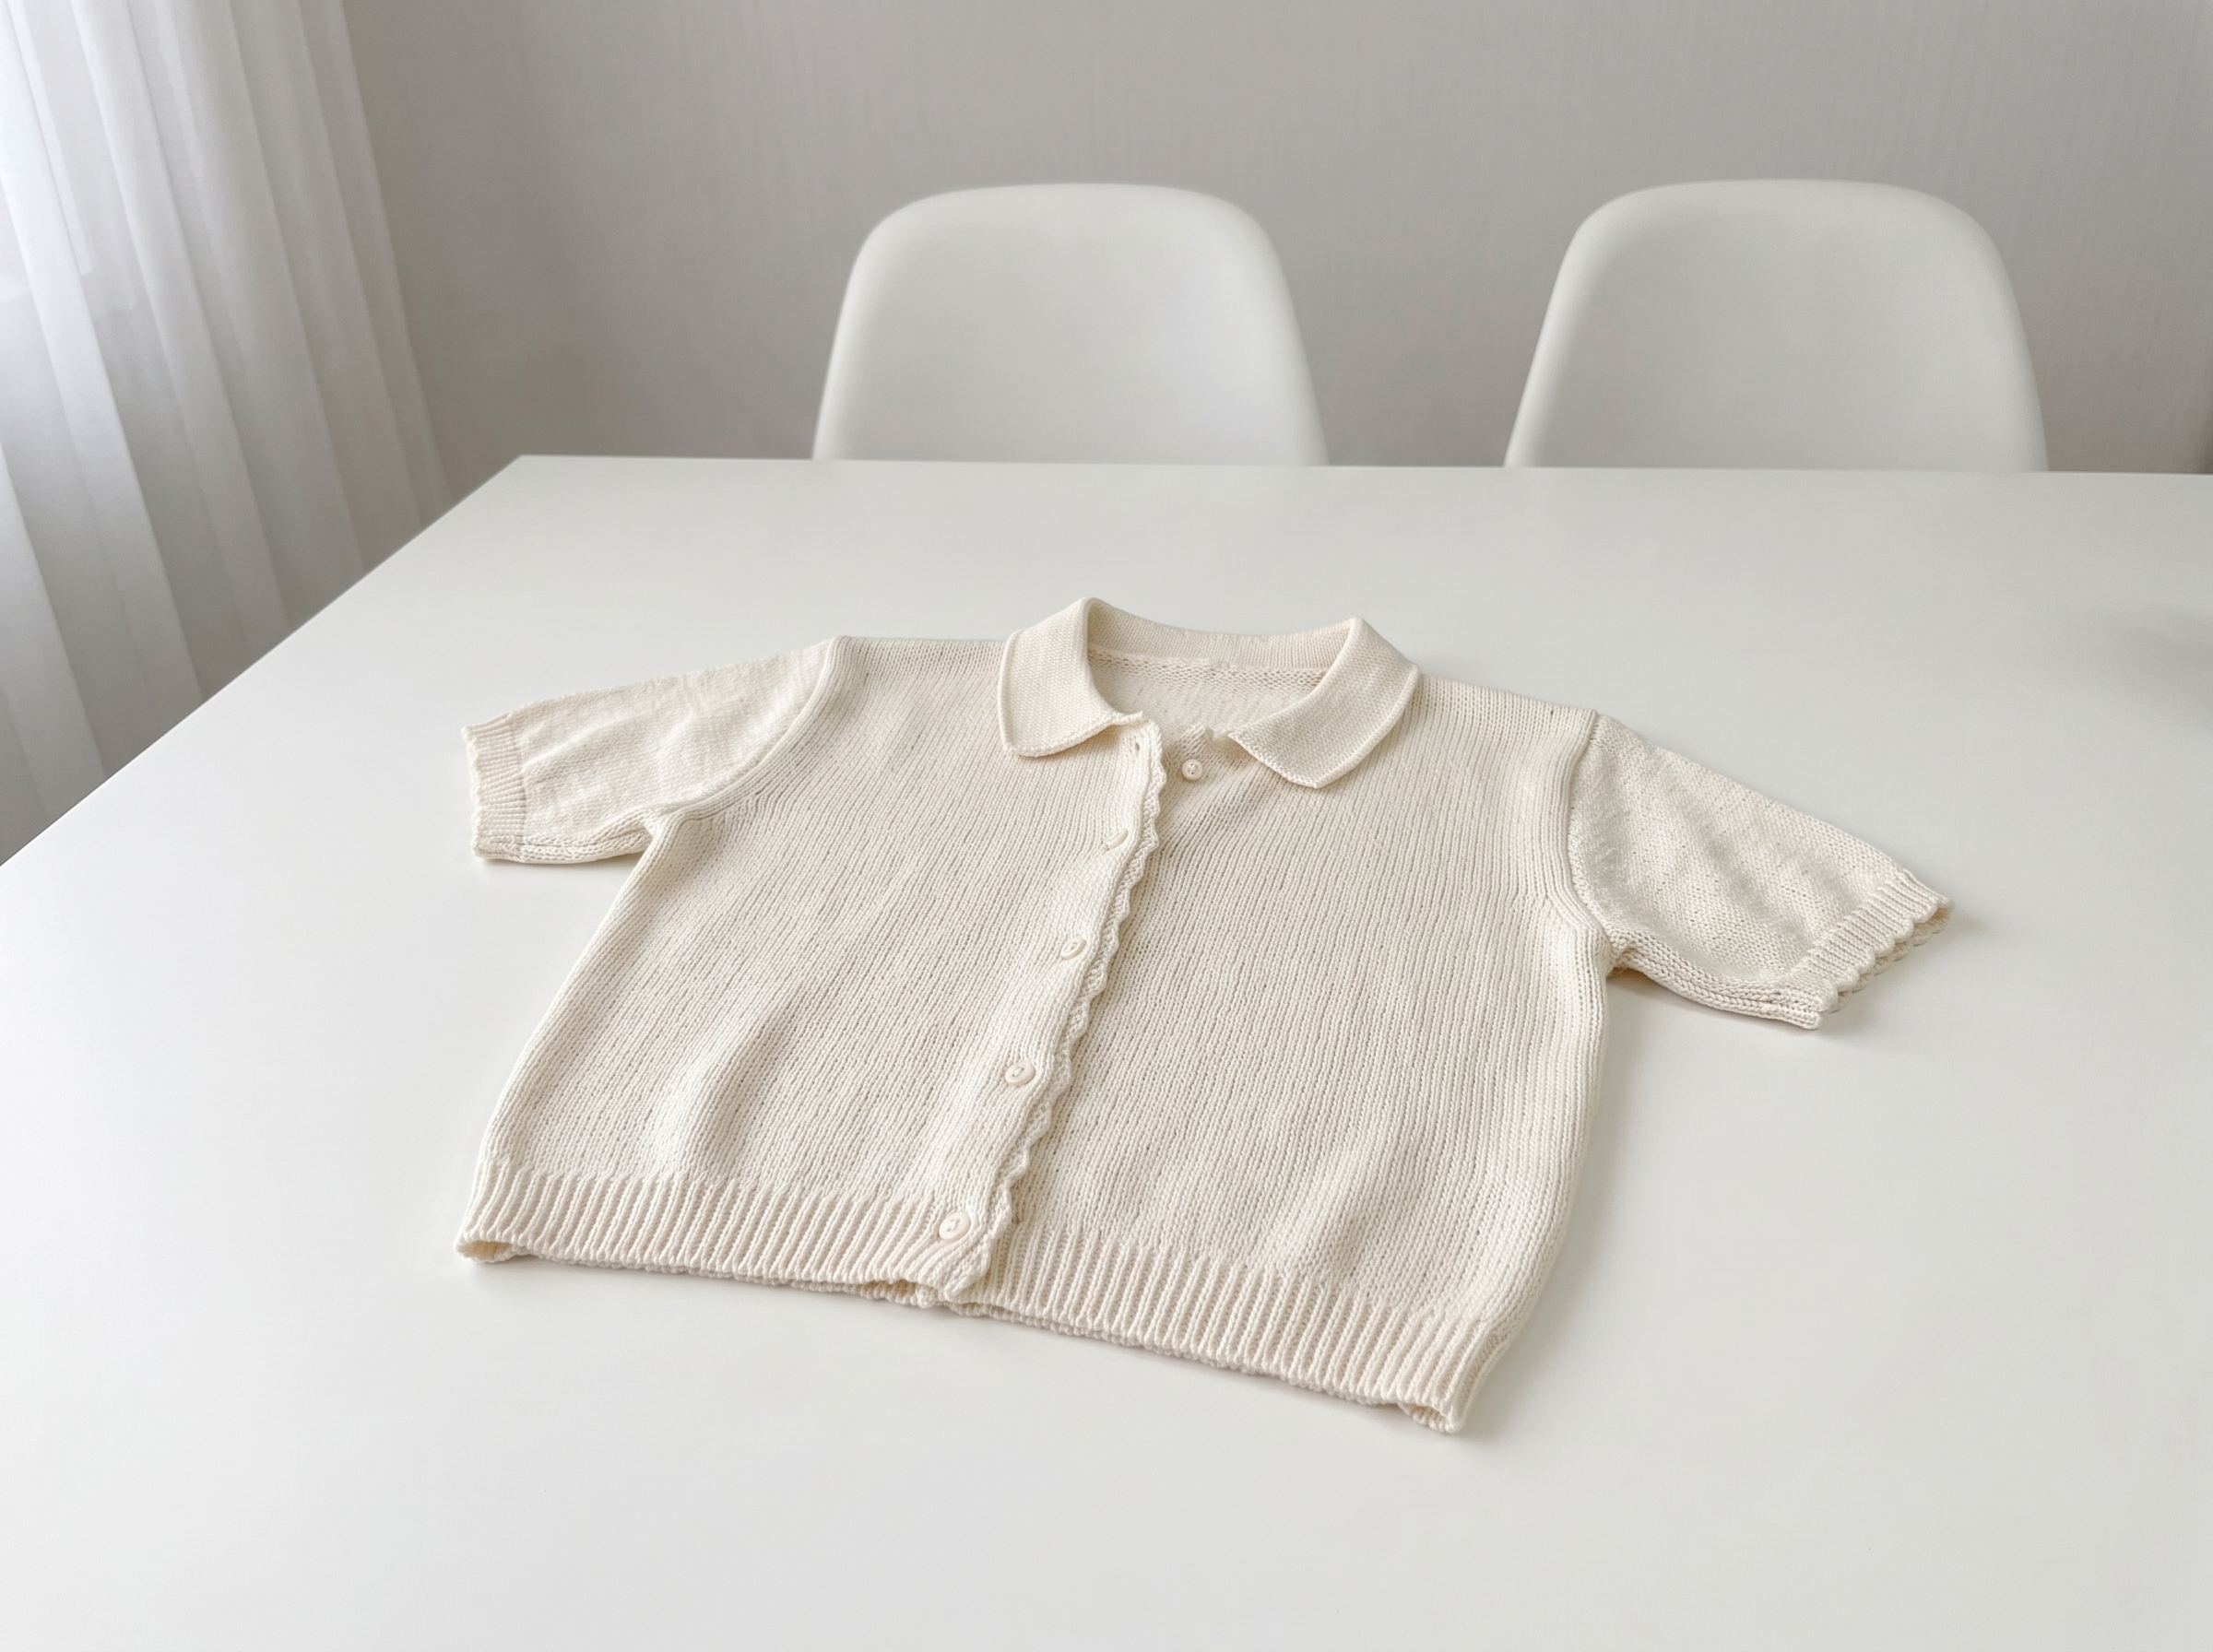
Polo Luna – Complete Step-by-Step Knitting Pattern
Grab your favorite luxurious yarn and get ready to knit a true wardrobe staple! The Polo Luna blouse is designed to be delicate yet structured, with a seamless body that flows beautifully into a custom-fitted yoke. Let’s dive in!
1. Materials & Gauge
Getting your gauge spot-on is the secret to a blouse that drapes perfectly. Since this pattern uses alpaca, blocking will be your best friend!
- Yarn: Oveja Lesa (100% alpaca, 330m / 100g) or a similar lightweight, drapey yarn. You'll need about 320g to 440g depending on your size.
- Needles:
- 3.25 mm circular needles (for the main body, sleeves, and collar).
- 2.75 mm circular needles (for the ribbing and delicate collar details).
- Notions: Stitch markers, 2.0 mm crochet hook (for the front bands), tapestry needle, 5 buttons, and a cable needle.
- Gauge: 30 stitches x 38 rows = 10 x 10 cm (4" x 4") in stockinette stitch, after blocking on 3.25 mm needles.
- Sizes: XS (S, M, L, XL, 2XL). Designed for a bust circumference of 82 to 106 cm with about 6 cm of positive ease.
What you'll master: Accurate gauge swatching for natural fibers, and calculating custom sizing based on positive ease.
2. Abbreviations & Special Techniques
Before we cast on, let’s quickly review a few terms. If you're new to any of these, don't worry—you'll be a pro by the time we reach the sleeves!
- k / p: knit / purl
- k2tog / ssk: knit 2 together (right-leaning) / slip, slip, knit (left-leaning)
- M1R / M1L: Make 1 Right / Make 1 Left (lifted increases from the strand between stitches)
- DP (Double Stitch): Used in German short rows. Slip the stitch, bring yarn to front, pull yarn over the needle to the back, and turn. On the return row, knit/purl both legs of the DP together as one stitch.
- Kitchener Stitch: A magical grafting technique using a tapestry needle to seamlessly join live stitches.
What you'll master: German short rows for flawless shoulder slopes, and the Kitchener stitch for invisible shoulder seams.
3. The Body (Bottom-Up)
We’re starting at the bottom hem and working our way up in the round. This gives the blouse a beautifully seamless foundation.
- Cast On: Using the 3.25 mm needles and the German twisted cast-on method, cast on 274 (286, 298, 316, 334, 346) stitches.
- Markers: Place markers to divide your stitches for the Left Front, Back, and Right Front.
- Ribbing: Work in the established 3-stitch ribbing pattern for about 5 cm.
- Main Body: Switch to stockinette stitch (knit every round) and continue until the body measures 27 to 30 cm from the cast-on edge, depending on your size.
What you'll master: Seamless circular knitting, and managing large stitch counts with ease.
4. Splitting for Front and Back (Armholes & Shoulders)
Now for the shaping! We’ll split the work to create the armholes and shape the shoulders using short rows. (Note: The original pattern relies on charts A1-A6 for the specific lace and armhole decrease placements, so be sure to have your charts handy!)
- Left Front: Work the armhole decreases and lace pattern according to Chart A1, then transition to Chart A2. Place shoulder stitches on a holder.
- Back: Join new yarn and work the back armhole decreases using Charts A5 and A6.
- Back Neck Short Rows: Work German short rows to shape the back neck slope, then bind off the center back neck stitches. Place the remaining shoulder stitches on a holder.
- Right Front: Join new yarn and mirror the left front using Charts A3 and A4.
What you'll master: Reading complex lace and shaping charts, and executing German short rows for a tailored shoulder slope.
5. Shoulders & Assembly
Time to bring the front and back together!
- Kitchener Stitch: Using your tapestry needle, graft the front and back shoulder stitches together using the Kitchener stitch. Remember to treat the Double Stitches (DP) from the short rows as single stitches when grafting!
- Tip: Take your time here. A seamless shoulder makes the blouse look incredibly high-end and boutique-quality.
What you'll master: The Kitchener stitch for invisible, flexible seams.
6. Sleeves
We’re picking up right from the armholes and working top-down.
- Pick Up: Using the 3.25 mm needles, pick up and knit 100 to 122 stitches evenly around the armhole, starting at the center of the underarm.
- Sleeve Cap Short Rows: Work German short rows back and forth to shape the sleeve cap, ensuring a perfect fit over the shoulder.
- Working in the Round: Once the cap is shaped, join in the round and work in stockinette.
- Decreases: Decrease 7 to 9 stitches evenly, then repeat decreases every 2 cm until you reach the desired sleeve length.
- Cuff: Switch to 2.75 mm needles, work 2 cm of ribbing, and bind off loosely using the Icelandic bind-off method for a stretchy, comfortable cuff.
What you'll master: Picking up underarm stitches, short-row sleeve caps, and stretchy bind-offs.
7. Collar & Front Band Finishing
Let’s give this blouse its signature delicate finish!
- Collar: Using 2.75 mm needles, pick up stitches evenly around the neckline from the wrong side. Work the collar in the established rib pattern until it reaches 2.5 cm, then switch to 3.25 mm needles and continue until the collar is 7 cm total. Bind off using the Icelandic method.
- Front Bands: Using a 2.0 mm crochet hook, work a delicate, openwork crochet edge along the front bands.
- Buttonholes: Mark your buttonholes on the right front band. Carefully snip the horizontal strands between stitches to create the openings, then reinforce them with a blanket stitch or tambour stitch using matching yarn.
What you'll master: Integrating crochet edging with knitted garments, and creating reinforced, professional buttonholes.
8. Blocking & Final Touches
Proper blocking is essential to open up the lace and set the shoulders.
- Wet Blocking: Submerge the blouse in cool water with a gentle wool wash. Roll in a towel to remove excess water, then lay flat to dry, shaping it to your exact measurements.
- Steam Pressing: Once dry, lightly steam the shoulders and the crochet front bands to ensure they lay perfectly flat and crisp.
- Buttons: Sew your 5 buttons securely opposite the buttonholes.
What you'll master: The transformative power of wet blocking and steam pressing on natural fibers.
Final Section: Where to Go from Here
Take a deep breath and admire your handiwork! By completing the Polo Luna blouse, you’ve conquered bottom-up seamless construction, short-row shoulder shaping, the Kitchener stitch, and hybrid knit-crochet finishing. These are truly advanced, custom-tailoring techniques that will elevate every garment you knit from now on.
Now that you know how to manipulate these shapes, try experimenting with different yarn weights! A silk-linen blend would make this an incredibly breezy summer top, while a soft merino would make it a cozy autumn layer. Happy knitting, and enjoy your beautiful new wardrobe staple!