August 31, 2026
Scandinavian Gnome – A Cozy, Weighted Amigurumi Pattern
Bring a touch of Nordic charm to your home with this adorable, weighted Scandinavian gnome! Featuring a sturdy, weighted base, a fluffy faux-fur beard, and a cute pointed hat, this project is a delightful mix of crochet and simple sewing. It’s a perfect, confidence-building project for crafters looking to create a charming holiday decoration or year-round shelf sitter.
Jump to pattern instructions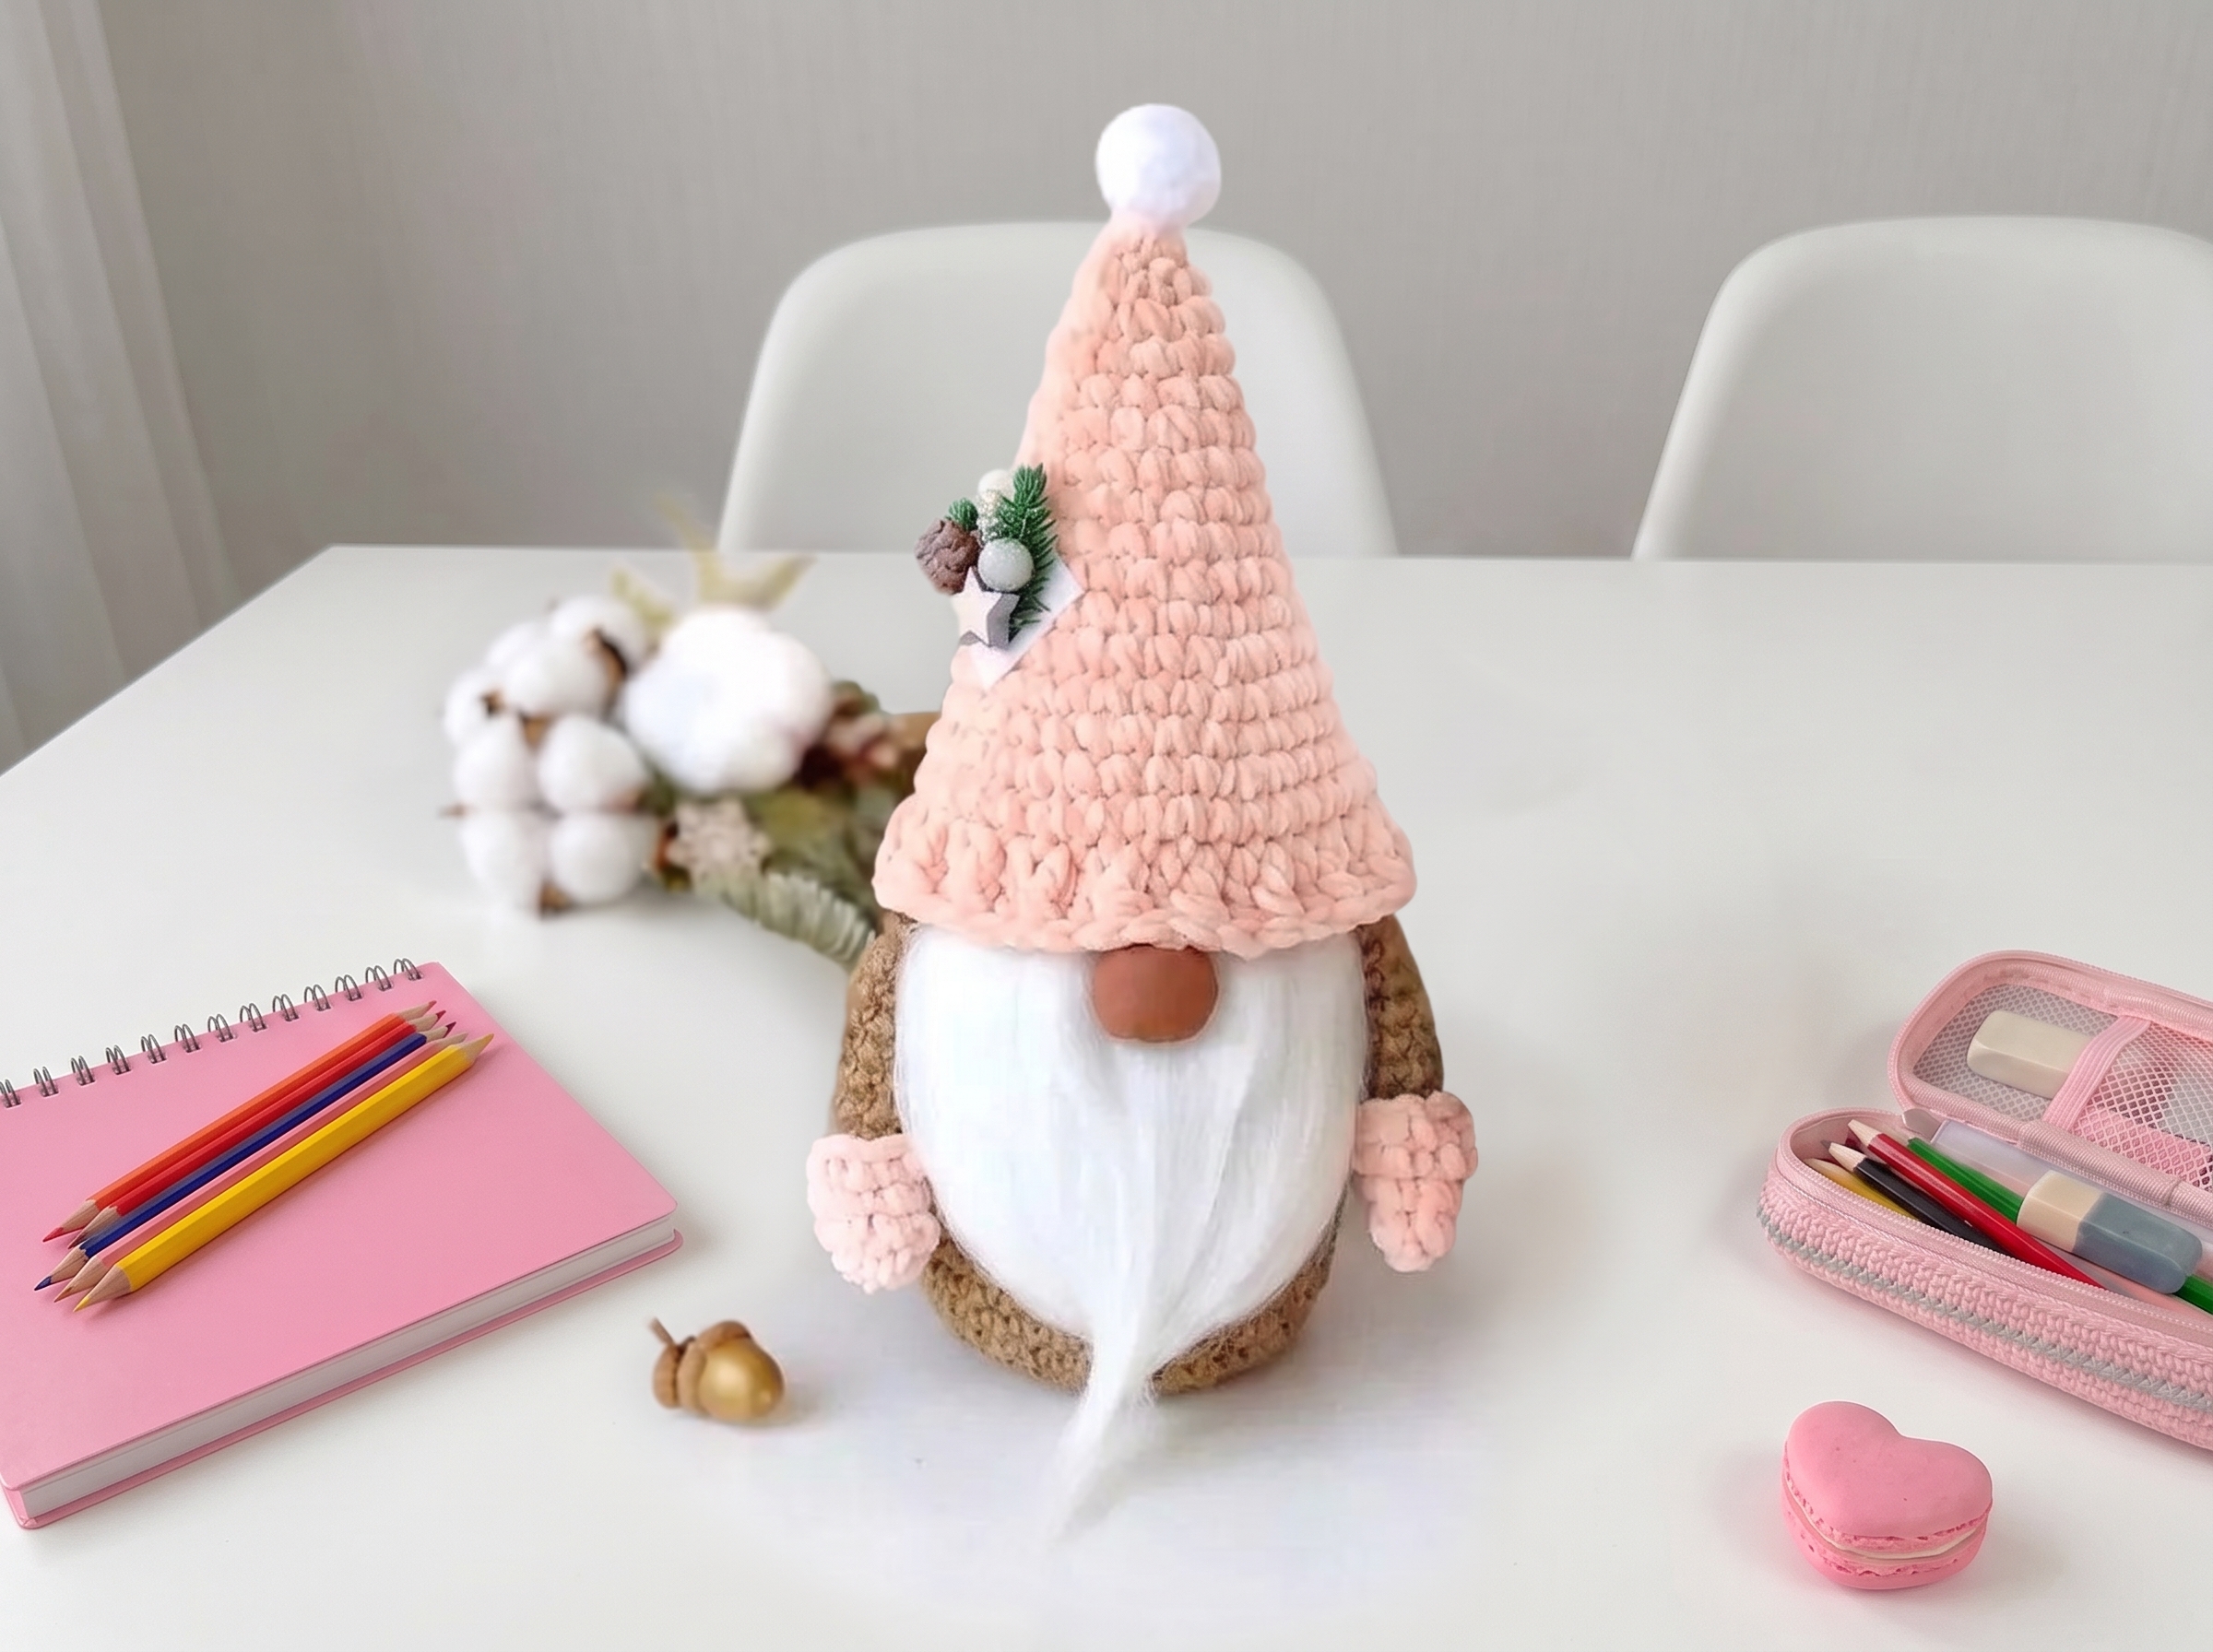
Scandinavian Gnome – Complete Step-by-Step Pattern
1. Materials & Abbreviations
Let’s gather our supplies! This gnome uses a mix of textures, from sturdy jute twine for the body to soft plush yarn for the hat, giving it that authentic, cozy Scandi vibe.
- Yarn:
- Body: Two-ply jute twine (1100 tex, approx. 50m)
- Hat & Mittens: Plush yarn (approx. 30m)
- Beard: Long-pile faux fur yarn or fluffy wool-style yarn
- Hook: 4.0 mm (for jute twine), 4.0 mm and 6.0 mm (for plush yarn, depending on your tension)
- Notions: Light beige fabric (7x8 cm for the nose), poly-fil stuffing, a small plastic bag with a weighting agent (salt, sand, or grain), hot glue or needle and thread, scissors, and fun hat decor (pom-pom, bell, buttons, ribbon, or twigs).
- Abbreviations:
- MR – magic ring
- ch – chain
- sc – single crochet
- sl st – slip stitch
- inc – increase (2 sc in one stitch)
- dec – decrease (2 sc crocheted together)
What you'll master: Working with unconventional yarns (like jute twine), creating a weighted base for stability, and mixing textures for a professional finish.
2. The Body (Base & Walls)
We’ll start with a sturdy, flat base and build upward, adding weight as we go to ensure your gnome stands tall and proud!
- The Base:
- R1: 6 sc in MR (6)
- R2-R6: Work in a continuous spiral, increasing evenly each round to form a perfect flat circle. By the end of R6, you should have 36 sc. (Tip: Use a stitch marker to keep track of the beginning of each round!)
- The Walls:
- R7-R21: 36 sc (15 rows). Work straight without any increases to build the height of the body.
- The Weighting (Crucial Step!):
- Before you start decreasing, it’s time to add the weight. Place a thin layer of poly-fil at the bottom. Then, place your small plastic bag filled with salt, sand, or grain right in the center. Top it off with more poly-fil to cushion it.
- Pro Tip: Keep the base resting on a flat, horizontal surface while you stuff and crochet to ensure the bottom stays perfectly flat and stable.
- The Decreases (Shaping the Top):
- Since we increased every 4th stitch to reach 36 sc, we will now start decreasing evenly (for example, work
(8 sc, dec) x 4to get 32 sc). - Work 2 rows straight without decreases.
- Continue this pattern: 1 decrease row, followed by 2 straight rows, gradually adding a little more poly-fil after each decrease row to keep the shape firm.
- When you are down to the final 6 stitches, cut the yarn, leaving a long tail. Thread it onto a tapestry needle, weave it through the front loops of the remaining 6 stitches, and pull tight to cinch the hole closed. Hide the end inside the body.
- Since we increased every 4th stitch to reach 36 sc, we will now start decreasing evenly (for example, work
What you'll master: Structural stuffing techniques, creating a weighted base, and tapering a cylindrical shape into a neat, closed cone.
3. Arms & Mittens
These little details add so much personality to your gnome!
Arms (Make 2, Jute Twine):
- Instructions: Chain 6, join with a sl st to form a ring. Work 10 rounds of sc in a continuous spiral.
- Finishing: Fasten off, leaving a tail for sewing. Do not stuff.
Mittens (Make 2, Plush Yarn):
- R1: 6 sc in MR (6)
- R2-R4: 6 sc (3 rows)
- Finishing: Fasten off and weave in the ends. Slip these cute little caps over the ends of the jute arms.
What you'll master: Quick, small-scale crochet and creating modular, mix-and-match accessories.
4. The Nose
A classic, rosy Scandi gnome nose is made with a simple sewing technique rather than crochet.
- Instructions: Cut a 7x8 cm oval from your light beige fabric. Thread a needle with a strong, matching thread and run a simple gathering stitch (like a running stitch) all the way around the outer edge of the oval.
- Assembly: Place a small pinch of poly-fil in the center, then pull the thread tight to gather the fabric into a neat, rounded ball. Knot the thread securely and hide the tail inside the nose.
What you'll master: Simple fabric gathering techniques to create perfectly round, soft 3D shapes.
5. The Hat
The hat is worked in soft plush yarn to contrast beautifully with the rustic jute body.
- R1: 6 sc in MR (6)
- R2-R3: 6 sc (2 rows)
- R4-R18: Begin increasing to form the cone. Work in a pattern of 1 increase row, followed by 2 straight rows, just like you did for the base, until you reach a total of 18 rows.
- Final Shaping: In your very last increase row, increase evenly (e.g., every 4th stitch). Follow this with 2 final straight rows.
- Finishing: Work a couple of slip stitches to create a neat finishing loop at the very tip of the hat. Fasten off and weave in the end.
What you'll master: Spiral cone shaping and creating a decorative, functional loop at the tip of a hat.
6. Assembly & Finishing
Now for the magic moment where your gnome truly comes to life!
- The Beard: Cut a generous piece of your long-pile faux fur or fluffy yarn. Trim it into a beard shape that suits your gnome’s personality (a long, flowing beard or a short, neat one).
- Attaching the Face: Use hot glue or a needle and thread to attach the fabric nose to the upper part of the body. Immediately below the nose, glue or sew the beard in place, letting it drape down the front of the body.
- The Arms: Glue or sew the jute arms to the sides of the body, just peeking out from under where the beard will sit.
- The Hat: Place the plush hat on top of the body, covering the top of the beard and the cinched hole. Glue or sew it securely in place.
- Decorate! This is where you make it yours. Add a pom-pom or a tiny bell to the tip of the hat. Sew on some cute buttons, tie a ribbon around the base of the hat, or even glue on a tiny sprig of faux pine or holly.
What you'll master: Multi-media assembly (combining crochet, fabric, and faux fur) and creative, personalized finishing touches.
Final Section: Where to Go from Here
Congratulations! You’ve just crafted a beautiful, sturdy Scandinavian gnome. By completing this pattern, you’ve practiced working with unique yarns, mastering weighted stuffing, and combining different crafting techniques for a polished result.
From here, try experimenting with different yarn colors to create a whole "Gnome Family" for your mantle! You could make a spring gnome with a floral hat, a summer gnome with a sunhat, or a whole set of holiday gnomes with different colored beards and hats. Happy crafting, and enjoy your cozy new handmade friend!