September 1, 2026
Silka T-Shirt – A Elegant, Top-Down Raglan Knit with a V-Neck
Elevate your warm-weather wardrobe with the Silka T-Shirt! This beautifully draped, sporty-chic top features a flattering V-neck, short raglan sleeves, and subtle ribbed detailing along the sides and cuffs. Knit seamlessly from the top down in luxurious 100% silk, it’s a rewarding, intermediate-friendly project that results in a truly high-end, boutique-quality garment.
Jump to pattern instructions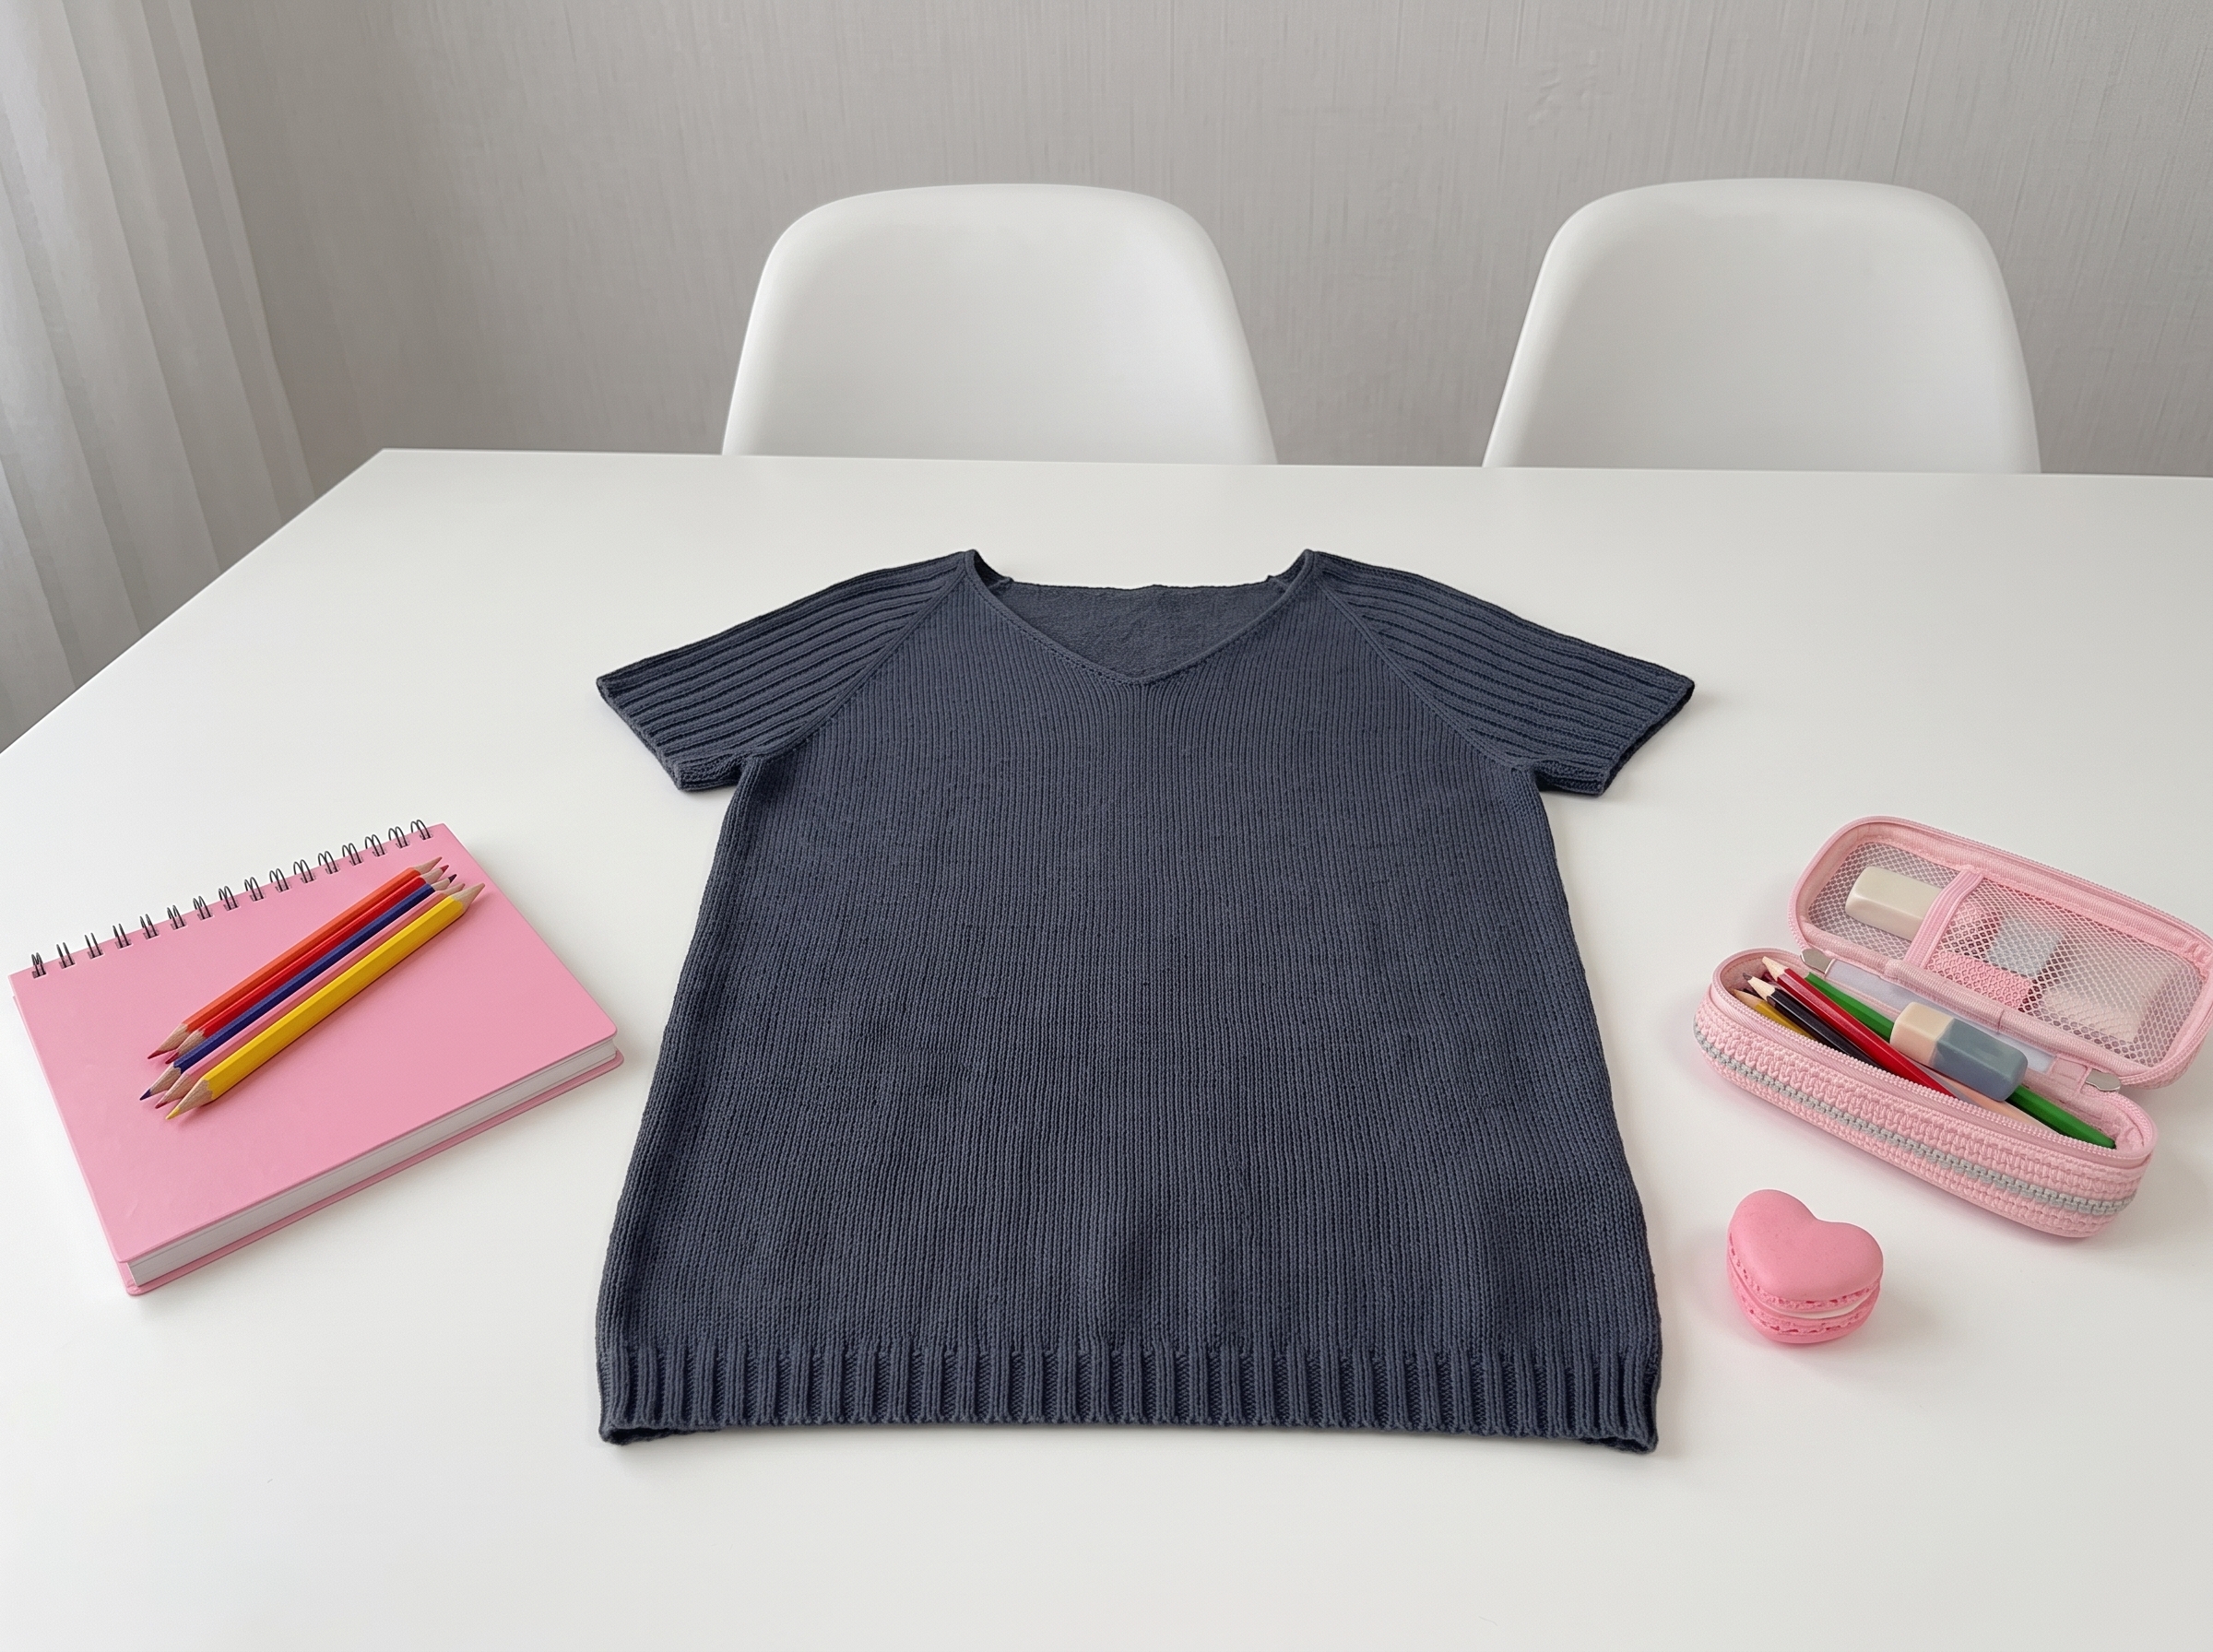
Silka T-Shirt – Complete Step-by-Step Pattern
Original design by Christina Körber-Reith. Let’s grab our needles and some beautiful silk yarn to create this stunning top!
1. Materials & Gauge
Silk yarn has a gorgeous drape and a subtle sheen, but it can be slippery. Taking the time to get your gauge right and blocking your swatch is the absolute key to success with this pattern!
- Yarn: Pure Silk by Knitting for Olive (100% silk, 250m / 50g).
- Amount: 175 (180, 190, 200, 215, 230) 245 (260, 275, 295, 325) g, depending on your size.
- Needles:
- 3.0 mm circular needles (80–100 cm length) for the body.
- 3.0 mm short circular needles, DPNs, or Magic Loop method for the sleeves.
- Notions: Stitch markers (including a unique one for the Beginning of Round), stitch holders or waste yarn, a cable needle (or removable marker) for crossing the V-neck, tapestry needle, and scissors.
- Gauge: 26 stitches x 38 rows = 10 x 10 cm (4" x 4") in stockinette stitch on 3.0 mm needles, after washing and blocking.
- Pro Tip: Silk grows significantly when wet! Always wash and block your gauge swatch exactly as you plan to wash the finished garment.
2. Abbreviations & Special Techniques
- M / Myz: Marker / Pattern marker
- PM / UM / SM: Place marker / Remove marker / Slip marker
- BOR: Beginning of Round
- RS / WS: Right Side / Wrong Side
- sl1 wyif: Slip 1 stitch purlwise with yarn in front
- M1R / M1L: Make 1 Right / Make 1 Left (lifted increases)
- M1R-p / M1L-p: Make 1 Right / Make 1 Left purlwise (for the ribbed sections)
- V-Neck Crossing: A clever technique using a cable needle to overlap the front edges seamlessly when joining in the round.
3. Step 1: The Upper Body & V-Neck Shaping
We start at the very top, knitting flat (back and forth) to shape the V-neck and establish the raglan increases.
- Cast On: 64 (64, 64, 68, 68, 68) 68 (68, 70, 70, 70) stitches. Do not join in the round yet.
- Setup Row (WS): Distribute the stitches for the front bands, sleeves, and back, placing markers between each section. The front bands will be worked in a 2x2 rib pattern, while the sleeves will also feature a 2x2 rib pattern that grows with the increases.
- Rows 1–14 (Body + Sleeve Increases): Work RS rows by making lifted increases (M1R/M1L) at the front bands, on both sides of each sleeve, and on both sides of the back. Work WS rows as established, without increases.
- Rows 15–46 (Body + Sleeve + V-Neck Increases): Continue the raglan increases, but now also add increases along the V-neck edges on the RS to deepen the neckline gracefully.
- Pro Tip: Pay close attention to the ribbing on the sleeves! As you add stitches, incorporate them into the 2x2 rib pattern so the design remains symmetrical.
4. Step 1C: Joining in the Round & The V-Neck Cross
This is the most magical part of the pattern! We will seamlessly cross the front edges to finish the V-neck point and join the work into a continuous circle.
- The Cross: On the final RS row of the flat section, work to the last stitch of the right front band. Slip this last stitch onto a cable needle and hold it to the front.
- Join: Knit the first stitch of the left front band, then knit the slipped stitch from the cable needle. You have now crossed the fronts and eliminated the gap at the bottom of the V!
- Establish BOR: Place your Beginning of Round marker right after this crossed section. You are now knitting in the round!
5. Step 1D & 1E: Expanding the Yoke
Now that we are in the round, we continue to build the width of the sweater.
- Body + Sleeve Increases: Continue making raglan increases every 2nd round until the sleeves reach the desired width (ending with 2 purl stitches on each side of the sleeve ribbing to create a clean visual line).
- Body-Only Increases: Once the sleeves are wide enough, stop increasing on the sleeves. Continue making increases only on the front and back sections every 2nd round (or every round for larger sizes) until the bust measurement matches your desired finished circumference (including the 6–10 cm of positive ease).
6. Step 2: Separating the Body and Sleeves
Time to divide the yoke into the torso and the arms!
- Underarms: Remove the BOR marker. Slip the sleeve stitches onto waste yarn. Using the backward loop method, cast on 2 (2, 6, 6, 6, 6) 6 (6, 6, 6, 6) stitches for the underarm, place a new BOR marker in the center of these new stitches, cast on another 6 stitches, and then knit across the back stitches. Repeat this process for the second sleeve.
- Pro Tip: Picking up extra stitches from the "legs" of the cast-on underarm stitches in the next round will prevent unsightly holes at the armpits!
7. Step 3: Finishing the Body
Now for the easy, relaxing part: knitting the length of the shirt!
- Length: Knit straight in stockinette stitch, maintaining the 2x2 rib panels on each side seam, until the body measures about 3 cm shorter than your desired final length.
- Bottom Ribbing: Switch to a 3.0 mm needle (or smaller, if your ribbing tends to be loose) and work 12 rounds of 2x2 ribbing (2 purl, 2 knit).
- Bind Off: Bind off loosely and stretchily in pattern (an Italian bind-off or a stretchy sewn bind-off is highly recommended for silk to prevent the hem from flaring).
8. Step 4: The Short Raglan Sleeves
- Pick Up: With the RS facing, start at the center of the underarm cast-on. Pick up and knit stitches evenly around the armhole, including the underarm stitches and the held sleeve stitches. Place a BOR marker.
- Sleeve Cap Shaping: To ensure the sleeve sits perfectly in the armhole without puckering, work a few short rows (German short rows or wrap-and-turn) at the top of the sleeve cap before continuing in the round.
- Length: Knit straight in the established 2x2 rib pattern until the sleeve measures about 5 cm (or your desired short-sleeve length).
- Cuff Ribbing: Work the final 5 cm in a tighter 2x2 rib (you may need to switch to a smaller needle size here). Bind off loosely in pattern. Repeat for the second sleeve.
9. Step 5: Finishing & Blocking
- Weave in Ends: Silk can be slippery, so weave in your ends meticulously, splitting the yarn strands with your tapestry needle to lock them in place.
- Wet Blocking: Submerge the finished T-shirt in cool water with a gentle wool/silk wash (like Eucalan or Soak) for 20 minutes. Do not wring or twist! Roll it in a towel to press out the water.
- Shaping: Lay the shirt flat on a drying rack or towel. Gently pat it into shape, ensuring the V-neck lies flat, the side ribbing is straight, and the sleeves are even.
- Pro Tip: Silk will grow in length when wet. If your shirt is slightly short, you can gently tug the bottom hem and sleeves to add a few extra centimeters while it dries.
Final Section: Where to Go from Here
Take a step back and admire your handiwork! By completing the Silka T-Shirt, you’ve mastered top-down raglan construction, seamless V-neck crossing, and the delicate art of knitting with silk.
This pattern is incredibly versatile. Once you’re comfortable with the construction, try experimenting with different yarns! A crisp, high-twist cotton would make this the ultimate structured summer top, while a lightweight merino-silk blend would create a cozy, elegant transitional piece for spring and autumn. Happy knitting, and enjoy your beautiful new handmade staple!