September 2, 2026
Sweet Little Elephant Amigurumi – A Huggable Crochet Pattern
Bring this adorable, gentle elephant to life! this pattern features a sweet, sculpted face, a cute little trunk, and clever seamless limb joining. It’s a joyful, intermediate-friendly project that makes a perfect handmade gift or a cherished addition to your amigurumi collection.
Jump to pattern instructions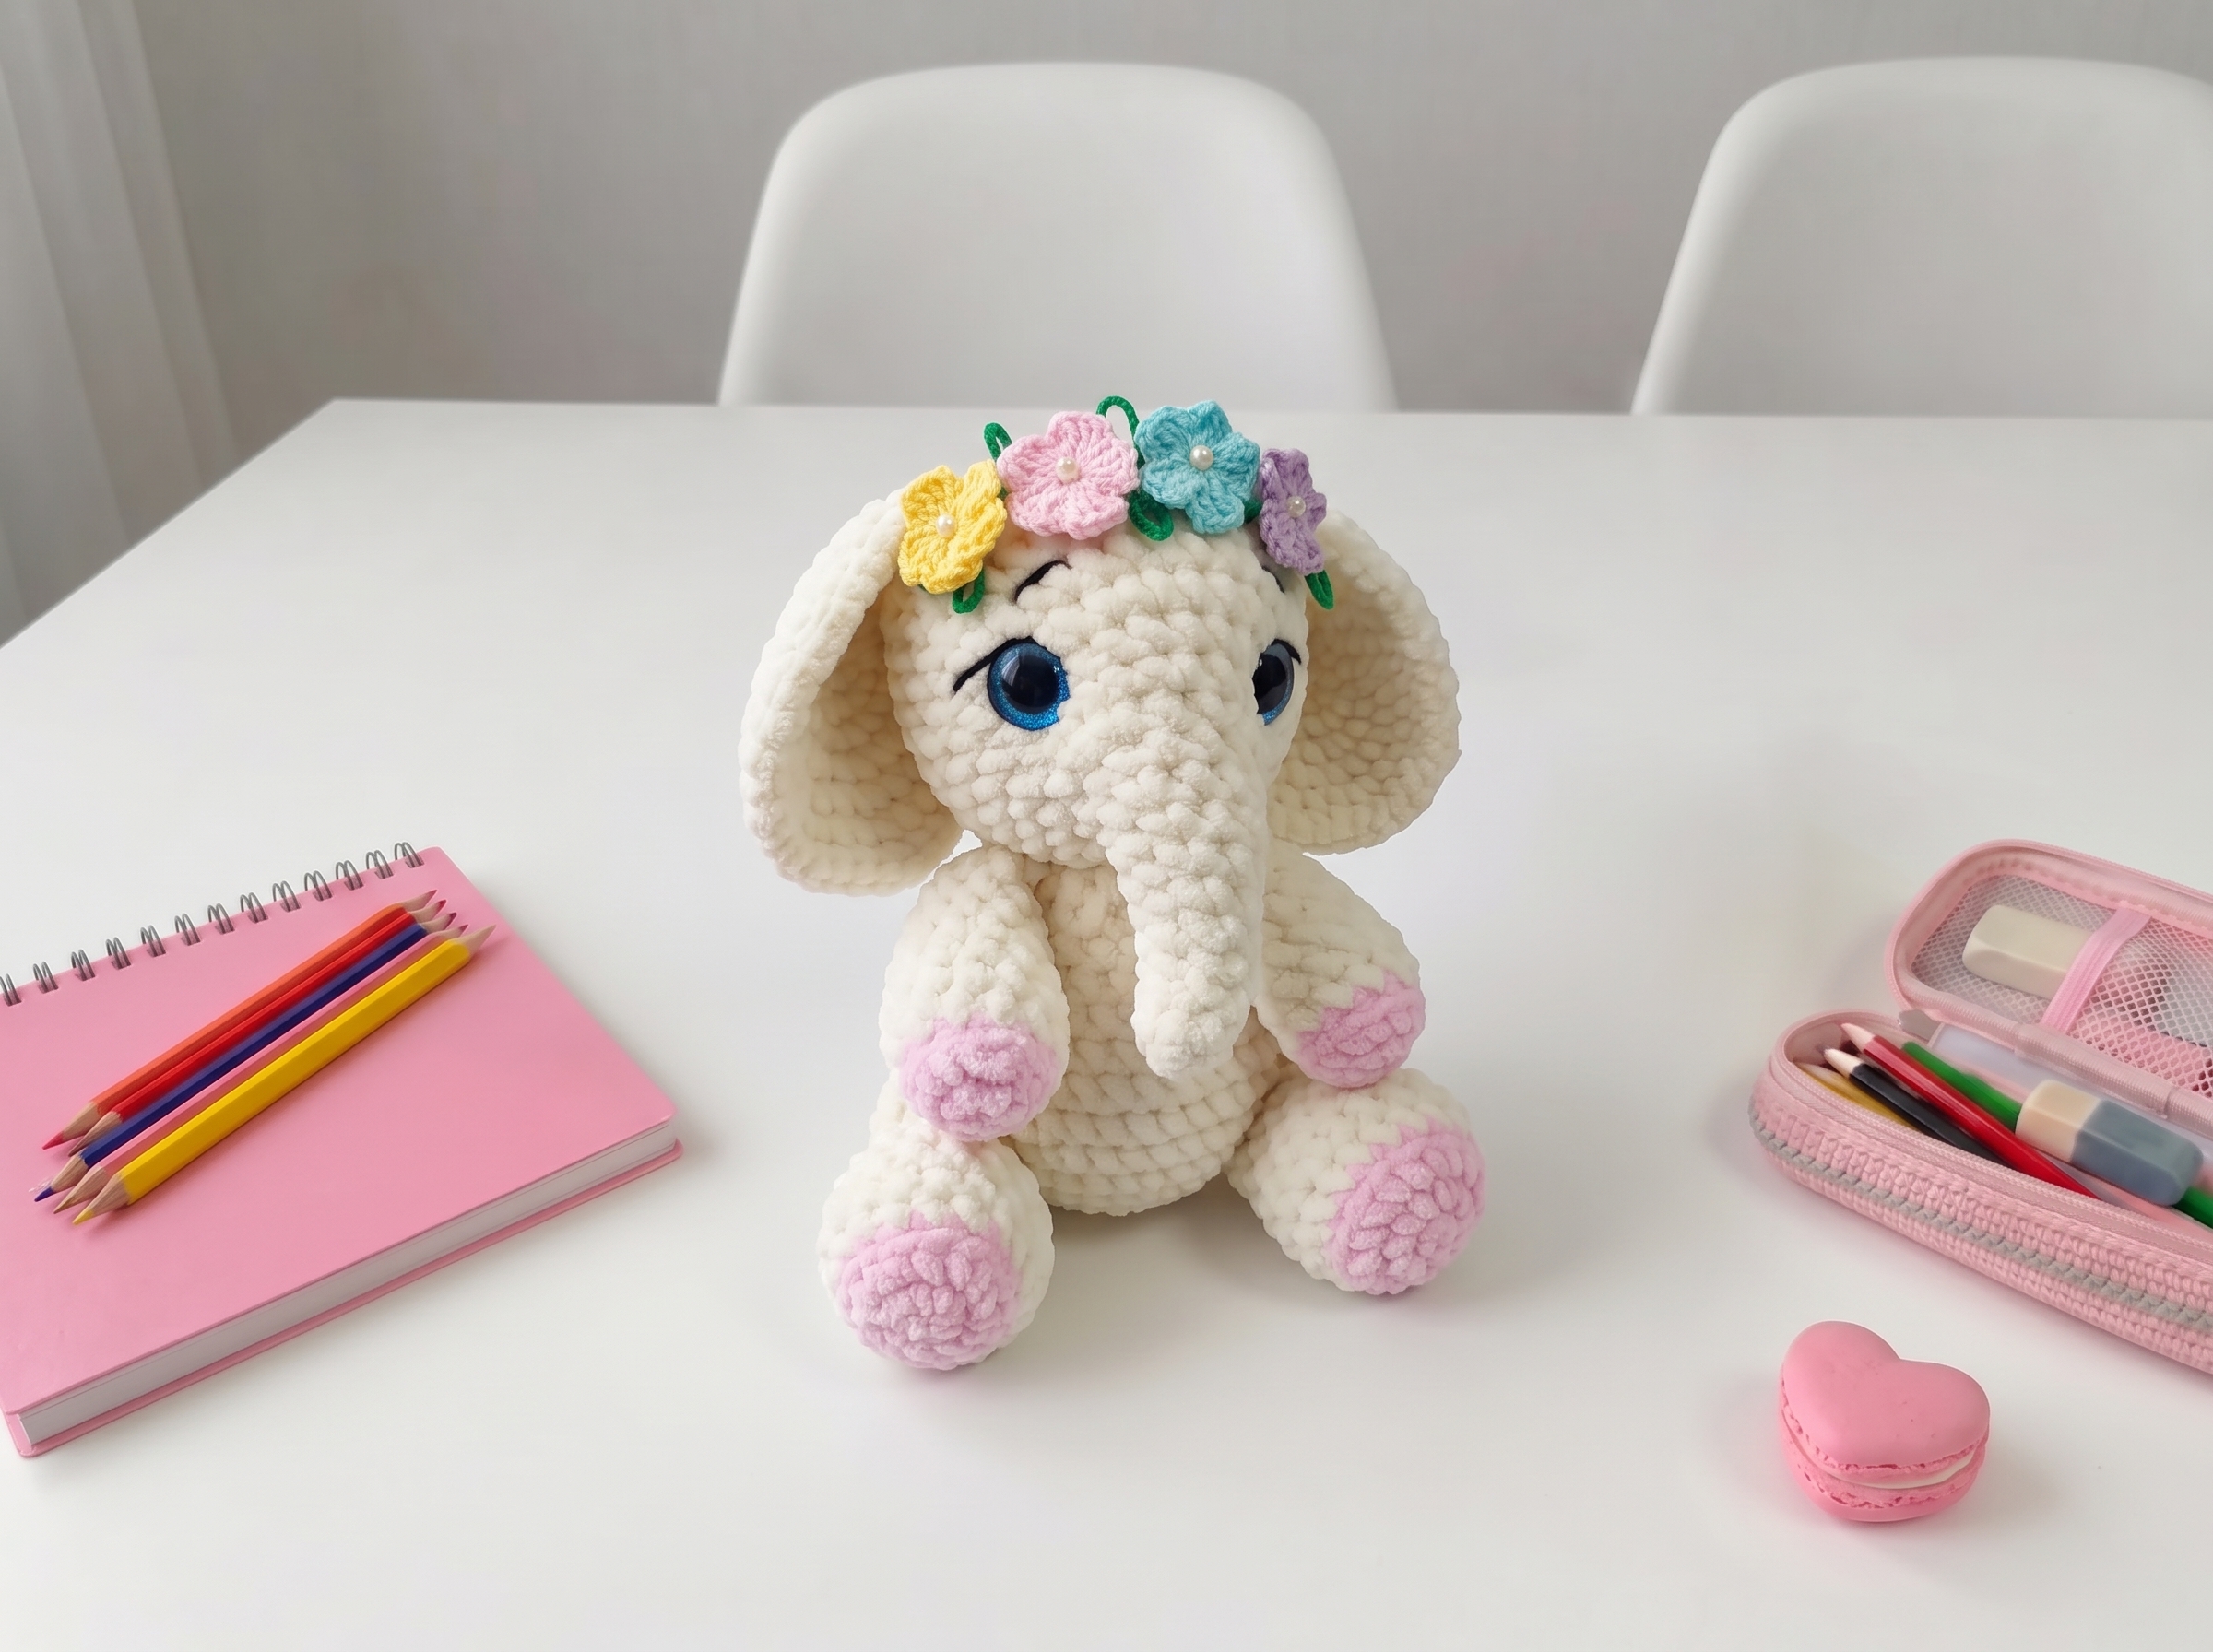
Sweet Little Elephant – Complete Step-by-Step Pattern
1. Materials & Abbreviations
Let’s gather our supplies! Using a soft, plush yarn for the body and a smooth cotton for the details will give your elephant a beautiful, huggable texture.
- Yarn:
- Main Color: Himalaya Dolphin Baby (100g / 120m) or a similar plush yarn.
- Contrast Color: YarnArt Jeans (50g / 160m) or similar smooth cotton for the feet, arms, and facial details.
- Hook: 3.5 mm (or size needed to achieve a tight, stuff-proof gauge with your plush yarn).
- Notions: 16 mm safety eyes, poly-fil stuffing, tapestry needle, scissors, and a strong, thick needle with yarn for facial sculpting.
- Abbreviations:
- MR – magic ring
- ch – chain
- sc – single crochet
- sl st – slip stitch
- inc – increase (2 sc in one stitch)
- dec – decrease (2 sc crocheted together)
- BLO – back loop only
What you'll master: Proper tool selection for plush yarns, gauge management, and familiarization with standard international crochet abbreviations.
2. Head & Trunk
The head is worked from the tip of the trunk upward, featuring a clever slip-stitch detail that naturally forms the elephant's sweet little mouth!
- R1 (Main Color): 6 sc in MR (6)
- R2: 6 sc (6)
- R3: 5 sc, inc (7)
- R4: 6 sc, inc (8)
- R5: 7 sc, inc (9)
- R6: 8 sc, inc (10)
- R7: 9 sc, inc (11)
- R8: 10 sc, inc (12)
- R9: 2 sc, 6 sl st, 4 sc (12)
- Important detail: The 6 slip stitches in this row create the natural indentation for the elephant's mouth!
- R10: (1 sc, inc) x 6 (18)
- R11: (2 sc, inc) x 6 (24)
- R12: (3 sc, inc) x 6 (30)
- R13: (4 sc, inc) x 6 (36)
- R14-19: 36 sc (36) [6 rows]
- Eye Placement: Insert 16 mm safety eyes between R12 and R13, spaced exactly 11 stitches apart (counting from the base of the eye).
- R20: (4 sc, dec) x 6 (30)
- R21: (3 sc, dec) x 6 (24)
- R22: (2 sc, dec) x 6 (18)
- Stuffing: Stuff the head firmly, paying special attention to the area between the eyes and plumping up the cheeks for a sweet expression. Also, lightly stuff the trunk.
- R23: (1 sc, dec) x 6 (12)
- Finish Stuffing: Add the last bit of stuffing to fill the head completely.
- R24: 6 dec (6)
- Finishing: Sl st, cut yarn, and use your tapestry needle to weave the tail through the front loops of the remaining 6 stitches. Pull tight to close the hole and hide the end.
What you'll master: Spiral increase sequences, precise safety eye placement, and structured decreasing for spherical shaping.
3. Lower Legs (Make 2)
The legs feature a cute, contrasting foot that transitions smoothly into the main body color.
- R1 (Contrast Color): 6 sc in MR (6)
- R2: 6 inc (12)
- R3: (1 sc, inc) x 6 (18)
- R4 (Main Color): 18 sc in BLO (18)
- R5-7: 18 sc (18) [3 rows]
- R8: 3 sc, 6 dec, 3 sc (12)
- Pro Tip: Stuff this section lightly, using your fingers to gently push the walls of the leg outward to create a sturdy, flat base.
- R9: 4 sc, 2 dec, 4 sc (10)
- R10-13: 10 sc (10) [4 rows]
- Finishing: Work 1 more sc. Stuff the leg firmly about 2/3 of the way up. Fold the top opening in half and work 5 sc through both layers to close it flat. Cut yarn and fasten off.
What you'll master: Clean mid-project color changes, strategic stuffing for structural stability, and flat-folding techniques for seamless closures.
4. Upper Arms (Make 2)
These arms are simple, lightly stuffed tubes designed to be joined seamlessly to the body later.
- R1 (Contrast Color): 6 sc in MR (6)
- R2: 6 inc (12)
- R3 (Main Color): 12 sc in BLO (12)
- R4-5: 12 sc (12) [2 rows]
- R6: (4 sc, dec) x 2 (10)
- R7: 10 sc (10)
- Stuffing: Stuff the piece lightly.
- R8: (3 sc, dec) x 2 (8)
- R9: 8 sc (8)
- Finishing: Fold the top opening in half and work 4 sc through both layers to close it flat. Cut yarn and fasten off.
What you'll master: Creating uniform, lightly stuffed appendages and preparing pieces for seamless multi-part joining.
5. Body
The body is worked from the bottom up, seamlessly integrating the legs and arms as you go for a sturdy, poseable core.
- R1 (Main Color): 6 sc in MR (6)
- R2: 6 inc (12)
- R3: (1 sc, inc) x 6 (18)
- R4: (2 sc, inc) x 6 (24)
- R5: (3 sc, inc) x 6 (30)
- R6: (4 sc, inc) x 6 (36)
- R7: Chain 8. Starting in the 2nd ch from hook, work 7 sl st (this forms the little tail!). Continue working in the round: 36 sc (36)
- R8: 7 sc, 5 sc crocheted together with the first lower leg, 12 sc, 5 sc crocheted together with the second lower leg, 7 sc (36)
- R9: (4 sc, dec) x 6 (30)
- R10: 30 sc (30)
- R11: (3 sc, dec) x 6 (24)
- R12: (2 sc, dec) x 6 (18)
- R13: 18 sc (18)
- R14: 4 sc, 4 sc crocheted together with the first upper arm, 5 sc, 4 sc crocheted together with the second upper arm, 1 sc (18)
- Finishing: Sl st, cut yarn, leaving a very long tail for attaching the head to the body.
What you'll master: Seamless multi-piece joining, structured torso decreasing, and mid-round limb attachment.
6. Ears (Make 2)
Simple, floppy little ears that add so much personality to your elephant's face!
- R1 (Main Color): 6 sc in MR (6)
- R2: 6 inc (12)
- R3: (1 sc, inc) x 6 (18)
- R4: (inc, 2 sc) x 6 (24)
- R5: (3 sc, inc) x 6 (30)
- R6: 1 sc, inc, (4 sc, inc) x 5, 3 sc (36)
- R7: (5 sc, inc) x 6 (42)
- Finishing: Sl st, cut yarn, leaving a long tail for sewing. Do not stuff.
What you'll master: Rapid radial expansion and working flat, un-stuffed shapes for natural articulation.
7. Assembly & The Magic of Yarn Sculpting
Now for the most rewarding part: bringing your elephant’s personality to life!
- Facial Sculpting (The Secret Sauce!): Thread a long tapestry needle with strong yarn. Insert the needle under the trunk (right where the 6 sl st were in R9), and bring it out just under one of the safety eyes. Then, insert the needle at the top of that same eye and bring it out at the top of the other eye. Finally, insert the needle at the bottom of the second eye and bring it out under the trunk, right next to your starting end. Pull both ends tightly! This will draw the eyes closer together and give the trunk a sweet, downward tilt. Tie off securely and hide the ends inside the head.
- Embroidery: Use your contrast yarn to embroider delicate eyebrows and eyelids above the safety eyes.
- Head to Body: Place the head onto the body. Pro Tip: Insert two long knitting needles or skewers horizontally through the head and body to keep everything perfectly aligned while you sew. Stuff the neck area very firmly so the head doesn't wobble. Sew securely, then remove the needles.
- Ears: Attach the ears to the sides of the head as desired. You can fold them slightly like a teardrop or leave them fully open. The designer placed them around R20 of the head, about 12-13 stitches apart.
- Final Touch: If you'd like, crochet a few tiny little flowers to decorate your elephant's head or ears!
What you'll master: Multi-step structural assembly, advanced yarn sculpting for expressive facial features, and professional finishing techniques.
Final Section: Where to Go from Here
Congratulations! By completing this Sweet Little Elephant, you’ve practiced foundational spiral shaping, clever limb integration, and the transformative art of yarn sculpting. This project is a fantastic confidence-builder and makes an absolutely heartwarming gift.
From here, try experimenting with different yarn colorways to create a whole "safari friends" collection, or adapt the body pattern to design custom outfits (like a tiny scarf or hat!) for your new amigurumi companion. Happy crocheting, and don't forget to share your finished elephant with the community!