August 28, 2026
Sweet Spring Bunny Amigurumi – Complete Pattern with a Mini Bag!
Get ready to fall in love with this charming 35 cm amigurumi bunny! Featuring adorable little red shoes, a sweet bow, and an absolutely darling mini crossbody bag, this pattern is a joyful, intermediate-friendly project. We’ll walk through some fun yarn-sculpting tricks to give her face that perfect, expressive look. Let’s get crafting!
Jump to pattern instructions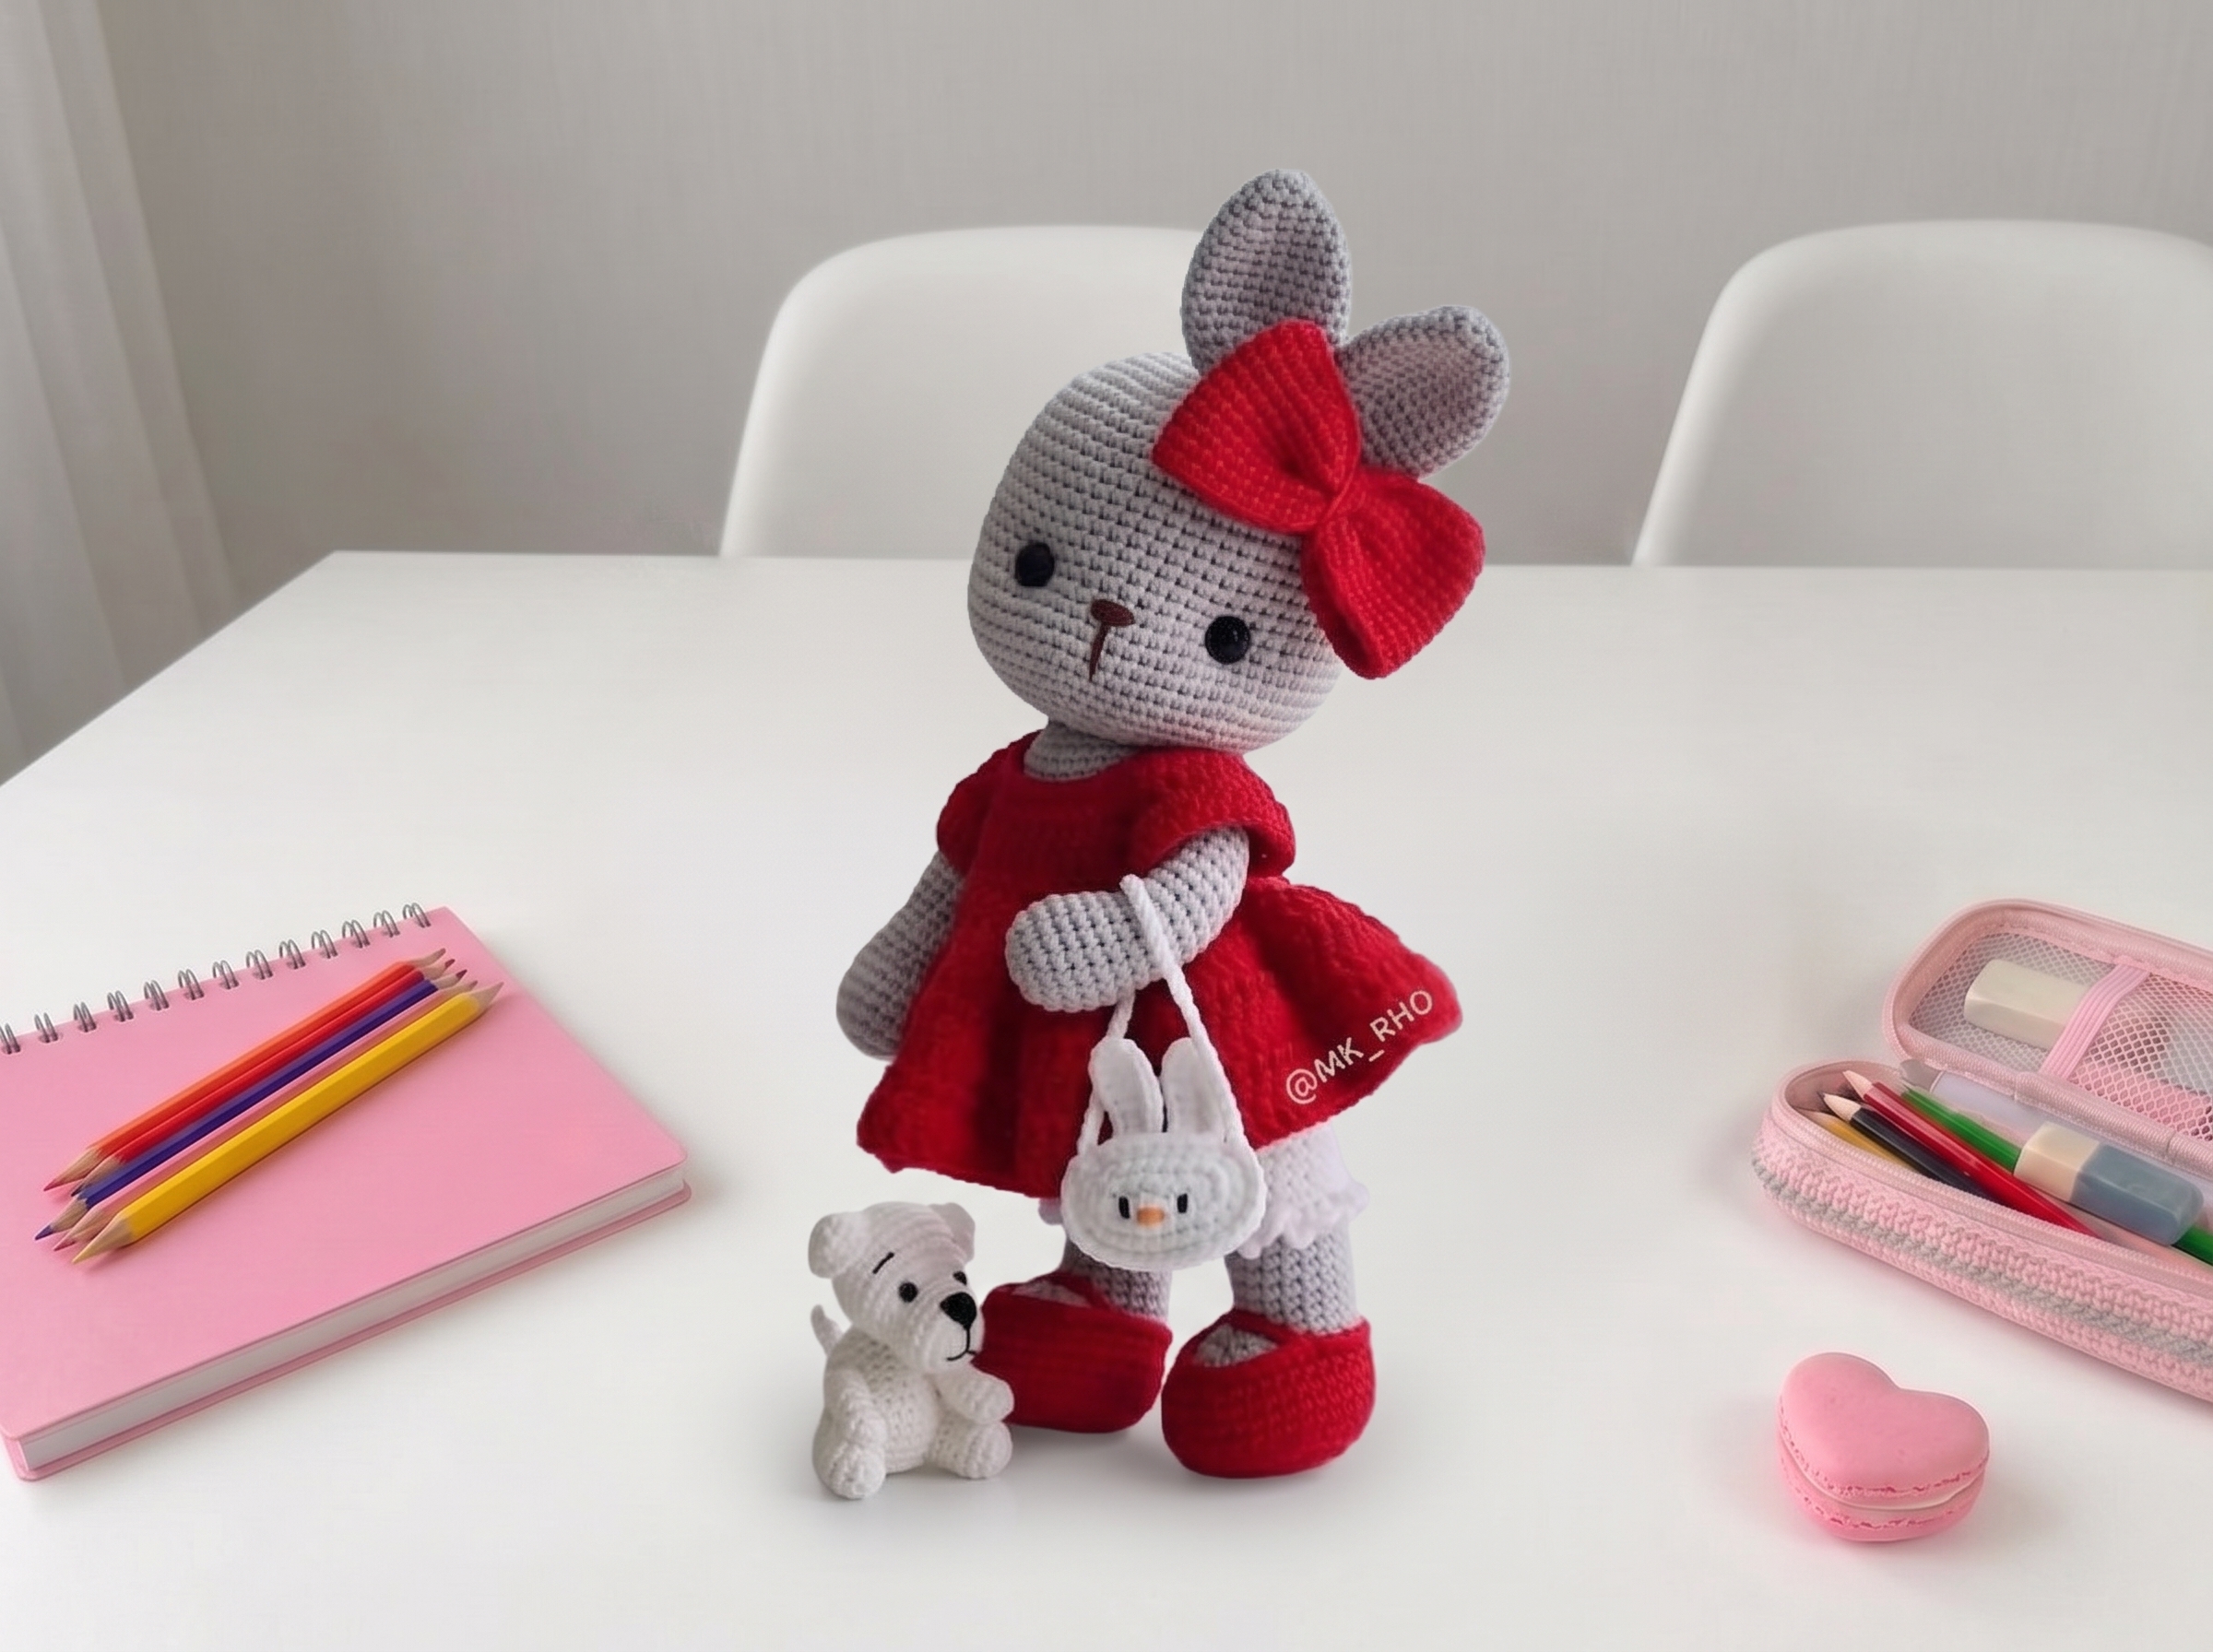
Sweet Spring Bunny – Complete Step-by-Step Pattern
1. Gathering Your Supplies
Grab your favorite light worsted-weight yarn (the original uses a lovely Korean brand, but any similar weight will work beautifully!).
- Yarn:
- Main Color (e.g., Light Gray) – approx. “70g
- Dress/Accents (e.g., Red) – approx. 80g
- Shoes/Accents (e.g., White) – approx. 23g
- Embroidery (Brown, Black, Orange) – small amounts
- Hook: 3.00 mm (and a 2.00 mm hook if you want to add optional wire armature)
- Notions: 12 mm black safety eyes (or black embroidery thread if you prefer a softer, all-yarn look), poly-fil stuffing, tapestry needle, scissors, and stitch markers.
Friendly Tip: Because this bunny has some detailed facial sculpting, using a yarn that isn't too fuzzy will make your embroidery and sculpting threads much easier to work with!
2. The Head & Facial Sculpting
We’ll start at the top! The head is worked in a continuous spiral. The real magic happens at the end when we sculpt the face to give her that sweet, expressive look.
- R1: 8 sc in MR (8)
- R2: 8 inc (16)
- R3: (1 sc, inc) x 8 (24)
- R4: (3 sc, inc) x 6 (30)
- R5: 2 sc, inc, (4 sc, inc) x 5, 2 sc (36)
- R6: (5 sc, inc) x 6 (42)
- R7: 3 sc, inc, (6 sc, inc) x 5, 3 sc (48)
- R8: (7 sc, inc) x 6 (54)
- R9: 4 sc, inc, (8 sc, inc) x 5, 4 sc (60)
- R10-19: 60 sc (10 rows)
- R20: 21 sc, (inc, 2 sc) x 3, place a contrasting stitch marker here to mark the nose position, (2 sc, inc) x 3, 21 sc (66)
- R21-24: 66 sc (4 rows)
- R25: (9 sc, dec) x 6 (60)
- R26: 4 sc, dec, (8 sc, dec) x 5, 4 sc (54)
- R27: (7 sc, dec) x 6 (48)
- R28: 3 sc, dec, (6 sc, dec) x 5, 3 sc (42)
- R29: (5 sc, dec) x 6 (36)
- R30: 2 sc, dec, (4 sc, dec) x 5, 2 sc (30)
- R31: (3 sc, dec) x 6 (24)
- R32: Work 24 sc in BLO (Back Loop Only) (This creates a neat ridge for attaching the body later!)
- R33: (1 sc, dec) x 6 (12)
- R34: 6 dec (6)
- Finishing: Fasten off, leaving a very long tail. Stuff the head firmly, keeping a nice, round shape.
The Magic of Sculpting:
- Eyes: Insert your 12 mm safety eyes between R19 and R20, spaced about 11 stitches apart. Thread a long tapestry needle with double black thread. Weave it under the eyes and pull tight at the back of the head to create little "sockets," giving her a lovely, dimensional gaze. Tie it off securely.
- Nose: Between R20 and R21, right at your marker, use brown thread to make a small, raised nose. Repeat the stitch 5-6 times in the same spot to build up a cute little bump. Pull tight and knot securely at the back.
3. Ears (Make 2)
We want these to be soft and floppy, so no stuffing here!
- R1: 6 sc in MR (6)
- R2: (1 sc, inc) x 3 (9)
- R3: (2 sc, inc) x 3 (12)
- R4: (3 sc, inc) x 3 (15)
- R5: (4 sc, inc) x 3 (18)
- R6: 18 sc (18)
- R7: (5 sc, inc) x 3 (21)
- R8-12: 21 sc (5 rows)
- R13: (5 sc, dec) x 3 (18)
- R14: (4 sc, dec) x 3 (15)
- R15: (3 sc, dec) x 3 (12)
- Finishing: Fasten off, leaving a long tail for sewing.
- Placement: Pin the ears to the head between R10 and R11, aligning the center of the ear with the center of the nose. Sew them on securely.
4. Arms (Make 2)
Simple, sweet little arms that will hold her mini bag perfectly.
- R1: 6 sc in MR (6)
- R2: 6 inc (12)
- R3: (1 sc, inc) x 6 (18)
- R4-6: 18 sc (3 rows)
- R7: 3 dec, 12 sc (15)
- R8-9: 15 sc (2 rows)
- R10: 2 dec, 11 sc (13)
- R11-21: 13 sc (11 rows)
- R22: 6 dec, 1 sc (7)
- Finishing: Fasten off, leaving a long tail. Stuff lightly before closing.
5. Legs & Little Red Shoes (Make 2)
Let’s put some cute shoes on our bunny! We’ll start with red, switch to gray for the leg, and finish with a white trim.
- R1 (Red): 8 sc in MR (8)
- R2: 8 inc (16)
- R3: (1 sc, inc) x 8 (24)
- R4: (3 sc, inc) x 6 (30)
- R5: 2 sc, inc, (4 sc, inc) x 5, 2 sc (36)
- R6: Work 36 sc in BLO (36) (This creates the "sole" of the shoe)
- R7-10: 36 sc (4 rows)
- R11 (Switch to Gray): Work 36 sc in BLO. Pro Tip: Don't cut the red yarn yet; we'll use it for the back of the shoe! 10 sc, 8 dec, 10 sc (28)
- R12: 10 sc, 4 dec, 10 sc (24)
- R13: 9 sc, 3 dec, 9 sc (21)
- R14: 8 sc, 3 dec, 7 sc (18)
- R15-19 (Gray): 18 sc (5 rows)
- R20 (Switch to White): (2 sc, inc) x 6 (24)
- R21: Work 24 sc in BLO (24)
- R22-25: 24 sc (4 rows)
- Finishing: On the first leg, fasten off. On the second leg, do not fasten off. We are going to join the body right here!
6. The Body & Joining
This is where the magic happens and our bunny starts to stand up!
- R1 (Joining): 8 sc (on 2nd leg), ch 3, 24 sc (across the front of the 1st leg, picking up the BLO from R6), ch 3, 16 sc (on the 2nd leg) = 54 sc total. Place a marker at the back center.
- R2-7: 54 sc (6 rows)
- R8: (7 sc, dec) x 6 (48)
- R9-10: 48 sc (2 rows)
- R11: (6 sc, dec) x 6 (42)
- R12: 42 sc (42)
- R13 (Switch to Gray for the dress): Work 42 sc in BLO (42)
- R14: (5 sc, dec) x 6 (36)
- R15-22: 36 sc (8 rows)
- R23: (4 sc, dec) x 6 (30)
- R24-26: 30 sc (3 rows)
- R27: (3 sc, dec) x 6 (24)
- R28: 24 sc (24)
- Finishing: Fasten off, leaving a long tail.
- Assembly: Use the long tail from the head (R32 ridge) to sew the head securely to the body. Stuff the body firmly as you go!
--- a sweet finishing touch!
- The Bow: Chain 40 and join with a sl st to form a ring. Work 10 rows of 40 sc. Fasten off, leaving a 50 cm tail. Pinch the center of this rectangle, wrap the long tail around the middle 7-8 times to create a bow shape, and secure it on the back. Leave a long strand to sew it to the bunny's head or dress.
- The Dress: The body was worked in gray, but you can add a cute white collar or trim by picking up stitches along the BLO of R13 and working a round of (sc, ch 1, skip 1) for a delicate, lacy edge.
- The Mini Bag: This is the star of the show! Work two flat oval pieces in white (starting with 8 ch, increasing to 28 sts). Embroider a tiny bunny face on the front piece. Chain 5 for little ears on the bag and attach them. Join the front and back pieces with 20 sc around the top edge, then chain 40 to create a long crossbody strap.
Final Section: Where to Go from Here
Congratulations, you’ve just brought an absolutely delightful bunny to life! By completing this pattern, you’ve practiced some wonderful techniques: seamless leg joining, color changes, and the transformative power of yarn sculpting for the face.
This bunny makes an absolutely heartwarming gift. Next time, try experimenting with different colorways to create a whole "burrow" of friends, or knit a tiny little carrot for her to carry in that adorable mini bag! Happy crocheting!