August 29, 2026
The Sage Cable Cardigan – A Cozy, Classic Knit
Wrap yourself in timeless elegance with this beautifully cabled cardigan! Featuring intricate cable panels, a flattering tailored fit, and classic button details, this pattern is a deeply rewarding project for intermediate knitters ready to master cable crossings and beautiful garment shaping.
Jump to pattern instructions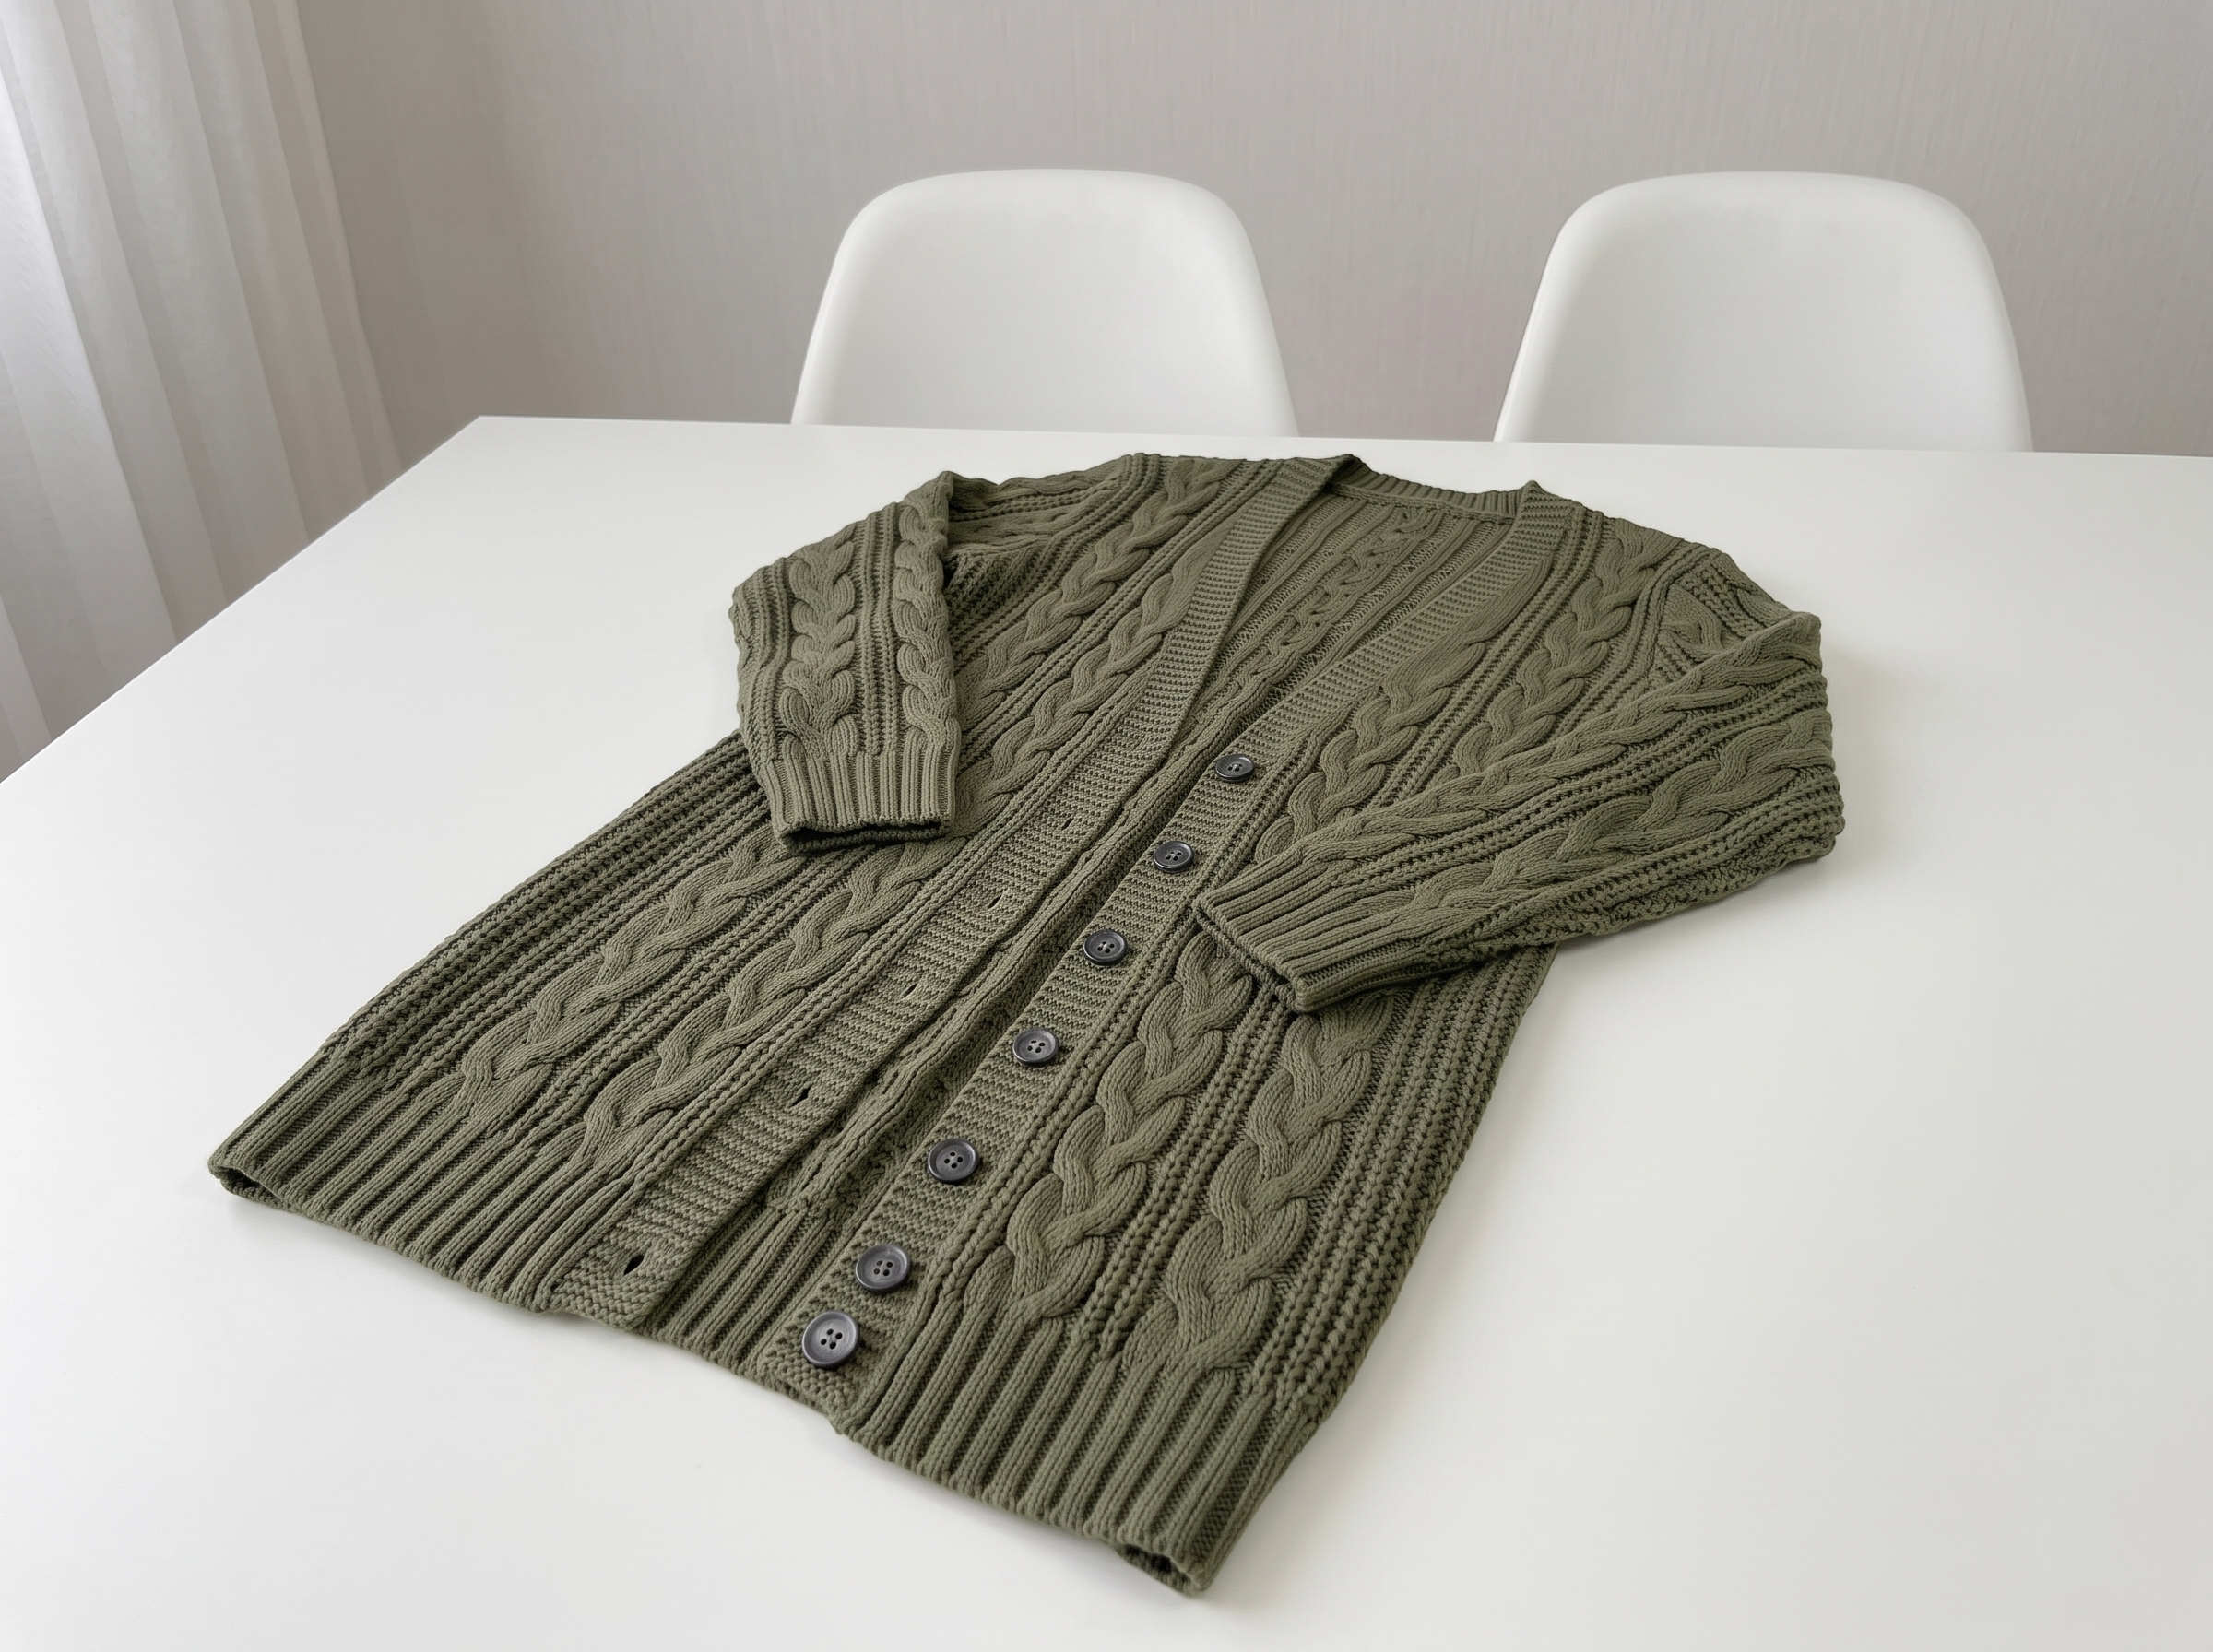
The Sage Cable Cardigan – Complete Step-by-Step Pattern
Grab your favorite cup of tea and let’s get knitting! This cardigan is designed to be a staple in your wardrobe, combining the warmth of 100% merino wool with the sophisticated texture of classic cables. I’ve broken down the instructions to make the shaping and cable work feel completely manageable. Let’s dive in!
1. Materials & Gauge
Getting your materials and gauge right is the secret to a cardigan that fits like an absolute dream.
- Yarn: Rowan Super Fine Merino Aran (100% Merino Wool, 85m / 50g).
- Amount: 19 (20, 21, 22, 23, 24) balls. (Color shown: Sage)
- Needles:
- 4.0 mm circular or straight needles (for the ribbing)
- 5.0 mm circular or straight needles (for the main body)
- A cable needle (or a double-pointed needle) for those gorgeous cable crosses.
- Notions: 7 beautiful buttons (approx. 1.5 - 2 cm), stitch markers, a tapestry needle, and stitch holders.
- Gauge: 18 stitches x 26 rows = 10 x 10 cm (4" x 4") in Stockinette stitch on 5.0 mm needles, after blocking.
- Pro Tip: Please, please knit a swatch and wash it! Merino wool blooms beautifully after blocking, and you want to ensure your cardigan turns out perfectly.
2. Abbreviations & Special Stitches
Let’s quickly review a few terms. If you're new to cables, don't worry—you'll be a pro by the time you finish the first sleeve!
- k / p: knit / purl
- C6B (Cable 6 Back): Slip the next 3 stitches to a cable needle and hold at the back of the work, k3, then k3 from the cable needle.
- C6F (Cable 6 Front): Slip the next 3 stitches to a cable needle and hold at the front of the work, k3, then k3 from the cable needle.
- Tw2L (Twist 2 Left): Knit the 2nd stitch on the left needle through the back loop, then knit the 1st stitch through the front loop, then drop both stitches from the left needle.
- Tw2R (Twist 2 Right): Knit the 2nd stitch on the left needle through the front loop, then knit the 1st stitch through the front loop, then drop both stitches from the left needle.
- M1 (Make 1 Knitwise): Lift the strand between stitches from back to front, and knit it through the front loop.
- M1P (Make 1 Purlwise): Lift the strand between stitches from front to back, and purl it.
3. The Back Panel
We’ll start at the bottom hem and work our way up, establishing a beautiful ribbed border before moving into the main cable pattern.
- Cast On: Using 4.0 mm needles, cast on 100 (104, 108, 114, 118, 124) stitches.
- Ribbing: Work in the established ribbing pattern (alternating knits and purls as set by your size) for 15 rows, ending on a Right Side (knit) row.
- Switch to Main Needles: Change to your 5.0 mm needles.
- Main Pattern: Begin working the main cable pattern as established. Continue straight in this pattern until the piece measures approximately 38 (38, 38, 38, 38, 38) cm from the cast-on edge, ending on a Wrong Side row.
Armhole Shaping:
- Bind off 4 (4, 5, 5, 6, 6) stitches at the beginning of the next 2 rows.
- Decrease 1 stitch at each end of the needle in the next 5 (5, 5, 7, 7, 7) rows.
- Then, decrease 1 stitch at each end in every 2nd row 3 (4, 4, 4, 4, 5) times.
- Finally, decrease 1 stitch at each end in the following 4th row.
- You should now have 86 (88, 90, 92, 94, 98) stitches.
Shoulder & Neck Shaping:
- Continue straight until the armhole measures 18 (19, 19, 20, 21, 22) cm, ending on a Wrong Side row.
- Row 1 (RS): Bind off 9 (9, 9, 9, 10, 10) stitches, work in pattern until there are 13 (13, 14, 14, 13, 15) stitches remaining on your right needle. Turn your work. Place the remaining center stitches on a stitch holder for the back neck.
- Row 2 (WS) and beyond: Work short rows to shape the shoulder slope, binding off stitches at the neck edge as specified in your size chart, until all shoulder stitches are bound off.
- Finishing: Cut the yarn, leaving a long tail for seaming.
4. The Left Front Panel
The left front mirrors the back but includes shaping for the V-neck or rounded neckline.
- Cast On: Using 4.0 mm needles, cast on 50 (52, 54, 57, 59, 62) stitches.
- Ribbing: Work 15 rows in the established ribbing pattern, ending on a Right Side row.
- Switch to Main Needles: Change to 5.0 mm needles and begin the main cable pattern, working the decreases for the armhole on the right edge exactly as you did for the Back panel.
Neckline Shaping:
- Once the armhole shaping is complete and you’ve worked straight for a bit, it’s time to shape the neck.
- You will begin decreasing 1 stitch at the neck edge (the left edge of your work) every few rows, following the specific row counts for your size, to create a smooth, elegant curve.
- Once the neck shaping is done, work the shoulder slope using the same short-row technique as the back panel.
- Finishing: Cut the yarn, leaving a long tail.
5. The Right Front Panel
The right front is a mirror image of the left front, but this is also where we’ll add our buttonholes!
- Cast On & Ribbing: Same as the Left Front.
- Main Pattern & Armhole: Work exactly as the Left Front, but perform the neck decreases on the right edge of your work.
- Buttonholes: Plan your 7 buttonholes evenly along the front band. A classic method is to work to 2 stitches before the edge, yarn over, knit 2 together, and continue to the end. On the return row, knit into the yarn over to create a neat little hole.
6. The Sleeves
Sleeves are worked from the cuff up, with gentle increases to shape the arm.
- Cast On: Using 4.0 mm needles, cast on 46 (48, 50, 52, 54, 56) stitches.
- Ribbing: Work 15 rows in the established ribbing pattern, ending on a Right Side row.
- Switch to Main Needles: Change to 5.0 mm needles.
- Increases: Begin increasing 1 stitch at each end of the needle every 8th (8th, 8th, 8th, 8th, 8th) row, and then every 6th (6th, 6th, 6th, 6th, 6th) row, until you have 64 (66, 68, 70, 74, 76) stitches.
- Sleeve Cap: When the sleeve measures 45 (46, 47, 48, 49, 50) cm, begin binding off stitches at the beginning of the rows to shape the cap, mirroring the armhole decreases of the body.
- Finishing: Bind off the remaining stitches.
7. Assembly & Finishing
This is the most satisfying part—watching your flat pieces transform into a beautiful, wearable garment!
- Blocking: Before seaming, gently wash all your pieces in cool water with a wool wash, roll them in a towel to remove excess water, and lay them flat to dry, pinning them to their exact measurements. This makes seaming so much easier.
- Shoulder Seams: Use the three-needle bind-off or a neat mattress stitch to join the front and back shoulders.
- Sleeve & Side Seams: Sew the sleeves into the armholes, matching the center of the sleeve cap to the shoulder seam. Then, sew the side seams and underarm seams in one continuous, smooth line.
- Button Bands: Using your 4.0 mm needles, pick up stitches evenly along the entire front edge (including the neckline). Work a few rows of ribbing to create a sturdy, professional-looking button band.
- Buttons: Sew your 7 buttons securely opposite the buttonholes, taking care to align them perfectly.
Final Section: Where to Go from Here
Take a deep breath and look at what you’ve just created! By completing the Sage Cable Cardigan, you’ve conquered complex cable patterns, tailored armhole and neck shaping, and professional finishing techniques. These are truly advanced skills that will elevate every garment you knit from now on.
Now that you know how to manipulate these shapes, try experimenting with different yarn weights! A chunky merino would make this an incredibly cozy winter coat, while a crisp cotton blend would make it the ultimate breezy spring cardigan. Happy knitting, and enjoy your beautiful new wardrobe staple!