August 28, 2026
Tiny Amigurumi Angel – A Sweet & Magical Crochet Pattern
Bring a little bit of heaven to your handmade collection with this adorable amigurumi angel! Featuring a sweet ruffled dress, delicate wings, and a charming wire halo, this tiny project is a joyful, quick make that’s perfect for gifting or adding a touch of magic to your decor.
Jump to pattern instructions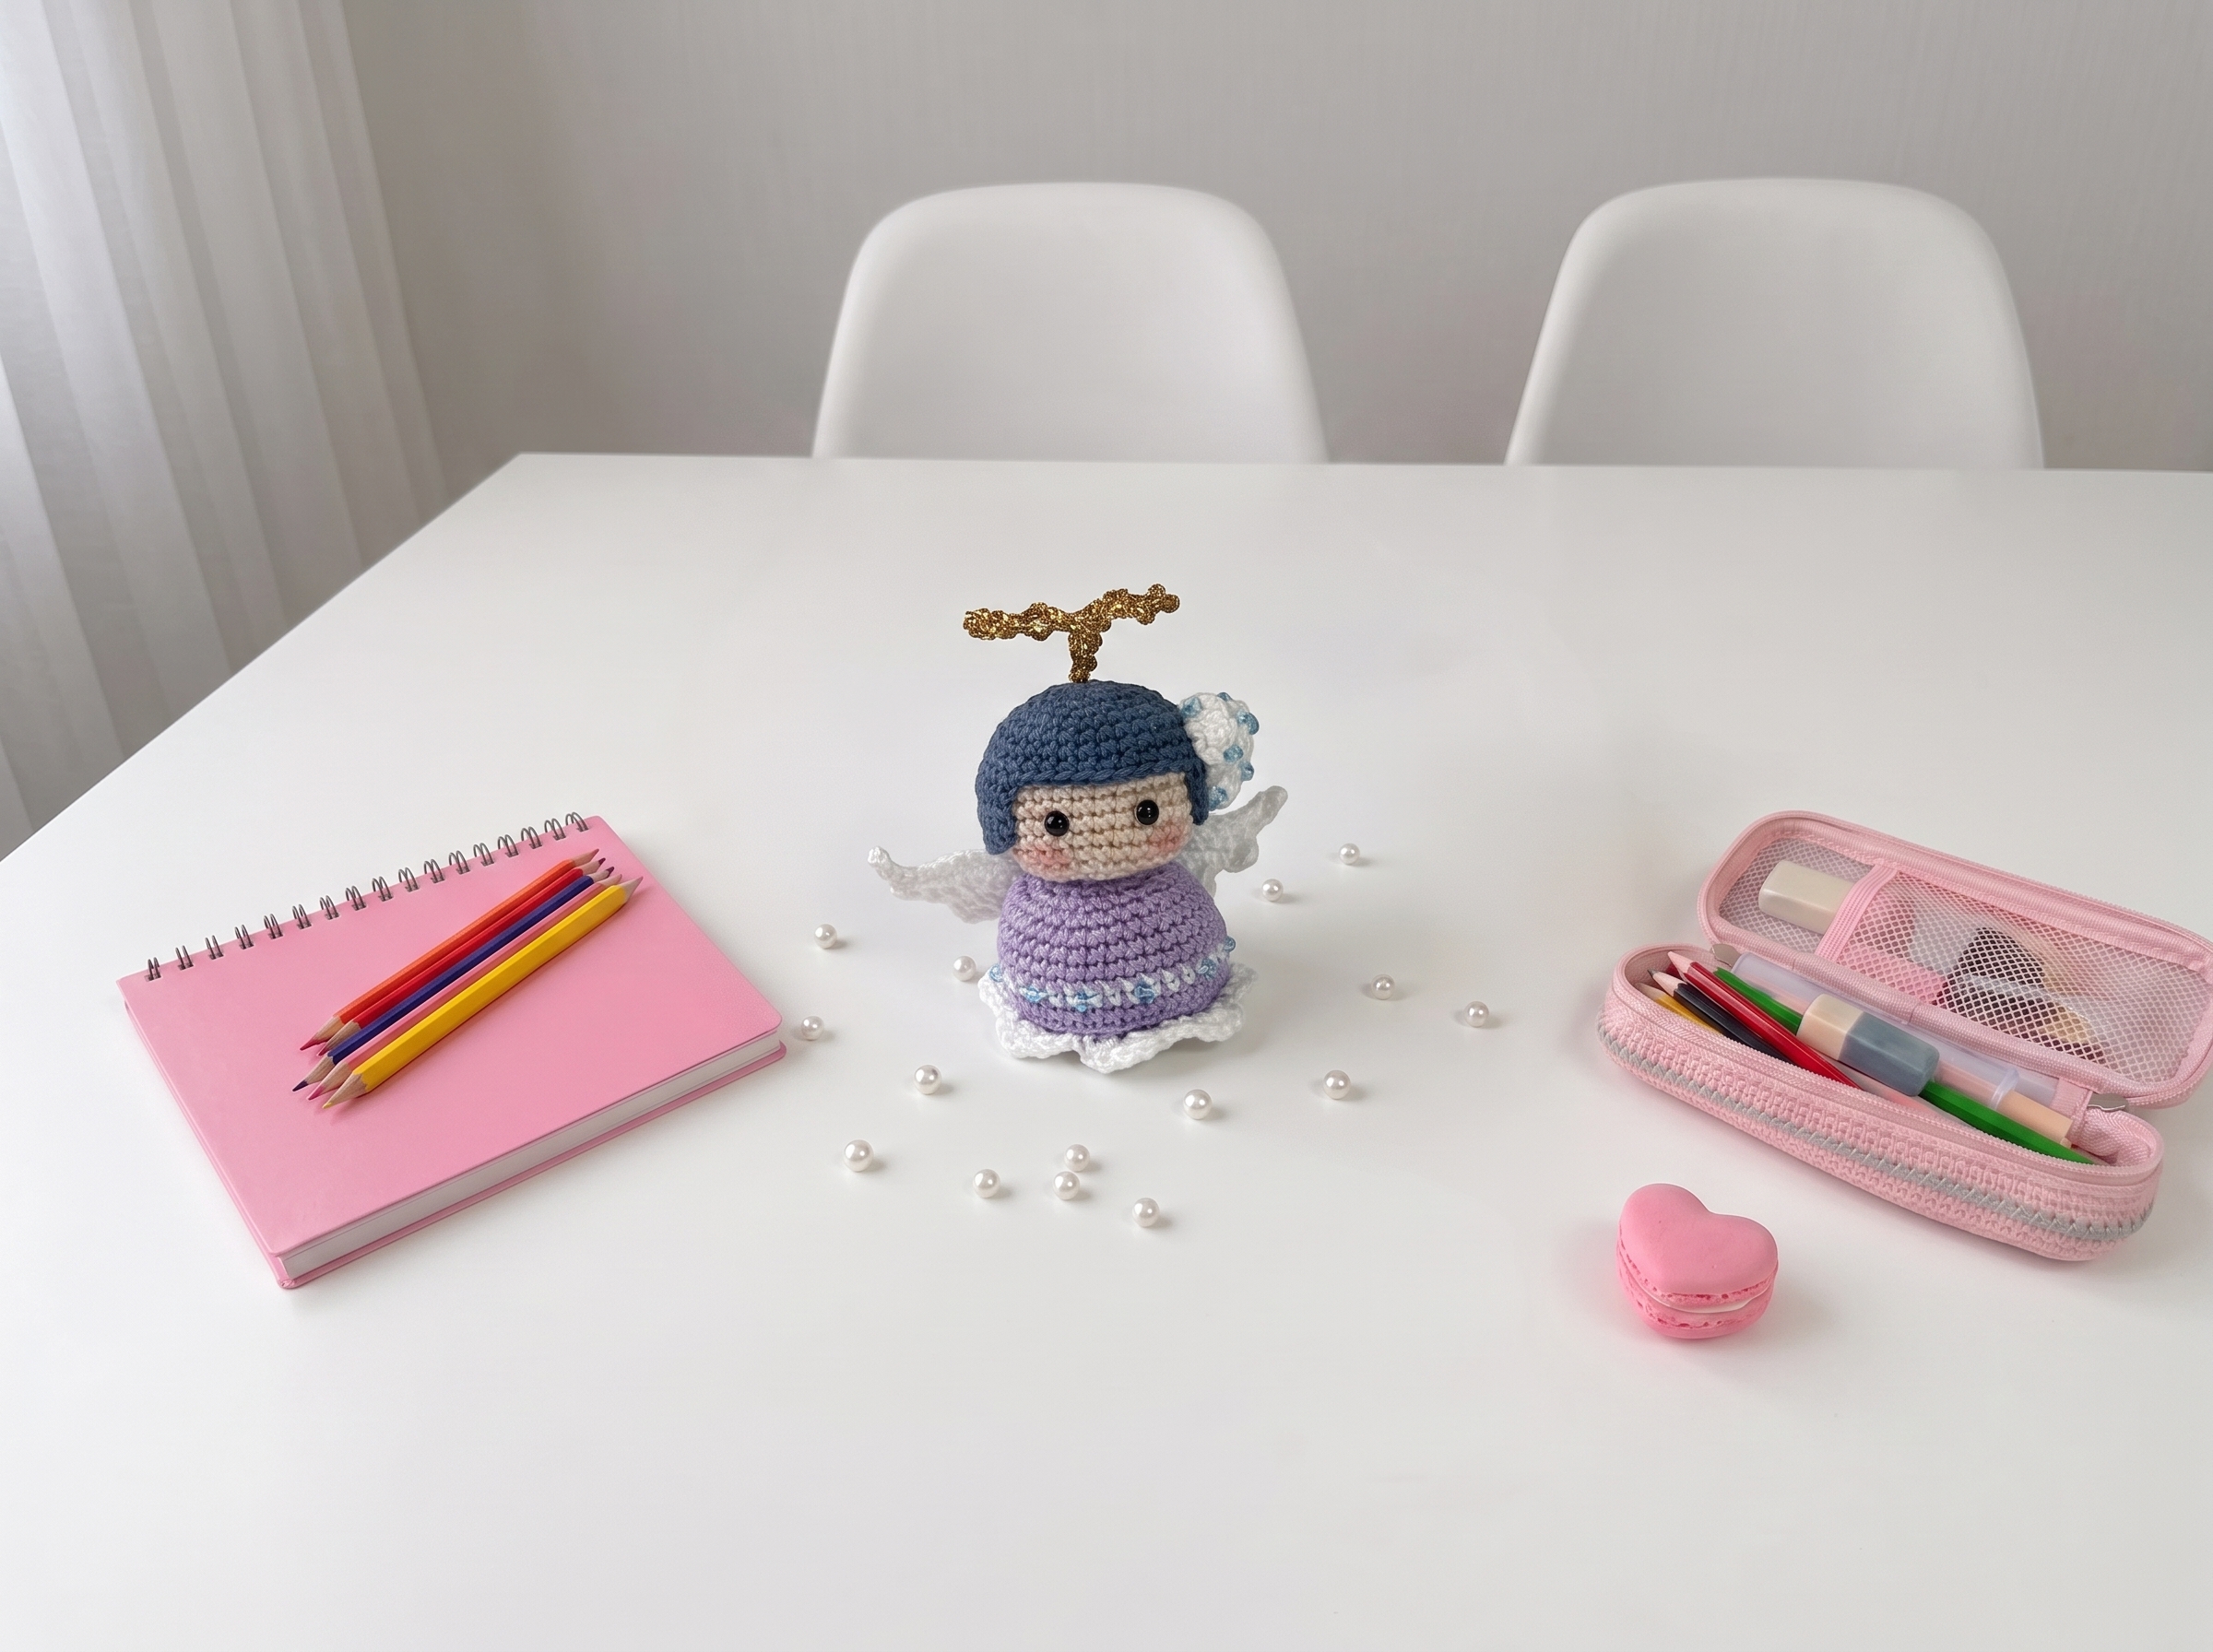
Tiny Amigurumi Angel – Complete Step-by-Step Pattern
1. Gathering Your Heavenly Supplies
Let’s get ready to create some magic! Because this angel is quite tiny (about 4 cm or 1.5 inches tall if using fine yarn), we’ll be using delicate materials.
- Yarn: Fine cotton yarn (like "Iris" or similar lace-weight yarn). You'll need small amounts of:
- Beige/Skin tone (for the head)
- Purple (or your favorite color for the dress)
- White (for the dress trim, wings, and flower)
- Blue-black (or your preferred hair color)
- Yellow (for the halo)
- Hook: 1.0 mm (or size needed to achieve a tight, fine gauge with your yarn).
- Notions: Polyester stuffing, a small piece of wire (for the halo and optional body stability), a tiny circle of cardboard (for a stable base), sewing needle, scissors, tiny beads (for decoration), safety eyes (or embroidered eyes), and cosmetic blush or pastel chalk (for those sweet rosy cheeks!).
What you'll master: Working with fine yarns for delicate details, and using simple household items (like cardboard and wire) to add professional stability to tiny amigurumi.
2. The Body & Dress
We’ll start from the top of the dress and work our way down, adding a beautiful, ruffled white hem at the end.
- R1 (Dress Color): 6 sc in MR (6)
- R2: 6 inc (12)
- R3: (1 sc, inc) x 6 (18)
- R4: (2 sc, inc) x 6 (24)
- R5: (3 sc, inc) x 6 (30)
- R6: (4 sc, inc) x 6 (36)
- R7: 36 sc in BLO (Back Loop Only) (This creates a ridge for our ruffle later!)
- R8: 36 sc in BLO
- R9: 36 sc (working through both loops now)
- Change to White Yarn.
- R10: 36 sc. Fasten off white yarn, tying the ends securely on the inside.
- Change back to Dress Color.
- R11-14: 36 sc (4 rows)
- R15: (4 sc, dec) x 6 (30)
- R16: (3 sc, dec) x 6 (24)
- Important detail: Begin stuffing the body firmly with polyester stuffing. Don't skimp on the stuffing here, as it gives the angel a lovely, plump shape!
- R17: (2 sc, dec) x 6 (18)
- R18: (1 sc, dec) x 6 (12)
- Finishing: Fasten off, leaving a long tail for sewing. Weave the tail through the front loops of the remaining 12 stitches and pull tight to close the hole.
The Dress Ruffle: Grab your white yarn. Working into the unworked front loops of Rows 7 and 8, create a beautiful shell-stitch hem: (1 sc, skip 1 loop, 5 dc in the next loop, skip 1 loop, 1 sc) repeated 7 times around the base. Fasten off and weave in the end.
What you'll master: Creating a decorative ridge with BLO/FLO, and working a classic shell-stitch ruffle for a feminine, finished look.
3. The Head
The head is a simple, perfectly round sphere that sits sweetly atop the body.
- R1 (Beige): 6 sc in MR (6)
- R2: 6 inc (12)
- R3: (1 sc, inc) x 6 (18)
- R4: (2 sc, inc) x 6 (24)
- R5: (3 sc, inc) x 6 (30)
- R6: 30 sc (30)
- R7: (3 sc, dec) x 6 (24)
- Important detail: Begin stuffing the head firmly.
- R8: (2 sc, dec) x 6 (18)
- R9: (1 sc, dec) x 6 (12)
- R10: 6 dec (6)
- Finishing: Fasten off, leaving a very long tail. Weave the tail through the front loops and pull tight to close. We will use this long tail to sew the head securely to the body.
What you'll master: Smooth, symmetrical decreases for a flawless spherical shape.
4. The Hair
We’ll build a little cap and then add delicate, individual strands of hair.
(Note: The original pattern had a slight typo skipping Row 6, so I’ve added it here to ensure your math works out perfectly!)
- R1 (Hair Color): 6 sc in MR (6)
- R2: 6 inc (12)
- R3: (1 sc, inc) x 6 (18)
- R4: (2 sc, inc) x 6 (24)
- R5: (3 sc, inc) x 6 (30)
- R6: 30 sc (30)
- R7: (9 sc, inc) x 3 (33)
- R8: 33 sc (2 rows)
- R9 (Creating Strands): We will now work back and forth in short rows to create hair strands.
- Chain a desired length (e.g., 10-15 chains depending on how long you want the hair).
- Turn, work slip stitches or single crochets back down the chain, and slip stitch into the next stitch of the cap.
- Repeat this process, creating little locks of hair all around the cap. The original pattern suggests doing this 4 times in a specific sequence, but feel free to adjust the number of strands to make the hair as full as you like!
- Finishing: Fasten off, leaving a tail. Tuck the end securely into the inside of the hair cap.
What you'll master: Creating textured, free-form hair strands using chain-and-slip-stitch techniques.
5. The Wings (Choose Your Favorite Method!)
You have two wonderful options for the wings. Method 1 is a bit sturdier, while Method 2 is incredibly delicate and airy.
Method 1: The Sturdy Shell Wing
- R1 (White): Ch 2, work 6 sc in the 2nd ch from hook (6)
- R2: 6 inc (12)
- R3: (1 sc, inc) x 6 (18)
- R4: (2 sc, inc) x 6 (24)
- R5: (3 sc, inc) x 6 (30)
- R6-8: 30 sc (3 rows)
- Finishing: Fold the circle in half. Add just a tiny pinch of stuffing. Join the two halves together using the same shell stitch as the dress: (1 sc, skip 1 st, 5 dc in next st, skip 1 st, 1 sc) repeated 4 times along the folded edge. Leave a long tail for sewing.
Method 2: The Airy Feather Wing (Author's Choice)
- R1 (White): Ch 6. Turn.
- R2: 4 sc, sl st in the last st, ch 1. Turn.
- R3: 2 sc, inc, 1 sc, ch 4. Turn and work directly into the chain.
- R4: 4 sc, inc, 2 sc, sl st, ch 1. Turn.
- R5: 2 sc, inc, 5 sc, ch 4. Turn.
- R6: 8 sc, inc, 1 sc, sl st.
- Finishing: Fasten off, leaving a tail. Make a second identical wing.
What you'll master: Adapting patterns to your preferred aesthetic, and working delicate, openwork feather shapes.
6. Assembly & Magical Details
Now for the most rewarding part: bringing your little angel to life!
- Head to Body: Use the long tail from the head to sew it securely and centrally to the top of the body.
- Wings: Sew the wings to the upper back of the body. If you want extra stability, you can insert a tiny piece of wire into the body before attaching the wings.
- Hair: Position the hair cap on the head. Sew it down gently around the edges, being careful not to pull too tightly, which can distort the head shape.
- The Flower: Make a chain of 26. Work the same shell stitch as the dress: (1 sc, skip 1, 5 dc in next, skip 1, 1 sc) x 5. Fasten off, leaving a long tail. Pro Tip: Roll the flat strip of shells inward like a scroll to form a beautiful, multi-petaled flower. Wrap the tail around the center to secure it, and sew it sweetly into the angel's hair.
- The Halo: Shape a small piece of wire into a classic halo. Wrap it snugly with your yellow yarn (shiny yarn works beautifully here!). Attach it to the back of the head.
- The Face: Attach tiny safety eyes or embroider them. Use a dry brush and a tiny bit of cosmetic blush to dust the cheeks and nose for an irresistibly rosy glow. Add a tiny bead or embroidered detail for extra charm.
What you'll master: Multi-step structural assembly, creative yarn manipulation (the rolled flower!), and delicate facial detailing.
Final Section: Where to Go from Here
Congratulations! You’ve just crafted a tiny, heavenly angel. This project is a wonderful exercise in working with fine details, shell stitches, and creative assembly.
Because this pattern is so versatile, try experimenting with different yarn colors to create a whole choir of angels, or swap the dress color to match a specific holiday theme (like red and green for Christmas, or soft pastels for Easter). Happy crocheting, and may your handmade creations bring a little bit of magic to the world!