October 19, 2026
Toadstool Bucket Hat
This cheerful hat looks like a little mushroom popped right out of the forest floor. A bright cherry-red crown with a gently flared brim is dotted with big cream spots, and a ruffled oatmeal frill peeks out from underneath, just like the gills of a real toadstool. It is made from simple rounds worked from the top down, with the spots stitched on as flat circles, so it is a fun project for practicing shaping and appliqué. Wear it on a woodland walk, a Halloween night, or any day you feel like being a little bit magical. Pour something warm, grab your reddest yarn, and let us grow a mushroom.
Jump to pattern instructions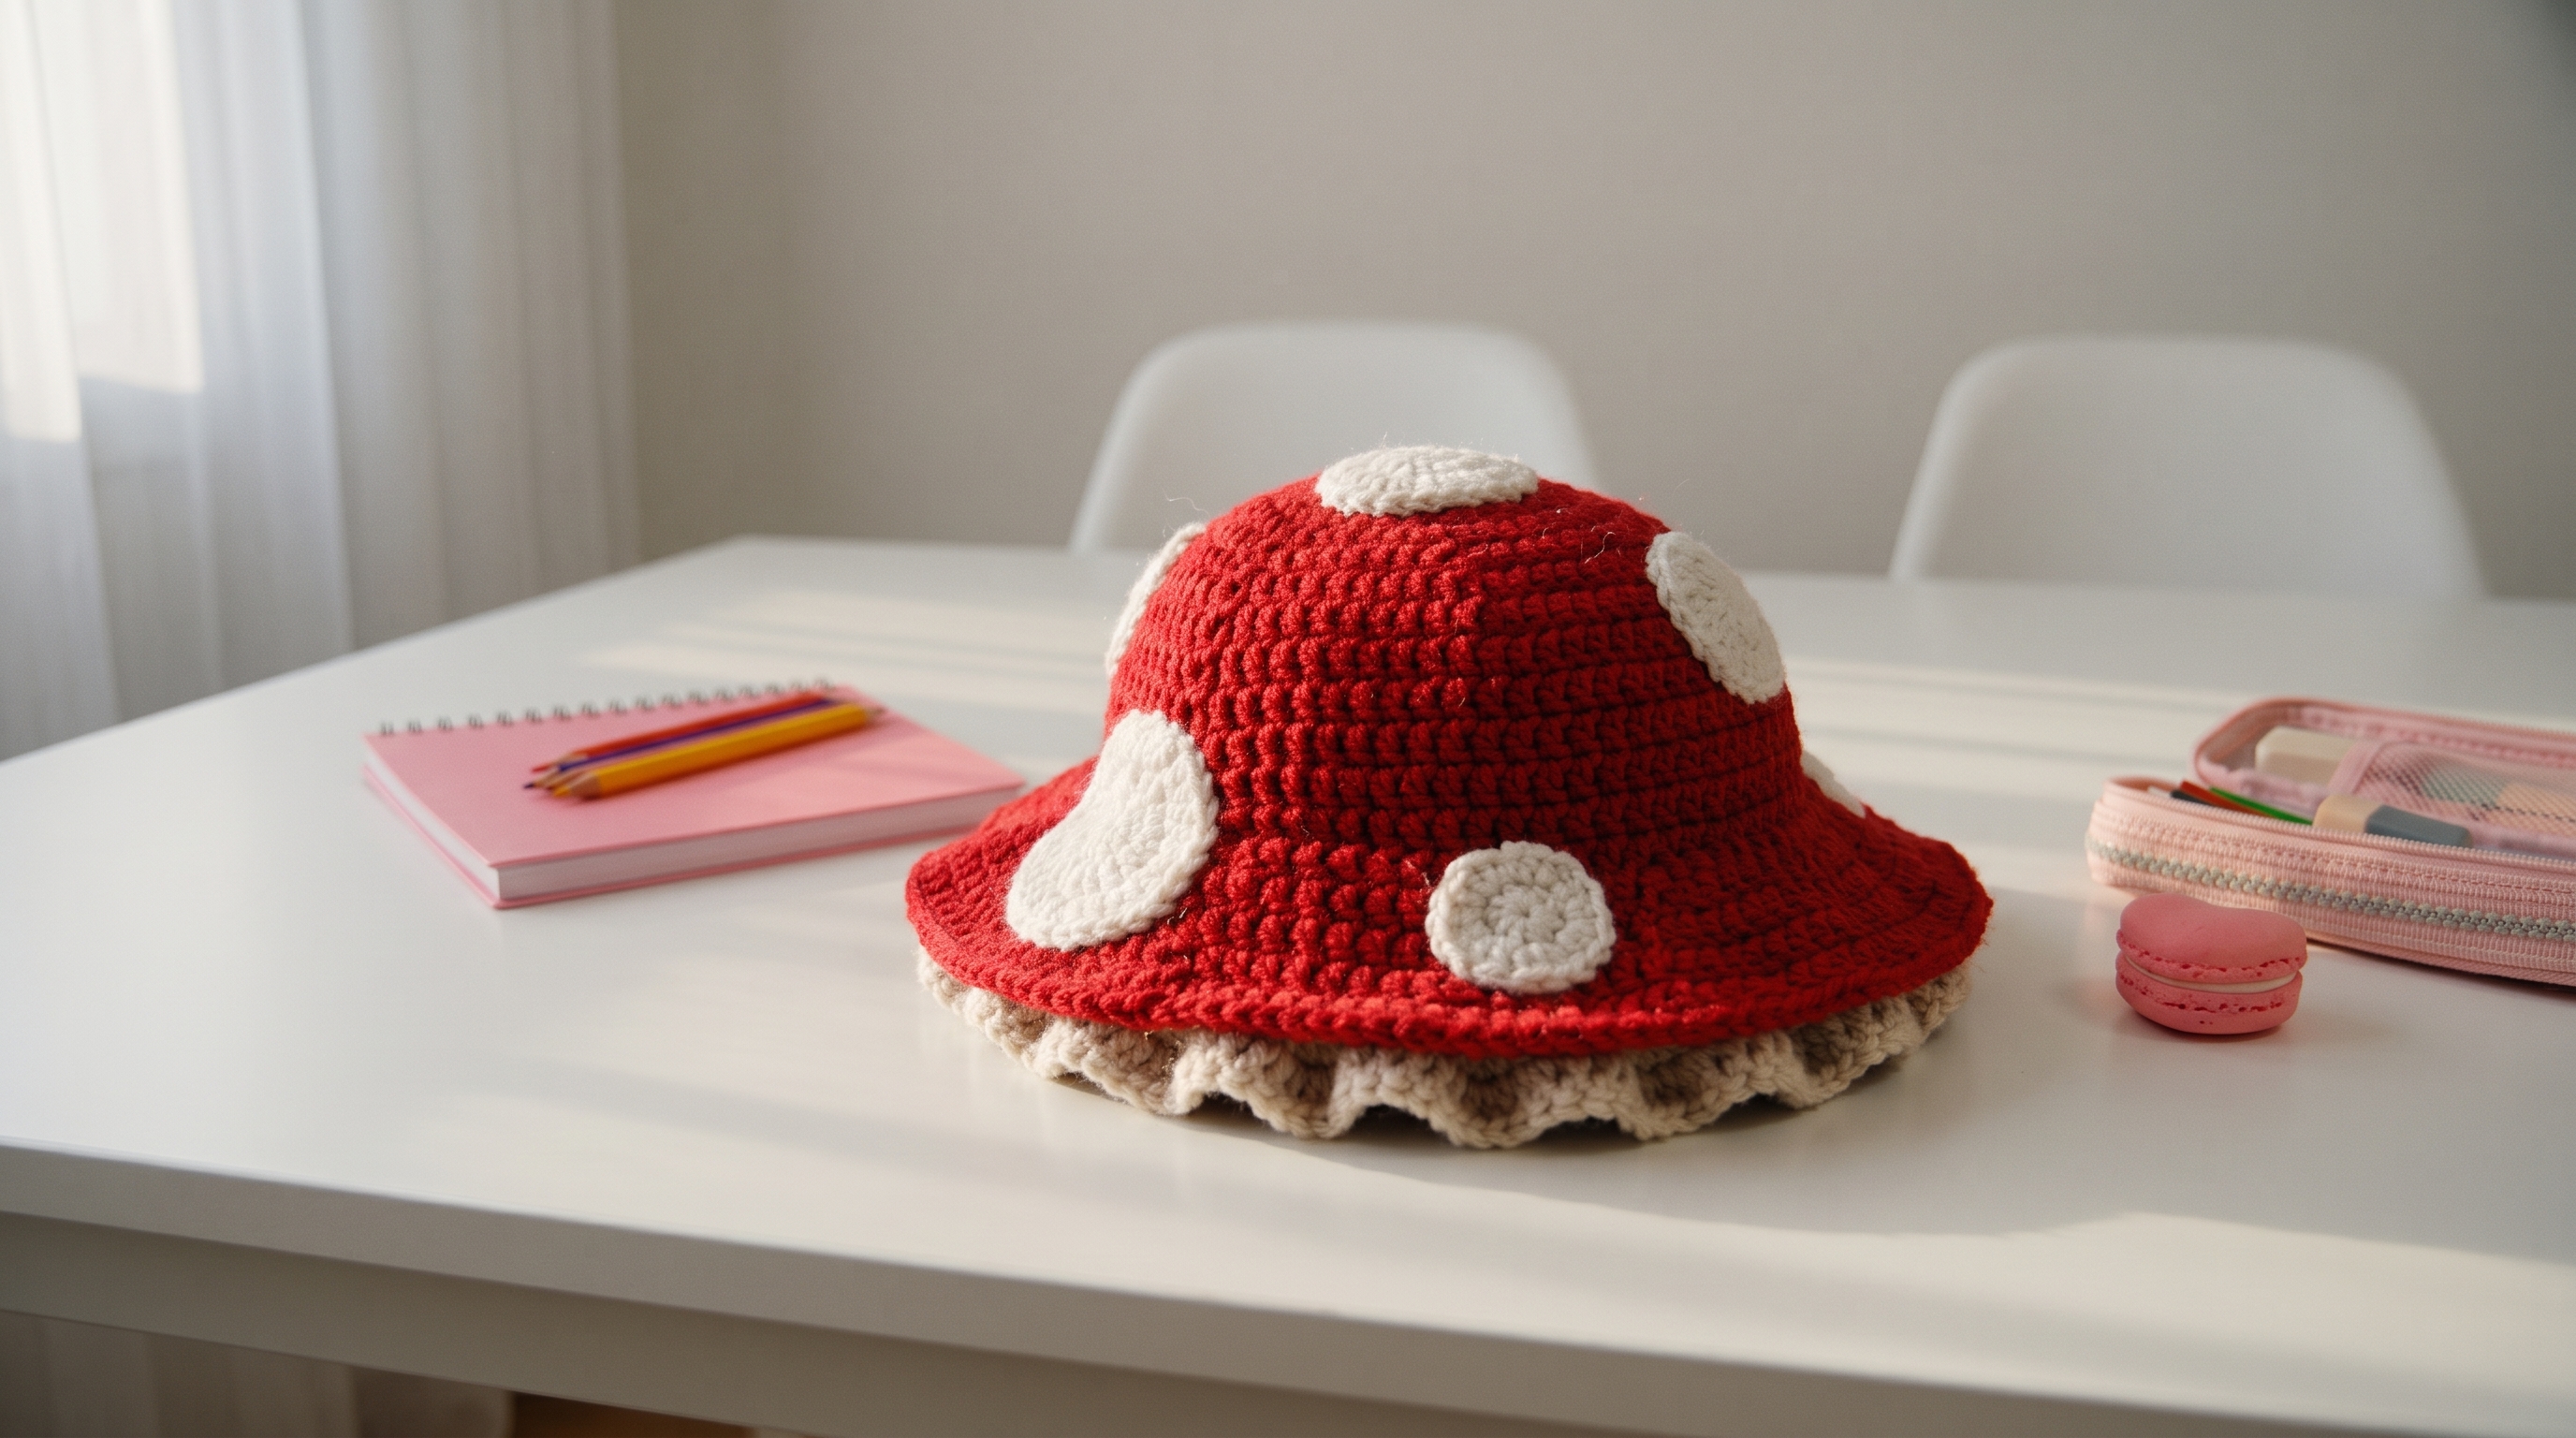
Toadstool Bucket Hat
Difficulty: Easy to intermediate (basic stitches, plus a ruffle and a few small appliqués)
Finished Size: Adult medium, fits a 21 to 22 inch (53 to 56 cm) head. About 5 inches (13 cm) tall for the crown, with a 2 inch (5 cm) brim and a 1.5 inch (4 cm) ruffle. Sizing for kids and babies is in the tips.
Time to Complete: 4 to 5 hours.
What You Will Need
Yarn:
- Cherry red (R), about 180 yards (165 m), for the crown and the brim
- Cream (C), about 40 yards (37 m), for the spots
- Oatmeal or light taupe (O), about 50 yards (46 m), for the ruffle
- Tip: Use a worsted weight cotton blend or soft acrylic yarn. A cotton blend gives crisp stitches and holds the shape of the brim. Pick a smooth yarn, so the stitches show clearly.
Tools:
- 4.5 mm (7) crochet hook. Go up or down a size if your gauge does not match.
- Yarn needle with a large eye for sewing and weaving in ends
- Stitch markers
- Sharp scissors
- Straight pins
- Blocking mats and pins (optional but helpful)
Gauge: 15 stitches and 16 rounds in single crochet = 4 x 4 inches (10 x 10 cm). Please make a swatch, since the gauge decides how the hat fits.
The Basics (US Terms)
- MR = magic ring
- ch = chain
- sc = single crochet
- hdc = half double crochet
- dc = double crochet
- inc = increase (work 2 stitches into the same stitch)
- sl st = slip stitch
- BLO = back loop only
- FLO = front loop only
- R, C, O = red, cream, oatmeal
- The hat is worked in continuous rounds, from the top down. Use a stitch marker to mark the first stitch of each round, and move it up as you go.
Let Us Get Started
We will make the crown and brim first, then the ruffle, then the spots.
Part 1: The Crown
Worked with red yarn, from the top down.
- Round 1: Work 6 sc into a magic ring. (6 stitches)
- Round 2: Inc in every stitch around. (12 stitches)
- Round 3: (1 sc, inc) repeat 6 times. (18 stitches)
- Round 4: (2 sc, inc) repeat 6 times. (24 stitches)
- Round 5: (3 sc, inc) repeat 6 times. (30 stitches)
- Round 6: (4 sc, inc) repeat 6 times. (36 stitches)
- Round 7: (5 sc, inc) repeat 6 times. (42 stitches)
- Round 8: (6 sc, inc) repeat 6 times. (48 stitches)
- Round 9: (7 sc, inc) repeat 6 times. (54 stitches)
- Round 10: (8 sc, inc) repeat 6 times. (60 stitches)
- Round 11: (9 sc, inc) repeat 6 times. (66 stitches)
- Round 12: (10 sc, inc) repeat 6 times. (72 stitches)
- Round 13: (11 sc, inc) repeat 6 times. (78 stitches) The flat circle should now measure about 5 inches (13 cm) across. If it curls up like a bowl, you are pulling too tight. If it ruffles, you are working too loosely.
- Rounds 14 to 21: Work 1 sc in every stitch around. (78 stitches) This makes the sides of the crown. To make the hat taller or shorter, add or remove rounds here, so the crown measures about 5 inches (13 cm) from the top.
Part 2: The Brim
Worked with red yarn, continuing from the crown.
- Round 22: Work 1 sc in the BLO of every stitch around. (78 stitches) This leaves a row of front loops, which you will use for the ruffle in Part 3.
- Round 23: (12 sc, inc) repeat 6 times. (84 stitches)
- Round 24: (13 sc, inc) repeat 6 times. (90 stitches)
- Round 25: (14 sc, inc) repeat 6 times. (96 stitches)
- Round 26: (15 sc, inc) repeat 6 times. (102 stitches)
- Round 27: (16 sc, inc) repeat 6 times. (108 stitches)
- Round 28: (17 sc, inc) repeat 6 times. (114 stitches)
- Round 29: Work 1 sc in every stitch around. (114 stitches)
- Join with a sl st to the next stitch and fasten off. Weave in the ends. The brim should be about 2 inches (5 cm) wide, and slightly flared. If you want a wider brim, repeat Rounds 28 and 29 with 6 more stitches each time.
Part 3: The Ruffle
Worked with oatmeal yarn, in the front loops left by Round 22.
- Turn the hat upside down, so the front loops of Round 22 are facing you, on the underside of the brim.
- Round 1: Join oatmeal in any front loop. Ch 1, then work 2 sc in each front loop around. Join with a sl st to the first sc. (156 stitches)
- Round 2: Ch 1. Sc in every stitch around. Join with a sl st. (156 stitches)
- Round 3: Ch 1. Work 2 sc in each stitch around. Join with a sl st. (312 stitches)
- Round 4: Ch 1. Sc in every stitch around. Join with a sl st and fasten off. (312 stitches)
- Weave in the ends. The extra stitches make the ruffle ripple, like the gills under a mushroom cap. For a smaller ruffle, skip Rounds 3 and 4, and work Round 2 twice. For a fuller ruffle, work Round 3 as 3 sc in each stitch.
Part 4: The Spots
Worked with cream yarn. Make 7 spots in mixed sizes.
Large spot (make 2):
- Round 1: Work 6 sc into a magic ring. (6 stitches)
- Round 2: Inc in every stitch around. (12 stitches)
- Round 3: (1 sc, inc) repeat 6 times. (18 stitches)
- Round 4: (2 sc, inc) repeat 6 times. (24 stitches)
- Round 5: (3 sc, inc) repeat 6 times. (30 stitches)
- Join with a sl st to the next stitch and fasten off, leaving a long tail for sewing. The spot is about 2.5 inches (6 cm) across.
Medium spot (make 3):
- Work Rounds 1 to 4 of the large spot. (24 stitches)
- Join with a sl st to the next stitch and fasten off, leaving a long tail for sewing. The spot is about 2 inches (5 cm) across.
Small spot (make 2):
- Work Rounds 1 to 3 of the large spot. (18 stitches)
- Join with a sl st to the next stitch and fasten off, leaving a long tail for sewing. The spot is about 1.5 inches (4 cm) across.
For the oval spots on the sides of the crown, as in the photo, gently stretch the spot into an oval while you sew it on.
Assembly and Finishing
This is where your mushroom comes together. Take your time pinning before you sew.
Blocking:
- Pin the hat to a rounded form, such as a bowl or a balloon, and lightly steam or mist it. Pin the brim flat, and let it dry fully.
- Fluff the ruffle with your fingers, and arrange it into soft waves, so the folds are evenly spaced.
Adding the Spots:
- Place the hat on a table, and arrange the spots on the crown with a few pins. Put a large spot on the front, one on the top, and the rest spread around the sides, a bit uneven for a natural look.
- Check the spots from a few angles. Put a medium one on the brim edge, if you like, as in the photo.
- Sew each spot on with the long tail, using small stitches around the edge, and take the stitches through the top loop of the hat only, so they do not show on the inside.
- Weave in all remaining ends.
A Few Friendly Tips
- Swatch first: Make a 4 x 4 inch swatch in single crochet, and check your gauge. If you have too many stitches per inch, go up a hook size. If you have too few, go down.
- Count as you go: Count your stitches at the end of each increase round. Each round should have 6 more stitches than the one before.
- Even ruffles: If the ruffle looks uneven, make sure you worked exactly 2 stitches in each loop in Round 1. Counting the stitches at the end of the round should give you 156.
- Brim shape: If you want a floppy brim, use a looser tension in the brim rounds. For a stiffer brim, spray it lightly with starch, and let it dry flat.
- Adjusting the size:
- Baby (16 inch or 41 cm head): Stop increasing after Round 9 (54 stitches), work even for 6 rounds, then work the brim increases down to 6 stitches fewer per round. Make the ruffle with 108 stitches in Round 1.
- Child (19 inch or 48 cm head): Stop increasing after Round 11 (66 stitches), work even for 6 rounds, then work the brim with 6 fewer stitches per round. Make the ruffle with 132 stitches in Round 1.
- Large adult (23 inch or 58 cm head): Add Round 14 as (12 sc, inc) 6 times for 84 stitches, work even for 8 rounds, then work the brim with 6 more stitches per round.
- Cozy lining: For a chilly day, sew a layer of soft fleece or cotton fabric inside the crown.
- Make it your own: Try a white mushroom hat with brown spots, a purple toadstool with yellow spots, or a pink fairy hat with a ruffle in cream.
- Care: Machine wash gently on a cool setting, and lay flat to dry. Reshape the ruffle and the brim with your fingers while the hat is damp.
I hope you enjoy making this happy little mushroom hat. It is such a fun, quick project, and it makes a wonderful handmade gift for anyone who loves the woods.
If you run into any trouble or just want to share how your hat turned out, please reach out. I love seeing what you create.
Happy crocheting!