September 26, 2026
Vintage Lace Table Runner Pattern
There is a timeless elegance to a beautifully set table, and nothing adds that special touch quite like a handmade lace runner. This vintage-inspired design features a classic rectangular center with delicate vertical columns, framed by an intricate, scalloped border that looks like it came straight from a grandmother's trunk. It is a wonderful project for a rainy afternoon, perfect for practicing your tension and creating a true heirloom piece. Grab your favorite fine cotton yarn, and let us crochet some history together.
Jump to pattern instructions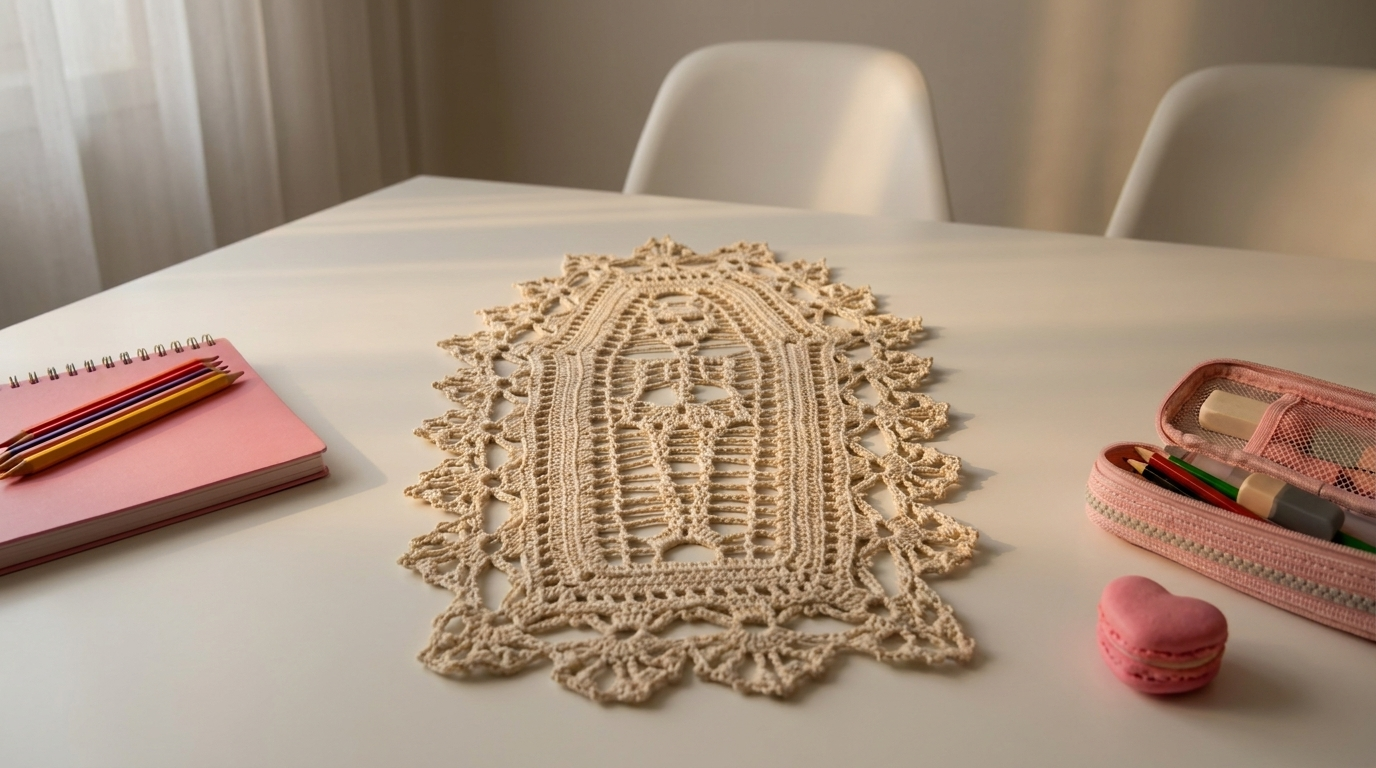
Vintage Lace Table Runner Pattern
Difficulty: Intermediate to Advanced (requires patience and consistent tension)
Finished Size: Approximately 14 inches wide by 36 inches long (35 cm x 90 cm). This can be easily adjusted by adding or removing chains in the foundation.
Time to Complete: 10 to 15 hours of focused crocheting.
What You Will Need
Yarn:
- Size 10 or Size 20 crochet cotton thread in a natural cream, ecru, or white color. You will need about 3 to 4 balls (approx. 500 to 600 yards).
- Tip: Mercerized cotton gives a beautiful sheen and holds the lace shape perfectly after blocking.
Tools:
- 1.5 mm (Steel size 7) or 1.75 mm (Steel size 5) crochet hook.
- Yarn needle for weaving in ends.
- Sharp scissors.
- Stitch markers (helpful for counting large repeats).
- Blocking pins and a foam blocking board (essential for lace).
The Basics (US Terms)
- ch = chain
- sc = single crochet
- dc = double crochet
- tr = treble crochet
- sl st = slip stitch
- sp = space (usually a chain space)
- picot = ch 3, sl st into the first ch of the ch-3
- sk = skip
- rep = repeat
Let Us Get Started
This runner is worked in two main sections: the central rectangular panel and the elaborate scalloped border. We will work the center back and forth in rows, and then work the border in rounds around the entire piece.
Part 1: The Central Panel
The center features vertical columns of double crochets separated by open chain spaces, creating a "gate" or "column" effect.
Foundation: Chain 102. (This number can be adjusted. The pattern repeat is a multiple of 12 chains plus 6 additional chains for the edges).
Row 1: Sc in the 4th ch from the hook (this counts as your first dc and ch-1). Ch 1, sk 1 ch, dc in the next ch. Rep from * to * across the row. Turn. (You should have 99 stitches/spaces).
Row 2: Ch 3 (counts as first dc). Dc in the next dc, ch 1, sk the next ch-1 sp. Rep from * to * across. End with a dc in the top of the turning chain. Turn.
Row 3 (Creating the vertical bars): Ch 3. Work 3 dc in the next ch-1 sp, ch 1, sk the next ch-1 sp, dc in the next dc. Rep from * to * across. Turn. Note: This row creates the solid vertical lines you see in the center of the runner.
Row 4: Ch 3. Ch 1, sk the next 2 dc, dc in the next dc, ch 1, sk the next ch-1 sp. Rep from * to * across. Turn.
Row 5: Ch 3. Dc in the next dc, ch 1, sk the next ch-1 sp, work 3 dc in the next ch-1 sp. Rep from * to * across. Turn.
Rows 6 to 20: Repeat Rows 2 through 5 four more times, then repeat Rows 2 and 3 once more. This will give you a long, rectangular panel with a beautiful, rhythmic pattern of solid bars and open lace.
Fasten off the yarn, leaving a long tail. Weave in all ends securely before moving to the border.
Part 2: The Scalloped Border
This border is what gives the runner its vintage, doily-like appearance. We will work in continuous rounds around the entire rectangle.
Round 1 (Foundation Round): Join your yarn at one of the corners.
- Along the long sides: Ch 1. Work a series of single crochets evenly along the side edge. Aim for about 1 sc for every row end. When you reach a corner, work (sc, ch 2, sc) in the corner space to turn the edge.
- Along the short ends: Work sc evenly across the foundation chain edge.
- Sl st to the first sc to join. Do not turn.
Round 2 (Building the Shells):
- Corners: In the corner ch-2 sp, work (3 dc, ch 2, 3 dc). This is your corner shell.
- Sides: Sk 2 sc, work 5 dc in the next sc (this is a shell), sk 2 sc, sc in the next sc. Rep from * to * along the sides.
- When you reach the next corner, work the corner shell again.
- Continue this pattern all the way around the runner.
- Sl st to the top of the first corner shell to join.
Round 3 (The Picot Edge): This round adds the delicate, pointy finish to the scallops.
- Corners: In the corner ch-2 sp, work (3 dc, picot, 3 dc, ch 2, 3 dc, picot, 3 dc).
- Sides: Sl st into the top of the next 3 dc from the previous round. In the center dc of the 5-dc shell, work (2 dc, picot, 2 dc). Sl st into the top of the remaining 2 dc. Sc in the next sc from the previous round.
- Rep from * to * all the way around.
- Sl st to join. Fasten off and weave in all ends.
Blocking (The Most Important Step)
Lace crochet does not look like lace until it is blocked. This step opens up the stitches and makes the pattern visible.
- Fill a basin with lukewarm water and a little bit of gentle soap or wool wash.
- Submerge your finished runner and let it soak for 15 minutes. Do not wring it out.
- Gently press the water out by rolling it in a clean towel.
- Lay the runner flat on a foam blocking board or a thick towel pinned to a carpet.
- Use rust-proof pins to pin out every scallop and point of the border. Stretch the center panel gently so the vertical columns are straight and the open spaces are visible.
- Let it dry completely (this may take 24 hours). Once dry, unpin it, and your runner will hold its beautiful shape.
A Few Friendly Tips
- Count your chains: The foundation chain is the backbone of the project. If it is too tight, the whole runner will pucker. Try using a hook one size larger just for the foundation chain, then switch to your smaller hook for the rest.
- Tension is everything: In lace projects, consistent tension is key. If your stitches are too tight, the fabric will be stiff. If they are too loose, it will look messy. Aim for a relaxed, even hand.
- Take breaks: This pattern involves a lot of counting and repetition. Take breaks to rest your eyes and hands. It is a marathon, not a sprint.
I really hope you enjoy making this runner. There is something so deeply satisfying about watching a simple thread turn into a piece of intricate art. It is a project that takes time, but the result is something you can be incredibly proud of.
If you run into any trouble or just want to share how your runner turned out, please reach out. I love seeing what you create.
Happy crocheting.