August 29, 2026
Zheltok the Rat – A Whimsical Amigurumi Crochet Pattern

Bring this adorable, long-tailed friend to life! Featuring clever integrated limb construction, expressive yarn-sculpted eyes, and a sweet little pair of crocheted overalls, this pattern is a delightful project for crafters ready to master seamless assembly and charming, personalized details.
Jump to pattern instructions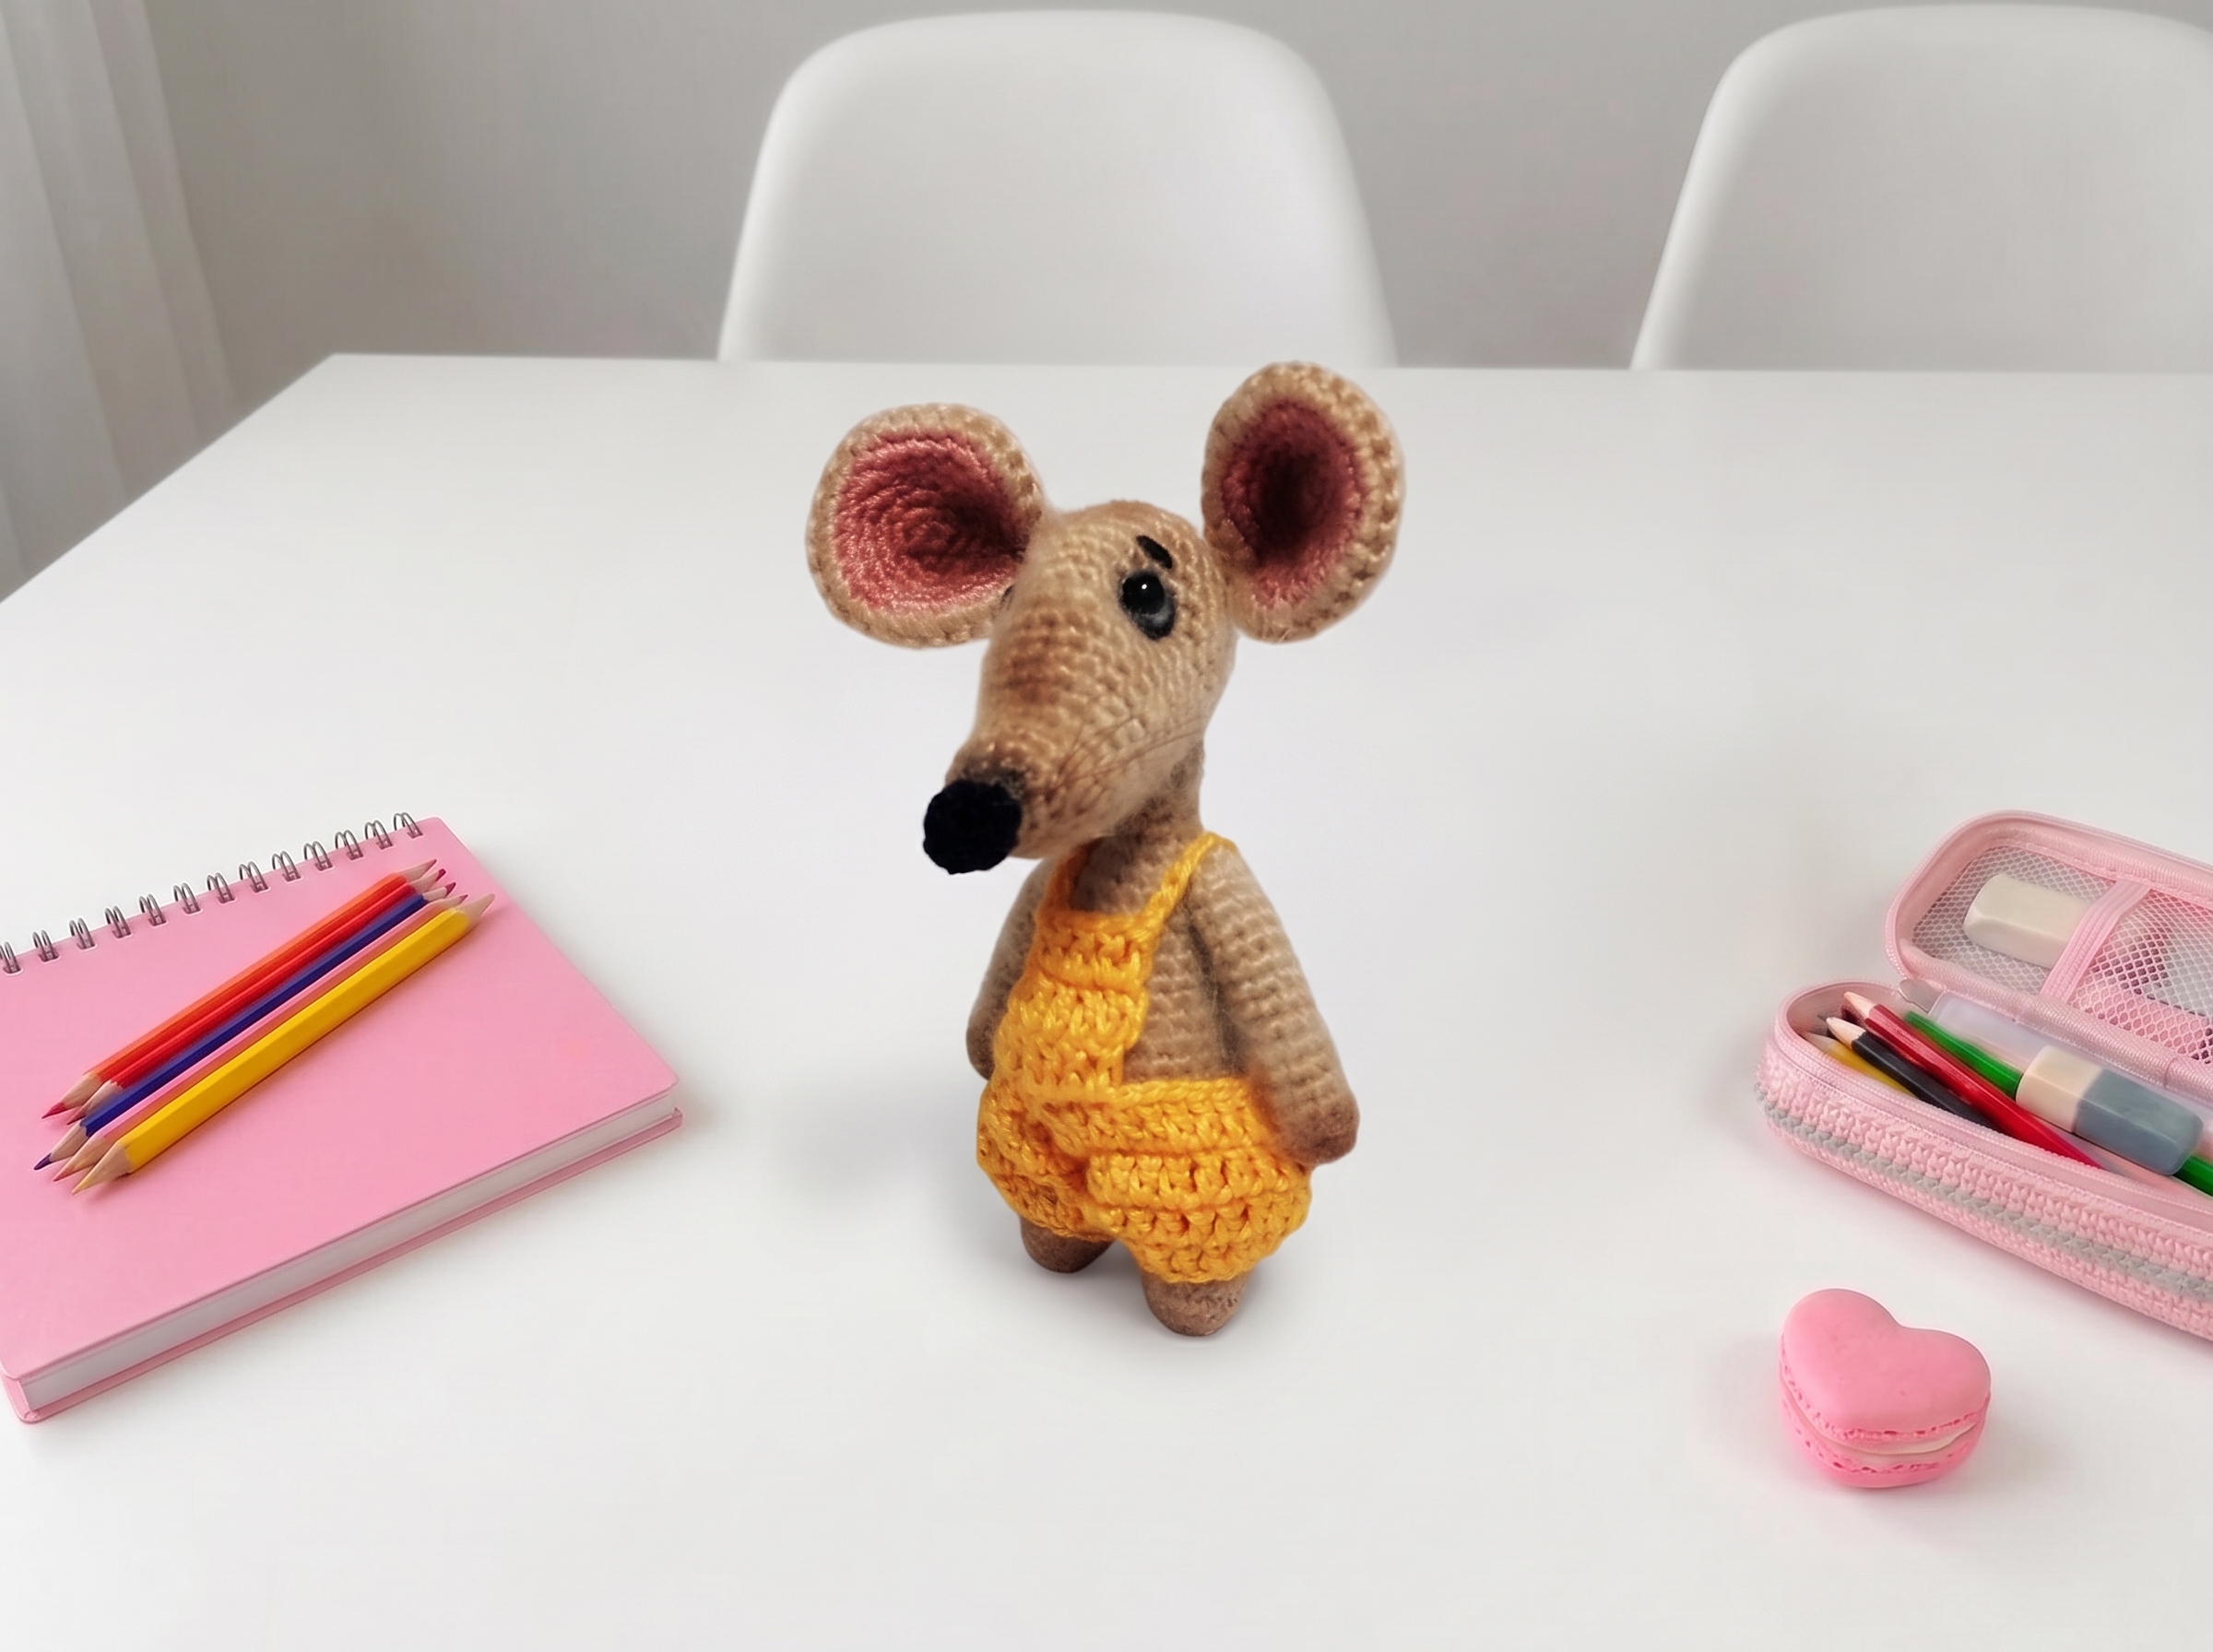
Zheltok the Rat – Complete Step-by-Step Pattern
Hello, fellow crafter! Let’s make Zheltok, a sweet little rat with a big personality. This pattern is designed to be worked seamlessly from the bottom up, meaning minimal sewing and maximum fun. Grab your favorite yarn, and let’s get started!
1. Gathering Your Supplies
To give Zheltok that perfect, slightly fuzzy, and soft look, we recommend using a fine, fluffy yarn for the body and a smooth cotton for the details.
- Yarn (Main Body): Alize Angora Gold or similar (approx. 550m / 100g) in your favorite color (gray, brown, or even a whimsical pastel!).
- Yarn (Details): Fine cotton thread (like Iris or similar) in pink (for ears, nose, and tail wrapping) and black (for the nose outline).
- Hooks: 1.25 mm (or a size that gives you a tight, stuff-proof gauge with your chosen yarn), and a 2.0 mm hook for the chain cast-on if needed.
- Notions:
- Two small black half-beads (or safety eyes) for the eyes.
- White felt (for the eye whites).
- Poly-fil stuffing.
- A short piece of thin craft wire (approx. 8 cm) for the tail.
- Fabric glue (like Moment Crystal), a lint roller or pet brush (for fluffing the angora yarn), chalk or pastels (for toning), and a tapestry needle.
What you'll master: Working with fine, fluffy yarns, integrating wire armatures, and using simple household items (like felt and chalk) to bring your toy to life.
2. Arms (Make 2)
We’ll start with the little arms. They are worked in the main yarn and stuffed very lightly so they remain soft and poseable.
- R1: 6 sc in MR (6)
- R2: (inc, 1 sc) x 3 (9)
- R3-14: 9 sc (12 rows)
- Finishing: Decrease to the end to close the top. On the first arm, fasten off and weave in the end. On the second arm, leave a long tail for sewing it to the body later.
What you'll master: Creating uniform, lightly stuffed tubular limbs.
3. Ears (Make 2 Sets)
Zheltok’s ears have a lovely two-tone effect, with a soft pink inner ear and a main-color outer ear.
Inner Ears (Pink Thread):
- R1: 5 sc in MR (5)
- R2: 5 inc (10)
- R3: (inc, 1 sc) x 5 (15)
- R4: (inc, 2 sc) x 5 (20)
- R5: (inc, 3 sc) x 5 (25)
- R6: (inc, 4 sc) x 5 (30)
- Finishing: Fasten off, leaving a tail.
Outer Ears (Main Yarn):
- Work exactly the same as the inner ears (R1-R6). Do not fasten off on the second outer ear.
Assembly:
- Place a pink inner ear and a main-color outer ear together, wrong sides facing. Crochet a round of single crochets around the entire edge to join them.
- Fold the joined ear in half at the base and work 3 sc through all layers to create a cute, cupped shape. Leave a long tail for sewing.
What you'll master: Layering colors for dimensional features and flat-folding techniques for seamless closures.
4. Head
The head is worked from the nose up, featuring a clever color change and a shaped muzzle that makes yarn sculpting a breeze.
- R1-R3 (Nose - Pink or Black Thread): 6 sc in MR (6). R2: (inc, 1 sc) x 3 (9). R3: 9 sc.
- R4: (dec, 1 sc) x 3 (6). Change to Main Yarn here.
- R5: 6 sc (6)
- R6: (inc, 1 sc) x 3 (9)
- R7: (inc, 2 sc) x 3 (12)
- R8: (inc, 3 sc) x 3 (15)
- R9-10: 15 sc (2 rows)
- R11: (inc, 4 sc) x 3 (18)
- R12: 18 sc (18)
- R13: (inc, 5 sc) x 3 (21)
- R14: 21 sc (21)
- R15: (inc, 6 sc) x 3 (24)
- R16: 24 sc (24)
- R17: (inc, 7 sc) x 3 (27)
- R18-22: 27 sc (5 rows)
- R23: (7 sc, dec) x 3 (24)
- R24: (4 sc, dec) x 4 (20)
- R25: (3 sc, dec) x 4 (16)
- R26: 8 dec (8)
- Finishing: Stuff the head firmly, but leave the very tip of the nose slightly less stuffed so it’s easy to sculpt later. Fasten off, leaving a long tail, and weave it through the front loops to cinch the hole closed.
What you'll master: Seamless mid-project color changes and structured decreasing for a rounded head shape.
5. Legs (Make 2)
Just like the arms, the legs are worked seamlessly and will be joined directly to the body.
- R1: 6 sc in MR (6)
- R2: 6 inc (12)
- R3-4: 12 sc (2 rows)
- R5: 2 dec, 8 sc (10)
- R6-7: 10 sc (2 rows)
- Finishing: On the first leg, fasten off. On the second leg, do not cut the yarn. We will continue directly into the body!
What you'll master: Preparing limbs for seamless multi-piece joining.
6. Body
Here’s where the magic happens! We’ll join the legs and build the torso in one continuous piece.
- R1 (Joining): Work 9 sc around the second leg, chain 5, work 9 sc around the first leg, chain 3. Place a marker at the center of the back (the 3 sc of the second chain). (28 sts total)
- R2: 2 sc on the chain, 9 sc on the leg, 5 sc on the chain, 9 sc on the leg, 3 sc on the chain. (28)
- R3: 13 sc, 2 inc, 13 sc (30)
- R4-8: 30 sc (5 rows)
- R9: 7 sc, (2 sc, dec) x 4, 7 sc (26)
- R10: 7 sc, (dec, 1 sc) x 4, 7 sc (22)
- R11-15: 22 sc (5 rows)
- R16: (dec, 9 sc) x 2 (20)
- R17: 10 dec (10)
- R18-20: 10 sc (3 rows)
- R21 (Neck Shaping): Work 3 sc, turn. Chain 1, work 4 sc starting in the 2nd chain from the hook. Sl st to join.
- Finishing: Fasten off, leaving a very long tail for sewing the head and sculpting the belly.
What you'll master: Seamless leg joining, shaping a tapered torso, and creating a structured neck for head attachment.
7. Assembly & The Magic Touch!
This is where Zheltok truly gets his personality. Take your time and enjoy the process!
- The Eyes: Find the center of the muzzle. Count 8-9 rows up from the bottom of the head, and 4-5 stitches left and right from the center. Use a long tapestry needle and strong thread to make 2-3 pull-throughs (yarn sculpting) to create deep, expressive eye sockets.
- The Eyes (Part 2): Cut tiny circles of white felt, slightly larger than your black beads. Glue the felt to the beads, then glue the beads securely into the sculpted sockets. Outline the eyes with black thread or a fine marker, and embroider sweet little eyebrows above them.
- Head & Arms: Sew the head to the body, making sure the nose points slightly downward (the neck shaping we did in R21 helps with this!). Sew the arms to the sides of the body.
- The Belly: Use the long tail from the body to make a few gentle pull-throughs at the lower front to create a cute, rounded tummy.
- Toning: Use chalk or soft pastels to gently dust the area around the nose, the forehead, the paw tips, and the belly for a soft, realistic finish.
- The Tail: Fold your 8 cm wire in half. Apply a dab of glue to the middle and wrap it tightly with pink thread. Join the two wire ends, glue them, and wrap the rest of the tail, leaving a 1 cm bare tip. Thread the wrapped base onto a needle, insert it into the lower back of the body, and sew it in place with tiny, invisible stitches. Bend the tail into a cute, playful curl!
- Fluffing: If your angora yarn allows, gently run a lint roller or pet brush over the body to fluff up the fibers and hide any stitch lines.
What you'll master: Yarn sculpting, mixed-media detailing (felt, glue, chalk), and wire armature integration.
8. Bonus: Zheltok’s Tiny Overalls
No rat is complete without a stylish outfit! These are worked in fine cotton thread with a slightly loose tension for a relaxed fit.
- Legs (Make 2): Chain 14, join with a sl st to form a ring.
- R1-3: Ch 2 (counts as first dc), 13 dc, sl st to join (14 dc).
- Joining: On the second leg, do not fasten off. Chain 3, and sl st to the first leg to join them.
- R4: Ch 2, 5 dc, dc dec, 6 dc, 3 dc into the joining chain, 6 dc, dc dec, 5 dc, 3 dc into the other side of the joining chain, sl st to join (30 dc).
- R5: Ch 2, dc dec, 9 dc, dc dec, 10 dc, dc dec, 3 dc, sl st to join (26 dc).
- The Bib: Sl st to move to the front. Now work in turning rows. Ch 2, work 5 dc across. Repeat for 3 rows total.
- The Straps: Without cutting the yarn, chain 15. Sl st to the center back of the overalls. Chain 15 again, and sl st to the top corner of the bib. Fasten off and weave in ends.
What you'll master: Flat-to-round transitions, creating functional garment shapes, and delicate accessory crocheting.
Final Section: Where to Go from Here
Congratulations! You’ve just brought Zheltok the Rat to life. By completing this pattern, you’ve practiced seamless limb joining, yarn sculpting, and even a bit of mixed-media crafting.
This pattern is incredibly versatile. Try experimenting with different yarn colors to create a whole "sewer crew" of rat friends, or adapt the overall pattern to dress up other amigurumi animals in your collection. Don't forget to fluff him up, give him a name, and share your creation with the world. Happy crocheting!
Frequently asked questions
Are your crochet and knitting patterns free?
Yes! You can read the patterns in our free pattern library directly on the website.
Which crochet pattern should I try as a beginner?
Start with a small, flat project that uses basic stitches, such as a simple granny square or coaster. Read the materials, stitch abbreviations, and difficulty notes before you begin.
Do your patterns use US or UK crochet terms?
Check the abbreviations section before starting. For example, our Crabby Crossbody Pouch uses US terms. US and UK stitch names differ, so follow the terminology stated in each pattern.
Can I use a different yarn or hook size?
Yes, but substitutions can change the finished size, texture, and amount of yarn needed. Choose a similar yarn weight and make a gauge swatch when size matters.
What do crochet abbreviations mean?
In US terminology, “ch” means chain, “sc” means single crochet, and “sl st” means slip stitch. Check each pattern’s abbreviation list for the stitches and special techniques it uses.
Why is my project a different size from the pattern?
Yarn thickness, hook size, and your tension all affect size. Check your gauge against the pattern and adjust your hook size if needed.
Can I print a pattern or save it as a PDF?
Use “Print this post” on the pattern page. To save a copy, choose “Save as PDF” in your browser’s print options. Your current pattern pages already have the print button.
Why doesn’t my stitch count match?
Recount the previous row or round, then check for missed stitches, extra increases, or skipped repeats. Use a stitch marker to mark the beginning of each round.