August 30, 2026
Zoya the Rabbit – A Charming Amigurumi Doll with a Custom Outfit
Meet Zoya, a sweet and stylish amigurumi rabbit! This pattern features a beautifully sculpted head with expressive yarn-embroidered eyes, a custom crocheted dress with button details, and an adorable mini handbag. Perfect for intermediate crafters ready to master seamless limb joining and wearable doll accessories.
Jump to pattern instructions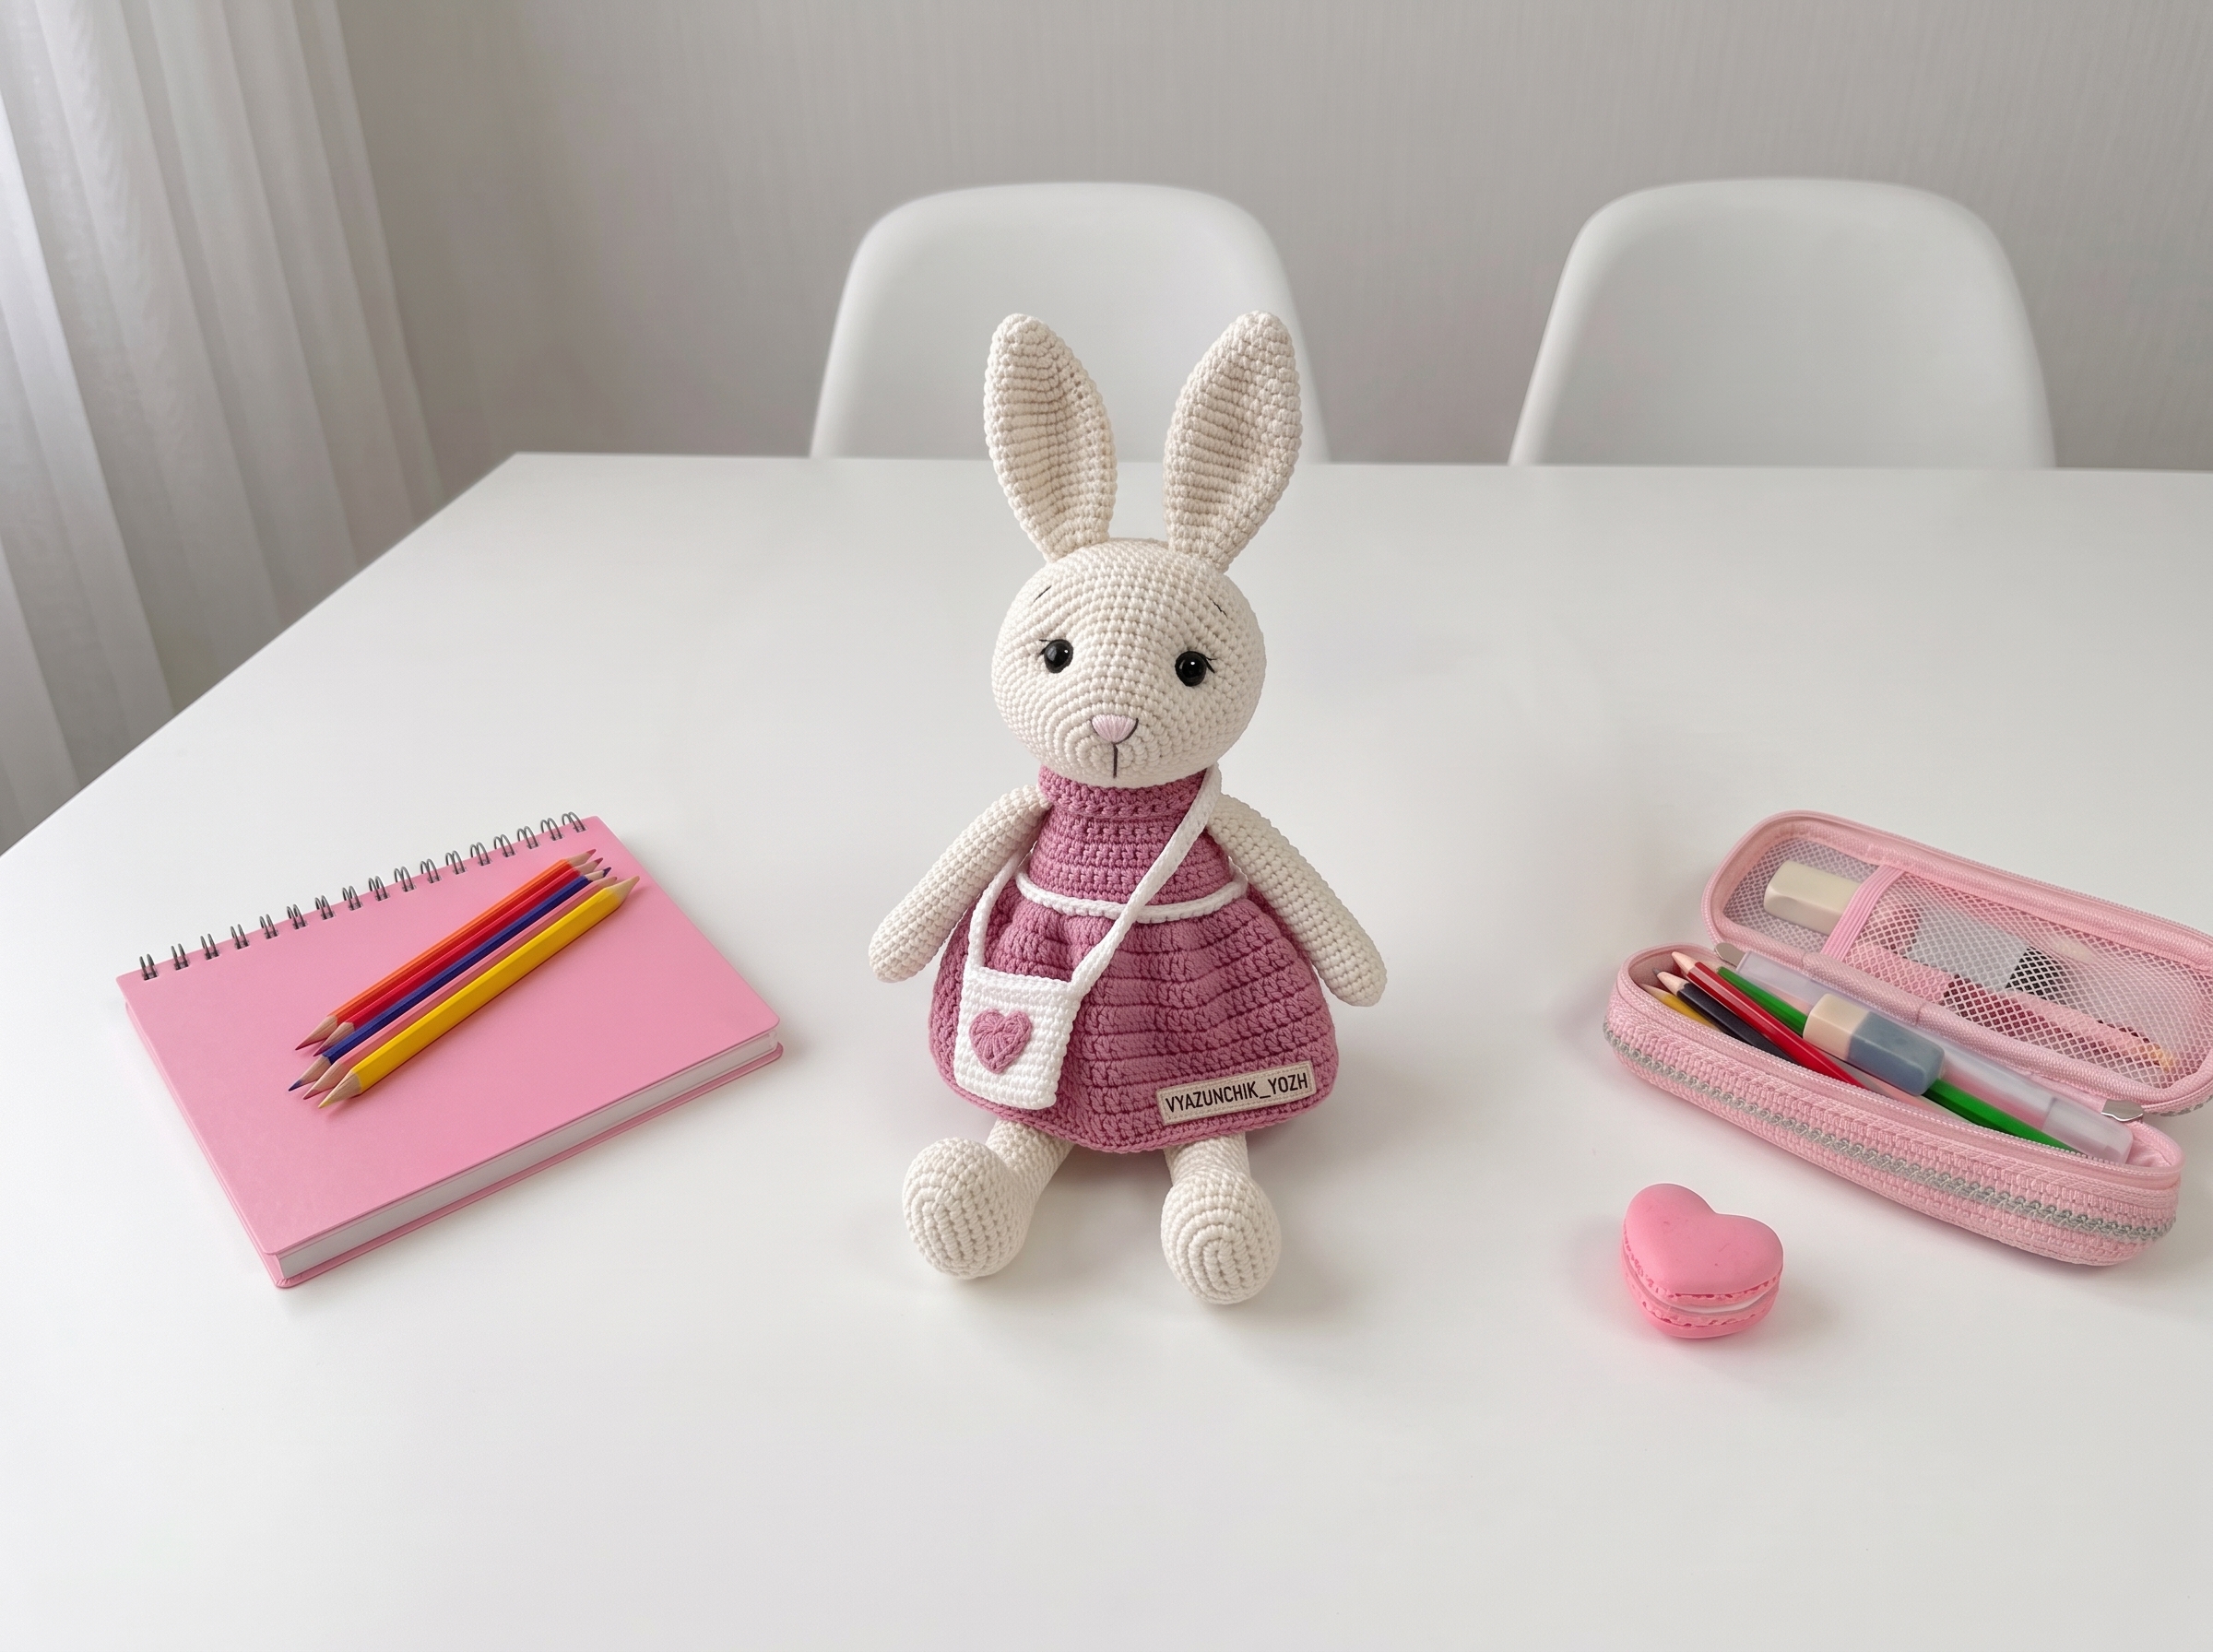
Zoya the Rabbit – Complete Step-by-Step Pattern
1. Materials & Abbreviations
Let's gather our supplies! Using a smooth cotton blend will give Zoya beautiful stitch definition, making her tiny outfit details truly pop.
- Yarn: YarnArt Jeans (or similar semi-cotton, approx. 160m/50g).
- Main Color (e.g., #03 Gray)
- Dress Color (e.g., #65 Blue)
- White (#01), Black (#53), Pink (#74) for facial details.
- Hook: 2.0 mm (or size needed to achieve a tight, stuff-proof gauge). You may also use 1.75 mm or 2.25 mm depending on your tension.
- Notions: 10 mm safety eyes, poly-fil stuffing, tapestry needle, scissors, long needle for yarn sculpting, pins, and a lighter (for sealing thread ends).
- Abbreviations:
- MR – magic ring
- ch – chain
- sc – single crochet
- hdc – half double crochet
- dc – double crochet
- sl st – slip stitch
- inc – increase (2 sc in one stitch)
- dec – decrease (2 sc crocheted together)
- BLO – back loop only
What it teaches: Proper tool selection for fine cotton yarns, gauge management, and familiarization with standard international crochet abbreviations.
2. Arms (Make 2)
The arms are worked as simple tubes and are stuffed up to row 22 before being folded flat at the top for a natural drape.
- R1: 7 sc in MR (7)
- R2: 7 sc (7)
- R3: 7 inc (14)
- R4: 14 sc (14)
- R5: 13 sc, 1 inc (15)
- R6: 1 inc, 14 sc (16)
- R7: 16 sc (16)
- R8: 14 sc, 1 dec (15)
- R9: 1 dec, 13 sc (14)
- R10-23: 14 sc (14) [14 rows]
- R24: (5 sc, dec) x 2 (12)
- R25-26: 12 sc (12) [2 rows]
- Finishing: Work 3 shift stitches to align the seam, then fold the opening in half and work 6 sc through both layers to close it flat. Fasten off, leaving a long tail for sewing.
What it teaches: Creating uniform tubular limbs and using flat-folding techniques for seamless closures.
3. Legs (Make 2)
Zoya’s legs feature a cleverly shaped foot and heel, worked partially in turning rows to create a realistic ankle structure.
- R1: 7 sc in MR (7)
- R2: 7 inc (14)
- R3: 14 sc (14)
- R4: (1 sc, inc) x 7 (21)
- R5: 21 sc (21)
- R6: (6 sc, inc) x 3 (24)
- R7-10: 24 sc (24) [4 rows]
- R11: (6 sc, dec) x 3 (21)
- R12: 21 sc (21)
- R13: (5 sc, dec) x 3 (18)
- R14: (4 sc, dec) x 3 (15)
- Heel Shaping (Turning Rows):
- R15: ch 1, turn, 10 sc, ch 1, turn.
- R16: 10 sc, sl st into R14, ch 1, turn.
- R17: 11 sc, sl st into R14, ch 1, turn.
- R18: 12 sc, sl st into R14, ch 1, turn.
- R19: 13 sc, sl st into R14, ch 1, turn.
- R20: 14 sc, sl st into R14. (Place a marker here!)
- R21: 15 sc (15) [Stuff the foot firmly]
- R22-28: 15 sc (15) [7 rows] [Stuff the heel]
- R29: (4 sc, inc) x 3 (18)
- R30-37: 18 sc (18) [8 rows]
- R38: (5 sc, inc) x 3 (21)
- R39-44: 21 sc (21) [6 rows]
- R45: (5 sc, dec) x 3 (18)
- Finishing: Work 4-5 shift stitches, then fold the top in half and work 9 sc through both layers to close it flat. Fasten off, leaving a long tail.
What it teaches: Complex foot shaping with turning rows, strategic stuffing distribution, and flat-folding for seamless attachment.
4. Body
The body is worked from the bottom up, seamlessly joining the legs and later the arms to create a sturdy, poseable core.
- R1: 7 sc in MR (7)
- R2: 7 inc (14)
- R3: (1 sc, inc) x 7 (21)
- R4: (2 sc, inc) x 7 (28)
- R5: (3 sc, inc) x 7 (35)
- R6: (4 sc, inc) x 7 (42)
- R7: (5 sc, inc) x 7 (49)
- R8: (6 sc, inc) x 7 (56)
- R9: (7 sc, inc) x 7 (63)
- R10: 63 sc (63)
- R11 (Join Legs): 9 sc (with leg), 22 sc, 9 sc (with leg), 23 sc (63)
- R12: 63 sc (63)
- R13: (19 sc, dec) x 3 (60)
- R14: 60 sc (60)
- R15: (13 sc, dec) x 4 (56)
- R16: 56 sc (56)
- R17: (6 sc, dec) x 7 (49)
- R18-21: 49 sc (49) [4 rows]
- R22: (5 sc, dec) x 7 (42)
- R23-25: 42 sc (42) [3 rows]
- R26: (4 sc, dec) x 7 (35)
- R27-28: 35 sc (35) [2 rows]
- R29: (3 sc, dec) x 7 (28)
- R30-32: 28 sc (28) [3 rows]
- R33 (Join Arms): 2 sc, 6 sc (with arm), 8 sc, 6 sc (with arm), 6 sc (28)
- Note: Ensure arms are parallel to the legs.
- R34: (5 sc, dec) x 4 (24)
- R35: 24 sc (24)
- Finishing: Fasten off, leaving a long tail for attaching the head.
What it teaches: Seamless multi-piece joining, structured torso decreasing, and mid-round limb attachment.
5. Head
The head features a unique increase round to create chubby cheeks, followed by structured decreases for a rounded shape.
- R1: 7 sc in MR (7)
- R2: 7 inc (14)
- R3: (1 sc, inc) x 7 (21)
- R4: (2 sc, inc) x 7 (28)
- R5: 28 sc (28)
- R6: (3 sc, inc) x 7 (35)
- R7: 35 sc (35)
- R8: (4 sc, inc) x 7 (42)
- R9: 42 sc (42)
- R10: (5 sc, inc) x 7 (49)
- R11: (6 sc, inc) x 7 (56)
- R12: (7 sc, inc) x 7 (63)
- R13-14: 63 sc (63) [2 rows]
- R15: (20 sc, inc) x 3 (66) [Creates the cheek expansion]
- R16-19: 66 sc (66) [4 rows]
- R20: (20 sc, dec) x 3 (63)
- R21: 63 sc (63)
- R22: (7 sc, dec) x 7 (56)
- R23: 56 sc (56)
- R24: (6 sc, dec) x 7 (49)
- R25: 49 sc (49)
- R26: (5 sc, dec) x 7 (42)
- R27: (4 sc, dec) x 7 (35)
- R28: (3 sc, dec) x 7 (28)
- R29: (2 sc, dec) x 7 (21)
- R30: (1 sc, dec) x 7 (14)
- R31: 7 dec (7)
- Finishing: Stuff the head firmly. Fasten off, leaving a long tail. Weave the tail through the front loops and pull tight to close.
What it teaches: Spiral increase sequences, strategic cheek shaping, and structured decreasing for spherical shaping.
6. Ears & Tail
These small details add so much personality to Zoya!
Ears (Make 2):
- R1: 6 sc in MR (6)
- R2: (1 sc, inc) x 3 (9)
- R3: (2 sc, inc) x 3 (12)
- R4: 12 sc (12)
- R5: (3 sc, inc) x 3 (15)
- R6: (4 sc, inc) x 3 (18)
- R7: 18 sc (18)
- R8: (5 sc, inc) x 3 (21)
- R9: (6 sc, inc) x 3 (24)
- R10-15: 24 sc (24) [6 rows]
- R16: (6 sc, dec) x 3 (21)
- R17: (5 sc, dec) x 3 (18)
- R18: 18 sc (18)
- R19: (4 sc, dec) x 3 (15)
- R20: (3 sc, dec) x 3 (12)
- R21: 12 sc (12)
- Finishing: Fasten off, leaving a long tail. Do not stuff. Sew to rows 21-23 of the head.
Tail:
- R1: 6 sc in MR (6)
- R2: 6 inc (12)
- R3: 12 sc (12)
- R4: (1 sc, inc) x 6 (18)
- R5: 18 sc (18)
- R6: (1 sc, dec) x 6 (12)
- Finishing: Stuff lightly. Fasten off, leaving a long tail. Sew between rows 10-13 of the body.
What it teaches: Rapid radial expansion and working flat, un-stuffed appendages.
7. The Dress & Accessories
Zoya’s wardrobe is just as charming as she is!
The Dress:
- Worked flat in turning rows, then joined in the round for the skirt. It features clever chain spaces for armholes and a ruffled hem.
- Key Detail: The dress is finished with a delicate edge and button loops, allowing you to fasten it securely with tiny buttons.
The Handbag:
- A tiny oval bag worked in continuous rounds, featuring a long chain strap and an adorable crocheted heart decoration.
- Heart: Worked in a magic ring with double crochets and chains to create the classic heart shape.
What it teaches: Flat-panel garment construction, creating functional armholes, and assembling multi-part accessories.
8. Assembly & Finishing
Now for the magic moment where Zoya truly comes to life!
- Head to Body: Sew the head securely to the top of the body. Use two long needles crossed through the neck to hold the head in place while you sew for perfect alignment. Stuff the neck firmly so the head doesn't wobble!
- Facial Details: This is where the personality shines!
- Yarn Sculpting: Use a long needle and strong thread to create deep, expressive eye sockets between rows 12-13.
- Embroidery: Stitch the nose, eyelash line, and eyebrows using black embroidery floss. Add white highlights to the eyes for a lively look.
- Blush: Use dry pastels or acrylic paint to add a soft pink blush to her cheeks.
- Dress Up: Slide the dress over Zoya’s head, fasten the buttons, and tie the little bow at the back. Place the handbag over her shoulder.
What it teaches: Multi-step structural assembly, yarn sculpting for expressive facial features, and professional finishing techniques for wearable doll accessories.
Final Section: Where to Go from Here
Congratulations! By completing Zoya the Rabbit, you have mastered foundational spiral shaping, complex foot construction, and intricate garment detailing. This project is a fantastic confidence-builder and makes an absolutely heartwarming gift.
From here, try experimenting with different yarn colorways to create a whole "bunny brigade," or adapt the dress and handbag patterns to design custom outfits for other amigurumi dolls in your collection. Happy crocheting!